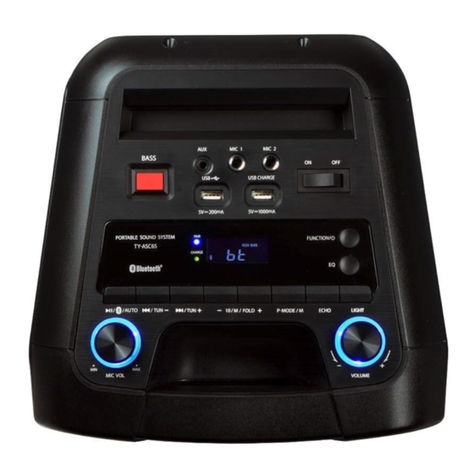
Toshiba TY-ASC65 User manual

User Manual
PORTABLE SOUND SYSTEM
Model No.: TY-ASC65( 客人型号 )
Model No.: KP686T(本厂型号)
Read this booklet thoroughly before using and save it for future reference
Unit must be fully charged before use

1
FCC STATEMENT
1. This device complies with Part 15 of the FCC Rules. Operation is subject to the following two
conditions:
(1) This device may not cause harmful interference,and
(2) This device must accept any interference received, including interference that may cause
undesired operation.
2. any Changes or modifications not expressly approved by the party responsible for
compliance
could void the user's authority to operate the equipment.
NOTE: This equipment has been tested and found to comply with the limits for a Class B digital
device, pursuant to Part 15 of the FCC Rules. These limits are designed to provide reasonable
protection against harmful interference in a residential installation.
This equipment generates uses and can radiate radio frequency energy and, if not installed and
used in accordance with the instructions, may cause harmful interference to radio
communications.
However, there is no guarantee that interference will not occur in a particular installation. If this
equipment does cause harmful interference to radio or television reception, which can be
determined by turning the equipment off and on, the user is encouraged to try to correct the
interference by one or more of the following measures:
Reorient or relocate the receiving antenna.
Increase the separation between the equipment and receiver.
Connect the equipment into an outlet on a circuit different from that to which the receiver is
connected.
Consult the dealer or an experienced radio/TV technician for help.
FCC Radiation Exposure Statement
This equipment complies with FCC radiation exposure limits set forth for an uncontrolled
environment. This equipment should be installed and operated with minimum distance 20cm

2
between the radiator & your body
IC warning
- English:
This device contains licence-exempt transmitter(s)/receiver(s) that comply with Innovation,
Science and Economic Development Canada’s licence-exempt RSS(s). Operation is subject to
the following two conditions:
(1) This device may not cause interference; and
(2) This device must accept any interference, including interference that may cause undesired
operation of the device.
FCC/ IC Radiation Exposure Statement
This equipment complies with FCC and IC radiation exposure limits set forth for an uncontrolled
environment. This equipment should be installed and operated with minimum distance 20cm
between the radiator & your body
- French:
Cet appareil contient des émetteurs / récepteurs exemptés de licence conformes aux RSS
(RSS) d'Innovation, Sciences et Développement économique Canada. L'exploitation est
autorisée aux deux conditions suivantes :
(1) l'appareil ne doit pas produire de brouillage, et
(2) l'utilisateur de l'appareil doit accepter tout brouillage radio électrique subi, même si le
brouillage est susceptible d'en compromettre le fonctionnement."
FCC/ IC Déclaration d 'exposition aux rayonnements
Cet appareil est conforme à FCC et IC l’exposition aux rayonnements limites fixées pour un
environnement non contrôlé. Cet appareil doit être installéet utiliséavec une distance minimale
de 20 cm entre le radiateur et votre corps. Cet transmetteur ne doit pas être co-situéou opérant
en liaison avec toute autre antenne ou transmetteur.

1. Minimum distances 30cm around the apparatus for sufcient ventilation;
2. The ventilation should not be impeded by covering the ventilation openings with items, such
as newspapers, table-cloths, curtains, etc.;
3. No naked flame sources, such as lighted candles, should be placed on the apparatus;
4. Attention should be drawn to the environmental aspects of battery disposal;
5. The use of apparatus in moderate climates.
6. WARNING : To reduce the risk of fire or electric shock, do not expose this apparatus to rain
or moisture;
7. CAUTION : Danger of explosion if battery is incorrectly replaced. Replace only with the
same or equivalent type;
8. Batterie shall not be exposes to excessive heat such as sunshine, fre, etc.
9. Where the MAINS plug or an appliance coupler is used as the disconnect device, the
disconnect device shall remain readily operable;
The lightning flash with arrowhead symbol, within an equilateral triangle is intended to
alert the user to the presence of uninsulated dangerous voltage within the product's enclosure
that may be of sufficient magnitude to constitute a risk of electric shock.
The exclamation point within an equilateral triangle is intended to alert the user to the
presence of important operating and maintenance (servicing) instructions in the literature
accompanying the appliance.
This equipment is a Class II or double insulated electrical appliance. It has been
designed in such a way that it does not require a safety connection to electrical earth.
Direct current
Alternating current
3

1. 30cm distance minimale autour de l'appareil pour une aération suffisante;
2. Il convient que l'aération ne soit pas gênée par l'obstruction des ouvertures d'aération par
des objets tels que journaux, nappes, rideaux, etc.;
3. Il convient de ne pas placer sur l'appareil de sources de flammes nues, telles que des
bougies allumées;
4. Il convient d'attirer l'attention sur les problèmes d'environnement dus à la mise au déchet
des piles;
5. Si l'appareil est destiné à être utilisé sous un climat tempéré;
6. ATTENTION : Pour réduire le risque du feu et du choc électrique, ne pas exposer cet
appareil aux pluies ou à l'humidité;
7. ATTENTION : Danger d'explosion si la pile n'est pas remplacée correctement. Ne remplacer
que par le même type ou un type équivalent;
8. La batterie ne doit pas être exposée à une chaleur excessive telle que le soleil, le feu ou
similaire.
9. Lorsque la prise du RÉSEAU D ’ ALIMENTATION ou une prise placée sur l’appareil est
utilisée comme dispositif de déconnexion, ce dispositif doit demeuré aisément accessible;
Le symbole en forme d'éclair avec une pointe de flèche dans un triangle équilatéral
est destiné à alerter l'utilisateur de la présence dans l'appareil d'un voltage non-isolé
dangereux pouvant être d'une puissance suffisante pour constituer un risque d'électrocution.
Le point d'exclamation dans un triangle équilatéral est destiné à alerter l'utilisateur de
la présence d'instructions d'utilisation et de maintenance (entretien) importantes dans la
documentation accompagnant l'appareil.
Ce matériel appartient à la classe Il ou un appareil électrique à double isolation. Il a
été conçu de telle so e qu'il ne nécessite pas de connexion de sécurité à la mise à la terre.
Courant continu
Courant alternatif
4

5
Instruc tions

6
1. Lisez ces instructions.
2. Conservez ces instructions.
3. Respectez tous les avertissements.
4. Suivez toutes les instructions.
5. Ne pas utiliser cet appareil à proximité de l’eau.
6. Nettoyez uniquement avec un chiffon sec.
7. Ne jamais boucher les ouvertures de la ventilation. Installez l’unité conformément aux instructions
du fabriquant.
8 . Ne pas installer près d’une source de chaleur telle que des radiateurs, des registres de chaleur,
ULVpHRXGHPLVHjODWHUUH8QH¿FKH
HGHWHUUHDGHX[ODPHVHWXQH
broche de terre. La lame large ou la troisième broche sont fournies pour votre sécurité. Lorsque
pOHFWULFLHQSRXUUHPSODFHUODSULVH
1. Lisez ces instructions.
2. Conservez ces instructions.
3. Respectez tous les avertissements.
4. Suivez toutes les instructions.
5. Ne pas utiliser cet appareil à proximité de l’eau.
6. Nettoyez uniquement avec un chiffon sec.
7. Ne jamais boucher les ouvertures de la ventilation. Installez l’unité conformément aux instructions
du fabriquant.
8 . Ne pas installer près d’une source de chaleur telle que des radiateurs, des registres de chaleur,
GHVSRrOHVRXG¶DXWUHVDSSDUHLOV\FRPSULVGHVDPSOL¿FDWHXUVTXLSURGXLVHQWGHODFKDOHXU
1HSDVFRQWRXUQHUOHGLVSRVLWLIGHVpFXULWpGHOD¿FKHSRODULVpHRXGHPLVHjODWHUUH8QH¿FKH
SRODULVpHDGHX[ODPHVGRQWXQHSOXVODUJHTXHO¶DXWUH8QH¿FKHGHWHUUHDGHX[ODPHVHWXQH
broche de terre. La lame large ou la troisième broche sont fournies pour votre sécurité. Lorsque
OD¿FKHIRXUQLHQHV¶LQVqUHSDVGDQVYRWUHSULVHFRQVXOWH]XQpOHFWULFLHQSRXUUHPSODFHUODSULVH
obsolète.
10. Évitez que le cordon d’alimentation ne soit piétiné ou pincé, en particulier sur les prises, les
multiprises et au niveau de la sortie de l’appareil.
1¶XWLOLVH]TXHGHV¿[DWLRQVDFFHVVRLUHVLQGLTXpVSDUOHIDEULFDQW
12. Utilisez uniquement avec le chariot, le stand, le trépied, le support ou la table
recommandée par le fabricant, ou vendu avec l’appareil. Lorsqu’un chariot est utilisé,
faites attention lors du déplacement de la combinaison du chariot/appareil pour éviter
de vous blesser en cas de chute.
13. Débranchez cet appareil pendant les orages ou lorsqu’il n’est pas utilisé pendant une longue
période.
&RQ¿H]WRXWHUpSDUDWLRQjGXSHUVRQQHOTXDOL¿p8QHUpSDUDWLRQHVWQpFHVVDLUHORUVTXHO¶DSSDUHLO
DpWpHQGRPPDJpGHTXHOTXHIDoRQTXHFHVRLWSDUH[HPSOHVLOHFRUGRQG¶DOLPHQWDWLRQRXOD¿FKH
sont endommagés, du liquide a été renversé ou des objets sont tombés dans l’appareil, l’appareil a
été exposé à la pluie ou à l’humidité, s’il ne fonctionne pas normalement, ou s’il est tombé.
15. Avertissement pour réduire le risque d’incendie ou de décharge électrique : ne pas exposer
cet appareil à la pluie ou à l’humidité. L’appareil doit être gardé à l’abri des gouttes ou des
éclaboussements d’eau ; ne posez jamais un objet contenant de l’eau sur cet appareil, par exemple
un vase.
16. Le système d’antenne extérieure ne devrait pas être situé à proximité de lignes électriques
aériennes ou d’autres circuits d’éclairage ou d’alimentation électrique, ou à un endroit où il
peut tomber sur ces lignes ou circuits électriques. Lors de l’installation d’un système d’ antenne
extérieure, prenez extrêmement soin de ne pas toucher ces lignes ou circuits électriques, car tout
contact peut être fatal.
17. Ne pas surcharger les prises murales et les câbles de rallonge, car cela peut entraîner des
risques d’incendie ou d’électrocution.
18. Ne pas introduire d’objets par les ouvertures de cet appareil, car ils pourraient entrer en contact
avec des points de tension dangereux ou court-circuiter des pièces qui pourraient provoquer des
incendies ou une décharge électrique. Ne jamais verser ou pulvériser de liquide quel qu’il soit sur
l’unité.
Instructions de sécurité importantes
7
Guide to the Appliance
Top View
1. 3.5mm AUX IN JACK
2. 6.3mm MIC JACK 1
3. 6.3mm MIC JACK 2
4. POWER ON/OFF BUTTON
5. USB CHARGE PORT
6. LCD DISPLAY
7. FUNCTION BUTTON
8. EQ BUTTON
9. LIGHT BUTTON
10. ECHO BUTTON
11. VOLUME CONTROL
12. P-MODE/M. BUTTON
13.10/MEM./FOLD.+ BUTTON
14. 10/MEM./FOLD.- BUTTON
15. /TUN.+ BUTTON
16. MIC VOL. CONTROL
17. /TUN.- BUTTON
18. /PAIR/SCAN BUTTON
19. CHARGE INDICATOR
20. PAIR INDICATOR
21. USB PORT
22. SUPER BASS BUTTON
Front and Back view
23. HANDLE
24. SPEAKERS
25. DECORATION LEDS
26. SPEAKER GRILL
27. DISCO LED LIGHT
28. TWEETERS
29. AC SOCKET
30. VENTILATION HOLES
31. FM ANTENNA

8
Getting Started
POWER SOURCE
This unit works with rechargeable lead-acid battery (the battery capacity 4000mAh). Fully
charge the unit (around 7 hours) before using the product for the first time. The playback time
has about 2hours after full charging. Unplug the AC Power cord from the AC socket to work on
the battery pack after fully charged. Plugging the AC Power cord while the battery pack is
attached initiates the charging of this battery, the charge LED indicator lights red during
charging, when the battery is fully charged the indicator will turn to green. When the unit is with
low battery, the LED indicator will flash in red.
Warning: Do not change the battery, only high-qualified personnel can perform this operation.
OPERATION INSTRUCTION
BASIC FUNCTION
TURNING THE UNIT ON/OFF
Press the power ON/OFF button to switch the unit on/off.
SETTING THE FUNCTION MODE
To change the function modes, press the FUNCTION button repeatedly to choose
USB/Bluetooth/AUX/Radio function.
ADJUSTING THE VOLUME
1. Rotate the VOLUME knob on the unit to increase or decrease the music volume.
2. Rotate the MIC VOL. knob on the unit to increase or decrease the microphone volume.
BASS ADJUSTMENT
Press the SUPER BASS button on unit to increase the bass effect.
EQUALIZER (EQ) FUNCTION
This unit has a built-in equalizer system, Press the EQ button on unit to select a setting that best
matches the music style: FLAT, CLASSIC, ROCK, POP and JAZZ.
USB CHARGING
This unit provides a 5V 1A USB charging port for charging your smart phone. Connect the USB
cable of your smart phone to the USB CHARGE port for charging.
MICROPHONE ECHO ADJUSTMENT
Press the ECHO button on unit turn on or off the microphone echo effect.
FLASHING LIGHT
There are 9 modes for the DISCO LED lighting. Press the LIGHT button to choose
the light modes. The decoration LED light around the speaker will be always
auto-changing between different colors smoothly. To inactivate the light, press the
LIGHT button until “OFF”showed on the display.
L-1: Blue LED will be on constantly when it is selected.

L-2: Red LED will be on constantly.
L-3: Green LED will be on constantly.
L-4: Purple LED will be on constantly.
L-5: Light green LED will be on constantly.
L-6: Light blue LED will be on constantly.
L-7: White LED will be on constantly.
L-8: 7 colors LED flash follow the music rhythm.
L-9: 7 colors auto change smoothly
There is LED lighting around the volume knobs. Press and hold the LIGHT button to
turn on the light. To inactivate the light, press and hold the LIGHT button again.
RADIO OPERATION
Listen to FM radio broadcasts. Press the FUNCTION button on the unit, the display reads FM
and the radio frequency.
Note: in order to get the best reception, extend the FM ANT. on the rear of the unit before useto
its full length.
TUNING TO A RADIO STATION
If you know the station frequency that you want to tune to directly:
Tune to a station by press the /TUN.+ or /TUN.- button repeatedly. The station
frequency is shown on the display.
AUTOMATIC TUNING STOP
Press and hold the /TUN.-BUTTON or /TUN.+ BUTTON to start tuning, Tuning stop
automatically when a station is received.
AUTO PRESET MEMORY / SCAN
To scan for stations within reception range and save them to preset memory
automatically, press and hold the /PAIR/SCAN button. After the unit is
finished scanning, the unit will automatically tune to preset number 1 (P01). To
tune to a preset station:
To tune to the next preset station, press the 10/MEM./FOLD.+ button.
To tune to the previous preset, press the 10/MEM./FOLD.- button.
MANUAL PRESET MEMORY OPERATION
Choose which stations to save in preset memory instead of scanning automatically.
1. Use the /TUN.+ or /TUN.- button to tune to the station that you want to
save as a preset (e.g., 93.1).
2. Press the P-MODE/M. button. “ ” will flash on the display to indicate that you
are saving the station as Preset Memory 01. (To change the preset memory
number, press the 10/MEM./FOLD.+ or 10/MEM./FOLD.- buttons.)
9

3. Press the P-MODE/M. button to finish saving the station (e.g., P01 is now set to
93.1).
4. To save another station, repeat steps 1 to 3. You may save up to 30 FM stations.
USB OPERATION
This unit provides two USB ports for music playback.
1. Press the FUNCTION button on unit to select “USB” mode.
2. Plug the USB memory stick to the USB port on top of the unit(The unit can support up to 32G
USB device). Playback will start automatically from Track 1.
3. To pause playback, press the /PAIR/SCAN button on unit. The playing time will flash on
the display.
4. To resume playback, press the /PAIR/SCAN button again.
5. To select a desired track, press the or button respectively during playing until the
desired track appears on the display. The unit will start play automatically.
6. To search for a particular passage during playback, press and hold the or button to
scan the current playing track at high speed until desired point (passage) appears, then
release the button for normal playback mode.
7. To select a song which track number exceeds 10,press the 10/MEM./FOLD.+ or
10/MEM./FOLD.- button each time to skip forward/backward 10 tracks, then press the or
button to select desired track.
8. To select a desired folder (if the USB contains more than one folder), press and hold the
10/MEM./FOLD.+ or 10/MEM./FOLD.-button each time to skip forward/backward a folder,
then press the or button to select desired track.
Important: The USB port is intended for data transfer only, other devices cannot be used
with this USB connection. The use of USB extension cords is not recommended. Don’t
plug the USB from the unit when playing or reading the USB device.
REPEAT PLAY
You can play one track or all tracks on the USB repeatedly.
To Repeat a Single Track
1.Press P-MODE/M. button on unit during play, the display will show “ ” and the current
track will be played over and over again.
2.To cancel repeat play, press P-MODE/M. button on unit until “ ” disappears from the
display.
To repeat all the Tracks
1.Press P-MODE/M. button on unit until the “ ” shows steadily on the display, all tracks on
the USB will be played over and over again.
2.To cancel repeat play, press the P-MODE/M. button on unit until “ ” disappears from the
display.
To repeat the folder (only for USB which contains more than one folder)
1.Press the P-MODE/M. button on unit until “ FOLDER ” shows steadily on the display,
the current folder will be repeated over and over again.
2.To cancel repeat play, press the P-MODE/M. button on unit until “ FOLDER”
disappears from the display.
10

11
RANDOM PLAY
Press the P-MODE/M. button on unit in play mode till the “RAND” shows steadily on the display,
the random play will start from next track automatically. Press the P-MODE/M. button on unit
again until the “RAND” disappears from the display to cancel.
BLUETOOTH OPERATION
1. Press the FUNCTION button on unit to switch to BLUETOOTH function, the LCD will display
“” and the pair indicator will flash at high speed.
2. Turn on the Bluetooth function on the device, scan the unit “AWPSL6”and connect, then
input the password 0000 if required, the pair indicator keep light up to indicate connection
done, and the display will show “ ” steadily. Press Play to start playback.
3. Rotate the VOLUME knob on the unit or adjust the volume on the external device to
increase or decrease the music volume to your desired level.
4. Press and hold the PLAY/PAUSE/PAIR/SCAN button to disconnect Bluetooth.
Note: The Bluetooth works best within 10 meters in open air.
AUX-IN OPERATION
1. Press the FUNCTION button on unit to select the “AUX” mode.
2. Connect your audio device to the AUX IN jack on the top panel of the unit with an AUX IN
cable.(audio cable is not included)
3. Rotate the VOLUME knob on the unit or adjust the volume on the external device to increase
or decrease the music volume to your desired level.
4. Control the playback with your audio device.
MIC JACK OPERATION
Microphone input is available in all modes.
1. Connect your microphone to the 6.3mm MIC JACK found on the top panel of the unit.
2. Rotate the MIC VOL. knob on the unit to increase or decrease the microphone volume.
3. Press the ECHO Button to turn on or off the echo effect of the microphone.

Technical Specifications
GENERAL
Power Requirements AC100-240V~60/50Hz
Battery type Built-in rechargeable battery,
4000mAh/12V, lead-acid
Power consumption 38W
Power output 30W X 2
FM frequency FM 87.5-108 MHz
AUX in jack 3.5mm
Microphone jack 6.3mm
Work temperature 5°C - +35°C
USB memory section
Playback format WMA/MP3
Memory 32MB to 32GB
Bluetooth
Communication system Bluetooth Standard version 5.0
Reception Range 10 meter (line-of-sight distance)
Compatible Bluetooth profiles Advanced Audio Distribution Profile (A2DP)
ACCESSORIES
Instruction Manual x 1pc
AC Cord x 1pc
Microphone x 1pc
Note: Specifications are subject to change for continuous improvement without prior notice.
12
This manual suits for next models
1
Table of contents
Other Toshiba Speakers manuals

Toshiba
Toshiba Symbio User manual

Toshiba
Toshiba TY-ASC66 User manual

Toshiba
Toshiba TY-ASC51 User manual

Toshiba
Toshiba TY-WSP21 User manual

Toshiba
Toshiba TY-WSP120 User manual

Toshiba
Toshiba TY-WSP200 User manual

Toshiba
Toshiba SBX1250 User manual

Toshiba
Toshiba PA5075U-1SPA User manual

Toshiba
Toshiba TY-SP3 User manual

Toshiba
Toshiba E-studio5540c Firmware update