tradetec TR2260 User manual

1
Android Car Navigation
User Manual
The use of certain features of these devices depends on your
network service provider's network settings and performance.
In addition, due to the different network service providers,
www.tradetec.es
2
some certain functions of this device may not be able to apply
or restrict to apply. And please contact your network service
provider for consulting the network functions and availability of
this device.
This mark indicates that the product used a label which is
classified CLASS1 laser, indicating that the device uses the
weakest level of laser beam, and there is no risk of radiation
outside the unit.
Contents
Contents.................................................................................................3
1. Quick Review...............................................................................................5
1.1 Turning On and Turning Off...........................................................5 1.2
Panel Function Button....................................................................5 1.3
Tips for Using Touch Screen.........................................................6
1.3.1 Clicking Function..................................................................6
1.3.2 Pressing Function................................................................6
1.3.3 Dragging Function................................................................6
1.3.4 Zooming Function ...............................................................6
1.4 Main Screen.......................................................................................6 1.5
Status bar indicator.........................................................................7 1.6
www.tradetec.es

3
Time and Date Setting.....................................................................8 1.7
Text Entering.....................................................................................9
2. Function Operations................................................................................10
2.1 Basic Settings.................................................................................10
2.1.1 User Defined Home Screen............................................. 10
2.1.2 Setting Wallpaper................................................................10
2.1.3 Shortcut.................................................................................10
2.1.4 Widget....................................................................................11
2.2 General.............................................................................................11
2.2.1 Steering Wheel....................................................................11
2.2.2 Screen Calibration..............................................................12
2.2.3 Navigation application......................................................13
2.2.4 factory settings...................................................................14
2.3 Navigation........................................................................................14
2.3.1 Navigation Software Installation.....................................14
2.4 Radio.................................................................................................18
2.4.1 RADIO....................................................................................18
2.4.2 RDS.........................................................................................19
2.5 Bluetooth Wireless Connection.................................................20
2.5.1 startup bluetooth application..........................................20
2.5.2 Bluetooth pairing................................................................20
2.5.3 Bluetooth Phone Book......................................................21
2.5.4 Phone.....................................................................................23
2.5.5 Call Record...........................................................................24
2.5.6 Bluetooth Music..................................................................25
2.5.7 The whole Bluetooth hardware settingss.................26
2.6 3G Application................................................................................27
2.6.1 Allow data roaming............................................................27
2.6.2 Set the access point information..........................................27
2.7.1 WLAN.............................................................................................34
2.7.2WiFi Hotspot..................................................................................36
2.8 Multimedia.......................................................................................37
2.8.1 Equalizer...............................................................................37
2.8.2 DVD Play...............................................................................38
www.tradetec.es
4
2.8.3 CD Player..............................................................................40
2.8.4 iPod Play...............................................................................41
2.8.5 Audio Play............................................................................42
2.8.6 Video Playing.......................................................................43
2.8.7Picture Browse.....................................................................45
2.8.8 Digital TV...............................................................................48
2.8.9 Analog TV...........................................................................48
2.9 AUX IN Function.............................................................................49
2.10 Rear View.......................................................................................49
2.11 E-mail..............................................................................................50
2.11.1 Email Setting......................................................................50
2.11.2 Sending E-mail..................................................................53
2.11.3 E-mail input........................................................................54
2.12 Message Functions.....................................................................55
2.12.1 Compose New Mails........................................................55
2.12.2 E-mails reply......................................................................56
2.13 Applications..................................................................................57
2.13.1 Weather...............................................................................57
2.13.2 Calculator...........................................................................58
2.13.3 Electronic reader..............................................................59
3 Firmware Upgrading.................................................................................59
3.1 preparing for upgrade...................................................................59 3.2.
update MCU....................................................................................59 3.3
Update system...................................................................................60 3.4
Update DVD......................................................................................61
4. Trouble handle..........................................................................................62
5.Specification..................................................................................................64
1. Quick Review
Warning: Before using this device, please read the manual
safety and law information.
1.1 Turning On and Turning Off
www.tradetec.es

5
Turning On
When you plug in the car keys, switch on ACC START
or the car's ACC power, the device will be automatically
turned on, displaying the boot animation LOGO.
Turning Off
When you take off the key, switch to ACC OFF, or turn
off the car's ACC power, the device will automatically be
shut down.
1.2 Panel Function Button
Icon Button Funciton
PWR/VOL
Power/Volum
e
① In the off state, press this button short, the
system is turned on.
②
In the boot state, press this button short, the
system becomes mute; press this button, the system
is shutdown
③ Turn this button clockwise, the volume is
increased ④ Turn this button counterclockwise, the
volume is decreased.
HOME Main
Interface Click to enter into main interface.
MENU Main Menu
①In each function, extended manipulation of
information, press the MENU key to pop up; ②In
the main interface, press the MENU key for the
system to quickly set function
BACK Back Click to back to the last interface.
NAVI Navigation
Click to enter into GPS navigation interface.
DVD DVD Play Click to enter into disk play interface.
PHONE PHONE Click to enter into Bluetooth telephone interface.
RADIO RADIO Click to enter into radio interface for receiving
FM1/FM2/ AM radio
TUNE Compound
①in the audio and video playback interface, up / down
one player
②In the radio interface up / move down frequency
In/Out Disc
Button disk in and out
SD SD Media
Card slot
Insert the appropriate memory card, multimedia file
system can read the card
www.tradetec.es

6
USB USB Socket
①Connect other devices by USB socket.
②Connecting an external WIFI/3G dongle
RESET Reset Button
Click reset button to reset system and re-start.
MIC Microphone
Receive voice from bluetooth telephone call.
Remark: All long press means press time at least lasting 3
seconds; Button and socket is different according to different
car types, please take real type as standard.
1.3 Tips for Using Touch Screen
When using the touch screen, you can use several ways to
perform corresponding operations on the device.
1.3.1 Clicking Function
You could select an application icon or option on the
screen to realize clicking function. For example, click
Bluetooth to enter into bluetooth application.
1.3.2 Pressing Function
You could press the current user interface, icon,
inputting column by pressing function. For example,
press on the blank area of the main interface, then
comes a pop-up menu, you could perform some function
1.3.3on the menu. Dragging
Function
Drag the touch screen or press the scroll bar for up and
down operation. For example, browse the contact list of
the bluetooth phones by dragging function.
1.3.4 Zooming Function
When browsing the web, click the screen twice, then
you could zoom in or out the page content. Or you
could press the screen with two fingers by control the
sliding distance between the fingers to zoom in or out
the page content.
www.tradetec.es

7
1.4 Main Screen
You can use the touch screen operation to use the various
functions of the device. This equipment has a total of five main
screen, left or right sliding can be switched with each other.
Any interface press the HOME physical buttons on the panel to
return to the main screen interface, and display the application
icon in the main screen interface, click any application icon to
open the program.
Note: You can add the freedom of the space of the main
screen or Remove Programs icon to see equipment Basic
Settings section.
Click the application icon; you can view all of the programs of
the equipment.
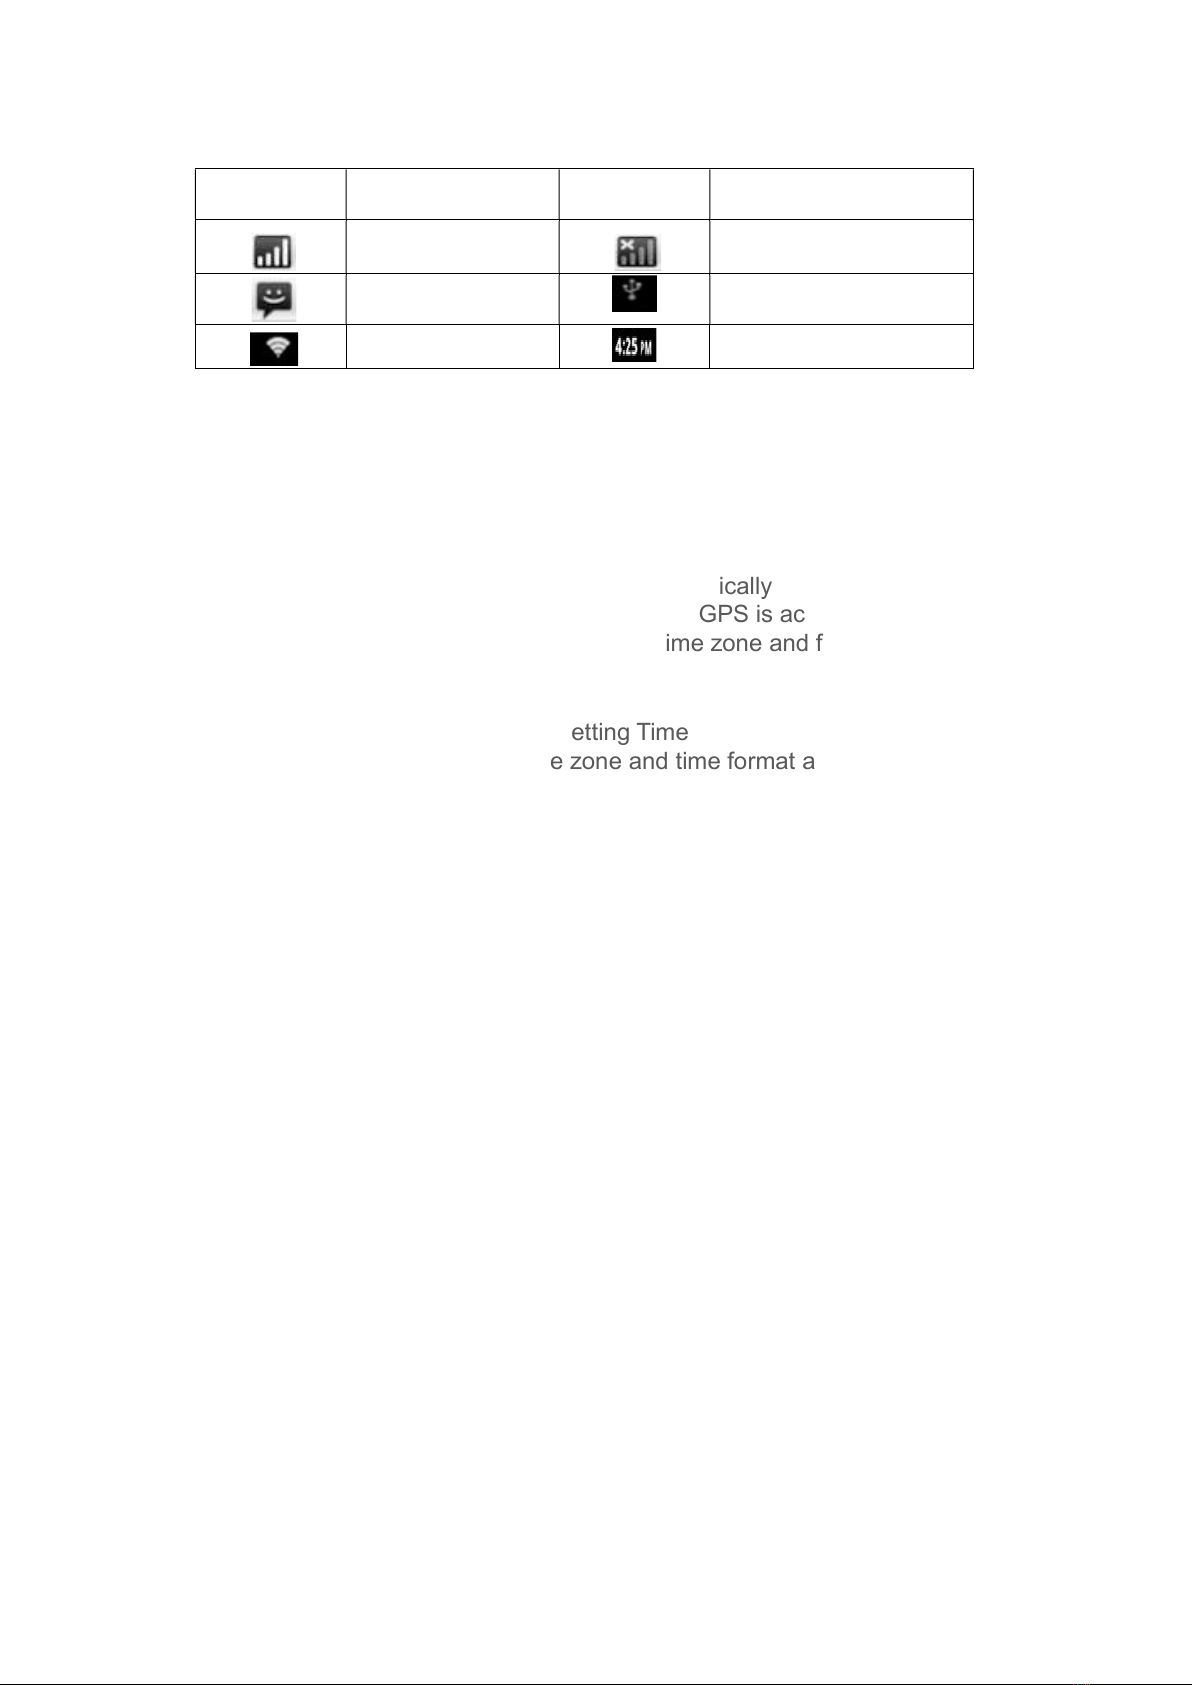
1.5 Status bar indicator
Icons on the left top of the screen are notifications for
messages and events; Icons on the right top of the
screen are device status indicator.
If there is new message, it will be displayed on the
status bar, slide your finger gently from the status bar,
www.tradetec.es
8
all prompts would be displayed. Then you could click
the message and view the content.
Indicators on
the left
Description Indicators on
the right
Description
Network signal
strength
Network signal
New Message USB connection
instructions
WIFI signal indicator Current Time indication
Tip: You can tap and hold the status indication bar to view
the current day.
Note: The device software is under upgrading, the
status indicator may be different with your device;
please refer to the actual device software.
1.6 Time and Date Setting
This device has the function to automatically calibrate the
current time on the condition that the GPS is active. You
could also manually set the date, time zone and format.
Applications> Settings
> Date and Time
> Setting Date or Setting Time
Tip: You can set the time zone and time format according
to request.
www.tradetec.es

9
1.7 Text Entering
When edit text, you could use existing method of entering
and Android keyboard to edit English, numbers, and
symbols etc., such as editing message, searching key
words etc.
Tip: The display format would be different according to
different status and keyboard of the entering, please refer
the actual one.
1.7.1 Switch on the Entering Method
Open the text editing interface
www.tradetec.es

10
Click in the editing area, then the editing menu would
appear.
According to the input method, input method you want to use
the midpoint of the input method menu, you can choose the
Android keyboard or install third-party input method.
1.7.2 Android Keyboard Input
Switch the input method into Android keyboard (see
switch input method)
Remark:
You can click the number sign key to
switch to numbers and symbols input mode.
Click to switch letter case.
2. Function Operations
2.1 Basic Settings
2.1.1 User Defined Home Screen
There are 5 main screens of this device, sliding left or
right to switch. In any interface, you just need to click
the HOME to back to main screen.
Note: You could add shortcut, widget and file in the
blank area of the main screen on the condition
that there is enough room for placing.
www.tradetec.es

11
2.1.2 Setting Wallpaper
Click the blank area of main screen> Wallpaper
> Wallpaper or Pictures Bank
Choose your preferred wallpaper and click to set as
wallpaper.
2.1.3 Shortcut
Click the blank area of main screen> shortcut >
Choose Shortcut
Click the shortcut needed.
www.tradetec.es

12
2.1.4 Widget
In application interface, slide to the right page> Widget
Long press and then drag the chosen widget to add it in
main menu.
2.2 General
2.2.1 Steering Wheel
Users could set the steering wheel according to hint. Note:
Steering wheel interface is special for cars with buttons,
but some cars’ steering button are not able for study
but by “can”, such as Ford MONDEO
Application>Setting
> General Settings
> Steering wheel Settings
www.tradetec.es

13
Steering Wheel Interface
a. First to click “Start”
b. Click the buttons as you want.
c. Click the corresponding button on the wheel, if the
study displays successful, there will be a change on
the corresponding color on the main screen.
d. Repeat step 1 and 2 till you complete all the buttons’
setting on the steering wheel.
e. Click “END” to ensure that the steering wheel setting
is completed.
If you want the steering wheel button to re-learn, press the
[CLEAR] Repeat a, b, c, three steps
www.tradetec.es
14
2.2.2 Screen Calibration (For resistive screen only)
Applications> Settings
> General Settings
> Touch screen calibration
Enter the calibration screen to calibrate the screen
interface, please click as close as possible to the cross
until a successful calibration, then exit the calibration
screen.
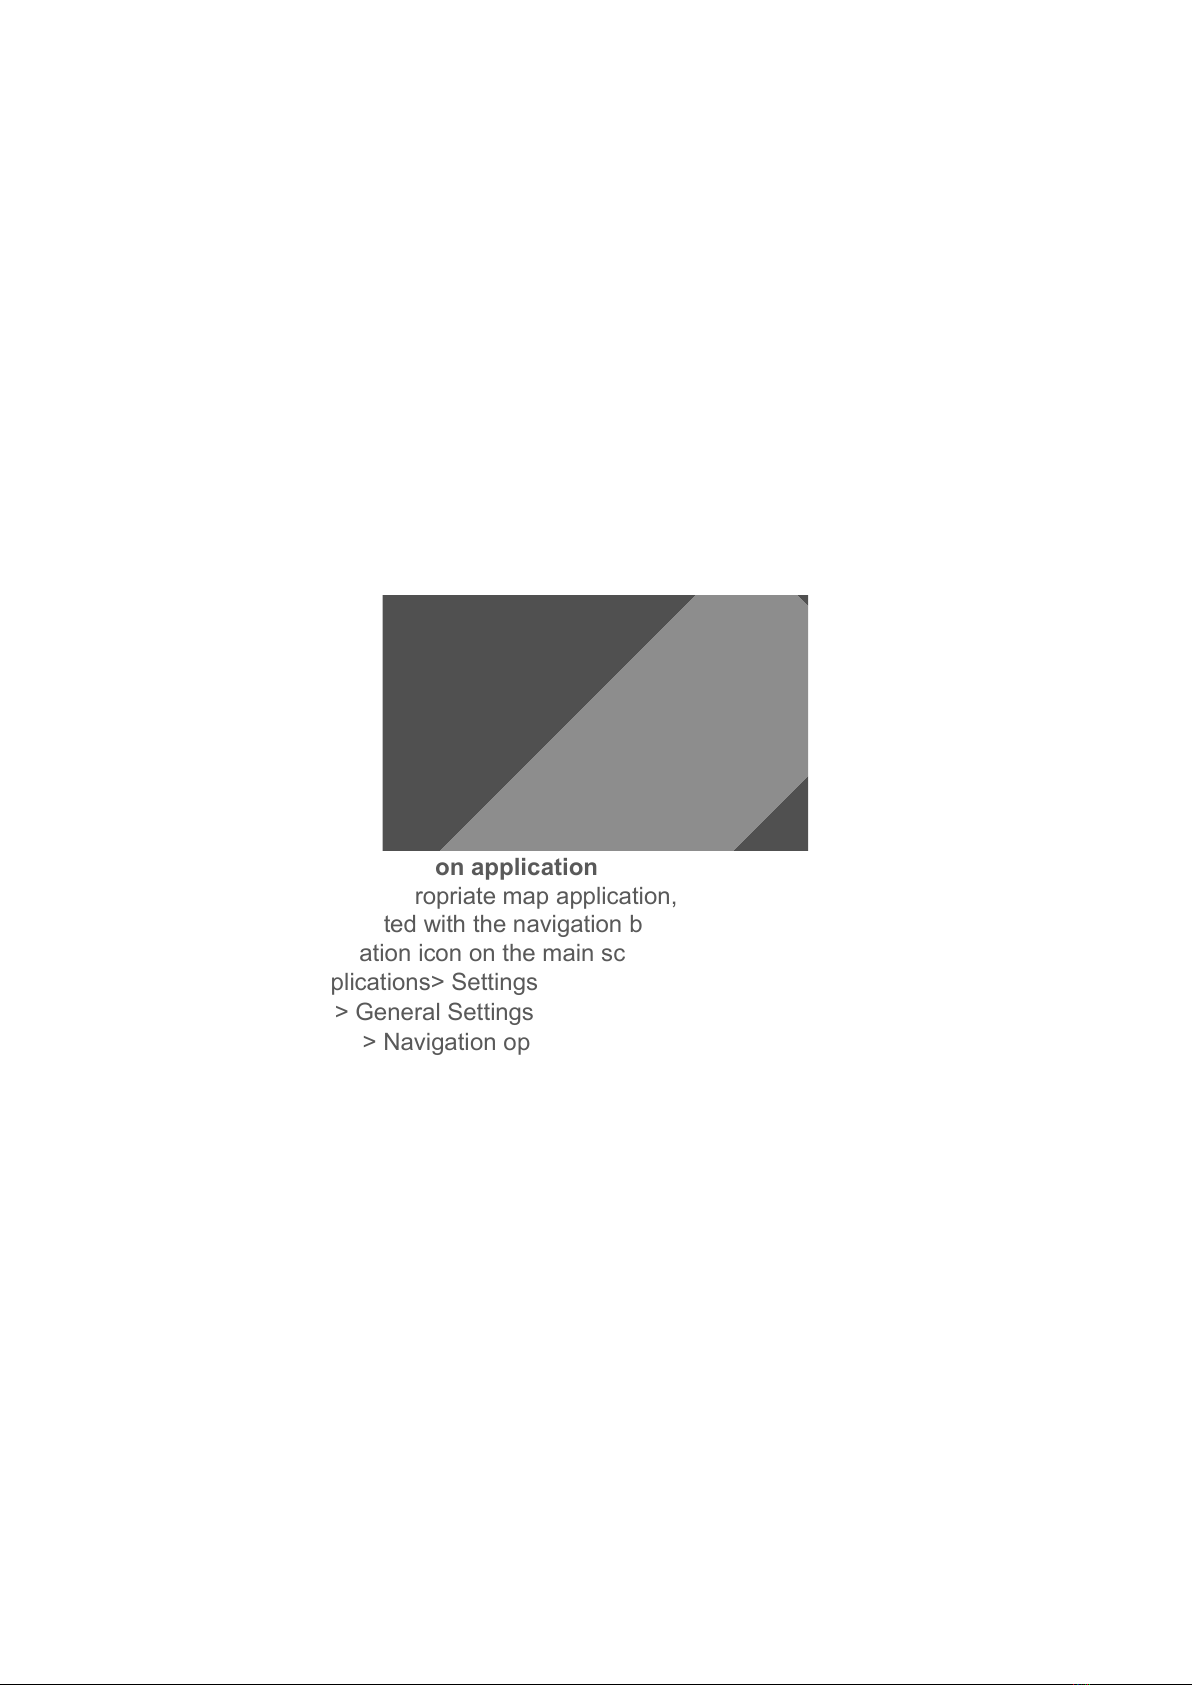
2.2.3 Navigation application
Select appropriate map application, then it can be
associated with the navigation button on the physical and
navigation icon on the main screen.
Applications> Settings
> General Settings
> Navigation options
www.tradetec.es

15
> For example: GO
2.2.4 factory settings
When the system is unable to work or there is problems
after user used the system, it can be restored to the factory
settings. Once it’s restored to factory settings, all the third-
party software would be deleted, and the current system
settings would be lost. For navigation software, just need
to install corresponding APK. Please operate carefully.
Applications> Settings
> General Settings
> factory settings
www.tradetec.es

16
2.3 Navigation
2.3.1 Navigation Software Installation
1. Copy the application program with suffix name “APK”
to SD card or U disk. There are two installation methods:
Click into the document management interface to find
SD card or U disk directory and select “APK” application,
and click install directly.
File Management Interface
Applications> File Management Interface
> Expansion card or U disk
Extra Interface->Application Program->Install
Application Program
Select the application program with suffix named
“APK” and install.
www.tradetec.es
17
Application Program Interface
Application > Settings
> Applications
> Application Program Installation
Note: Please copy the navigation map software to the
system storage memory first, and then install the
navigation APK. Steps are as follows:
1) Insert navigation data packets to the SD card or a
U disc
2) Start the ES file browser ( or other document
management software )
3) Enter the" /sdcard/Favorites/mnt/usb/mmcblk1p1"
( SD) or" Favorites / mnt/usb/mmcblk1p1" ( U-disk)
directory, find the navigation packet directory ( for
example: APK (3rd party application)), long press
the directory and select “Copy” in pop-up menu
www.tradetec.es

18
4) Go back to the "/sdcard/" directory, choose the paste
command
5) Waiting for the copy is complete (30 minutes approximately
/3.5G )
www.tradetec.es

19
2. After successful installation required to choose you need to use
the navigation application program, association panel on
navigation physical keys NAVI and interface of the main
navigation application icon ( see 2.2.4navigation options ).
2.4 Radio
2.4.1 RADIO
Press the RADIO button on panel or click the icon on
the main menu to enter the radio interface, the specific
functions and operations are as follows:
Radio Interface
The functions of Icons in the radio interface are described
below:
www.tradetec.es

20
Icon Button Name
Function Description
Band Switching
Click BAND to switch between mode FM1/FM2
/AM.
Search
Channel
Backwards
Click to search channel backwards then stop
when find clear channel
Search
Channel
Forwards
Click to search channel forwards then stop when
find strong and clear channel.
Scan all
Channels
Scan automatically and save channels(Coupled
with a scanning radio signals broadcast for 10
seconds, no signal of the radio scan play 3
seconds)
www.tradetec.es
Table of contents
Popular Car Navigation System manuals by other brands


Pontiac
Pontiac 2004 Vibe Navigation System owner's manual

Volvo
Volvo RTI operating manual

Kenwood
Kenwood DNN9150BT instruction manual

Sanyo
Sanyo NVM-4030 - Easy Street - Automotive GPS... instruction manual

Advanced ICE
Advanced ICE HD-G2 Update instructions

Boss Audio Systems
Boss Audio Systems BV9384NV user manual