Trailblazer BBQ Grillmaster 600S User manual

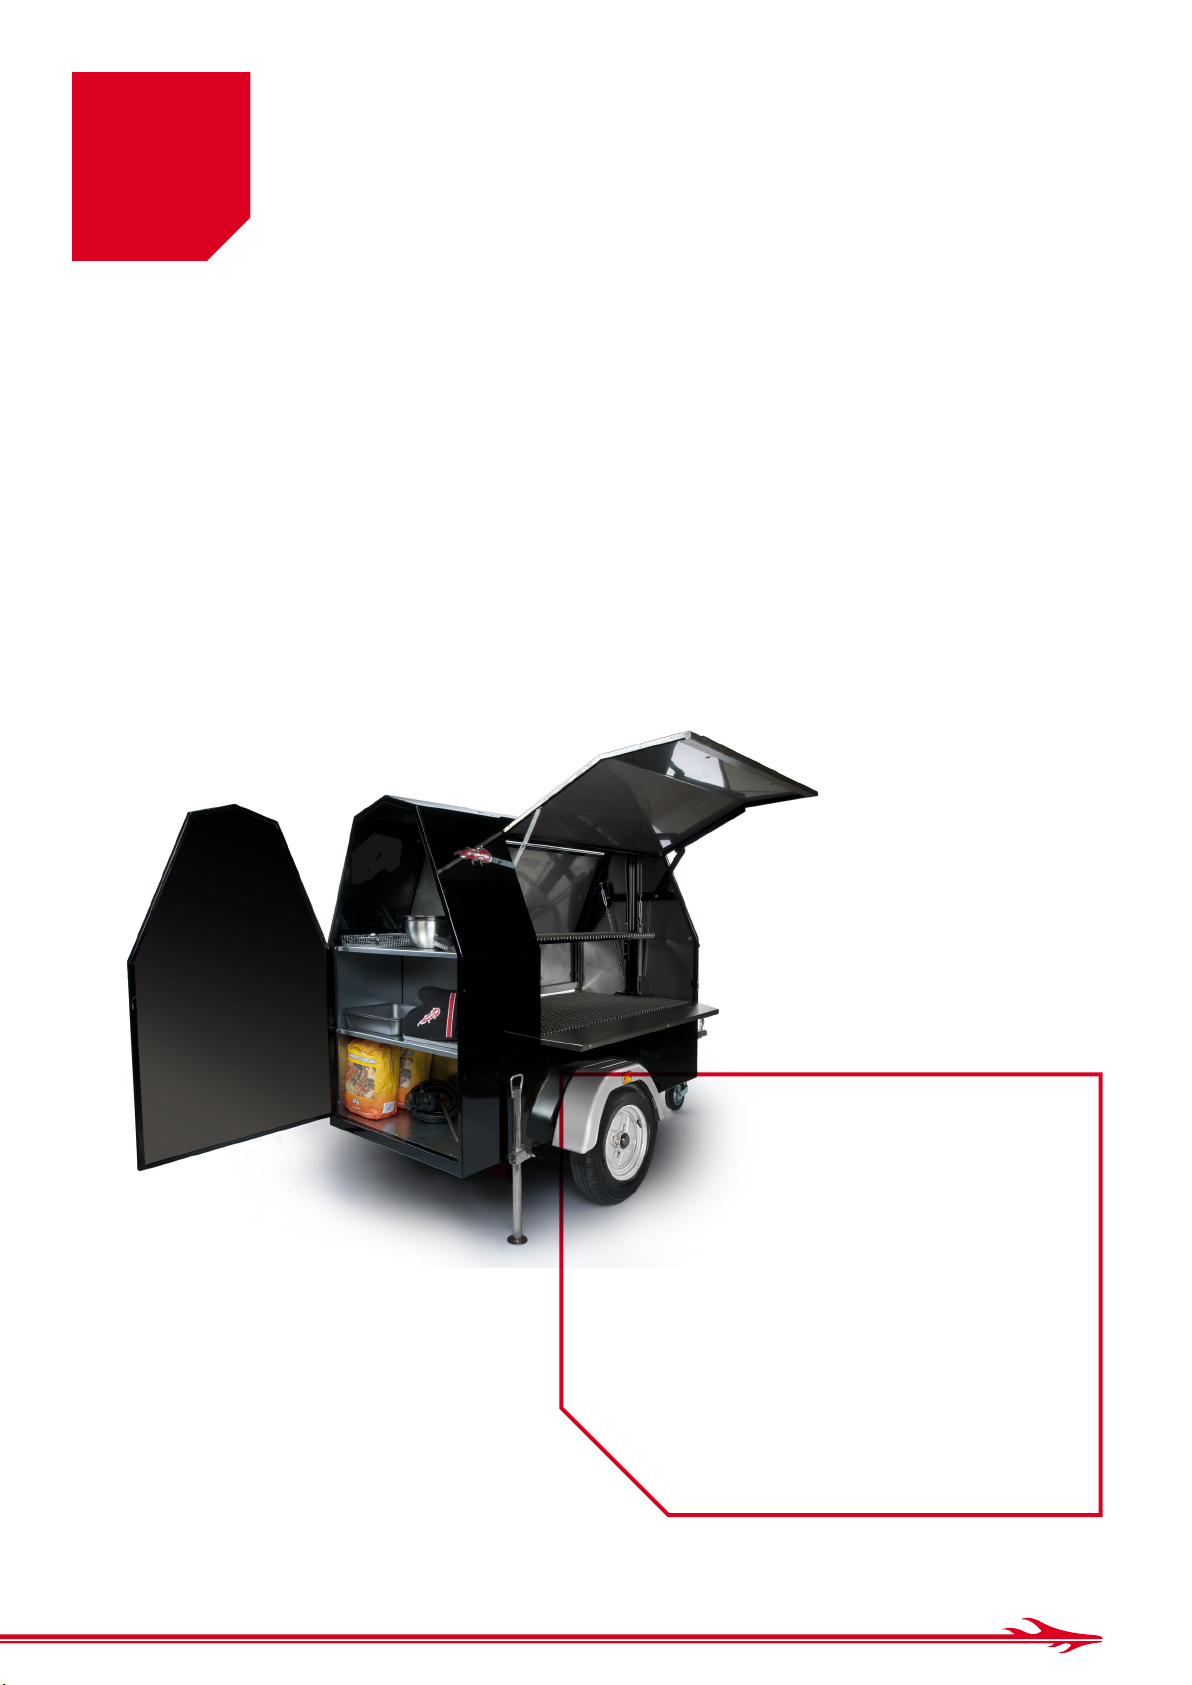
KNOW
YOUR
600S
TRAILBLAZER 600S GRILLMASTER
USER MANUAL
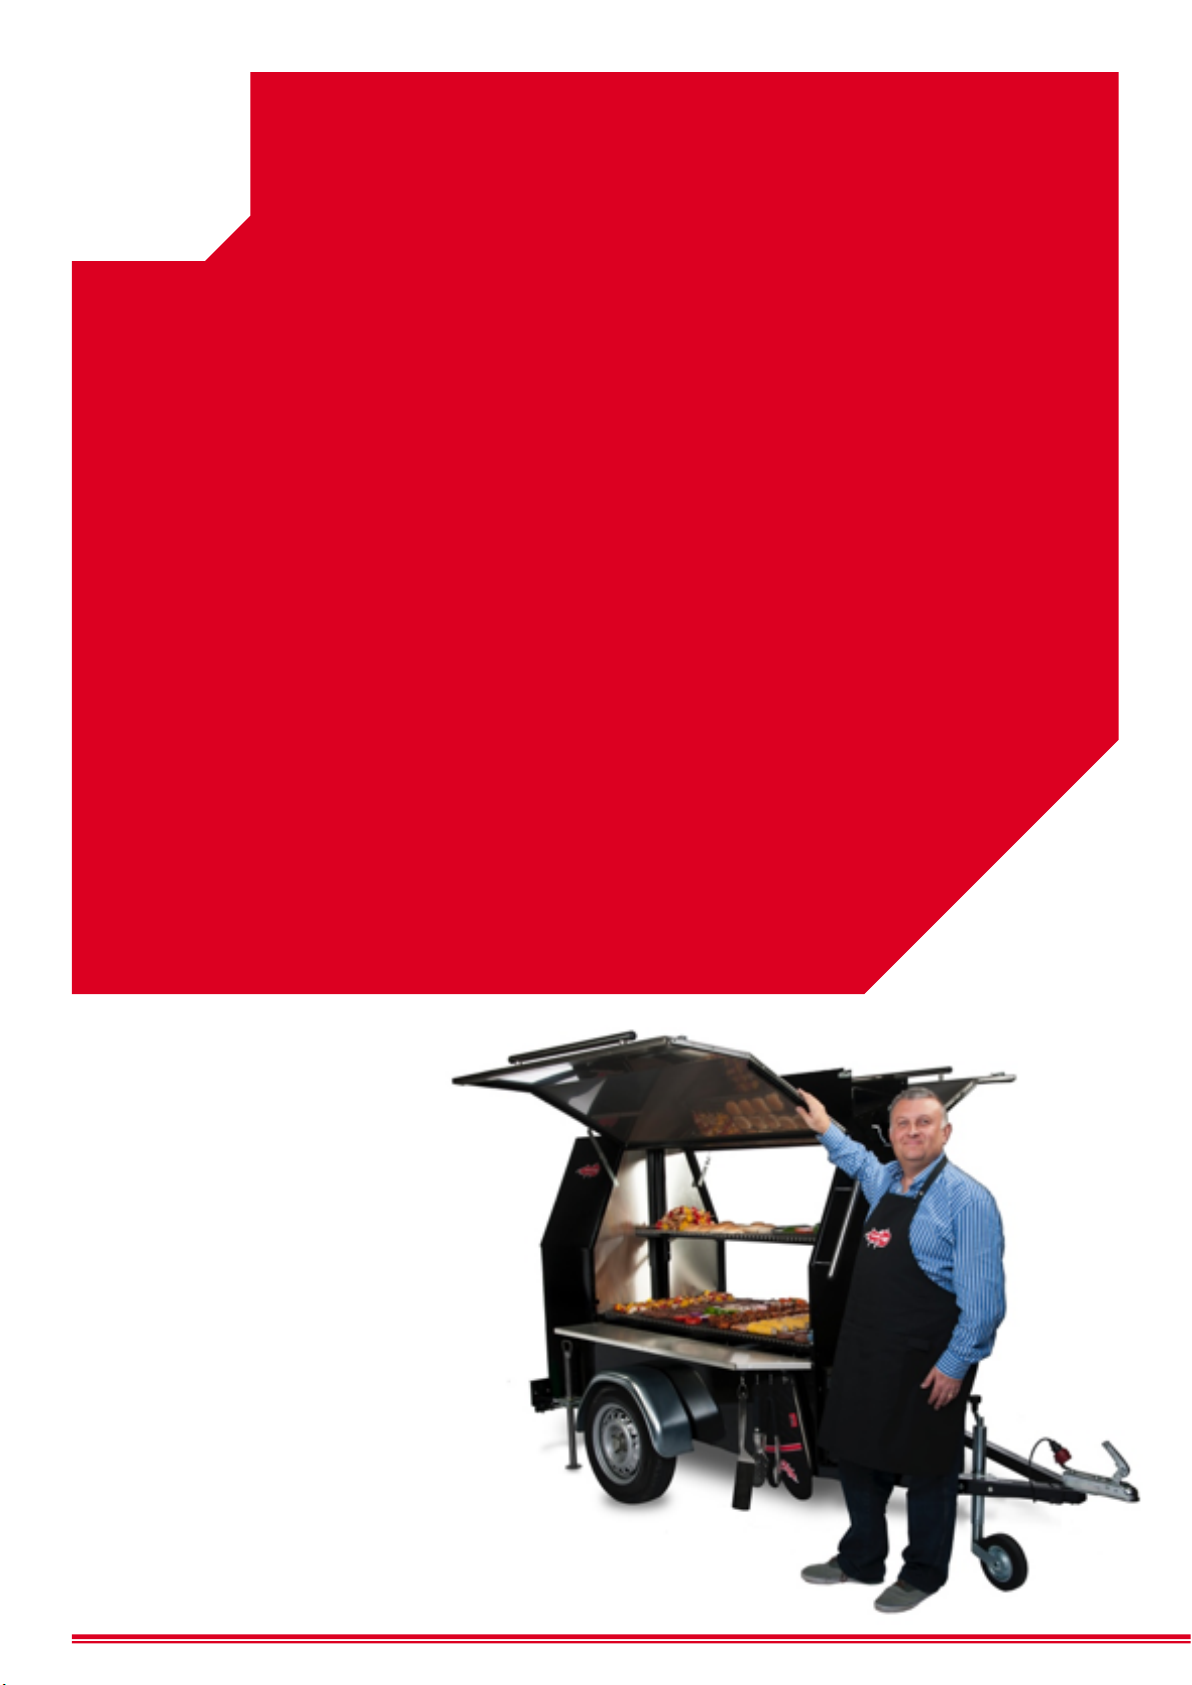
Barbecuing for
large Groups?
The Trailblazer 600S
Grillmaster has got it all...

CONTENTS
TRAILBLAZER 600S GRILLMASTER USER MANUAL
1 INTRODUCTION
2 BEFORE YOU START
3 YOUR TRAILBLAZER AT A GLANCE
4 DON’TS
5 LIGHTING UP
6 OPERATION
7 BEFORE YOU LEAVE
8 CLEANING
9 TOWING
10 SAFETY
11 FOOD SAFETY
12 MAINTENANCE & ADJUSTMENT
13 ACCESSORIES
14 TROUBLESHOOTING
15 WARRANTY
16 TRAILBLAZER NETWORK
1INTRODUCTION
Thank you for purchasing the amazing Trailblazer 600S Grillmaster towable BBQ/
Grill. We hope that your Trailblazer will be everything you hoped for.
Your Trailblazer will give you years of good service if you take time to look after it
and keep it well maintained at all times.
Please read this manual before you use your Trailblazer for the first time and
periodically refer to it to ensure that you are covering all the areas that need
attended to including adjustment, maintenance and safety.
Take time to sign up as a Trailblazer Network member to assist in helping your
business grow and run more smoothly.
From all at Trailblazer BBQ,
Welcome to
the Trailblazer
community!
Lester Manley,
Founder & MD
2BEFORE YOU START
Your Trailblazer 600S Grillmaster is a very powerful and versatile machine that will
serve you well throughout its life. It is essential that you have a good knowledge of
your 600S Grillmaster in order to ensure a long and trouble free service.
When you take delivery, unwrap all packaging material inside and out. Check
thoroughly for any loose parts after being in transit. Read the instruction manual
thoroughly.
Familiarise yourself with all the features of your Trailblazer including hitching,
towing, safety, maintenance and adjustments.
Make sure you have done a trial run with the Trailblazer before your first
assignment in order to allow you to familiarise yourself with lighting up, heat
control, friction block adjustment, volume of charcoal etc.
Familiarise
yourself with all
the features of
your Trailblazer
5
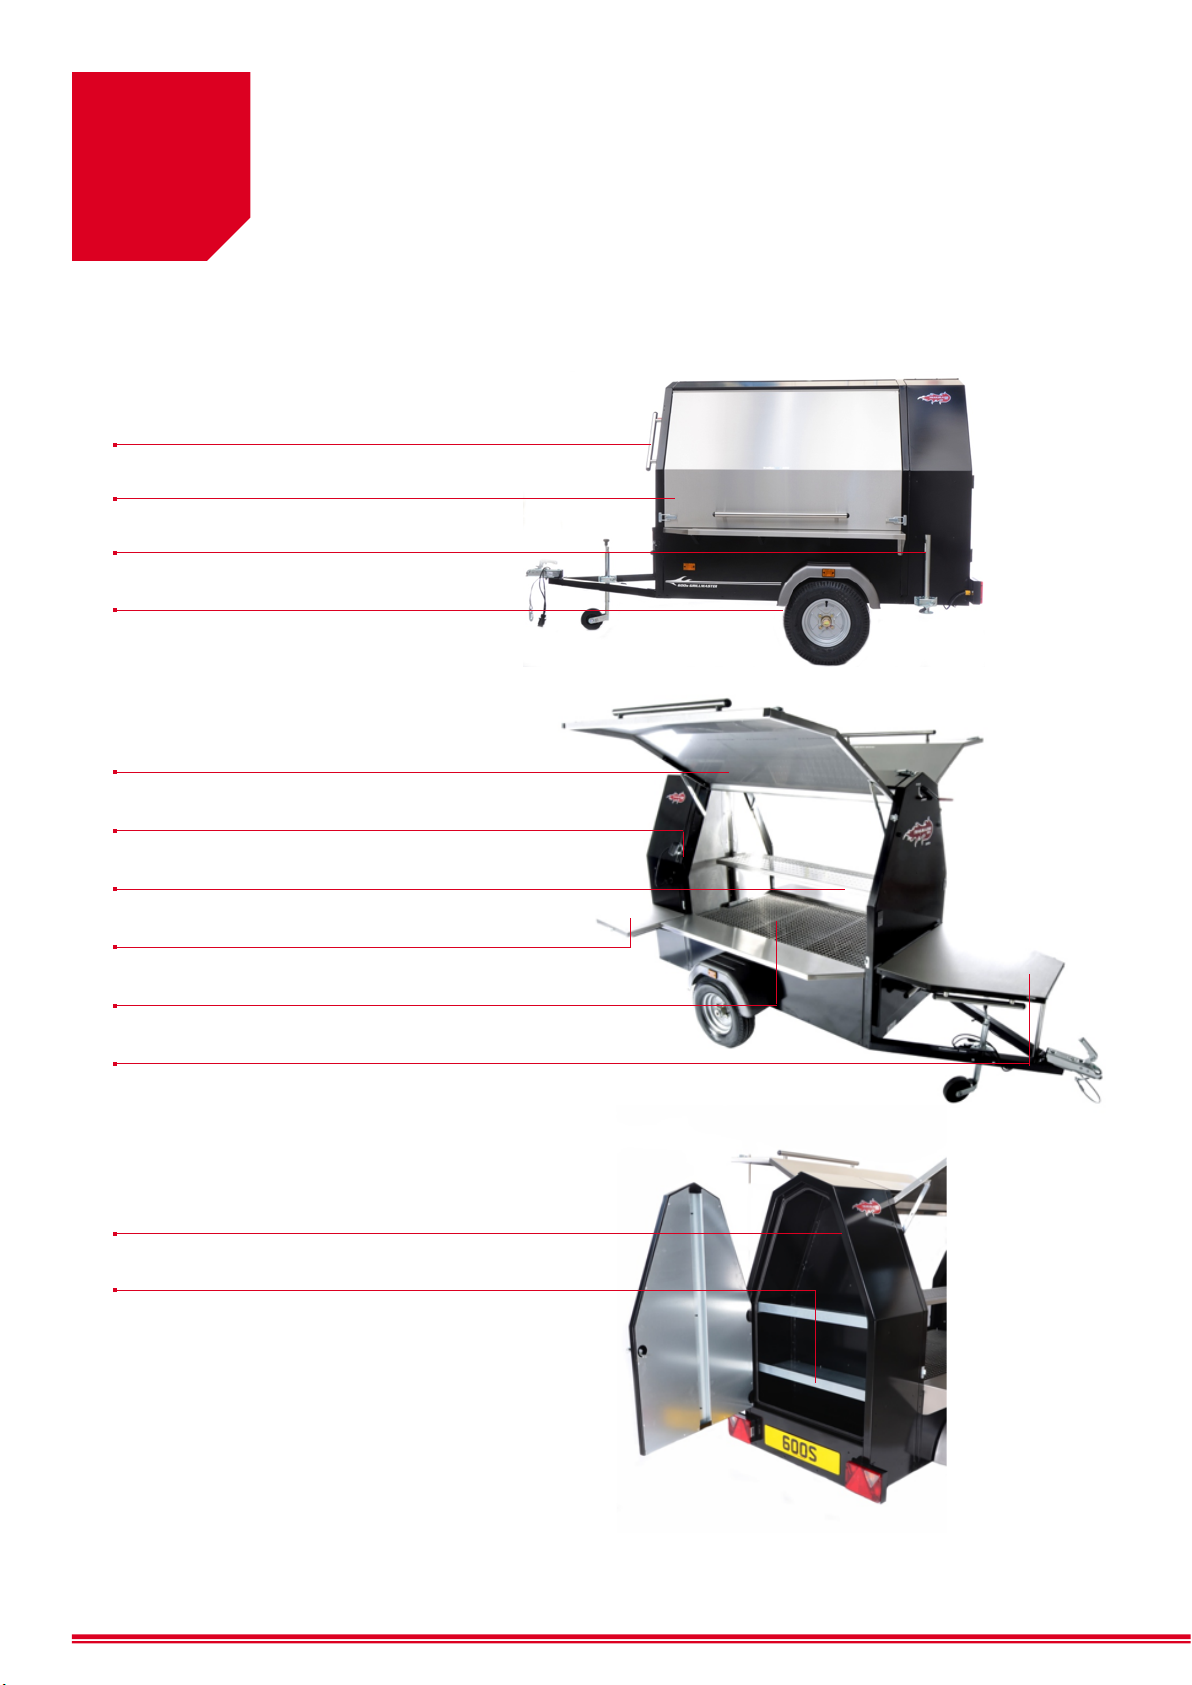
3
Front positioning handles
Door latch
Rear prop stand
Wheel & Mudguard
Gull wing door
12v Lighting socket (optional)
Upper warming tray
Lift up side table (optional)
Rear storage compartment
Storage shelves
Cooking surface
Drop down front table (optional)
YOUR TRAILBLAZER 600S
GRILLMASTER AT A GLANCE

BEFORE YOU START
Cooking surface wind up handle
Front positioning handles
Scraper blade handle
Ash Box
Rear lockable door
Rear lockable door handle
Side work surfaces
Rear Lights
Vent fixing stay
Cooking surface wind up handle
Number plate position
Vent fixing latch
Jockey wheel
Tow hitch
Secondary hitch
Top opening vents
Gull wing door stays
7

4DON’TS
DON’T light BBQ with doors closed
DON’T travel with Prop stand or Jockey wheel down
DON’T travel with cooking surface raised up
DON’T forget to latch and lock rear storage unit
DON’T forget to attach secondary latch
DON’T over soak charcoal with lighter fluid
DON’T forget to lock trailer when leaving it unattended
DON’T leave trailer unattended while still hot
DON’T over load rear storage, max load 20kg
DON’T forget a regular safety check around the whole unit
DON’T scrape ash out until cooled down
5LIGHTING UP
Always light up with both doors and both vents open in order to allow maximum air
and prevent the machine from overheating and causing damage.
Use good quality charcoal. We recommend Trailblazer South African Premium
Charcoal. This will give your food the best flavour possible. Most briquette charcoal
and automatic light charcoal use binders which give off a harsh smoke.
If using the entire surface, start with 12kg of charcoal (4kg per
each bay)
Make several small piles and use lighter fluid to light the piles. Once the charcoal
starts to turn white, spread the charcoal piles out in an even layer.The charcoal is at
its hottest and ready to cook on when it has a thin layer of white ash covering the
pieces of charcoal.
When the charcoal is fully lit evenly distribute throughout the firebox.
If cooking for a prolonged period, the fire will need restocking over time. You
may wish to have a separate container to start additional charcoal. You will
need an additional 4 - 5 kg. of charcoal for each hour of cooking time. Add your
supplemental charcoal after it has been burning for at least 10 minutes.
Adding unlit charcoal during the cooking process will give your food a harsh taste.
It is useful to keep a spray bottle of water handy whilst cooking. It can be helpful in
reducing flare ups.
STEP 1
STEP 2
STEP 3
STEP 4
STEP 5
STEP 6
9
6OPERATION
The Trailblazer is designed to operate with at least 1 door open at all times with
both doors being the normal mode of operation.
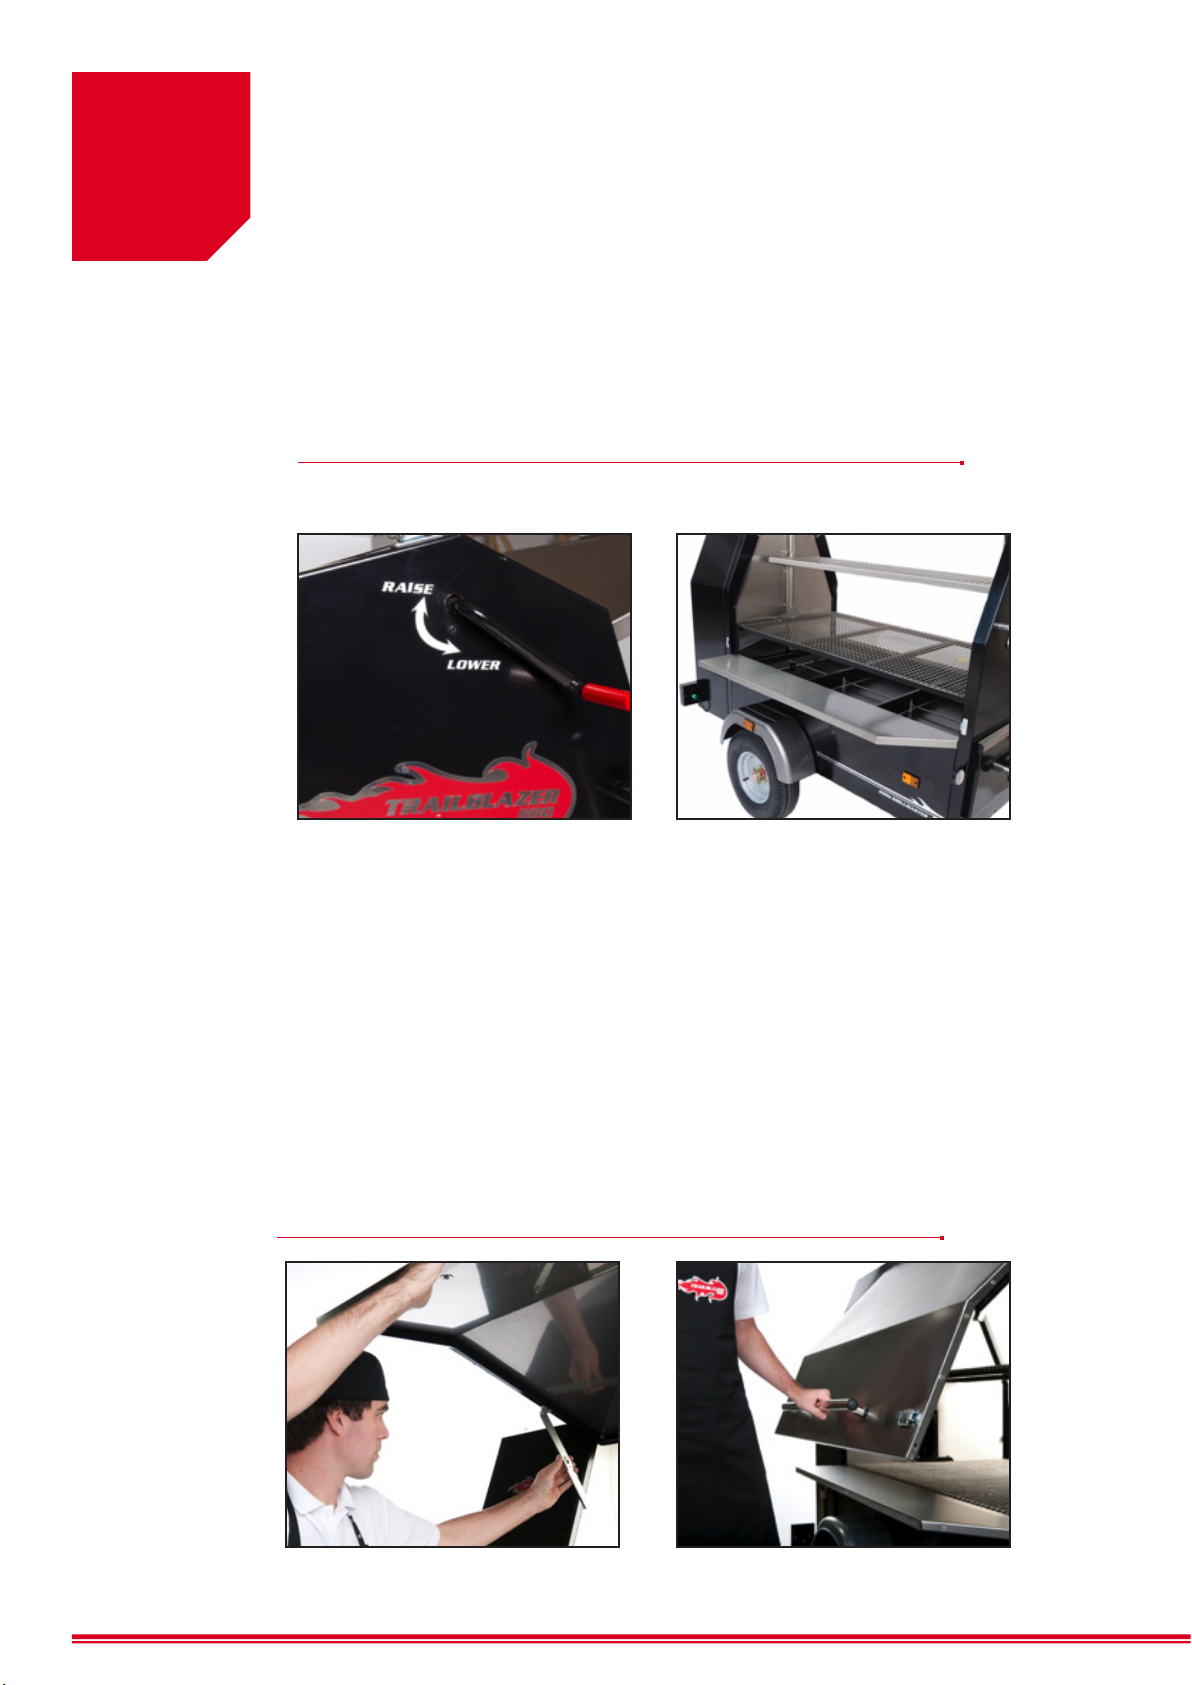
GRILL HEIGHT ADJUSTMENT
DOOR OPERATION
The height of the grill may be adjusted easily from, at its lowest, sitting on top of the fire box
to fully raised as seen in the picture above. This allows access to the fire box to load charcoal
and light the BBQ, adjust the temperature at which cooking is carried out, and aid cleaning.
The grill is raised and lowered using the winch handle at the top of the front gable. Make sure
to follow the direction shown on your Trailblazer when turning the winch handle as incorrect
operation will cause accessive wear of the lifting wire.
Turn clockwise to raise and anti-clockwise to lower the grill (and is marked on the front gable
of the 600S Grillmaster).

Gull wing doors provide protection from sun and rain whilst cooking and fully
enclose the grill whilst not in use or whilst travelling. They are secured with clasps
at both front and rear. These can be adjusted if necessary by loosening the
retaining nuts and moving forward or rear as required before re-securing. Only
very minor adjustments should be made at a time.
The stays which hold open the doors are simple but effective. They operate by
opening the door fully and pushing up the centre of the stay whilst lowering the
door down until it is supported. This should be done at one side and then the
other. Once up insert the door stay keys to ensure doors do not close throughout
use. More info on page 26.
To close the doors, first open the door a little more and allow the centre section of
the stay to come downwards.
11
6OPERATION
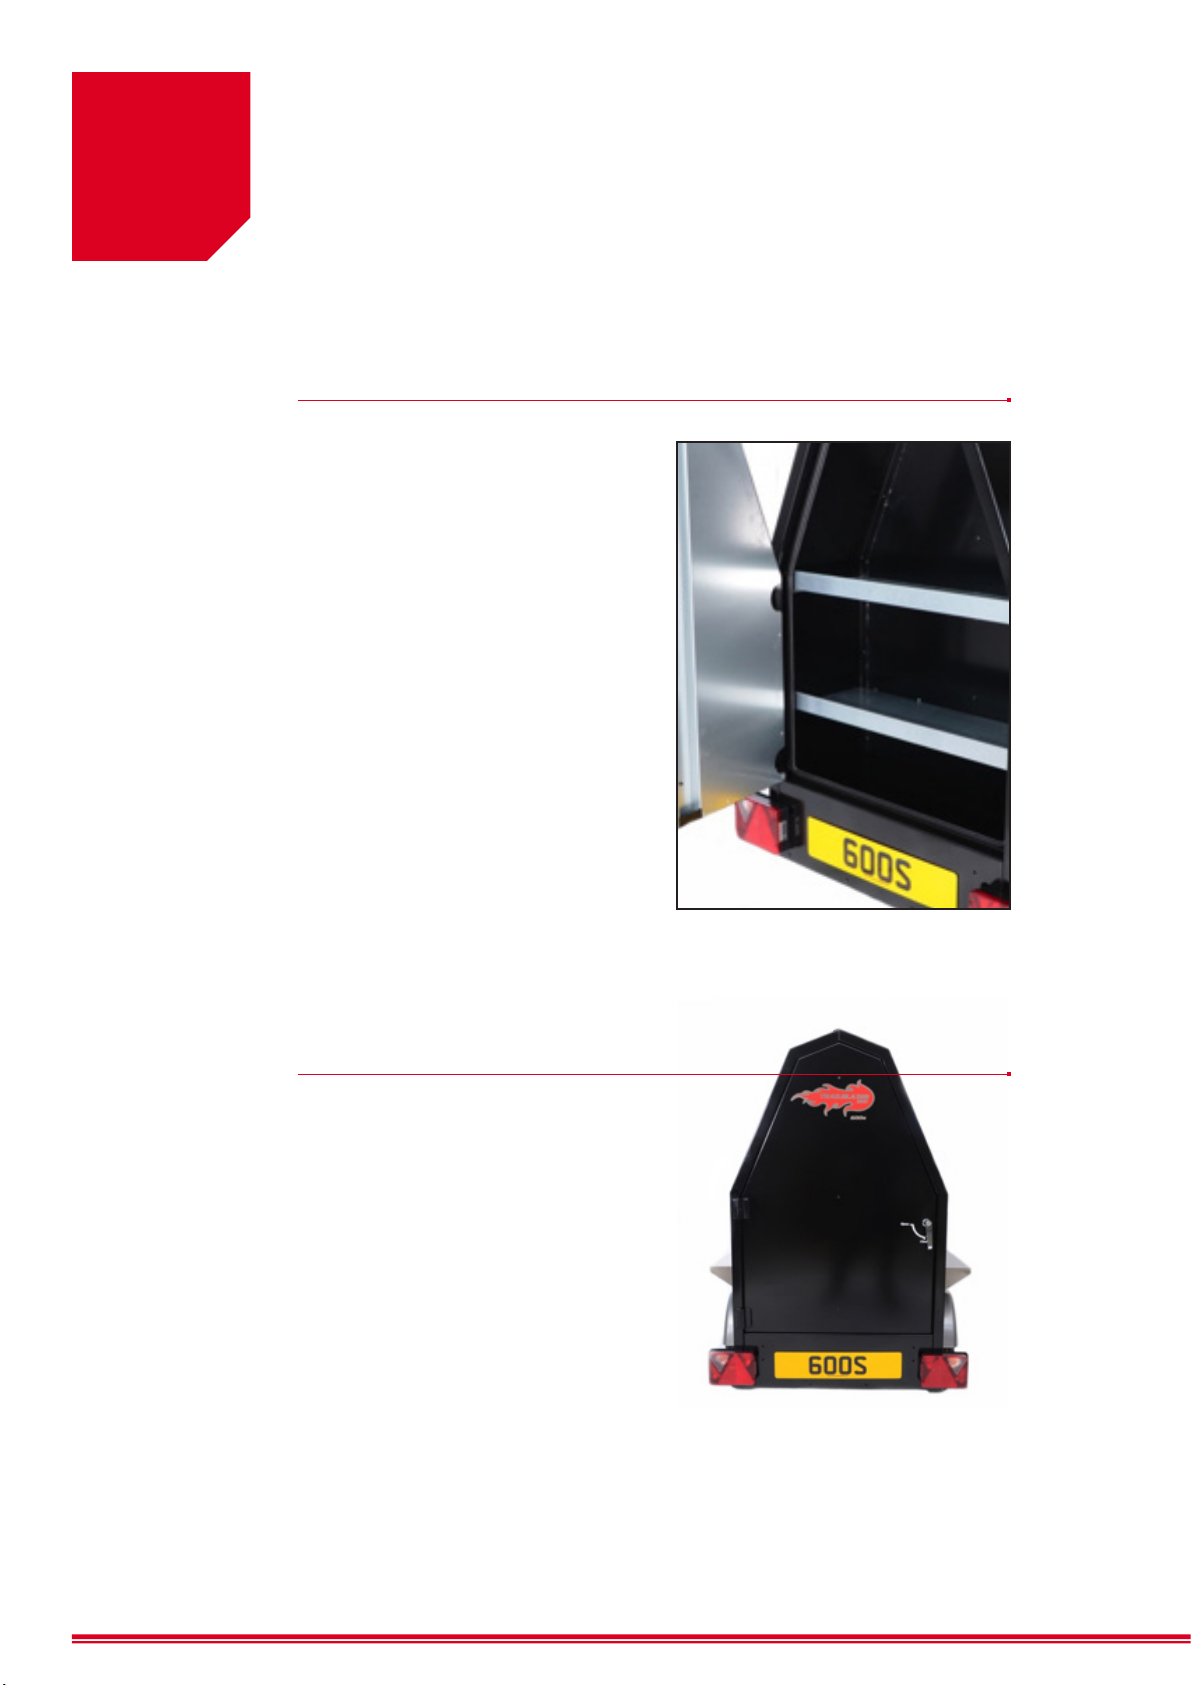
The rear storage area is provided with a
lockable door. This is mounted on two
heavy duty hinges which should be oiled
periodically.
The integral storage compartment has
a multitude of uses, is lockable and is
weather-proof. The stainless steel shelves
have lips at the front to retain items. Care
should be taken not to overload ether the
floor or the upper shelves as heavy weights
could cause damage during transportation.
Do not load over 20kgs as it could upset
the balance of the trailer.
Ensure that the door is securely closed
preferably with the handle locked
whenever you are on the move.
REAR STORAGE COMPARTMENT
Your Trailblazer BBQ is a fully approved
road legal trailer and does not require any
ancillary equipment for use on the road.
The requirements include indicator, side
and brake lights, rear triangular reflectors,
side amber reflectors and front clear
reflectors. The lights should be checked
regularly to ensure that all are operating
correctly. If a bulb should need to be
replaced this can be done at any motor
accessory retailer or many petrol stations.
ROAD LIGHTS
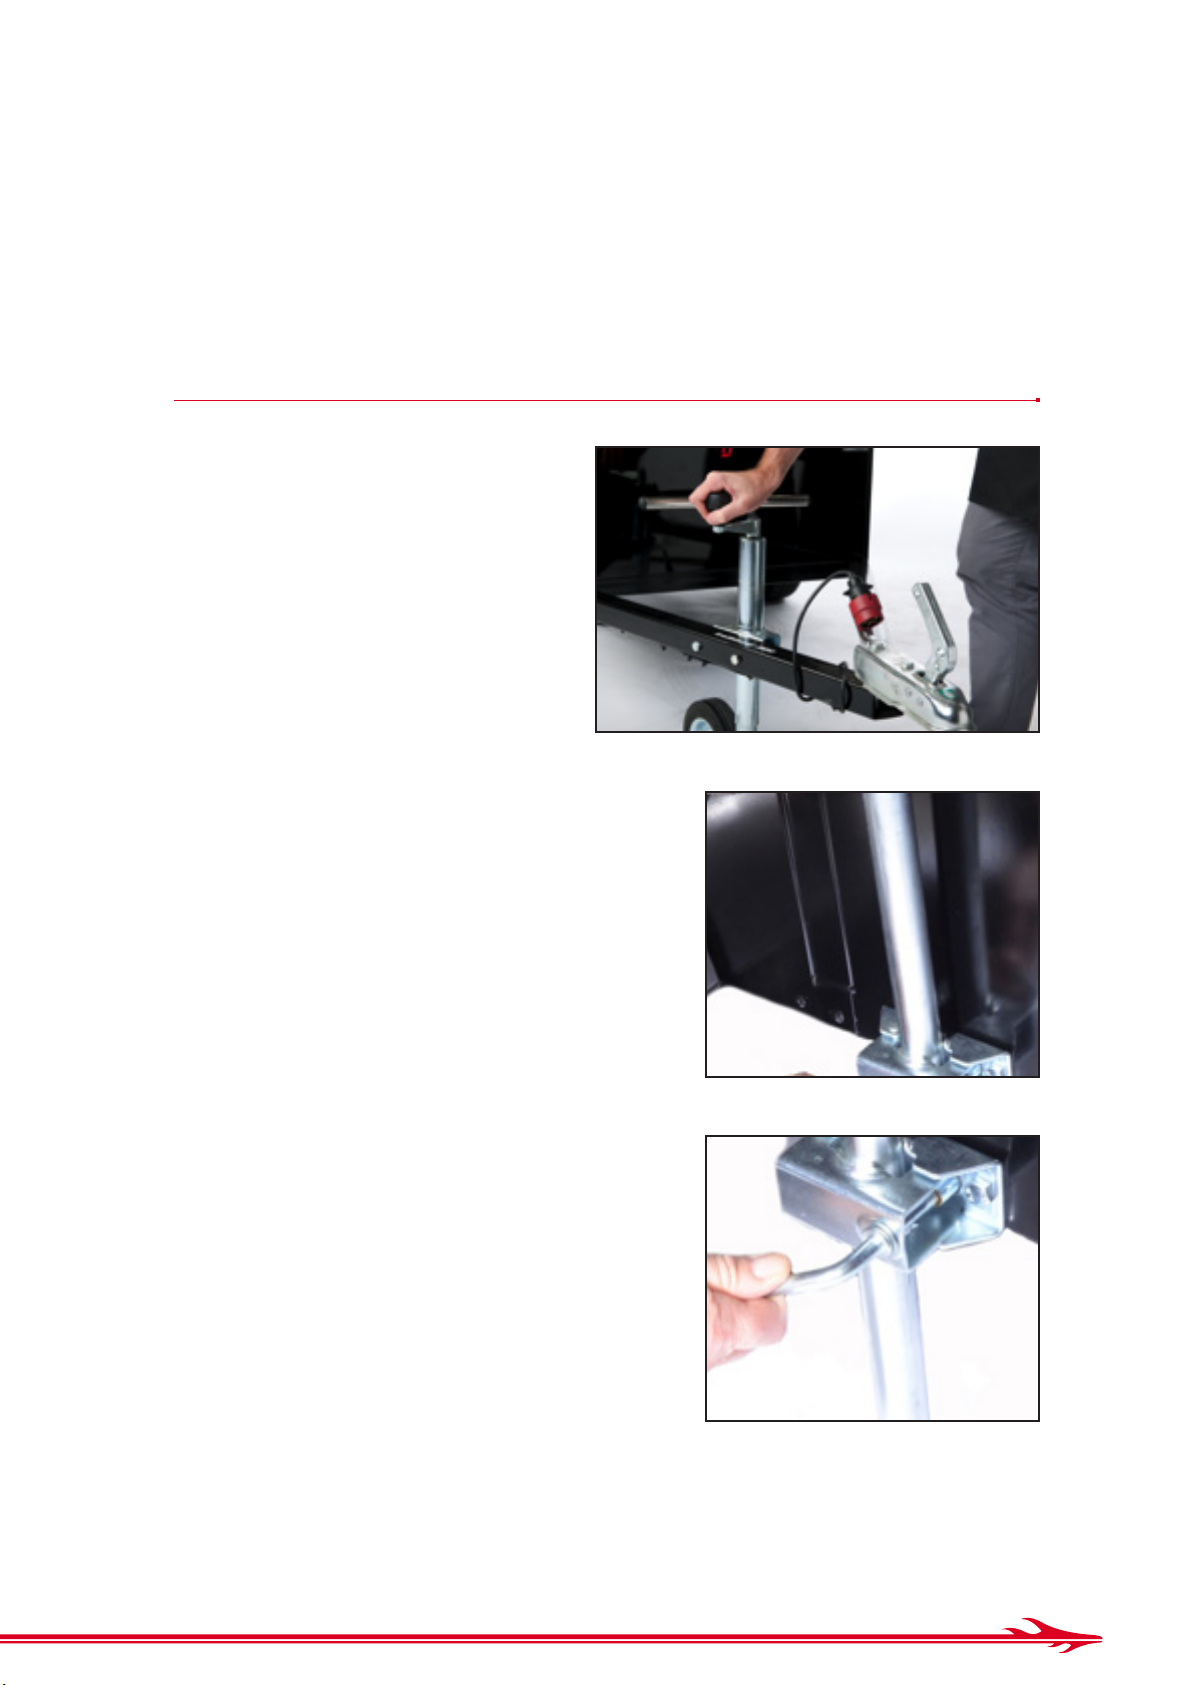
Your Trailblazer BBQ is equipped with
a Jockey wheel that is useful when
manoeuvring by hand and then to level the
BBQ during use. It is adjusted by winding
the top handle to raise or lower the front of
the Trailblazer. Loosening the lever on the
side of the chassis and raising or lowering
the full jockey wheel assembly can make
more significant adjustments.
When levelled with the jockey wheel the
Trailblazer can be secured in position by
lowering the prop stand located at the left
rear. Drop this to the ground and tighten
securely. A further turn of the jockey wheel
handle will put additional pressure on the
prop stand and assist with fixing it into
position.
For traveling first raise fully the prop stand
and secure in place with the lever. Then
the jockey wheel should be raised until
the wheel arms are located into the slot
in the bottom of the outer sleeve. The
wheel should be secured into this position
by winding the wheel up firmly. This is to
prevent the wheel vibrating down during
travel. Once the wheel is secured the full
jockey wheel should then be raised as far
as possible and securely fixed in place with
the side lever.
When unhitching your Trailblazer from your
vehicle the jockey wheel may be used to
lift it off the tow ball. First disconnect the
electrical connection then drop the jockey
wheel down by releasing the side lever.
Re-secure the side lever and then, whilst
holding up the hitch lock handle, wind the
top handle to lift the front of the Trailblazer
up and off the tow ball.
JOCKEY WHEEL / PROP STAND
13

6OPERATION
The Trailblazer 600S Grillmaster is equipped with independent roof vents that can be left
closed or opened at one or both sides whilst cooking.
The right hand vent has a clasp (same as gull wing doors) that fastens to the front gable to
secure both vents for travelling. The left hand vent should be closed first to sit beneath the
right hand vent. The vents are held open by small stays at the front of each. There is a slot
at the base of each stay, which falls onto the retaining bolt holding it in the open position.
To close the vents push the stays towards the centre of the Trailblazer 600S Grillmaster
and lower the vent to its closed position.
ROOF VENTS

CLEANING OUT FIRE BOX
After coals are cold, draw the ash into the ash box with the integral scraper and dispose
of in an appropriate manner. Lift up scraper handle at front to release cross bar, pull
scraper the whole way to scrape ash into ash box then unlatch ash box and remove to
dispose of ash safely.
You will notice that before being able to pull the scraper bar through the fire box, you must first
adjust the positioning of the three flaps fitted on the fire box.
To do so simply lift and rotate each flap so as it sits in the upright position. Allowinf the blade
to pass through each fire bay position to allow the blade to pass each one of the three bays.
(Please see below)
15

Ensure you regularly pay attention to the wheel nut indicators. Each indicator should be running in a
clockwise direction and poining at each other. If a nut indicator looks to be out of place you need to
tighten the wheel nut and reset the indicator accordingly.
Correct positioning Incorrect positioning
ENSURE THAT ALL WHEEL NUTS ARE ADEQUATELY TIGHTENED AND
CHECK PERIODICALLY
ENSURE THAT ALL WHEEL NUTS ARE ADEQUATELY TIGHTENED AND
WHEEL NUT INDICATORS REMAIN IN THE CORRECT POSITION.
ENSURE THAT THE TYRE PRESSURES ARE BOTH EQUAL AT 20PSI
Tyres should be checked periodically for any damage, cuts or bulges. Tread depth must be at least
1.6mm across the centre three-quarters of the width.
The Trailblazer 600s wheels are fitted with sealed for life bearings.
Rating
The correct tyre rating is 10” 72N.
Ensure that all wheel nuts are fully tightened and keep an eye on the wheel indicators to ensure they
havent moved positioning. The wheel nuts require an 18mm socket or wheel brace.
WHEELS AND TYRES

7BEFORE YOU LEAVE
• Always attach the secondary hitch to a suitable anchor point on the
towing vehicle.
• Ensure that the hitch is fully engaged and locked into position by
pulling up hard on the handle without depressing the release latch
located beneath this.
• Ensure the grill is fully lowered and resting on the fire box.
• Check that the jockey wheel is raised, the clamp is tightly closed an
the winding mechanism has lifted the wheel into the slot at the
bottom of the post to stop it rotating. Tighten well to prevent the
wheel vibrating down during towing.
• Ensure that the storage door is securely closed and preferably
locked.
• Check that prop stand is raised and secured in place.
• Close all door clasps securely.
• Check that the ash box is secured and the lock is fully engaged
behind the front panel.
• Ensure the ash scraper bar holding cross piece is correctly located
inside the slot in the front panel.
• Close top vents and secure with the front clasp.
• Check that side lights, brake lights and indicators are functioning
correctly.
• Do not overload the storage shelves, or if being used, the grill during
transportation.
• Ensure that any load carried is correctly secured to prevent
movement during travel.
BEFORE LEAVING
17

8CLEANING
Before cooking raise the grill from the firebox and spray with Palm or vegetable
oil to prevent food sticking to the grill top.
STEP 1
Raising the grill top immediately after cooking prevents grease from baking
onto the grill surface.
STEP 2
Warning! Cold water poured onto hot coals in the firebox can seriously damage
the BBQ. The sudden change in temperature can cause the firebox to twist.
STEP 3
After coals are cold, draw the ash into the ash box with the integral scraper and
dispose of in an appropriate manner.
STEP 4
Warning! On no account should hot coals be scrapped into the front ash box.
STEP 5
When cooled the stainless steel grill wire may be cleaned with detergent and
a stiff brush. If there are baked on deposits it may be necessary to use a wire
wool cleaning pad or other such abrasive material to spot clean the wire.
STEP 6
Remove ash box and clean separately after disposal of ash. Leave out for next
steps.
STEP 7
Once the Trailblazer BBQ is cool the interior may be cleaned with a power hose.
STEP 8

8CLEANING
Hose the firebox from the rear towards the opening where the ash box is
normally situated to allow any debris remaining to exit the Trailblazer BBQ.
STEP 9
If the exterior has become dirty from road use, power hose the exterior of the
BBQ. Take care not to remove portions of the Trailblazer logo or wordings whilst
doing so.
STEP 10
Heavier deposits of burnt on materials may be removed from stainless steel
surfaces with the use of Trailblazer Heavy Duty Stainless Steel cleaner.
STEP 11
When dry the finish of the stainless steel gull wing doors, shelves and inner
panels may be rubbed with a lint free cloth containing a small amount of baby
oil or sprayed and wiped with a light oil product.
STEP 12
Powder coated (painted) panels can be washed and polished with any good
quality automotive polish.
Warning! Do not use abrasive cleaners or pads as these will damage the
surface.
STEP 13
19

9TOWING
The driver of the towing vehicle is responsible at law for the safe and lawful
condition of the Trailblazer BBQ. Whilst all necessary steps have been taken by
Trailblazer BBQ to ensure that all is correct and in good working order before
leaving the factory it is essential that routine checks are carried out before each
journey. The following may be of assistance.
Your Trailblazer BBQ should be equipped with an approved number plate to
match the vehicle towing. This can be easily attached between the rear light
clusters using double sided number plate adhesive pads.
Remember that when towing a Trailblazer the maximum speed limits for some
roads change.
30mph/50kph limit applies on all roads with street lighting unless signs show
otherwise.
50mph/80kph applies on single carriageways unless signs show otherwise.
60mph/100kph applies on dual carriageways and motorways.
Also note that on a 3 lane motorway it is illegal to tow in the right hand lane. On
any road or motorway always return to the left lane as soon as possible.
LEGAL REQUIREMENTS
Table of contents
Other Trailblazer BBQ Grill manuals


