Transonic TC2670BRDVD User manual
TC2670BRDVD
Blu-Ray Disc Player
Please read these instructions carefully and retain
for furture reference
Helpline
For assistance during normal working hours (9am-5pm, Mon-Fri, New Zealand local time) call
Oriental Pacific International Ltd.
NZ call: 0800 89 85 80
Email: [email protected]
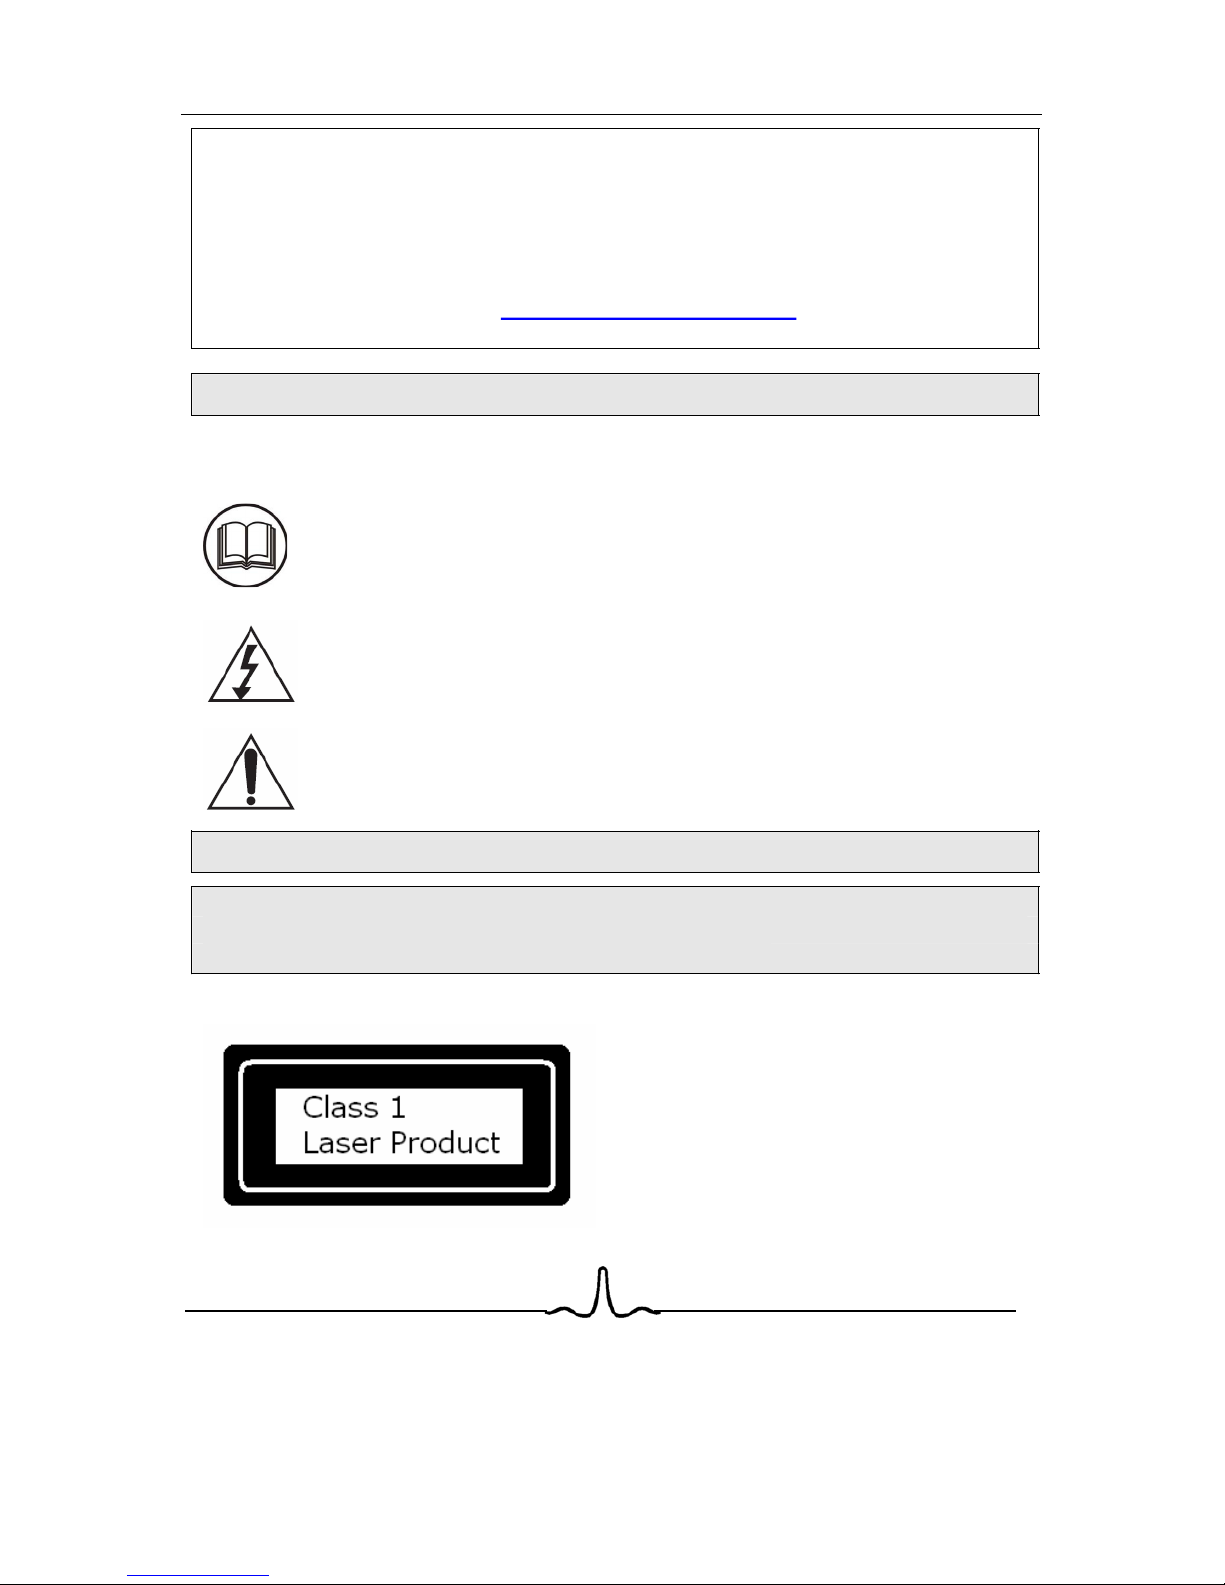
SYMBOLS
The graphic symbols used in this manual or on the back cover of the set
mean the following:
Read this manual in full before use.
The lightning flash symbol is intended to alert the user to the
enclosures that contain hazardous voltages.
The exclamation symbol is intended to alert the user to the
presence of important operating and maintenance (servicing)
instructions in the literature accompanying the appliance.
IMPORTANT SAFEGUARDS
When using any electrical apparatus always observe safety regulations
and use basic safety precautions to reduce the risk of fire, electric
shock and personal injury, including the following
Read, Keep and Follow these instructions, heeding all Warnings.
CAUTION! This is a class 1 laser product.
beam which could cause hazardous
radiation exposure if directed. Be sure to
operate the equipment as directed. Do not
place eyes close to any openings when
connected to the mains supply.
However this player uses a visible laser

WARNING! Do not remove any cover.
WARNING! No objects filled with liquid, such as vases, shall be placed on this
equipment or in any position where liquid may fall into this equipment or any other
electrical apparatus.
WARNING! Do not insert any objects into any openings of this equipment or any
other electrical apparatus.
WARNING! Do not use this apparatus near water. To avoid the risk of fire or electric
shock, do not expose this apparatus to rain or moisture. The apparatus shall not be
exposed to dripping or splashes and is strictly for indoor use only.
WARNING! Do not immerse in any liquid whilst in use or cleaning. Clean only with a
damp cloth, dry with a dry towel. Do not use harsh abrasives as these may damage
the plastic parts.
WARNING! DO NOT block any ventilation openings. Keep away from curtains,
newspapers and restricted areas. Install in accordance with any specific
manufacturer’s instructions. Always allow a sufficient gap around the apparatus to
avoid overheating.
WARNING! Do not install near any heat sources such as radiators, gas heaters,
stoves or other apparatus (including amplifiers) that produce heat. Do not leave in
direct sunlight.
WARNING! Do not place any naked flame source, such as lighted candles on any
electrical apparatus.
WARNING! Connect to a suitable 230-240V ~ 50 Hz power supply only. This
equipment must be connected to a mains socket with a protective earth connection
suitable for class 1 equipment.
WARNING! Keep out of reach of young children. This apparatus is not suitable for
use by young children or infirm persons without supervision. Young children must be
supervised to ensure that they do not play with the apparatus. Ensure young children
have enough knowledge to operate the equipment safely if they do have access to
this equipment.
WARNING! Do not abuse or damage a power cord. If any power cord is damaged, it
must be replaced by the manufacturer, its service agent or a similarly qualified
person in order to avoid a hazard. A replaceable cord must be replaced with an
authorised replacement from an authorised service agent only.

WARNING! Only use attachments/accessories specified by the manufacturer.
WARNING! Unplug completely from the power source this apparatus during
lightening storms or when unused for long periods of time.
WARNING! Attention is drawn to the environmental aspects of disposing of any
battery.
WARNING! Refer all servicing to qualified personnel. Servicing is required when the
apparatus has been damaged in any way, such as when the power supply cord or
plug is damaged, liquid has been spilled or objects have fallen into the apparatus, the
apparatus has been exposed to rain or moisture, does not operate normally, or has
been dropped.
WARNING! For household use only, this apparatus is not intended for commercial
use.
WARNING! If this apparatus is to be used by a third party, please supply these
instructions with it.
WARNING! No liability will be accepted for any personal injury or damage
caused by failure to follow these instructions.
This product incorporates copyright protection technology that is protected by
U S patent rights. Use of this copyright protection technology must be
authorised by the Macrovision, and is intended for home and other limited
viewing use only unless otherwise authorised by Macrovision. Reverse
engineering or disassembly is prohibited.
Manufactured under licence from Dolby Laboratories. Dolby and the double-D
symbol are trademarks of Dolby Laboratories.
Confidential Unpublished Works, 1992-1997 Dolby Laboratories. Inc. All rights
reserved.

...............................................................................................33
..................................................................................................................31
30
......30
................................................................30
................................................................30
..........................29
29
29
.....................................................................................28
..........................................................................27
..................................................................26
...26
.....................................................................................................................................25
..............................................................................................................25
.........................................................................................................................24
4.7
4.6
4.5
ETWORK
N
.................................................................................................................18
..............................................................................................................14
..........................................................................................................13
............................................................................................................... 12
................ 12
....................................................................................11
TV .....................................................................................................................11
...............................................................................................................11
11
.............................................................................................
6.8 S
6.7 V
6.6 S
6.5 H
6.4 MP3/W
6.3 MP3/W
6.2 F
6.1 I
6 MP3 /WINDOWS MEDIA AUDIO / JPEG IMAGE PLAYBACK .........................................................
4.4
YSTEM
..............3
5
....................................................................................................................
..............................................................................................................9
Remote control
TABLE OF CONTENTS
1 INTRODUCTION ...................................................................................................................
1.1 O
VERVIEW
......................................................................................................................................3
1.2 P
LAYABLE
D
ISK
T
YPES
.....................................................................................................................
2 FUNCTIONAL
2.1 F
RONT
P
ANEL
.................................................................................................................................5
2.2
.....................................................................................................................
2.3 R
EAR
P
ANEL
C
ONNECTORS
3 CONNECTING THE BD PLAYER.......................................................................................................
3.1 C
ONNECTING THE
P
OWER
3.2 C
ONNECTING TO A
3.3 C
ONNECTING TO A
H
OME
T
HEATRE
S
YSTEM
4 SETUP MENU .....................................................................................................................
4.1 S
ETUP
M
ENU
O
PERATION
4.2 L
ANGUAGE
M
ENU
C
ATEGORY
4.3 D
ISPLAY
M
ENU
C
ATEGORY
P
ARENTAL
C
ONTROL
S M
ENU
C
ATEGORY
5 PLAYING A BD OR DVD DISK ........................................................................................................
5.1 S
TANDARD
(
OR
N
ORMAL
) P
LAYBACK A
BD
OR
DVD
DISC
5.2 N
ON
-S
TANDARD
P
LAYBACK OF A
BD
OR
DVD
DISC
5.3 O
THER
BD
AND
DVD P
LAYBACK
F
EATURES
NTRODUCTION
...............................................................................................................................
EATURES
S
UPPORTED FOR
MP3/W
INDOWS
M
EDIA
A
UDIO
/J
PEG
I
MAGE
P
LAYBACK
INDOWS
M
EDIA
A
UDIO
P
LAYBACK
R
EQUIREMENTS
INDOWS
M
EDIA
A
UDIO
P
LAYBACK
R
EQUIREMENTS
ELP
V
IEW
...............................................................................................................................
IMPLE
MP3/WMA A
UDIO
P
LAYBACK
A
UDIO
M
ENU
C
ATEGORY
IEWING
JPEG I
MAGES
LIDE
S
HOW
P
LAYER
I
NSTRUCTIONS
7 Appendix A Specifications...............................................................................................................38
A IMPORTANT SAFETY INSTRUCTIONS...............................................................................................1
6
3
8 Warranty Card.....................................................................................................................................41

Read these operating instructions carefully before using the unit. Follow all the safety instructions listed below.
Keep these operating instructions handy for future reference.
1) Read these instructions.
2) Keep these instructions.
3) Heed all warnings.
4) Follow all instructions.
5) Do not use this apparatus near water.
6) Clean only with dry cloth.
7) Do not block any ventilation openings, Install in accordance with the manufacturer's instructions.
8) Do not install near any heat sources such as radiators, heat registers, or other apparatus (including
amplifiers) that produce heat.
9) Do not defeat the safety purpose of the polarized or grounding- type plug. A polarized plug has two
blades with one wider than the other. A grounding type plug has two blades and a third grounding
prong. The wide blade or the third prong are provided for your safety. If the provided plug does not
fit into your outlet, consult an electrician for replacement of the obsolete outlet.
10) Protect the power cord from being walked on or pinched particularly at plugs, convenience
receptacles, and the point where they exit from the apparatus.
11) Only use attachments/accessories specified by the manufacturer.
12) Use only with the cart, stand, tripod, bracket, or table specified by the manufacturer, or sold with the
apparatus. When a cart is used, use caution when moving the cart/apparatus combination to avoid injury from tip-over.
13) Unplug this apparatus during lightning storms or when unused for long periods of time.
14) Refer all servicing to qualified service personnel.
Servicing is required when the apparatus has been damaged in any way, such as power-supply cord or
plug is damaged, liquid has been spilled or objects have fallen into the apparatus the apparatus has been
exposed to rain or moisture, does not operate normally, or has been dropped.
Precautions Handling Cautions
Before connecting other components to this Blu-ray disc player, be sure to turn them all off.
Do not move the Blu-ray disc player while a disc is being played, or the disc may be scratched or
broken, the Blu-ray disc player internal parts may be damaged.
Do not put a flower vase filled with water or any small metal objects on the Blu-ray disc player.
Be careful not to put your hand into the disc tray.
Do not place anything other than the disc in the disc tray.
Exterior interference such as lightning and static electricity can affect normal operation of this Blu-
ray disc player. If this occurs, turn the Blu-ray disc player
off and on again with the POWER button, or disconnect and then reconnect the AC power cord to
the AC power outlet. The Blu-ray disc player will operate normally.
Be sure to remove the disc and turn off the Blu-ray disc player after use.
Disconnect the AC power cord from the AC outlet when you don’t intend to use the Blu-ray disc
player for long periods of time.
Clean the disc by wiping in a straight line from the inside to the outside of the disc.
Apparatus shall not be exposed to dripping or splashing and no objects filled with liquids, such as
vases, shall be placed on the apparatus.
The Main plug is used as a disconnect device and shall stay readily operable at any time.
1
This Blu-ray disc player is designed and manufactured to respond to the Region Management Information.
If the Region number of a BD/DVD disc does not correspond to the Region number of this Blu-ray disc player,
The Blu-ray disc player cannot play the disc.
A IMPORTANT SAFETY INSTRUCTIONS

Restrictions on Playback
This player may not respond to all operating commands because some BD, DVD or CD discs allow
specific or limited operation and features during playback. Please note that this is not a defect in
the player.
The manufacturer cannot assure that this player will play every disc bearing the BD, DVD and CD
logos because disc formats may evolve, and problems and errors can occur during the creation of
BD, DVD and CD software and/or the manufacture of discs.
This player also operates differently than a standard DVD player or other AV equipment. Please contact
the customer support center if you have questions or encounter difficulty in playing BD, DVD or CD discs
in this player. Also, refer to the rest of this Manual for additional information on playback restriction
Disc Handling Precautions
This Blu-ray disc player supports discs that are compatible with DVD-RAM Standard Version 2.0.
Avoid touching the surface of a disc
Be careful not to leave fingerprints or scratches on the surface of the Disc.
Clean with an optional DVD-RAM/PD disc cleaner (LF-K200DCA1 where available). Do not use
cleaners or cloths for CDs to clean BD or DVD-RAM/-RW/-R discs.
Wipe off dirt or contamination on the disc with a soft cloth.
If the player is not used for a long period of time, remove any discs from the player and store it in its
case.
Do not write on the printed side with a ball-point pen or pencil.
Do not use record cleaning sprays or antistatic. Also, do not use volatile chemicals, such as benzene
or thinner.
Do not apply labels or stickers to discs. (Do not use discs fixed with exposed tape adhesive or
leftover peeled-off stickers.)
Do not use scratch-proof protectors or covers.
Do not use discs printed with label printers available on the market.
Do not load warped or cracked discs.
Disc Storage
Do not keep under direct sunlight.
Keep discs in a cool ventilated area.
Store vertically.
Keep in a clean protection jacket.
If you move your Blu-ray disc player suddenly from a cold place to a warm place, condensation may
generate on the operating parts and lens and cause abnormal disc playback. If this occurs, do not
connect the plug to the power outlet and wait for two hours. Then insert the disc and try to play back
again
2
high-definition and cinema-like pictures.
Soundtracks in more than one language are usua
Your BD player has the capability of providing
3
1 INTRODUCTION
1.1 O
VERVIEW
lly included on the disk, and subtitles in more
languages are often included as well.
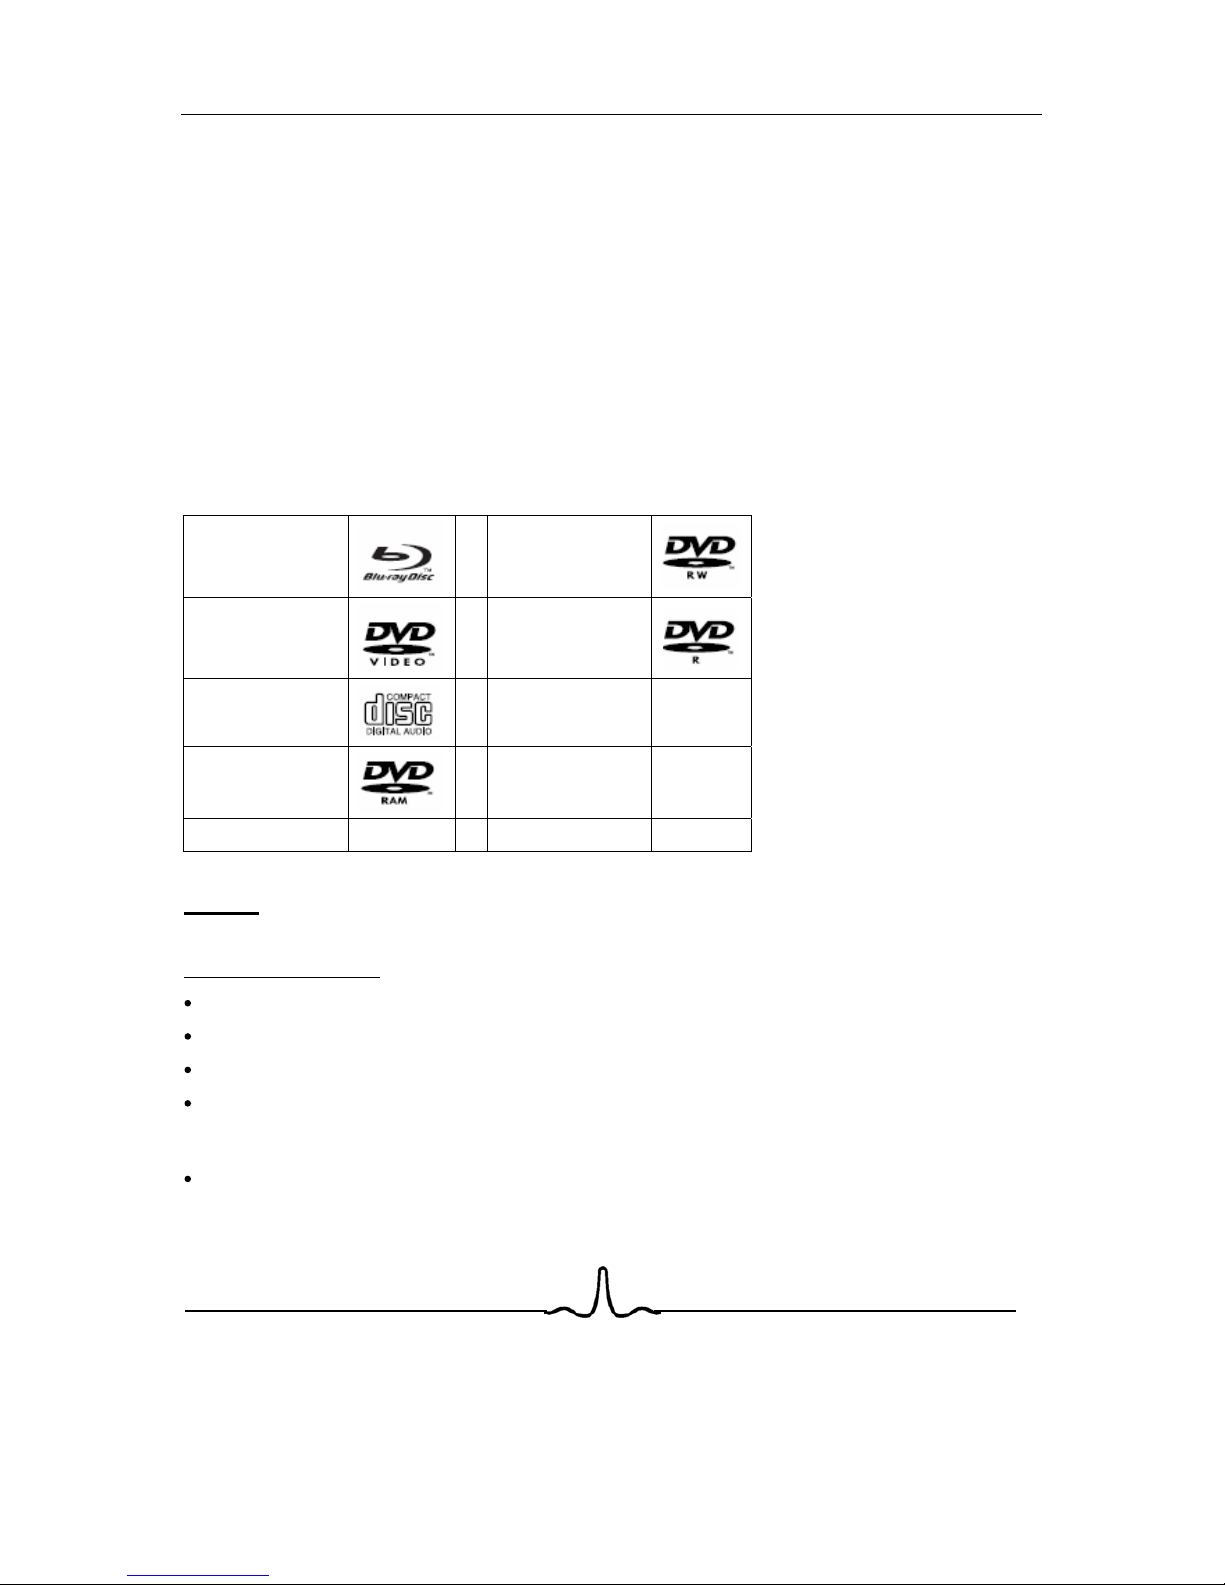
1.2 P
LAYABLE
D
ISK
T
YPES
The following types of disks can play in the REF player:
Blu-Ray
TM
Disks
DVD-RW
DVD Video Disks
(DVD-ROM)
DVD-R
Audio CDs
(CDDA)
DTS-CD
DVD-RAM
Mp3/WMA/Jpeg
Data CD
VCD
SVCD
NOTES:
For writeable DVD disks (DVD-RAM, DVD-RW, DVD-R)
DVD-RAM/-RW/-R recorded with UDF or ISO9660 format can be played back.
The disks must be finalized, VR-mode only
This Blu-ray disc player supports discs that are compatible with DVD-RAM Standard Version 2.0.
Playback may not work for some types of discs, or when specific operations, such as angle change
and aspect ratio adjustment, are being performed. Information about the discs is written in detail on
the box. Please refer to this if necessary.
Some DVD-VR disks will play. Not all features will be available
4
For writeable CD disks
CD-R/-RW media recorded with UDF or ISO9660 format can be played back.
MP3 files must be written to the disk with a .mp3 (or .MP3) file extension in order to be recognized
and played back properly
Windows Media Audio (WMA) files must be written to the disk with a .wma (or .WMA) file extension in
order to be recognized and played back properly
JPEG picture files must be written to the disk with an .jpeg or .jpg file extension in order to be
recognized and played back properly
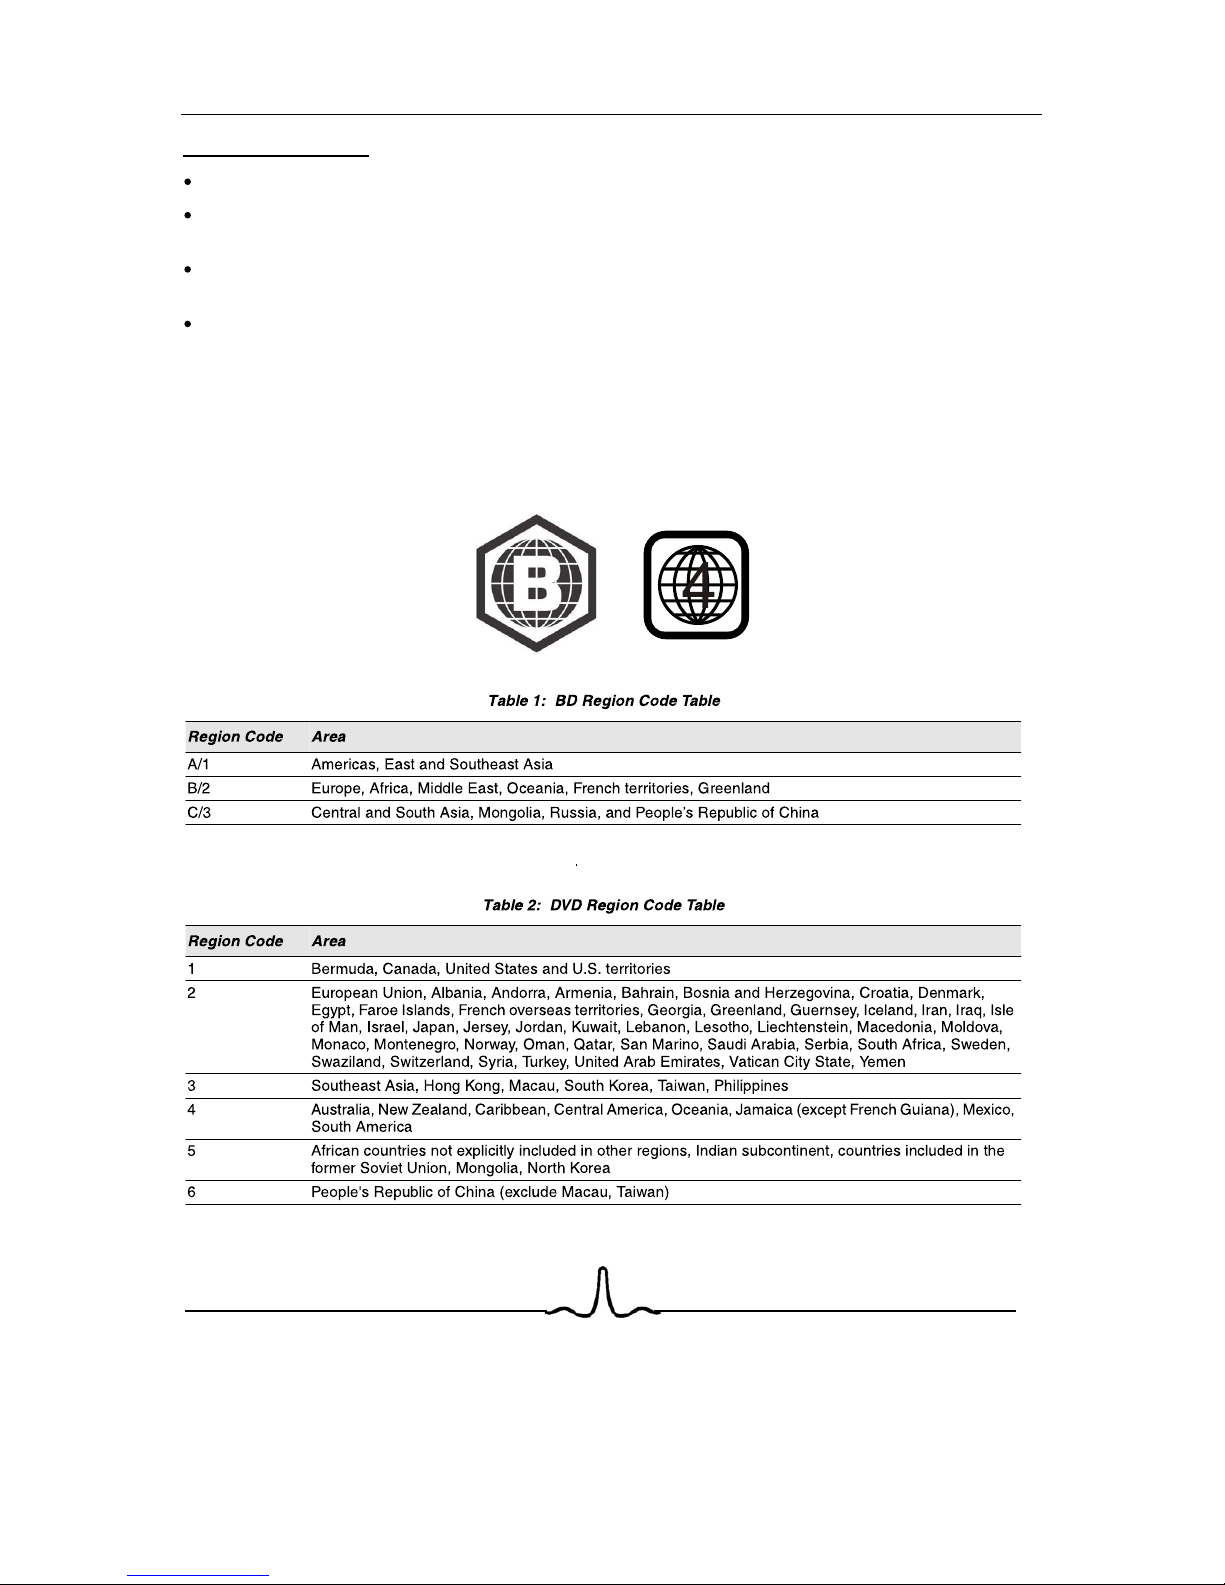
REGION CODE
If the Region number of a BD or DVD disc does not correspond to the region number of this Blu-ray disc
player, the Blu-ray disc player cannot play the disc. The region code is called out on the rear panel of the
BD player.

5
2 F
UNCTIONAL
O
VERVIEW
2.1 F
RONT
P
ANEL
6. POWER BUTTON
5. USB PORT
3. OPEN/CLOSE BUTTON
2. DISC TRAY
1. FRONT PANEL DISPLAY
4. PREVIOUS/NEXT/PLAY/PAUSE/NEXT BUTTONS
Opens to accept a disc.
Opens and closes the disc tray.
Displays the playing status, time, etc. (See next section)
Allow for control of playback from the front Panel
6. POWER BUTTON
7. INDICATOR LIGHT
Press POWER BUTTON to turn on the player- “ON” mode.
And press POWER BUTTON again to turn the player to
the standby mode.
When the rear power switch is turned on, the player at the
Standby mode, the indicator light is Blue, if the player at
“ON” mode, the indicator light is off. and the display is on.
12 3 4 56
7

playback.
playback.
BACK
AUDIO
CLEAR
ENTER
GOTO
SLOW
RANDOM
FORMATMENU
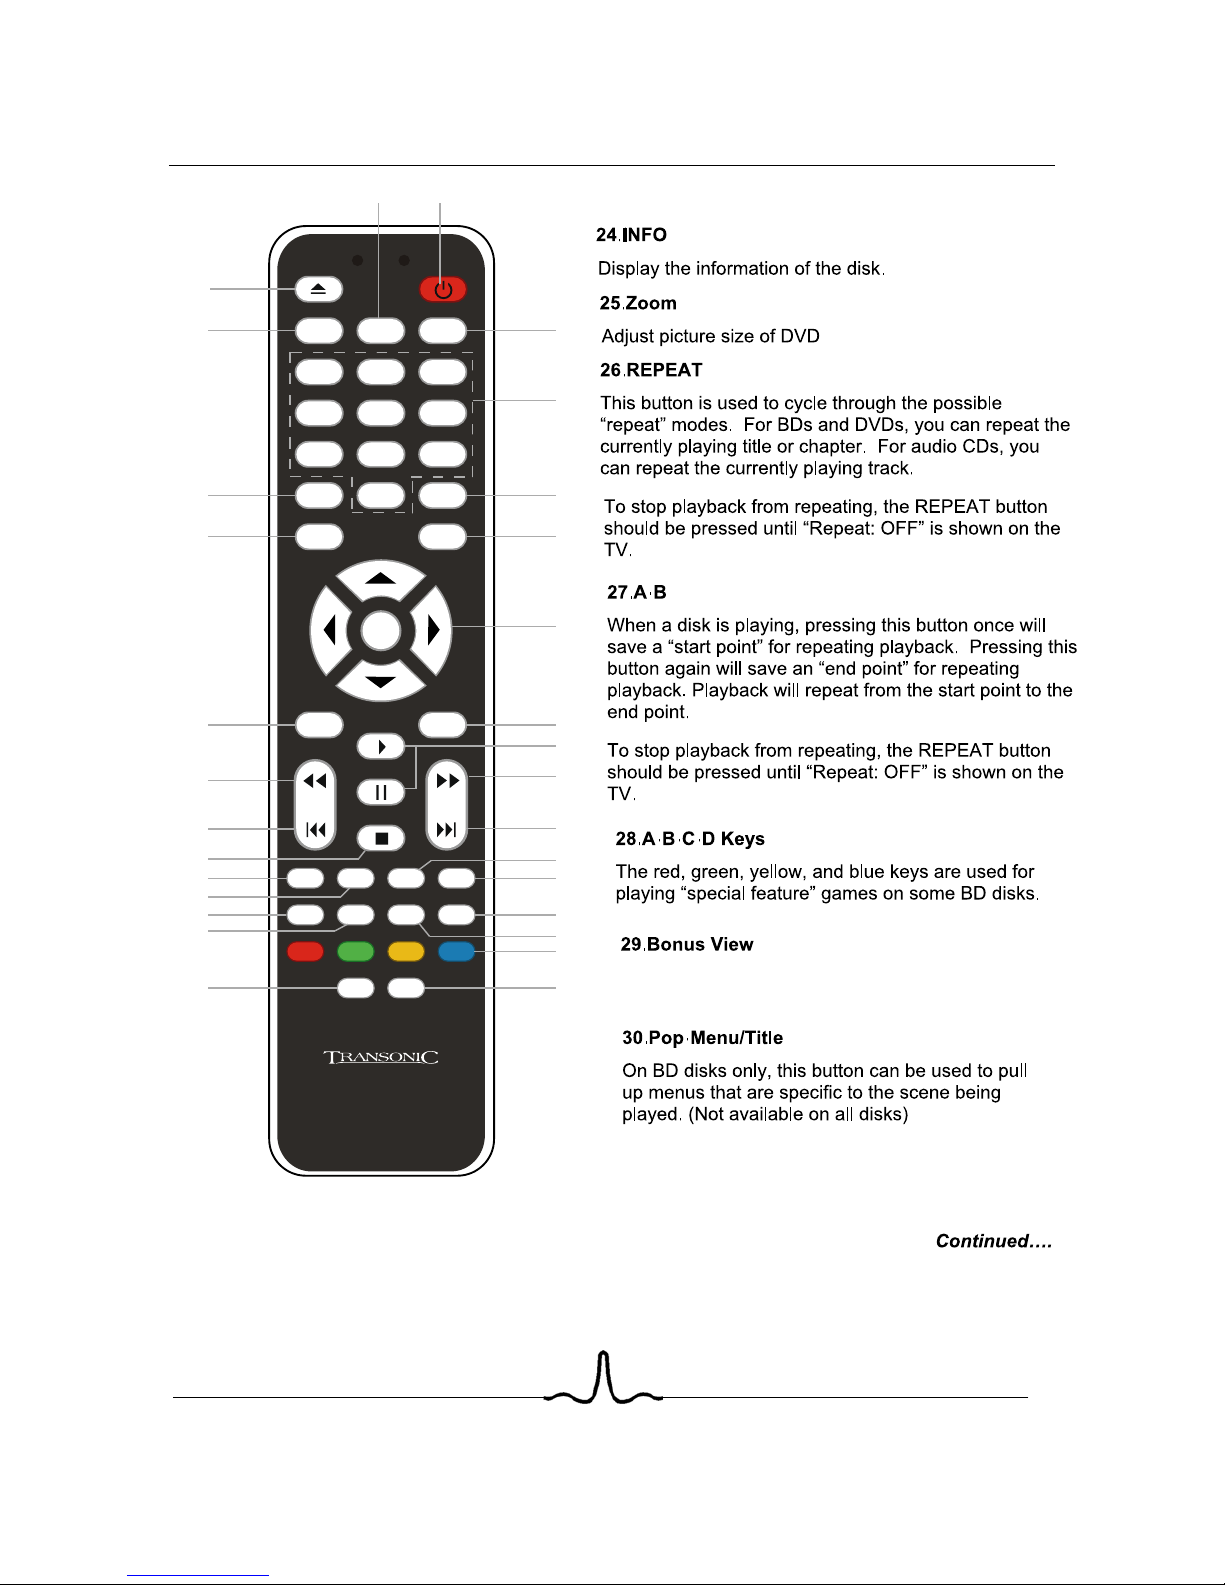
INFOZOOM
A-BREPEAT
BONUS VIEW
SETUP
SECONDARY AUDIO SECONDARY SUBTITLE
1 2 3
4 5 6
7 8 9
0
ANGLE
SUBTITLE
BACK
POP-MENU
TITLE
TC2670BRDVD
14
2
3
7
9
12
15
16
19
20
21
26
27
29 30
28
25
24
23
22
18
17
14
13
11
10
8
6
5
6
standby.

play
1/2, 1/4, 1/8
AUDIO
CLEAR
ENTER
GOTO
SLOW
RANDOM
FORMATMENU
INFOZOOM
A-BREPEAT
BONUS VIEW
SETUP
SECONDARY AUDIO SECONDARY SUBTITLE
1 2 3
4 5 6
7 8 9
0
ANGLE
SUBTITLE
BACK
POP-MENU
TITLE
TC2670BRDVD
14
2
3
7
9
12
15
16
19
20
21
26
27
29 30
28
25
24
23
22
18
17
14
13
11
10
8
6
5
7
AUDIO
CLEAR
ENTER
GOTO
SLOW
RANDOM
FORMATMENU
INFOZOOM
A-BREPEAT
BONUS VIEW
SETUP
SECONDARY AUDIO SECONDARY SUBTITLE
1 2 3
4 5 6
7 8 9
0
ANGLE
SUBTITLE
BACK
POP-MENU
TITLE
TC2670BRDVD
14
2
3
7
9
12
15
16
19
20
21
26
27
29 30
28
25
24
23
22
18
17
14
13
11
10
8
6
5
8
Allows you to start PIP(Picture in Picture).
NOTE:Some discs don’t support PIP function.

2.3 R
EAR
P
ANEL
C
ONNECTORS
Since the rear panel contains multiple video and multiple audio outputs, a brief description of the
capabilities of each of the outputs is described below, in order to help you chose the appropriate outputs
to connect to your television and, if present, your surround-sound receiver.
2.3.1 Video Output Capabilities
Each of the video outputs are capable of different levels of functionality, as described in the table below.
Actual output will depend on setup menu settings and TV capabilities for HDMI televisions.
BD Player
Video Output
Resolutions Supported
(NTSC Models)
Resolutions Supported
(PAL Models)
HDMI
1080p 60/50/30/25/24
1080i 60
720p 60/30/24
420p 60/30/24
480i
1080p 60/50/30/25/24
1080i 50
720p 50/30/24
576p 60/30/24
576i 50
Component Video
1080i 60/48
720p 60/30/24
576p 60/30/24
480p 60/30/24
NTSC SD (480i)
1080i 60/48
720p 60/30/24
576p 60/30/24
480p 60/30/24
PAL SD (576i)
Composite Video NTSC SD (480i) PAL SD (576i)
2.3.2 Audio Output Capabilities
Each of the audio outputs are capable of different levels of functionality, as described in the table below.
Actual output will depend on
BD player setup menu settings,
what types of audio tracks are encoded on the disk, and,
surround sound receiver capabilities (for BD players connected to a surround-sound system
through HDMI or SPDIF)
BD Player
Audio Output Audio tracks that can be sent
directly
to output
HDMI
Dolby TrueHD
DTS Master Audio
Dolby Digital Plus
DTS-HD High-Resolution Audio
Dolby Digital
DTS
PCM
(From mono up to 7.1 channels @96 Khz)
SPDIF or
Toslink
Dolby Digital
DTS
PCM
(stereo only, up to 96 Khz)
7.1 Analog
Outputs
Any selected digital track will be decoded, mixed with effects and
secondary channel, and converted to analog.
9

10
1. Component Video out
Rear Panel
2.3.3 Rear Panel Description
Connect these outputs to the component video inputs of the television, if the television does not have an
HDMI input.
Some televisions can accept digital video and audio signals via an HDMI (see item 7 below) connection.
If your television has an HDMI digital input, you may use HDMI connection, and leave the component video
outputs of the player disconnected.
NOTE: The component video output has a maximum resolution of 1080i. It is further limited to SD
resolution if the HDMI output is also being used.
For BD-Live capabilities. (
You can insert DISC with BD-LIVE mark and above 1G memory USB. then let the
Connect to an 100-240V, 50/60Hz AC outlet with the Power Cable.
Turn on/off the power supply.
8. Ethernet Connector (Note: This function is only for Blu ray Disc with BD-live mark.)
9. AC POWER IN
10. SWITCH
5. SPDIF Digital Audio Output
3. S-video Output
4. Stereo Audio Outputs
HD television.
nputs, connect this output to the S-video input of the
2. Composite Video Output
If your TV does not have component or HDMI video inputs, connect this output to the composite video
input of the HD television.
If your TV does not have component or HDMI video i
These are analog, “old fashioned” stereo (left/right) outputs. If your TV does not have an HDMI input, you
can connect these outputs to the stereo audio inputs of a TV.
This is a digital audio output. If you have a surround-sound receiver with a Coaxial Digital Audio input,
connect this output to the Coaxial Digital Audio input of the surround sound receiver.
6. TOSLink (digital optical) audio output
This is another digital audio output. If you have a surround-sound receiver with a TOSLink input, connect
this output to the TOSlink input of the surround sound receiver
7. HDMI 1.3 Audio/Video Output
If you are using a surround-sound audio receiver with an HDMI input
, connect the HDMI output of
the BD player to the HDMI input of the audio receiver. (You will need to connect a second HDMI cable
from the HDMI output of the audio receiver to the HDMI input of the television)
1 2
3 6 7 8 9
4 5 10
BB
Or, you can using HDMI connect the BD player to the television directly.
unit play the disc in the tray.
Using the Direct LAN cable (UTP cable), connect the LAN terminal on the rear
of the Blu-ray Disc Player to LAN terminal of your modem. connect to the internet to download BD film.
)
11
Connect the AC power to the BD player by the power cord.
3 C
ONNECTING THE
BD P
LAYER
3.1 C
ONNECTING THE
P
OWER
deo->TV
S-vi
3.2 C
ONNECTING TO A
TV
HDMI->TV
NOTE
:
To play back a BD or DVD disk when connected to the TV via HDMi, the TV must support
the HDCP copyright protection system.
If your TV does not support HDCP, the TV picture will not be viewable over the HDMI
output.
Component->TV Composite->TV
3.3 C
ONNECTING TO A
H
OME
T
HEATRE
S
YSTEM
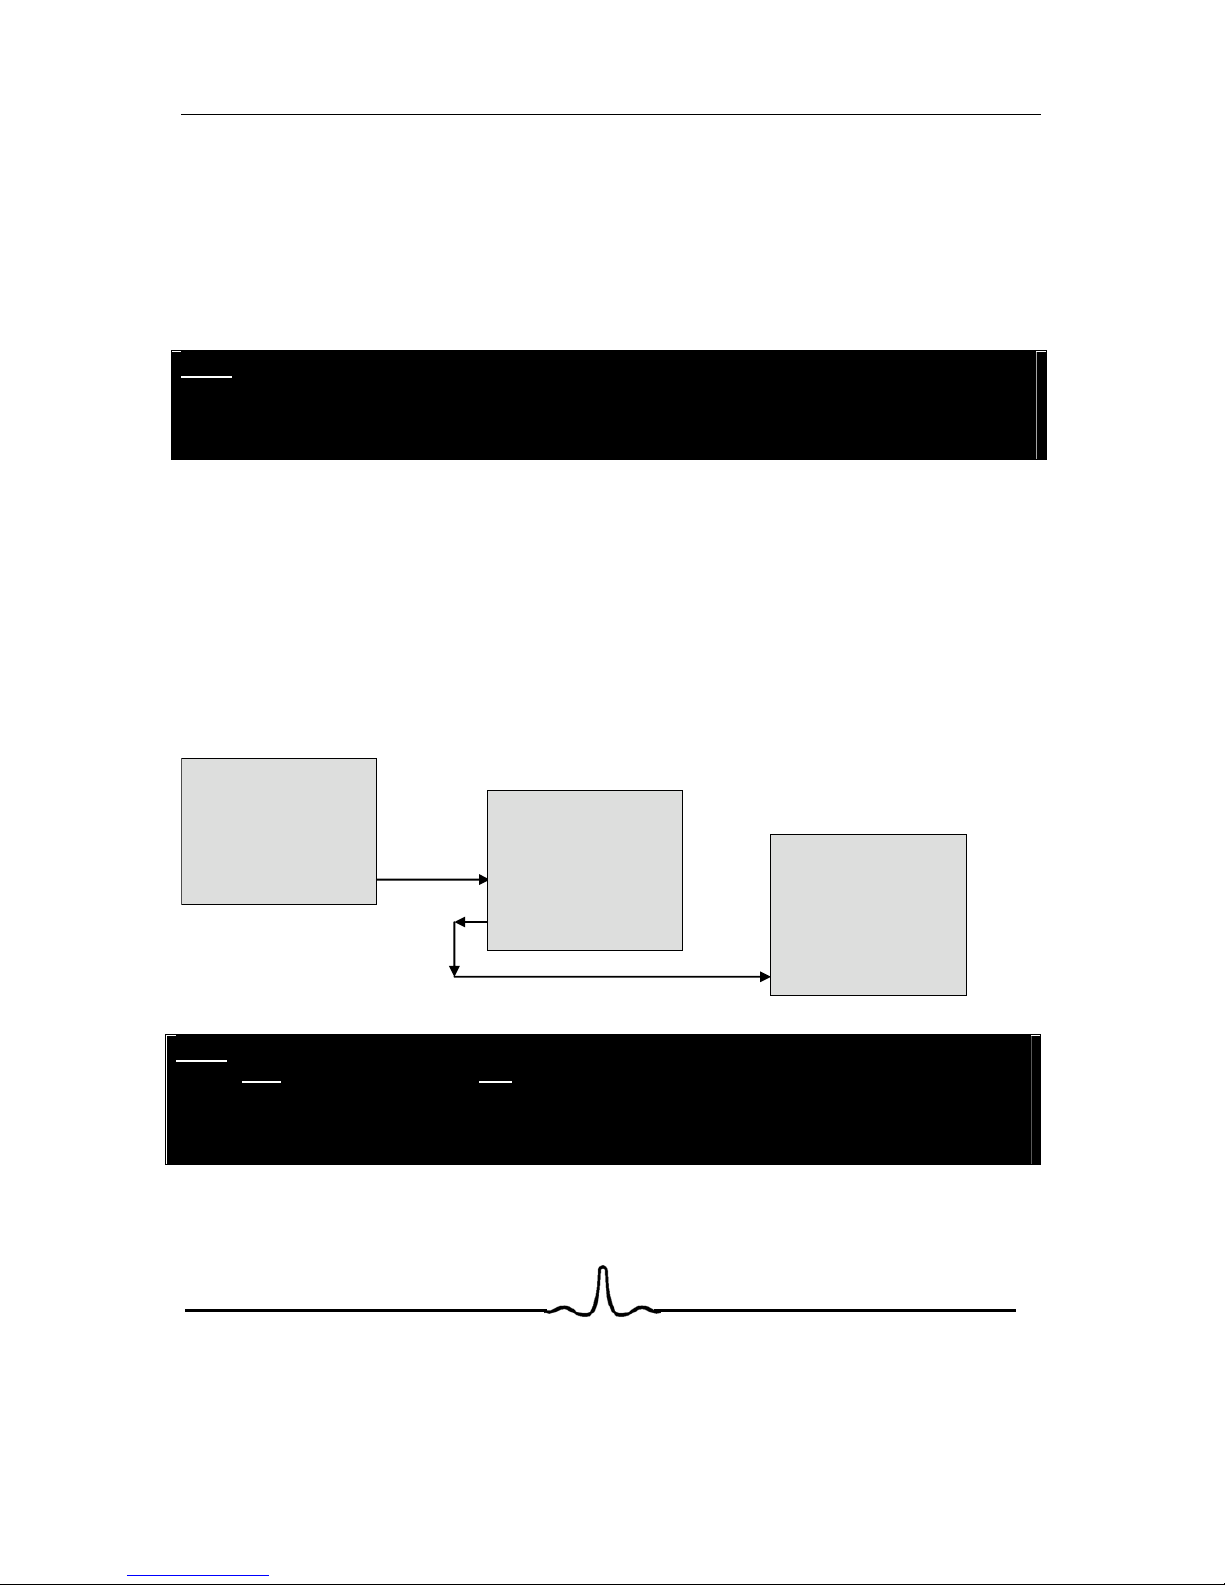
3.3.1 Highest-fidelity Audio and Video Setup:
Can only be achieved using HDMI. HDMI is the only REF output capable of 1080p video, and the only
output capable of the high definition audio codecs.
Connect the HDMI output of the player to the HDMI input of the audio receiver. (You will need to connect
a second HDMI cable from the HDMI output of the audio receiver to the HDMI input of the television)
BD Player
HDMI out
Surround Rcvr
HDMI in
HDMI out
HDTV
HDMI in
NOTE
:
To play back a BD or DVD disk when connected to a surround receiver and TV via HDMi,
both the surround receiver and the TV must support the HDCP copyright protection
system.
If your surround receiver and/or TV do not support HDCP, the TV picture will not be
viewable over the HDMI output.
SPDIF->Surround Rcvr Stereo analog->Surround Rcvr Stereo analog->TV
12
he SETUP menu by pressing the ENTER key on the
4 S
ETUP
M
ENU
4.1 S
ETUP
M
ENU
O
PERATION
4.1.1 Invoking the Setup Menu
After the BD player has been turned on, enter t
remote. The following screen will appear:
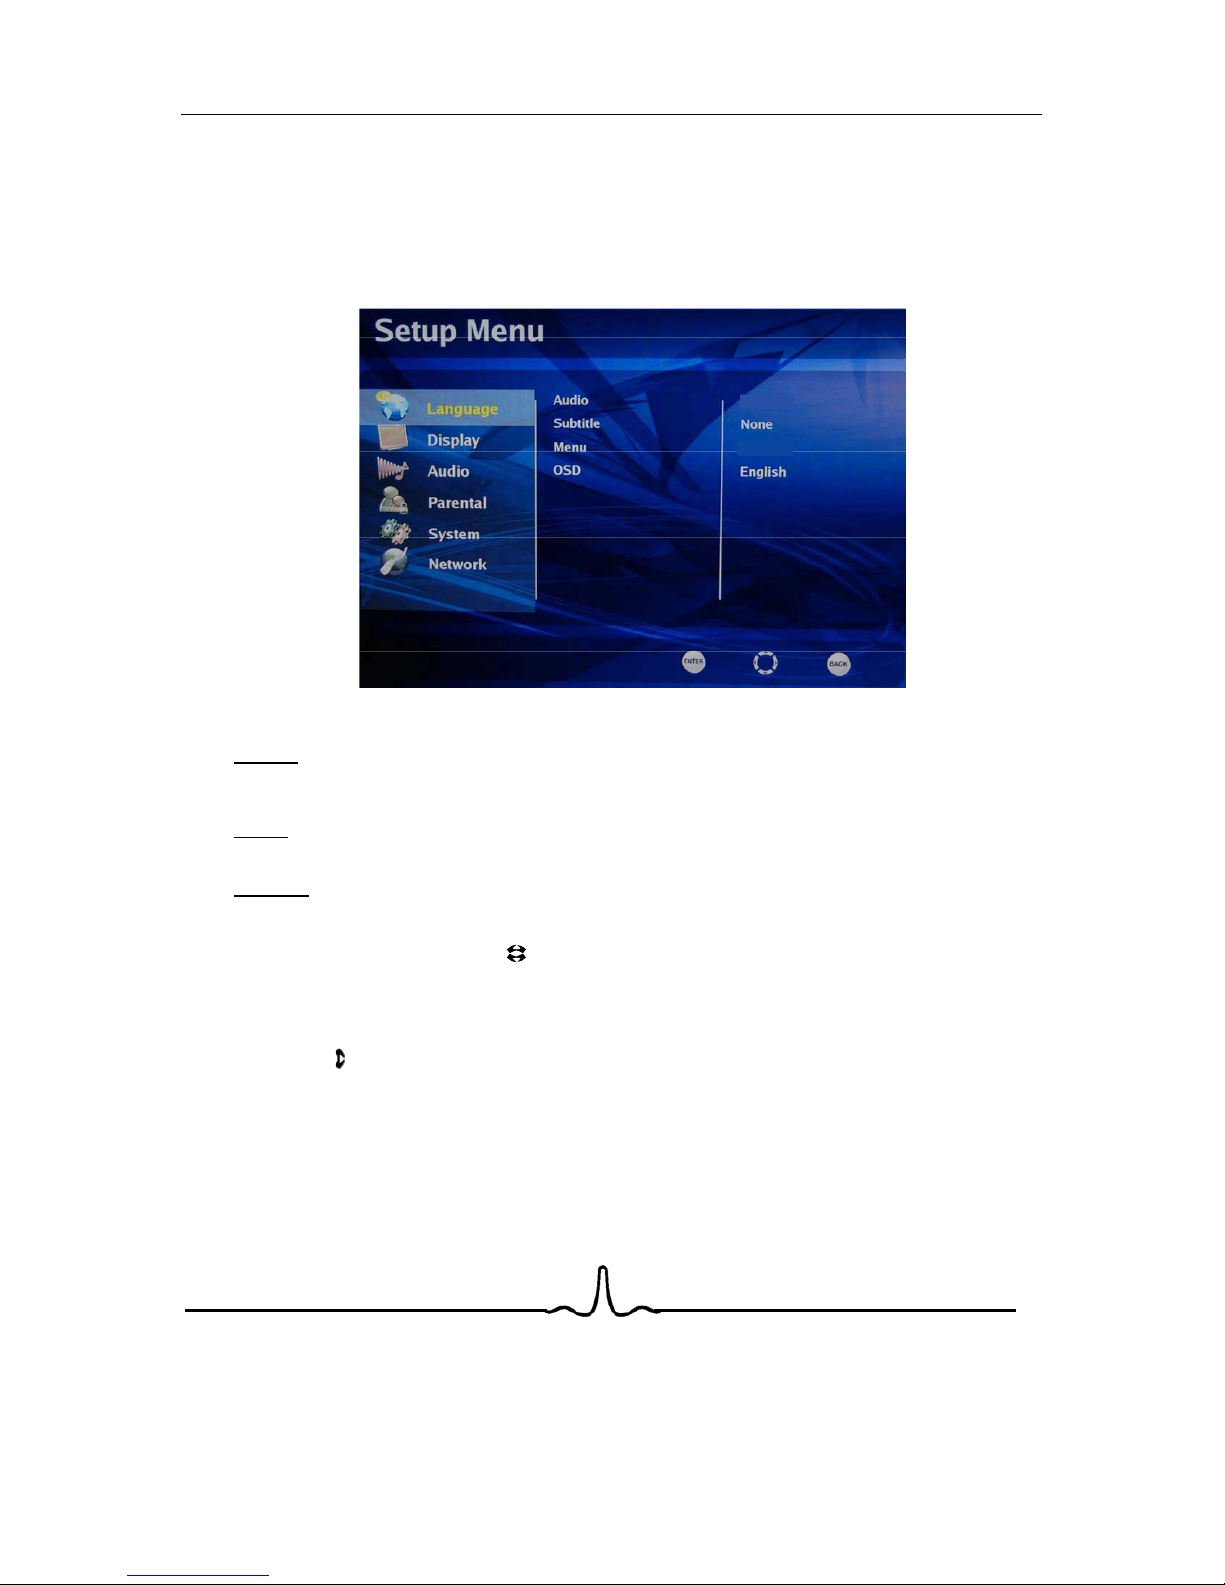
As shown in the figure above, the Setup Menu screen is divided into
three
separate sections.
The
leftmost
section of the setup menu screen contains setup menu categories. One of the setup menu
categories is always highlighted (in yellow). In the screen above, the setup menu category that is
highlighted is
Language
.
The
middle
section of the setup menu screen contains menu options for each category. In the screen
above, the setup menu options for the Language category are
Audio
,
Subtitle
,
Menu
, and
OSD
.
The
rightmost
section of the setup menu screen displays the currently saved choice for each menu
option. In the screen above, the Language categories’ menu options are currently set to
Audio: Auto
,
Subtitle: None
,
Menu: Auto
, and
OSD: English
. (Each of these settings will be described later).
By pressing the up/down arrow keys ( ) on the remote, different setup menu categories can be
highlighted.
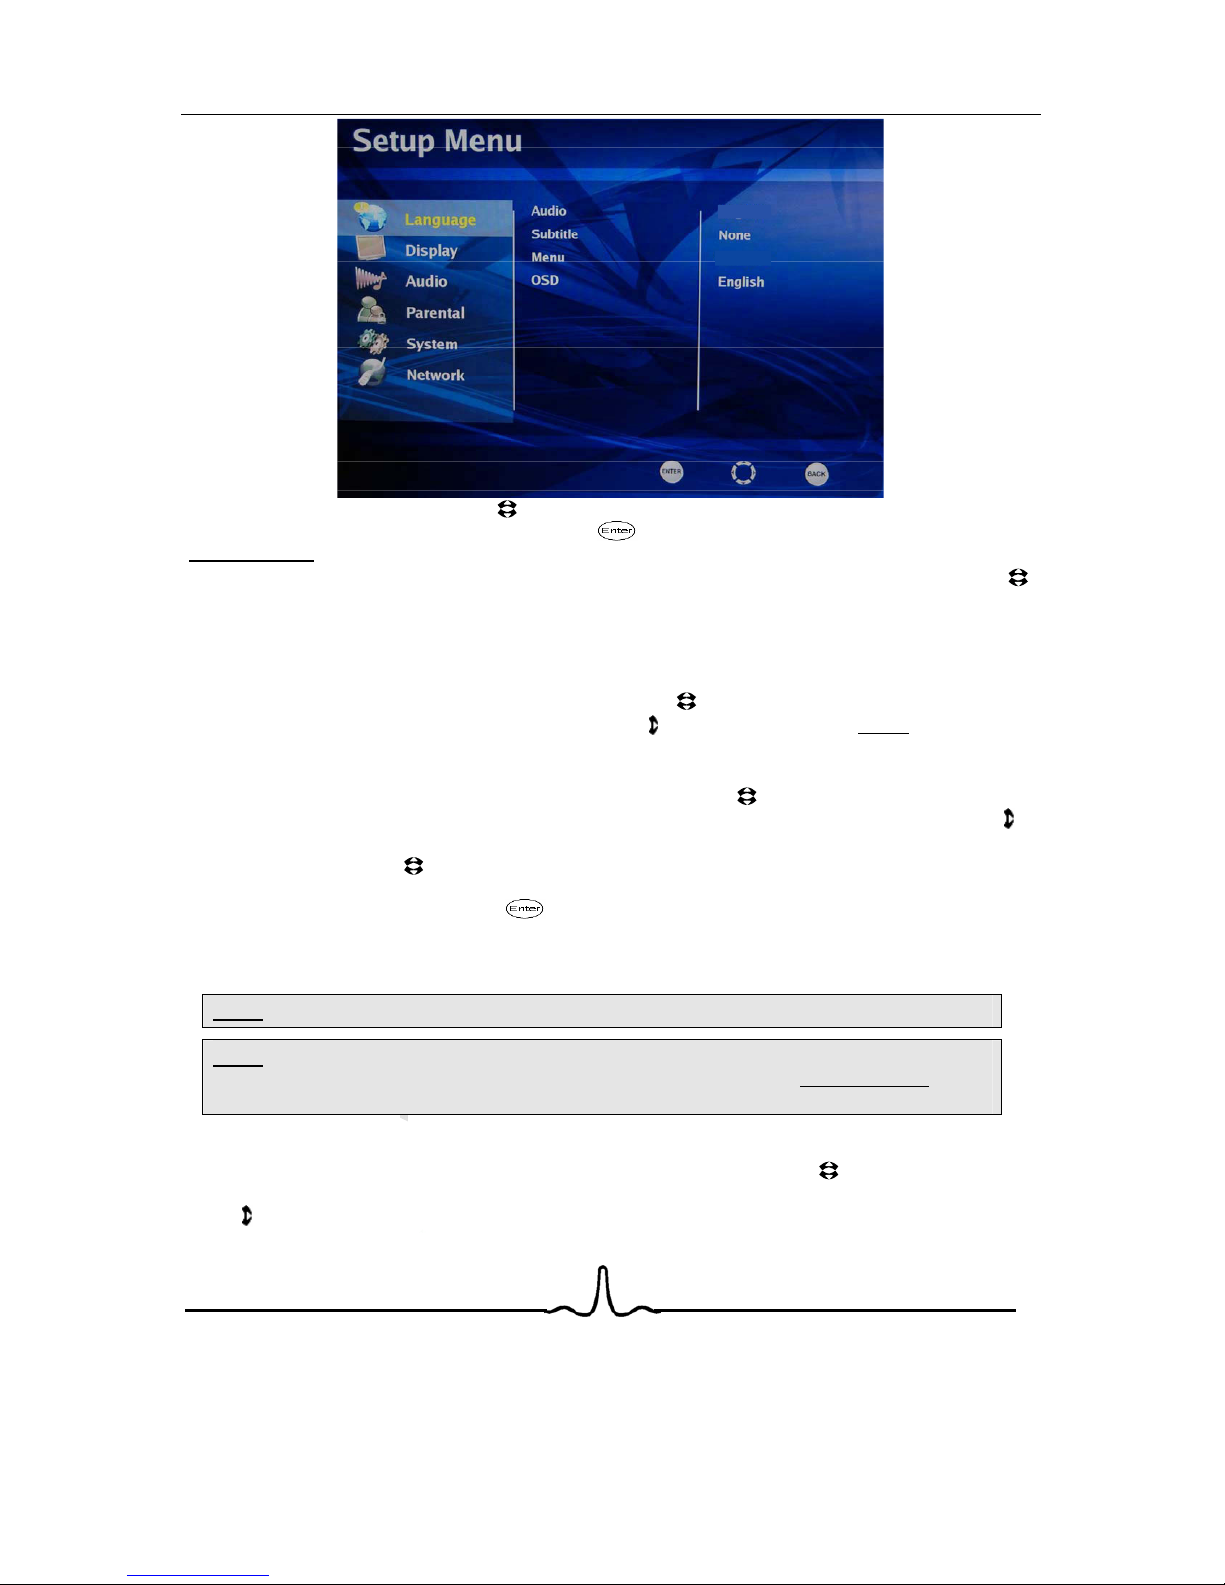
4.1.2 Changing Setup Menu Options
Once the desired Setup Menu category (Language, Display, Parental, etc) is highlighted, pressing the
right arrow key ( ) on the remote will cause one of the menu items in the center section of the screen to
be highlighted, and the rightmost portion of the screen will then show the options for each menu item, as
shown below:
Auto
Auto
13
By pressing the up/down arrow keys ( ) on the remote and moving the highlighting, the setting for each
option can be changed by pressing the Enter key ( ) once the desired choice is highlighted. The
currently saved
setting will be indicated by an orange ball, as shown in the figure above.
In order to configure the BD player for proper audio and video output, press the up/down arrow keys ( )
on the remote until one the following setup menu categories is highlighted:
Language Display Audio Parental
Language Display System Network
4.2 L
ANGUAGE
M
ENU
C
ATEGORY
From the main setup menu, press the up/down arrow keys ( ) on the remote until the
Language
menu
category is highlighted. Then, press the right arrow key ( ) on the remote until the
center
portion of the
setup screen is highlighted.
4.2.1 Audio Language
To set the player’s audio language, press the up/down arrow keys ( ) on the remote until the
Audio
menu choice is highlighted in the center of the setup menu screen. Then, press the right arrow key ( )
on the remote until the rightmost portion of the setup screen is highlighted.
The up/down arrow keys ( ) on the remote can then be used to select English, French, Spanish, or
Chinese as the default language the characters in the movie will speak. Once the desired language has
been highlighted, press the Enter key ( ) on the remote to select the language. The orange circle will
then move to that language.
Selecting ‘Auto’ will result in the default audio language being determined from information on the
BD/DVD disk.
NOTE
: Not all languages are available on all disks.
NOTE
: Some disks might not allow the user to select the audio language from the BD-player
setup menu. The audio language can only be selected from the BD or DVD disk ’s setup
menu. (The menu that appears after the disk has been inserted)
4.2.2 Subtitle Language
To set the player’s default subtitle language, press the up/down arrow keys ( ) on the remote until the
“Subtitle” menu choice is highlighted in the center of the setup menu screen. Then, press the right arrow
key ( ) on the remote until the rightmost portion of the setup screen is highlighted.
Auto
Auto

14
NOTE
: Not all languages are available on all disks.
NOTE
: Some disks to not allow the user to select the audio language from the BD-player setup
menus. The audio language can only be selected from the BD or DVD disk ’s setup
menu. (The menu that appears after the disk has been inserted)
4.2.3 Menu Language
To set the language that will be displayed when the BD or DVD disk’s main menu appears , press the
up/down arrow keys ( ) on the remote until the
Menu
choice in the center of the setup screen is
highlighted. Then, press the right arrow key ( ) on the remote until the rightmost portion of the setup
screen is highlighted.
The up/down arrow keys ( ) on the remote can then be used to select English, French, Spanish, or
Chinese as the default language for menus that appear after a BD disk is inserted. Selecting ‘auto’ will
result in the default menu language being determined from information on the BD or DVD disk.
NOTE
: Not all languages are available on all disks. Most disks only have one menu language
available.
to English, French, Spanish.
4.2.4 Setup Menu (OSD) Language
To set the language that will be displayed for the BD player’s setup menus , press the up/down arrow keys
( ) on the remote until the
OSD
choice in the center of the setup screen is highlighted. Then, press the
right arrow key ( ) on the remote until the rightmost portion of the setup screen is highlighted.
The up/down arrow keys ( ) on the remote can then be used to
instantly
change the on-screen display
4.3 D
ISPLAY
M
ENU
C
ATEGORY
To set the video outputs correctly, press the up/down arrow keys ( ) on the remote until the
Display
menu category is highlighted on the
leftmost
portion of the setup menu screen.
A screen similar to the following will appear:
The up/down arrow keys ( ) on the remote can then be used to select English, French, Spanish, or
Chinese Japanese and Korean as the default language for disk subtitles. Selecting ‘None’ will result in
no subtitle language being determined from information on the BD or DVD disk.
PAL
Wide

15
4.3.1 TV Type
You can tell the BD player whether to output US/Asia (NTSC) video or European (PAL) video using
this menu item.
To set the BD player’s output video format, press the up/down arrow keys ( ) on the remote until the
TV
Type
choice in the center of the setup screen is highlighted. Then, press the right arrow key ( ) on the
remote until the rightmost portion of the setup screen is highlighted.
The up/down arrow keys ( ) on the remote can then be used to select NTSC or PAL as the video output
format.
NOTE
: Incorrectly setting this menu item may result in not being able to see video.
If you can already see the setup menu,
leave this menu item alone!
4.3.2 TV Aspect
You can use this menu item to tell the BD player whether you have a very rectangular shaped,
16:9-aspect ratio television set, or a more traditional, almost square 4:3 aspect-ratio television set.
To inform the BD player of your TV’s aspect ratio, press the up/down arrow keys ( ) on the remote until
the
TV Aspect
choice in the center of the setup screen is highlighted. Then, press the right arrow key ( )
on the remote until the rightmost portion of the setup screen is highlighted.
The up/down arrow keys ( ) on the remote can then be used to select your TV’s aspect ratio.
If your TV has a very rectangular (16:9) aspect ratio
, you will need to choose one of the 16:9 aspect
ratios (wide or pillarboxed).
If your TV has an “old fashioned” (relatively square) (4:3) aspect ratio
, you will need to choose one
of the 4:3 aspect ratios (letterboxed or pan/scan).
Your preference should be based on whether the disk you will be watching contains a movie in
widescreen format, or has been cropped to fit a “standard” 4:3 screen, as well as your individual
preference for viewing, as shown in the table below:
TV Aspect Menu Selection
If your TV is 16:9, choose: If your TV is 4:3, choose:
16:9 Wide 16:9 Pillarboxed 4:3 Letterboxed 4:3 Pan and Scan
Disk
Contents
Movie in
widescreen
format
Movie will fill
entire screen
No effect -
Movie will fill
entire screen
Movie will be shown in
rectangular “wide”
aspect ratio
(Horizontal bars will
be shown
above/below movie)
Center of movie
will be shown on
TV. Left and right
portion of movie
contents will not be
shown
HD television
episodes in
widescreen
format
Episode will
fill entire
screen
No effect –
Epsiode will fill
entire screen
Episode will be shown
in rectangular “wide”
aspect ratio
(Horizontal bars will
be shown
above/below movie)
Center of episode
will be shown on
TV. Left and right
portion of episode
contents will not be
shown
Table of contents


