manuals.online logo
Brands
  1. Home
  2. •
  3. Brands
  4. •
  5. LG
  6. •
  7. Blu-ray Player
  8. •
  9. LG GC992NW User manual

LG GC992NW User manual

This manual suits for next models

3

Other LG Blu-ray Player manuals

LG BD360-P User manual

LG

LG BD360-P User manual

LG BP175 Specification sheet

LG

LG BP175 Specification sheet

LG BD590 User manual

LG

LG BD590 User manual

LG BP330.DUSALLK User manual

LG

LG BP330.DUSALLK User manual

LG BPM33 User manual

LG

LG BPM33 User manual

LG UBK90 Specification sheet

LG

LG UBK90 Specification sheet

LG BP350 User manual

LG

LG BP350 User manual

LG BD690 User manual

LG

LG BD690 User manual

LG BDS580 User manual

LG

LG BDS580 User manual

LG BD390 -  Blu-Ray Disc Player User manual

LG

LG BD390 - Blu-Ray Disc Player User manual

LG BH100 User manual

LG

LG BH100 User manual

LG BP430K User manual

LG

LG BP430K User manual

LG BD390 -  Blu-Ray Disc Player User manual

LG

LG BD390 - Blu-Ray Disc Player User manual

LG BP250 Specification sheet

LG

LG BP250 Specification sheet

LG BH100 User manual

LG

LG BH100 User manual

LG BD-370 -  Blu-Ray Disc Player User manual

LG

LG BD-370 - Blu-Ray Disc Player User manual

LG BP350 Specification sheet

LG

LG BP350 Specification sheet

LG BD560C User manual

LG

LG BD560C User manual

LG BP255 Specification sheet

LG

LG BP255 Specification sheet

LG BP340 Specification sheet

LG

LG BP340 Specification sheet

LG BP240 Specification sheet

LG

LG BP240 Specification sheet

LG BPM55 User manual

LG

LG BPM55 User manual

LG BKS-4000 User manual

LG

LG BKS-4000 User manual

LG BP550 Specification sheet

LG

LG BP550 Specification sheet

Popular Blu-ray Player manuals by other brands

Samsung HT-E5200 user manual

Samsung

Samsung HT-E5200 user manual

Memorex MVBD2535 user guide

Memorex

Memorex MVBD2535 user guide

Insignia NS-BRDVD Faqs

Insignia

Insignia NS-BRDVD Faqs

Philips BDP3380K Specifications

Philips

Philips BDP3380K Specifications

Samsung BD-P4600 Service manual

Samsung

Samsung BD-P4600 Service manual

Sharp BD-HP17U - AQUOS 1080p Blu-ray DiscTM Player Service manual

Sharp

Sharp BD-HP17U - AQUOS 1080p Blu-ray DiscTM Player Service manual

Pioneer BDP-140 Features & specifications

Pioneer

Pioneer BDP-140 Features & specifications

Sony BDP-S300 - Blu-Ray Disc Player operating instructions

Sony

Sony BDP-S300 - Blu-Ray Disc Player operating instructions

Panasonic DMR-HCT230 operating instructions

Panasonic

Panasonic DMR-HCT230 operating instructions

Panasonic Diga DMR-PWT420 operating instructions

Panasonic

Panasonic Diga DMR-PWT420 operating instructions

Marantz BD7004 Guide de l'utilisateur

Marantz

Marantz BD7004 Guide de l'utilisateur

Kogan KABRP3DWFIA user manual

Kogan

Kogan KABRP3DWFIA user manual

Toshiba BDX2700 Specifications

Toshiba

Toshiba BDX2700 Specifications

Samsung BD-E5400 user manual

Samsung

Samsung BD-E5400 user manual

Sony BDP-S185 Specifications

Sony

Sony BDP-S185 Specifications

Philips BDP7100 quick start guide

Philips

Philips BDP7100 quick start guide

Samsung BD-F5900 user manual

Samsung

Samsung BD-F5900 user manual

Sharp BD-HP90RU Operation manual

Sharp

Sharp BD-HP90RU Operation manual

manuals.online logo
manuals.online logoBrands
  • About & Mission
  • Contact us
  • Privacy Policy
  • Terms and Conditions

Copyright 2025 Manuals.Online. All Rights Reserved.

Before connecting, operating or adjusting your new Video,
please read this user guide carefully. Thank you.
User guide
Video
Model: GC992NW GC982NW
GC980NW GC470W
G-CODE R
GC982NW1F.BHKGLLS_ENG 3/20/09 4:46 PM Page 1
Contents, safety and cleaning
Please read the following information carefully.
2
Contents
Introducing your Video
and remote control 3
Connecting to a television 4
Tuning
TV stations 5
Adjusting TV stations manually 6
Operating your Video 7
Recording
Television programs 8
Timer recording 9
G-CODE (GC992NW/GC982NW
Only) 10
Advanced functions 11-14
Troubleshooting 15
Controlling your TV with the
supplied remote control and
technical specifications 16
Safety
• Position your Video so that no
bright light or sunlight falls directly
onto it.
• Care should be taken not to
expose your Video to any
unnecessary vibration, moisture,
dust or heat.
• During electrical storms it is
advisable to unplug both the aerial
cable and mains plug to prevent
accidental damage to your Video
and TV.
• Do not operate your Video if it is
damaged.
• If your Video still does not operate
properly, unplug it and call your
dealer. Your Video should not be
repaired by anyone except
qualified service personnel.
• Never remove the top cover of
your Video as this can expose you
to very high voltage and other
hazards.
• Ensure that your Video is placed in
a position to allow a free flow of
air.
• The apparatus shall not be
exposed to dripping or splashing
and that no objects filled with
liquids, such as vases, shall be
placed on the apparatus.
• Touch current is higher than
recommended limit value in
tropical climates, but does not
make delectric shock to users.
Cleaning
1Unplug the Video from the mains
supply.
2Clean the cabinet with a soft
damp cloth, do not apply liquid
cleaners or aerosol cleaners.
Never spray cleaning liquids on or
near the Video.
Video head cleaning
High quality video tapes will not
normally deposit dirt onto the video
heads, but old or damaged tapes
may. This dirt can accumulate on the
video heads after a long period of
time and cause the picture to
become blurred or broken up.
To clean the video heads use a video
heads cleaning tape available from
electrical stores.
The cord grip for the plug fitted to this
product is built into the existing power
cord as supplied. If, for any reason you
need to shorten the cord.
A new plug must be used to ensure
your continued safety by securing the
plug to the power cord in accordance
with Plug & Socket Regulations 1994.
IMPORTANT SAFETY NOTICE
DO NOT RE-USE THE PLUG.
GC982NW1F.BHKGLLS_ENG 3/20/09 4:46 PM Page 2
Introducing your Video and Remote Control
Most of your Video’s functions are accessed using the Remote Control. A summary of the functions of the main
buttons are shown below (right), other buttons are described elsewhere in this guide.
Basic functions of your Video can also be operated using the control panel on the front of your Video.
3
Video IN and Audio IN sockets are for connecting devices such as
Video Cameras, Games Consoles and other Video. You will need to
connect to them using an Audio Video cable.
Don’t forget to install AAA type batteries in the Remote Control.
Video IN
Audio IN
GC982NW/GC980NW
GC470W
To turn the Video on.
After turning on, the Video can be
operated by the Remote Control
To stop or
eject the tape Tape Compartment
To rewind a tape
To play a tape
To fast forward
a tape
Select the channel
you want to watch.
Display
Panel
Remote
Control
Sensor
To record the programme you
are watching
To Pause a tape or
view it frame by frame
TV control buttons
(Controlling your TV
with the supplied
remote control
-See page 16)
To watch one TV
channel whilst
recording another.
To display the
on screen menu
To reset the tape
counter to zero
To select the
recording speed
of the tape
Use the 3/4/1/2
buttons to move
through the menus,
after accessing them
via the MENU button.
Select the channel
you want to watch
(PR+/-).
To adjust tracking
(TRK+/-).
To control vertical
tremble during pic-
ture still (TRK +/-).
Press OK to approve
a menu item or show
the clock or counter.
To select the input
source for recording
To fast forward
picture search by
30 secs.
To record
programme
being watched
To pause and view
frame by frame
See page 13
To switch the child
lock on and off
GC992NW/GC982NW Only :
To display the programme menu
for G-Code programming.
GC982NW1F.BHKGLLS_ENG 3/20/09 4:46 PM Page 3
Connecting to a television
The information given here refers to the two most common forms of connection. Make sure that all the appliances
are unplugged from the mains power, before making any connections to avoid causing damage to your equipment.
Using a AV cable to connect your appliances will give you the best sound and picture quality.
4
Connection guide
Roof aerial
Your outside aerial should be
connected to the AERIAL socket
of your Video.
RF cable
If you are using the RF cable a
connection needs to be made from
the RF.OUT socket on your Video to
the aerial socket on your television.
AV socket
If you have a AV socket connection
on your television you can connect
the television’s AUDIO IN/VIDEO IN
sockets to the AUDIO OUT/VIDEO
OUT sockets on the back of the
Video.
Tune a video channel
If you are using a AV connection then
the video picture will be shown on the
AV channel of your television.
If you are using a RF cable you need
to select a Video channel on your
television and tune it to the Video
signal, a test picture.
Turn on the Video and TV.
Select the vacant position 36 on your
TV.
Press POWER on the Remote
Control to put the Video on standby
then press and hold PROG. 3 or 4
on the front of your Video for more
than 4 seconds. If the test picture
appear clearly on the television
screen, the position 36 is your video
channel.
If the test picture do not appear
clearly, go to next.
Select a vacant positon between 22
and 68 on your television.
Press PROG. 3 or 4on the Video
until the test picture appear clearly on
the television screen.
You can also set the output frequency
to OFF if there is any interference
when your TV is connected to the
Video with a AV cable.
Press POWER on the front of your
video when you have finished.
Roof aerial
(not supplied)
RF cable
AUDIO /
VIDEO OUT
Television (not supplied)
Video
You should use either a
RF connection or a AV
connection between your
Video and Television.
Aerial in
RF out
Note : GC470W has no AUDIO OUT (R) sockets.
Audio cable
Video cable
AUDIO/VIDEO IN
GC982NW1F.BHKGLLS_ENG 3/20/09 4:46 PM Page 4
Tuning in TV stations
The first time you use your Video you will see ACMS (Automatic Channel Memory System) displayed on the screen.
This system automatically tunes and stores TV channels. If you want to return to ACMS after your initial set up, access
it via the menu.
5
Using ACMS
1Press the POWER to turn on
your Video.
2Select the video channel you have
tuned on your television, refer to
your TV user guide if necessary.
The ACMS menu screen will
appear.
GC470W Only : Use 1 or 2to
select a desired TV system
according to the area you live in
(I/I, B/G, D/K).
3Press OK to start the automatic
tuning process.
4When the ACMS has finished a
screen showing all the channels
that have been found and the
positions they have been placed in
will be displayed.
5Check that the channels
correspond to the positions in
which you want them. If they are
not in the order that you would like
they can be moved or deleted.
See Changing the order of the
television stations and Deleting
the television stations.
6Press to store the settings.
Changing the order of
the television stations
You will find it useful to have a
current television programme guide
to hand during this operation.
1Press to access the main
menu. Use 1 or 2to select PR
SET then press OK.
2Press again.
3Use either the 3 or 4 buttons to
select the programme number that
you wish to move. Then press 2.
4Press 3 or 4 until you reach the
position you wish to store the
channel in.
5Press OK. The programme will
move to the new position.
6Press to leave the menu.
To move other programs repeat the
above process.
Deleting the television
stations
1Press to access the main
menu.
2Use 1 or 2to select PR SET
then press OK.
3Press then use 3 or 4to
select the programme number you
wish to delete.
4Press 1, after a short while the
selected station will be deleted.
The remaining stations are
resorted automatically.
5Press to remove the menu.
If you wish to delete further
stations repeat the above process.
Selecting ACMS
1Turn on your television and your
Video and select the video
channel on your television.
2Press to access the main
menu. Press 1 or 2to select
ACMS, and then OK.
3Follow the instructions in Using
ACMS, at the beginning of this
page.
ACMS
Pr-12
ACMS
OK
i
B/G D/KI/I
GC982NW1F.BHKGLLS_ENG 3/20/09 4:46 PM Page 5
Tuning and adjusting TV stations manually
You may prefer to tune your television manually. Manual tuning can be more effective if the television signal in your area is too
weak for the ACMS to work properly. You can also fine tune your channels and customise the channel names.
6
Manual tuning
1Turn on your television and your
Video. Select the video channel on
your television and press to
access the main menu.
2Press either 1 or 2 to select PR
SET then press OK.
3Press again and the television
station table will then appear.
4Use the 3 or 4 buttons to select
the programme number you want
to tune then press OK.
5GC470W Only : Press OK again
and use 3 or 4 to select a
desired TV system according to
the area you live in (I/I, B/G, D/K).
6GC470W Only : Press OK.
7Select the CH section (if not
already selected) by using the 1
or 2buttons and then press AV
to select C(Standard stations) or
S(Cable stations).
8Use the 3 or 4buttons to move
through the channel numbers to
find the required station.
9The station can be fine tuned to
improve picture quality. Select
MFT (Manual Fine Tuning) using
the 1 or 2buttons. Use
the 3 or 4buttons to adjust the
picture.
10 Select STATION by pressing 2you
can then name your station.
11 Press OK.
12 Use the 3 or 4to select letters
and numbers for the new station
name up to a maximum of 5.
13 Press 1 or 2to move between
the characters.
14 Press OK.
15 To confirm the station placement
press .
16 Press again to remove the
menu.
17 The new station has now been
stored into your Video.
If you wish to manually tune other
channels you should repeat the
above procedure.
To move the manually tuned channel
to it’s correct position see Changing
the order of the television stations
on page 5.
If it is necessary for you to tune all
the television stations manually you
may find it easier if you write the CH
numbers down for each station as
you find them. You can then select
each channel from the main menu
and type the CH numbers in directly.
Each channel will then be in the
correct position so there is no need
to change them later.
PR CH MFT
06 C- -
i
OK
PSET
R
STATION
- - - - - - -
I/I B/G D/K
PR CH MFT
06 00C40
i
OK
PSET
R
STATION
-
GC982NW1F.BHKGLLS_ENG 3/20/09 4:46 PM Page 6
Operating your Video
The main functions of your Video can be operated using either the Remote Control or front control panel on the Video.
Before starting, you should ensure that your television and your Video have been plugged in and switched on and that the video
channel on your television is selected.
7
Playing a video tape
Press PLAY 2. The television screen
will display PLAY.
Auto tracking
Your Video will automatically adjust
the tracking to give you the best
picture quality.
If the quality of the recording is poor,
repeatedly press TRK + or - on the
remote control to manually adjust the
tracking until any distortions have
been removed.
Stopping play
Simply press STOP 9to halt video
play. The Video will revert to
television mode.
Picture Search
While a video cassette is playing you
can search the tape forward and
backward to look for a specific
position on the tape.
Press REW 5or FF 6 to make
the tape play rapidly forwards or
backwards. The picture will be
shown at seven times normal play
speed.
Fast Forward/Rewind
To fast forward or rewind at
maximum speed, the tape must not
be in play mode. Press STOP 9then
press either 5REW for rewind or FF
6for fast forward. Whilst you are
rewinding or fast forwarding you can
view the section you are passing.
Press and hold (for a few seconds)
either REW 5or FF 6. Releasing
the REW 5or FF 6will return the
Video to normal rewind or fast
forward operation.
Slow Motion Playback,
Shuttle
Using the 1 or 2buttons it is
possible to adjust playback speed
during playing back or still picture.
Below is a list of what speeds are
accessible and how to reach them.
1once = slow play
1twice = still
1three times = play backwards
1four times = Reverse play 3x speed
1five times = Reverse play 7x speed
2once = 2x forward play
2twice = 7x forward play
To switch off the slow motion and
shuttle, press the desired function.
During slow motion and shuttle, the
noise bars may appear on the
picture according to the status of
tape. If distortions can be seen in the
picture, reduce them with TRK + or -.
Pausing a tape
Pressing P/STILL ;will pause play,
giving you a still picture on the
screen. This picture may display
some interference in the form of
black and white horizontal lines. This
is perfectly normal and does not
mean that the video tape or Video
are damaged.
The tape can be paused for up to
five minutes. The Video will then
automatically play back a tape in
order to avoid damaging the tape or
your Video.
Frame Advance
1Pressing P/STILL ;repeatedly will
advance the picture frame by
frame.
2You can use the TRK + or -
buttons to reduce any vertical
movement seen on the still picture.
3Press PLAY 2to continue play
from pause.
Removing the Video
tape
Press EJECT /to remove the video
cassette from your Video.
If the end of the tape is reached,
your Video will automatically stop,
rewind, eject the tape and place itself
into Standby mode.
GC982NW1F.BHKGLLS_ENG 3/20/09 4:46 PM Page 7
Recording from television programs
There are two methods of recording, Instant Timer Recording (ITR), Timer Recording and G-Code (GC992NW/GC982NW Only).
For all recording methods you should ensure the television channels are tuned and stored correctly and that the clock is set to
the correct time.
8
Recording from RCA
If you wish to record directly from the
AV socket at the Front of your Video,
connect the device you wish to
record from using a AV cable and
press AV to display the picture from
the device.
Long Play/Standard Play
Your Video has a Long Play (LP)
feature. This means you can record
twice the amount of information on
each recordable video tape.
For example on a three hour (E180)
tape you would be able to record six
hours worth of programmes.
With Long Play picture and sound
playback quality are slightly reduced
from that of standard play.
Press the LP button if you wish to
change to Long Play (LP), press it
again to select Standard Play (SP).
SP or LP will be displayed on your
television screen to let you know
which has been selected.
EP provides three times as much
recording time as SP.
Instant Timer Recording
ITR begins recording immediately,
either for a set period of time or until
the tape runs out.
1Turn on your Video and television.
Insert a video tape into the Video.
Select the Video channel on your
television.
2Use the PR + or -buttons to
select which programme you wish
to record. The currently selected
programme will be displayed on
screen. You can also select the
programme number using the
Remote Control number buttons.
3Press 0REC/ITR to begin
recording. On the first press REC
SP (or LP) will appear on the
television screen.
The Video will start recording. It
will continue recording until the
end of the tape is reached or it is
manually stopped.
To set the length of time which you
want to record for, press the
0REC/ITR button twice.
The television screen will show 0H30.
Each subsequent press of the
0REC/ITR button will increase the
recording time by thirty minutes to a
maximum of nine hours.
You can also interrupt recording to
avoid unwanted scenes.
If you press P/STILL ;during ITR
the Video will enter the record pause
mode and the set period of time is
cancelled.
1To pause recording press
P/STILL ;.
2Press P/STILL ;again to continue
recording.
Tapes can be paused for up to five
minutes. REC PAUSE will be
displayed on the television screen
while a tape is paused. After five
minutes your Video will
automatically cancel recording to
prevent damage to the video tape
or your Video.
To view one channel whilst recording
another, press TV/VCR to disappear
VCR on the display panel.
Using your TV remote, switch to the
channel you want to watch.
Finishing a recording
1Press STOP 9.
2Press EJECT /.EJECT will
appear on the television screen.
If the end of the tape is reached
your Video will automatically stop
recording, rewind, stop and eject
the tape and place itself into
Standby.
REC
SP
REC
SP 0H30
GC982NW1F.BHKGLLS_ENG 3/20/09 4:46 PM Page 8
Recording using Timer Recording
Allows you to specify a time at which the Video will start recording.
This can be done up to one month in advance with up to seven recordings being pre-programmed.
Ensure the television channels have been tuned and stored correctly and that the clock is set to the correct time.
9
Timer Recording
Insert a video tape.
1Press for the main menu.
2Use 1 or 2 to select REC.
3Press OK. Press OK again to
enter the timer record menu.
4To enter the programme number
that you wish to record you can
scroll through the available options
using the 3 or 4 buttons or you
can enter the numbers directly.
When selecting single digit
numbers remember to put 0 first.
If you wish to record from the
VIDEO IN/AUDIO IN sockets
press AV.
5Press 2and enter the date of the
programme that you wish to
record. Press OK before entering
a date to select one of the
automated features.
They are DLY (daily) to record
every day except Saturday and
Sunday at the set time, or
individual days e.g. MO (Monday)
to record at the same time every
week. Press 1 or 2 to select,
then press OK to confirm.
6Enter the time of the start and end
of the programme that you wish to
record. The Video uses a 24 hour
clock.
7Press 2to select the recording
speed.
Use the 3 or 4 to move among
Standard Play, Intelligent Play and
Long Play.
IP (Intelligent Play) determines how
much tape is left and switches
speed from SP to LP, if necessary,
to complete recording the
programme.
8Check that the timer event details
are correct, if they are, press to
save your settings. If PLEASE
CHECK is displayed you have
entered incorrect information.
Check the details on the television
screen and reenter it. If you want
to enter more Timer recordings,
repeat the above process from
point 3. Press again to remove
the menu.
9Place the Video on standby by
pressing the POWER on the
remote control.
TIMER will appear in the Video
display to show that it is set to
record. The Video is now set to
record at the time you have
specified.
10 Press POWER to end recording.
Changing timer events
If you wish at any time to change a
recording event press 3 or 4 to
select the timer slot that you wish to
change.
Press 1 to delete or OK to edit that
entry.
Use the 1 or 2 buttons to select the
section you wish to change and the 3
or 4 buttons to change those sections.
PR DATE T I M E
- - - -
26
SP
- - - - SP
- - - - SP
- - - - SP
- - - - SP
- - - - SP
PR-01
- - - - - - - -~::
10 00 00~::
- - - - - - - -~::
- - - - - - - -~::
- - - - - - - -~::
- - - - - - - -~::
- - - - - - - -~::
SP
i
11
PR DATE T I M E
- - - -
26
SP
- - - - SP
- - - - SP
- - - - SP
- - - - SP
- - - - SP
PR-01
- - - - - - - -~::
10 00 00~::
- - - - - - - -~::
- - - - - - - -~::
- - - - - - - -~::
- - - - - - - -~::
- - - - - - - -~::
SP
i
11
PR DATE T I M E
- - - - SP
- - - - SP
- - - - SP
- - - - SP
- - - - SP
- - - - SP
- - - - - - - -~::
- - - - - - - - - -~::
- - - - - - - -~::
- - - - - - - -~::
- - - - - - - -~::
- - - - - - - -~::
- - - - - - - -~::
SP
i
- -
GC982NW1F.BHKGLLS_ENG 3/20/09 4:46 PM Page 9
Recording using G-Code (GC992NW/GC982NW Only)
G-Code simplifies the process of recording television programmes. It works by entering codes that contain all the
necessary information for recording. These are called G-Code G-Codes and can be found in most television listings magazines.
You must tune and store channels as set out on page 5 and set the clock to the correct time before using G-Code.
G-Code is a registered trademark of Gemstar Development Corporation.
The G-Code system is manufactured under license from Gemstar Development Corporation.
G-Code
G-Code will only work if all the chan-
nels have been tuned and stored.
The clock must also be set to the
correct time, see page 12.
1Turn on your Video Recorder and
your television. Insert a recordable
video tape.
2Press the G-CODE button on the
Remote Control.
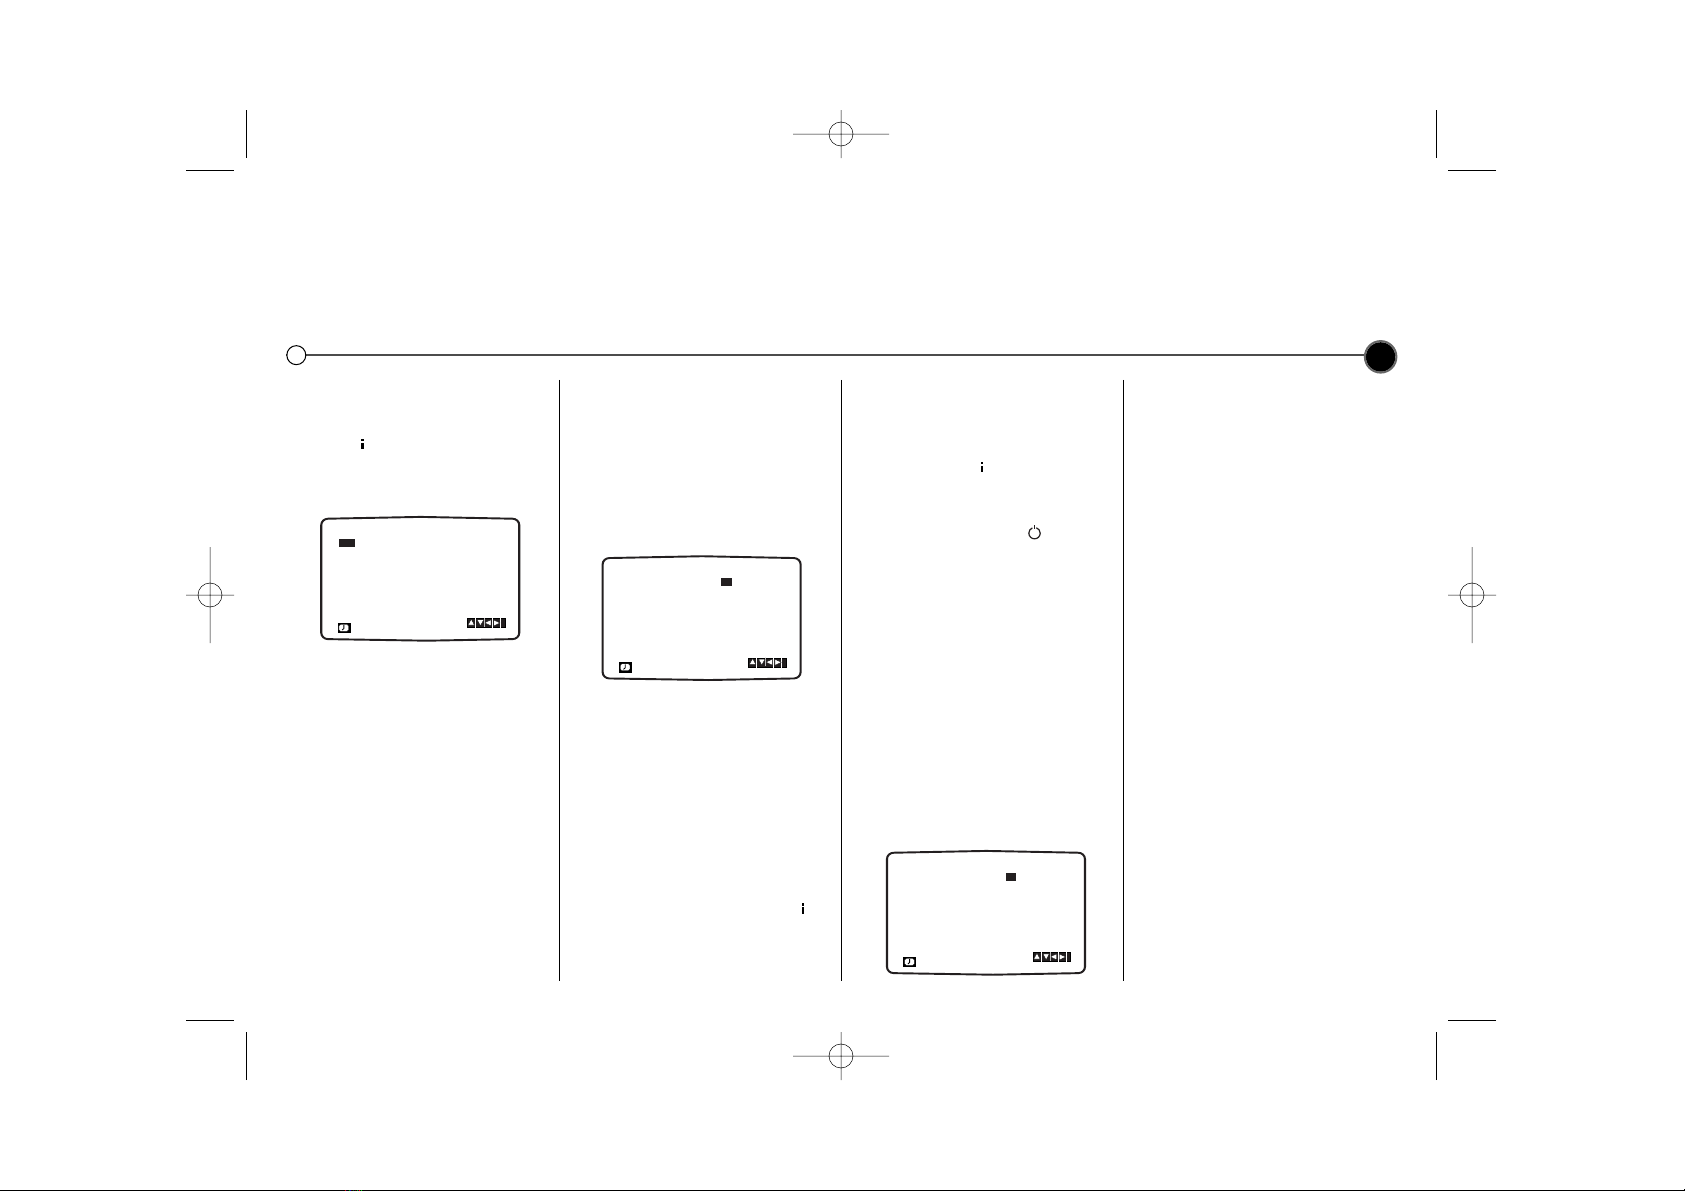
3Use the 3 or 4buttons to select
the recording type:
ONCE will be a single recording
event.
DAILY will record each week day
at the same time.
WEEKLY will record on the same
channel at the same time each
week.
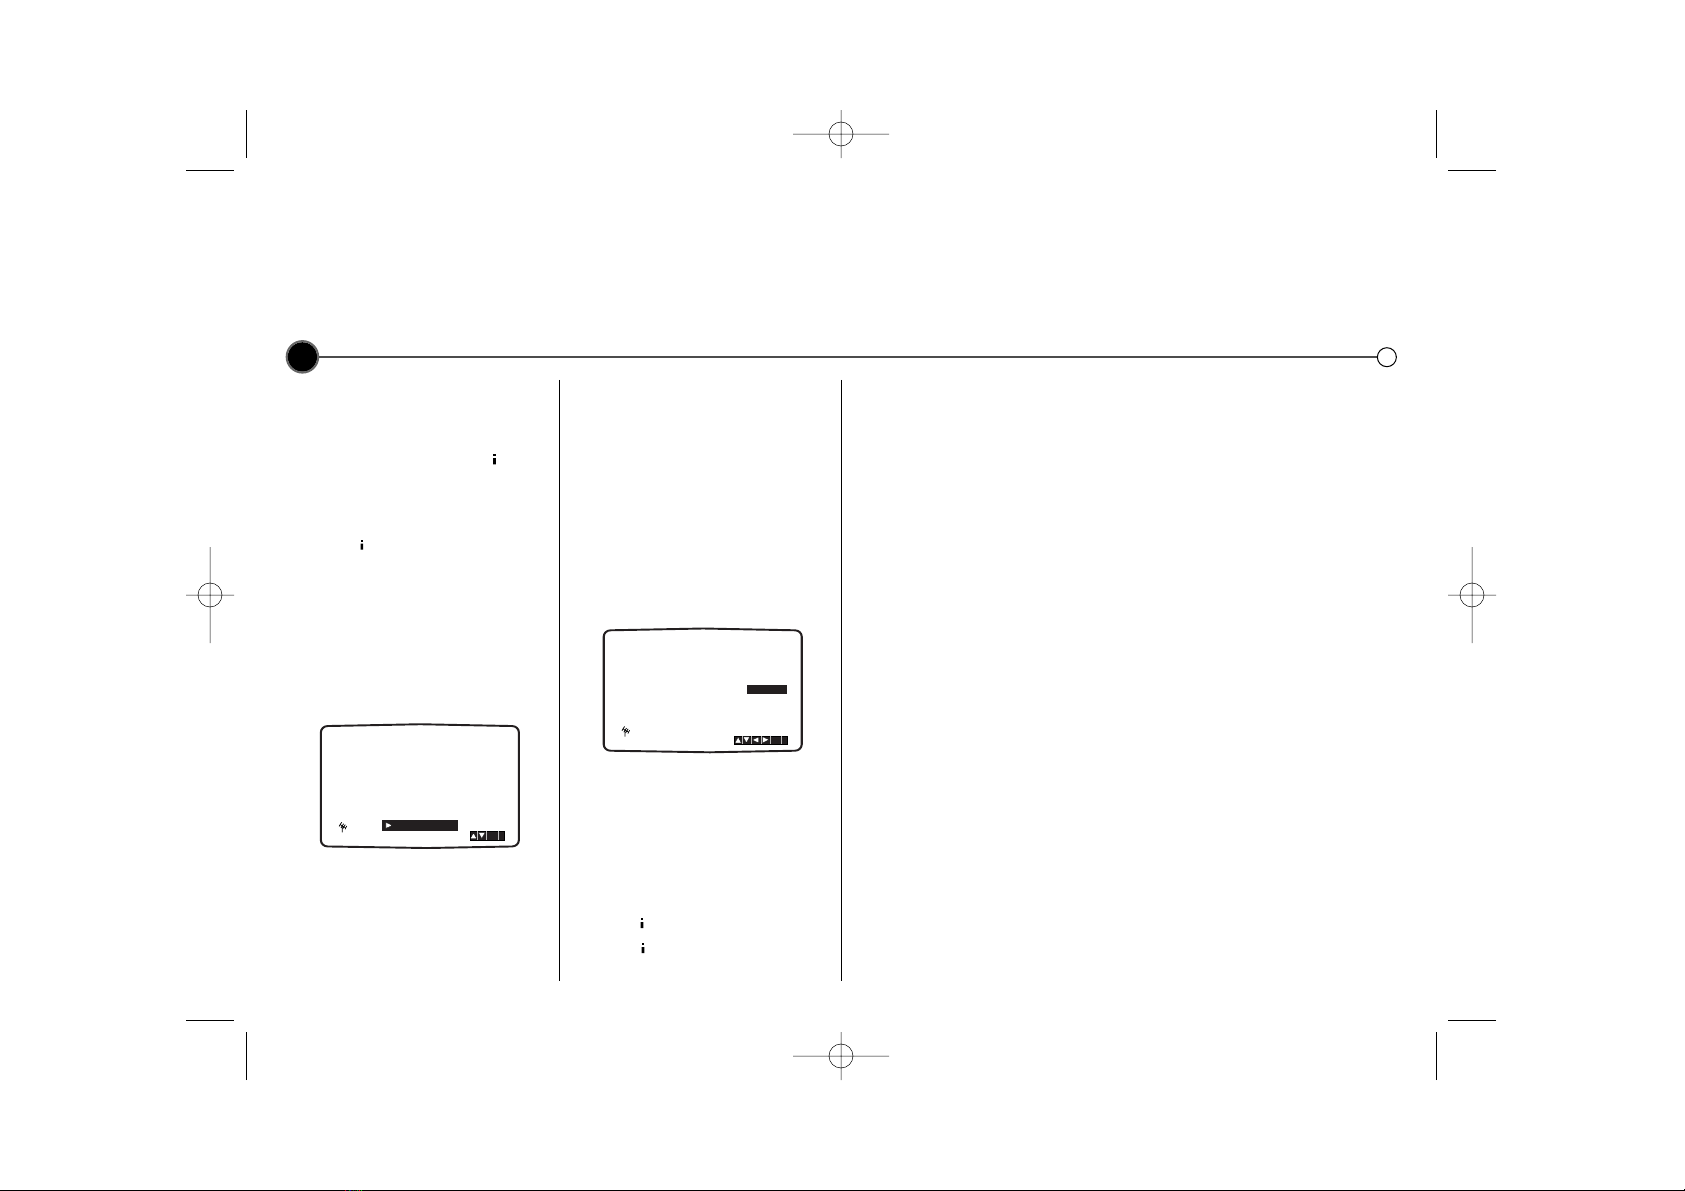
4Use the numbered buttons to
enter the G-Code of the television
programme you wish to record. If
you make a mistake press the 1
button and re-enter the correct
numbers.
5Press OK and the recording
details of your programme will be
displayed. If PLEASE CHECK is
displayed check that you have
entered the right G-Code. If the
number has been entered correct-
ly but does not work, it may have
been printed incorrectly in the tele-
vision listings guide.
If ‘- -’ is displayed on the “PR” you
will have to enter the programme
number that you want to record
from. This will only happen once
for each channel, once done it will
be stored in the Video Recorder’s
memory. If you wish to record from
the scart socket or RCA socket
press AV.
6Use the 3 or 4buttons to
choose among Standard Play,
Intelligent Play and Long Play, as
described on page 8.
IP mode determines how much
tape is left and switches speed
from SP to LP, if necessary, to
complete recording the
programme.
7Check the details are correct and
press to save your settings.
If PLEASE CHECK is displayed
check that the details are correct.
If you wish to set other G-Code
recordings repeat steps 2-7.
Press again to remove the
menu.
8Turn off the Video Recorder,
TIMER will be illuminated on the
Display panel.
9Press POWER to end recording.
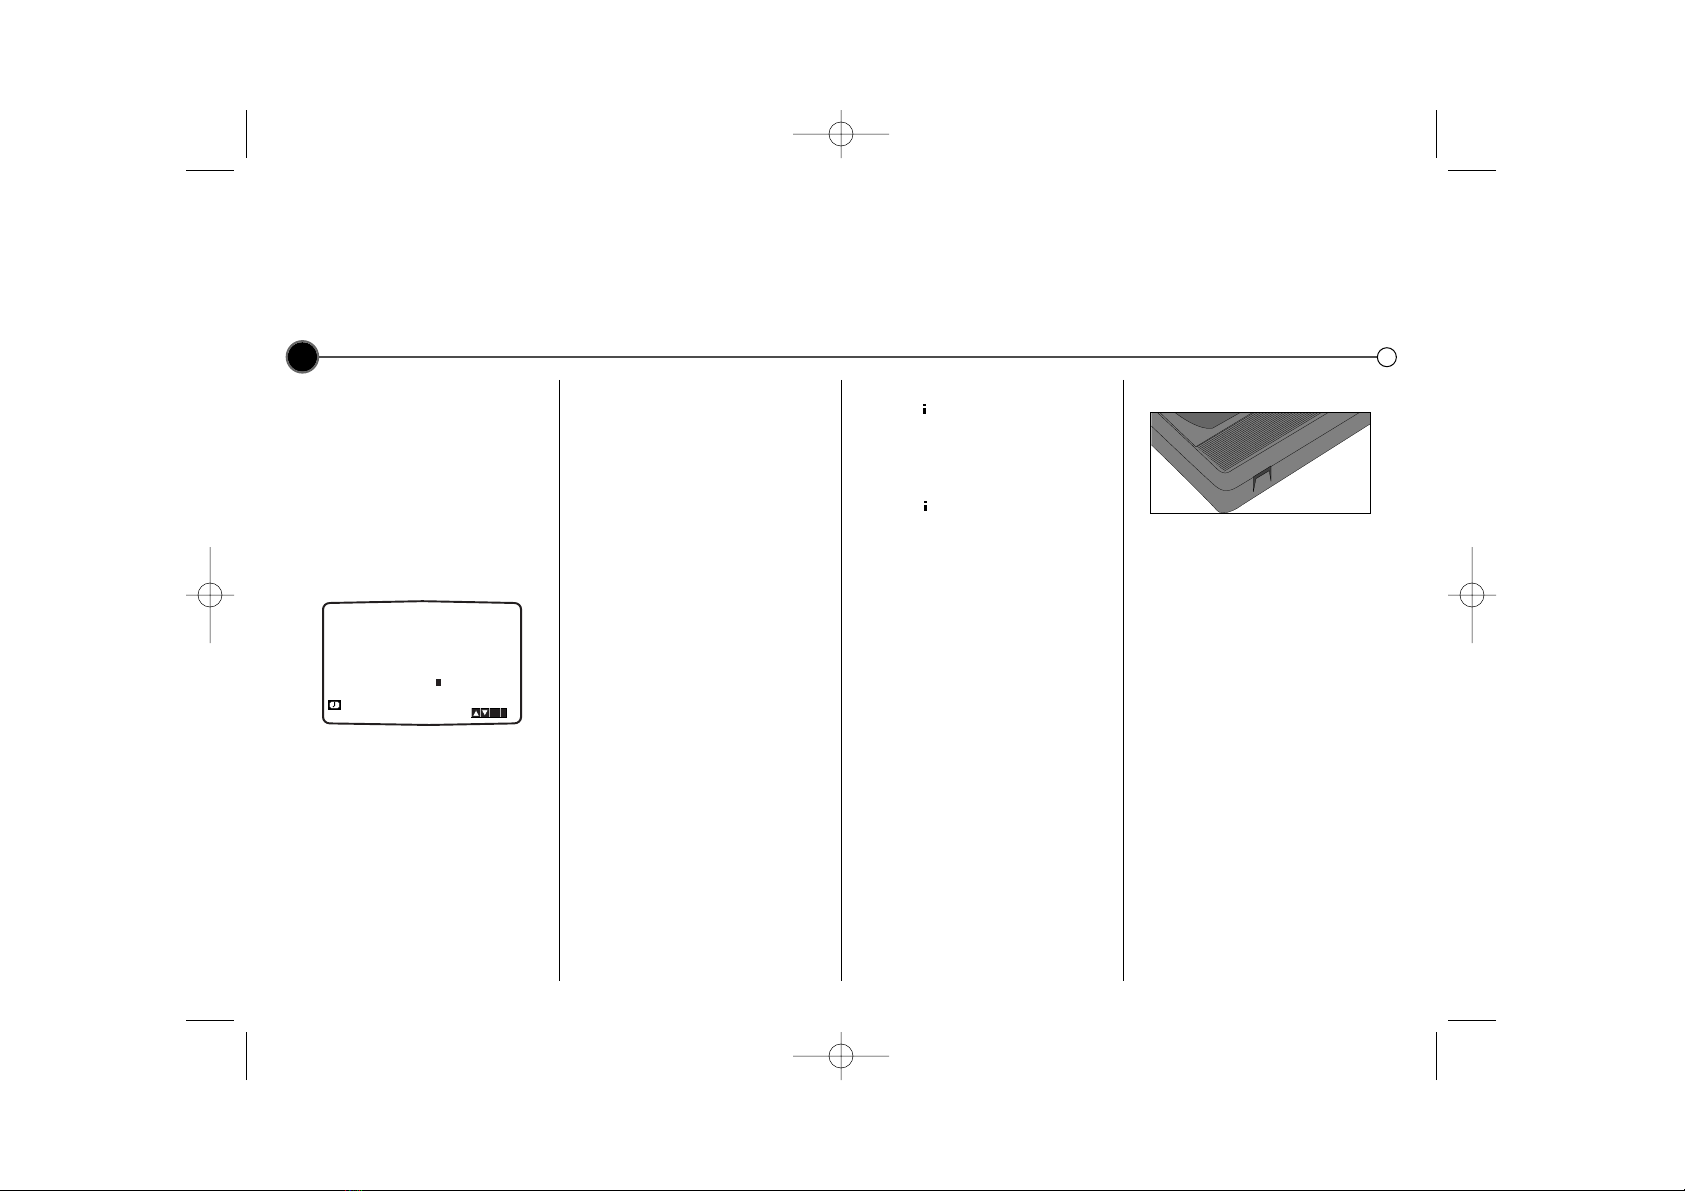
Protect your recordings
To stop a recording you have made
being recorded over, break off the
protection tab on the rear of the video
tape. To record on a tape that has
had its protection strip removed,
cover the hole with adhesive tape.
Recording tape to tape
You will need a second Video for tape
to tape copying. Connect using a AV
cable from AUDIO IN/VIDEO IN
sockets of your Video. Select
audio/video mode on the recording
Video by pressing the AV on the
Remote Control. To monitor the
recording, connect the recording
Video to your TV using the standard
coaxial aerial cable.
10
ONCE
OK
i
0~9,
G-CODE
- - - - - - - - -
REC
GC982NW1F.BHKGLLS_ENG 3/20/09 4:46 PM Page 10