Travor Speedlite User manual

http://www.travor.cn
中文 EN
使用说明书
USER’S INSTRUCTIONS
闪光灯

-1-
Ⅰ
.Thank you for purchasing a TRAVOR product
The TRAVOR Speedlite is an EOS-dedicated, high-output flash unit automatically It can serve
as an on-camera flash as well as a master unit or a slave unit in a wireless, multiple-Speedlite
system.
EN
Before using the speedlite,read this instruction manual and your camera’s instruction manual to
familiarize yourself with the speedlite operations.

1.To avoid possible inquiry to eyes, it is harm to people's retina.
2.To avoid possible safety accident, do not use the flash light on the people who need a high degree
of attention.
3.To avoid fire or electrical shock, do not expose this product to rain or moisture.
4.To avoid short circuit, be sure the batteries contacts are securely packed and in accordance with
local provision when handling the batteries.
5.Please place the batteries and the parts which can be allowed mistakenly away from children.
6.Do not disassemble or maintain this product .Touching the internal high voltage circuit will cause
electric shock.
7.Remove batteries during long periods of non-use .
8. Please take out the batteries and stop using immediately in case of below:
1. This product is dropped or shocked seriously and the inner part of the product is bared.
2. If the battery leaks corrosive liquids, please take out the battery with gloves.
3. The product gives off strange smell, smokes or heats.
4. When the product is full charged (the charge lamp bright), press < >, flash will not firing
Ⅱ.Warning
-2- -3-
EN
EN
1、To avoid overheating and degrading the flash head, do not fire more than 20 continuous flashes.
After 20 continuous flashes, allow a rest time of at least 10 min.
If you fire more than 20 continuous flashes and then fire more
flashes in short intervals, the inner overheating prevention function may be activated to make
the recycling time about 8 to20 sec. If this occurs, allow a rest time of about15 min. and the flash
will then return to normal.
2、Using size-AA batteries other than the alkaline type may cause improper battery contact due to
the irregular shape of the battery contacts
3、Change the batteries should be aware below:
3.1、If you change the batteries after firing many flashes continuously,
3.2、Use a new set of four batteries of the same brand. When replacing the batteries, replace all four
at one time
3.3、Size-AA Ni-MH or lithium batteries can also be used.
4、If you set the flash coverage manually, make sure it covers the lens focal length so that the picture
will not have a dark periphery.If you use a commercially-available sync cord to connect the camera
to the Speedlite's PC terminal, set the flash zoom manually.
5、During stroboscopic flash, the shutter remains open until the firing stops. Use the formula below to
calculate the shutter speed and set it with the camera.
After exceeding the number of
flashes,multi flash immediately
.
be care that battery may
become warm or hot.
.
Ⅲ. Caution:
Number of flashes ÷ Firing frequency = Shutter speed
For example, if the number of flashes is 10 and the firing frequency is5 Hz, the shutter speed should
be at least 2 sec.

Large and high clear LCD Panel
Large and high clear LCD Panel, it is very convenient for you to look into and set the functions on the
LCD panel clearly and directly.
Master & Slave Modes
Providing master function, could control C flash firing and accept C master signal under slave mode.
A variety of trigger synchronization
A variety of trigger synchronization
The product could be Triggered by camera-top ,C master flash ,PC ,S1&S2 modes ( S1 is flash start ,
S2 is avoiding relight)
Large guide number 60@ISO100 flash light
New large guide number manual speedlite, supporting M/Multi modes.
Ⅳ. Features
-4- -5-
EN
EN
Aperture imaging flash preview
Aperture preview button on operation ,flash will send out one second continue flash, Radiography
for shooting objects.
Supper speed of charge recycle system
It only takes 1~5 seconds in charging after full power output ,you can use the external power pack to
accelerate the charging speed once more .
Providing charging socket for external power pack
The products provide charging socket for external power pack ,to meet your higher demand for
charging cycle and will not miss wonderful moments any more .
Providing PC port
The product provides PC port; you could make the flash synchronously by connecting to the PC port
Sound prompt system
Turn on the sound prompt function, different sounds indicate working situation help you focus on
shooting, which will make you into taking photos.
Power saving mode
In the power saving mode, the speedlite will get automatic shutdown sooner; in the non-saving mode,
it will take a longer time before automatic shutdown .
Advanced options setting
The product provides advanced options setting function ,you could custom flash function according to
your own need .
ZOOM covers around
Supporting the flash auto and manual zoom .It can make the flash cover focal length
range from 20mm to 200mm cyclic variation, supporting full-size ,middle-size cameras.
Fully support ETTL function
Exposure Compensation, Exposure Bracketing, Rear-curtain Sync, Exposure Lock, Aperture imaging
flash preview, Access to Canon menu.

Flash Head/Wireless Transmitter
Wireless sensor
AF assist lamp
Mounting foot
Locking Pin
Catchlight Panel(Retracted)
Built-in wide panel(Retracted)
Contact cover
Contacts
External power source socket
PC Terminal
Bracket mounting hole
Mini stand pocket
Mini stand
Shoe
①
②
③
④
⑤
⑥
⑦
⑧
⑨
⑩
12
11
13
14
-6- -7-
EN
EN
Ⅴ.Part Names
⑤
⑥
⑨
①
②
③
④
⑧
⑩
⑦
11
13
14
15
12
15
LCD Panel
Volume adjustment
custom function setting button
Wireless /Linked shooting button
Flash mode
Pilot lamp/Test firing/wireless slave power on button
Mounting foot's lock lever
Lock-release button
Dust-and water-resistant adapter
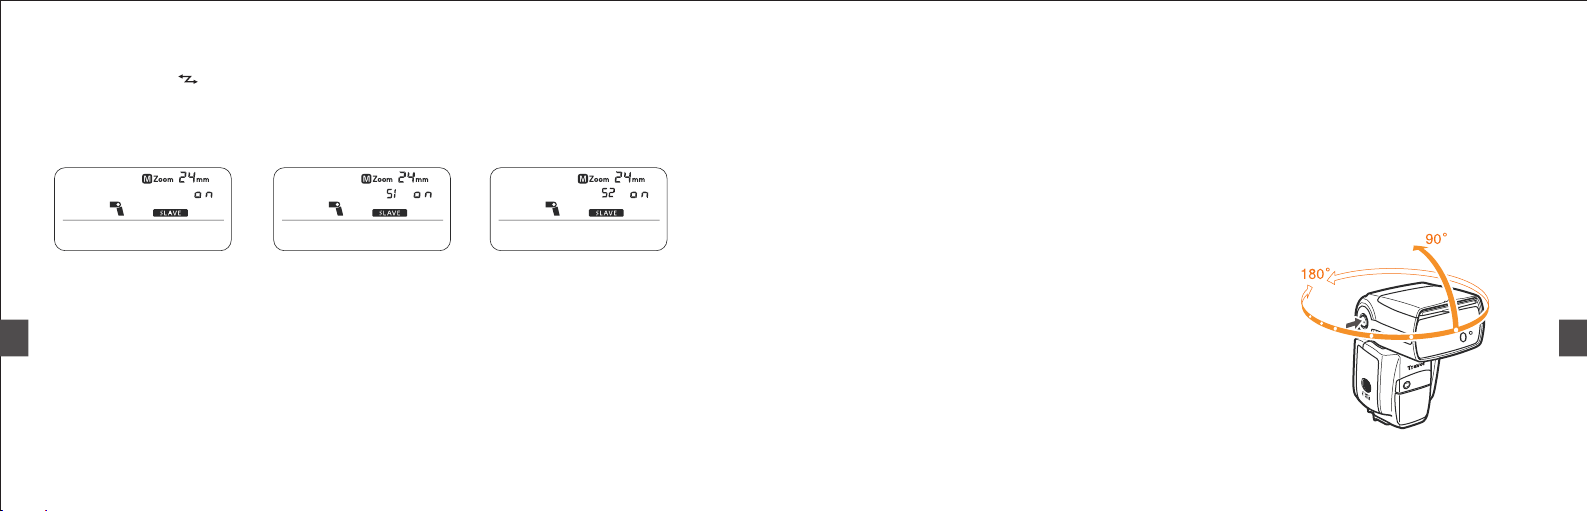
Bounce angle
Bounce lock release button
Rear-curtain sync/HSS shortcuts
Battery compartment cover
Battery compartment lock lever
Zoom /Wireless setting button
Power switch (OFF: power off, Lock button/Dial lock
<power on> ON: power on)
Flash exposure confirmation light
Select Dial
Select/set button
17
18
19
20
21
22
23
32
31
30
29
28
27
26
25
24
33
34
35
16 18
27
Fn
ZOOM
MOD E
17
19
20
21
22
23
24
25
26
28
29
30
31
32
33
34
35
16 Synchronization terminal

LCD Panel
-8-
EN
EN
1.Install Batteries
Ⅵ.Installation Instruction
Close the cover:Close the battery compartment
cover and slide it as shown by the arrow.When
the cover clicks in place,it will be locked.
Use your thumb to press the battery compartment
lock lever,then slide it to as shown by the arrow ①
to open the cover.
Install the batteries :Make sure the +and -battery
contacts are properly oriented as shown in the
compartment .
-9-
Flash ratio
[ ] FEB
Manual flash/Multi
(Stroboscopic)flash
[ ]Advanced setting
[ ]FEC
Rear-curtain sync
[ ]
[ ] Auto zoom forimage size
Slave ID
Slave group
Flash ratio
Flash range scale
Indicator(meters)
Indicator(feet)
[ ]
[ ]
[ ]
[ ] Master
ETTL autoflash
Channel
Slave
Manual
Aperture
FEB status
Stroboscopic flash count
Stroboscopic flash frequency
Manual flash 1/3-stop
increment indicator
Advanced setting
Zoom focal length
Advanced option NO.
Manual flash output level
flash exposure compensation
amount
FEB compensation amount
Flash mode
Master flash on:
Master flash off:
Slave flash:
HSS
[ ]

2.
Attaching to the camera
-10- -11-
Attach the speedlite
Slip the speedlite’s mounting foot into the camera’s hot shoe all the way.
Secure the speedlite
On the mounting foot,slide the lock lever to the right,When the lock lever clicks in place,it will be locked.
Detach the speedlite
While pressing the lock-release button,slide the lock lever to the left and detach the speedlite.
EN
EN
Ⅶ.Basic functions
1.Power-on and Power-off
Power-on and Power-off: the power of the speedlite can be turned on by press to ON ,and turned off
by pressing to OFF.
Turn on the power of the speedlite, when (PILOT) turns red that the speedlite can flash.
If the charging is less, the flash will automatically shutdown, then you need to replace with new
batteries.
You can press the testing button (PILOT) to test whether the speedlite works normally, after use,
hold the power to OFF to power off.
2. Button/Dial Lock
By setting the power switch to (LOCK),you can turn off flash's button and dial operations.
Use this to against the flash function settings from being accidentally changed after you
set them.
3.M
You can set the flash output from 1/128 power to 1/1 full power in 1/3- stop increments. Use a
hand-held flash meter to determine the required flash output to obtain a correct flash exposure
Press the (MODE) button so that (M) displayed.
By choose setting and dial button to adjust flash luminance in 0.3EV increments.
Adjust the camera and press the shutter, the speedlite will flash with the synchronic signal of the
camera.
mode

-12--13-
EN
EN
4.
With stroboscopic flash, a rapid series of flashes is fired. It can be used to capture multiple images
of a moving subject in a single photograph. You can set the firing frequency (number of flashes per
sec. expressed as Hz), the number of flashes, and the flash output.
Press the (MODE) button so that (Multi) displayed.
Press the select button and select dial to adjust flash output, the number of flashes and firing frequency.
The adjustment scope of output level is 1/128-1/64-1/32-1/16-1/8-1/4,the scope of flash frequency is
from 1~100.Adjustment method :please press select setting button to select setting items (firing),and
use the select dial to adjust the parameters. After the setting is completed, press select setting button
to confirm the setting.
Multi mode
The charging speed of speedlite is slow under the situation that the electricity quantity of the battery
is insufficient ,which may cause the occurrence of the high-frequency flash, please reduce the flash
frequency or change new battery under this situation .Notice: the shutter should keep open until the
flash stopped under the Multi mode .
5. ETTL mode
Set cameras' shooting mode to (AV) ,Aperture prior to auto exposure ,(TV) ,shutter prior to auto
exposure or (M),then you could use ETTL to auto flash .Under the mode of ETTL , Exposure
Compensation, Exposure Bracketing, Rear-curtain Sync, Exposure Lock, Aperture imaging
flash preview, Access to Canon menu .
6.Test flash
whether in any mode ,you can press(PILOT)button to test if the speedlite flashes
normally .When testing the speedlite, the speedlite will give flash at relevant output level in
accordance with the chosen output power setting.
3.M
You can set the flash output from 1/128 power to 1/1 full power in 1/3- stop increments. Use a
hand-held flash meter to determine the required flash output to obtain a correct flash exposure
Press the (MODE) button so that (M) displayed.
By choose setting and dial button to adjust flash luminance in 0.3EV increments.
Adjust the camera and press the shutter, the speedlite will flash with the synchronic signal of the
camera.
mode

8 C.Fn: Setting Custom Function.
You can customize Speedlite features to suit your shooting preferences. You do
this with Custom Functions.
-14- -15-
EN
EN
Setting No. Settings & Description
Function
Custom
Function No.
Distance indicator display
Auto power off
Modeling flash
FEB auto cancel
FEB sequence
Flash metering mode
Quickflash with continuous
shot
Test firing with autoflash
Meters(m)
Feet(ft)
Enabled
Disabled
Enabled(Depth-of-field preview button)
Enabled(Test firing button)
Enabled(with both buttons)
Disabled
Enabled
Disabled
0→-→+
-→0→+
E-TTL Ⅱ/E-TTL
TTL
External metering: Auto
External metering:Manual
Disabled
Enabled
1/32
Full output
7.Setting the ZOOM coverage
Flash automatically zoom :press ZOOM button to adjust covered
coverage ,when (M) don not display ,set flash to the camera that
supporting ETTL system ,flash led will move back and forth along
with the change of focal length to accommodate different covered
coverage .
The speedlite manual ZOOM: press ZOOM button to adjust the
coverage, default in 24mm.Manually set the zooming position:
press ZOOM button to adjust the coverage ,when (M) displayed ,
you can manually adjust the coverage (20,24,28,35,50,70,80,
105,135,200mm) setting method :press ZOOM button ,the ZOOM
icon firing ,you can adjust the flash coverage by selecting dial .
Notice: used in wide-angle diffusion board ,flash coverage
will range to 14mm.
C.Fn-00
C.Fn-01
C.Fn-02
C.Fn-03
C.Fn-04
C.Fn-05
C.Fn-06
C.Fn-07
9.Sound prompt
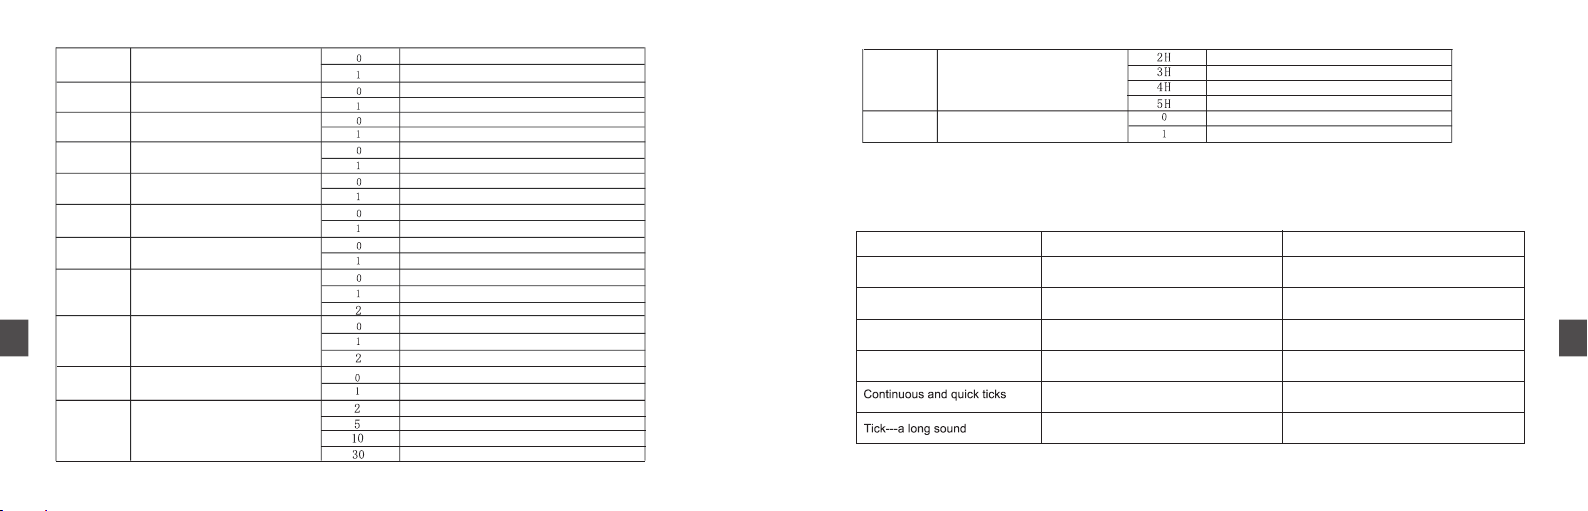
Under the condition that the sound indicator is en a b le, the speedlite will give different sounds to
indicate its working situation. Sound fuction is default to off condition,The meanings of the sounds
can be found in the table below:
The sound form Meaning Operation
Tick twice The speedlite is started/Sound prompt is
enabled/A standard flash is obtained.
The flash is in the charging state
Normal
Waiting for the completion of charging
Three ticks,two times The exposure may be over
Tick tick tick
The power is not enough
The speedlite is fully charged, and can be
used.
Please replace the batteries.
Normal
Asjusting exposure compensation
or changing shooting condition
Adjusting exposure setting or
shooting condition
The exposure may be excessive
AF-assist beam firing
Auto zoom for sensor size
Slave auto power off timer
Slave auto power off canel
Flash recycle with external
power source
Flash exposure metering
setting
Enabled
Disabled
Enabled
Disabled
60 minutes
10 minutes
Within 8 hours
Within 1 hour
Flash and external power
External power source
Speedlite button and dial
Speedlite dial only
Auto zoom light &Pilot
Pilot
-16-
EN
EN
C.Fn-08
C.Fn-09
C.Fn-10
C.Fn-11
C.Fn-12
C.Fn-13
C.Fn-20
OFF
C.Fn-21 Flash light range
C.Fn-22 LCD Display
Universal
Prior to flash GN
coverage range
Lighting for 12s
OFF
Continue
ON
C.Fn-23 Battery check on slave flash
2 hours
3 hours
4 hours
5 hours
Auto power off
(Sleep mode)
Clearly defined
function setting
C.Fn-25 NO
Customize the default recovery setting
C.Fn-24
Tick three times
Auto power off(Sleep mode)
C.Fn-24
2 minutes(DEFAULT)
5 minutes
10 minutes
30 minutes
-17-
Sound control settings

Ⅷ、Wireless flash
Master unit setting, when flash under master, can transmit signal to C automatically.
Slave unit setting, can accept C and travor signal.
-18- -19-
EN
EN
10. Access to Canon camera menu.(Only Latest Canon camera).
We could operate the flash via newest Canon camera's menu that has ETTL function. Flash's
related pa rameter could be set b y “External flash function setting”and “External flash C.Fn
setting” on flash control menu: switch ETTL mode/manual flash mode and Multi flash, wireless
flash setting , Rear-curtain Sync, Exposure Bracketing ,Exposure Compensation, focal length
and advanced option function etc.
12. Modeling light function
Press down the camera's aperture preview button ,flash will send out continuous flash
lasting one second.
Note: please control the flash fired less than 10 times, should let flash have a rest about
10~15 minutes to avoid heat or damage.
13. PC synchronous port (for input)
By connecting to the PC synchronous port, you can make the flash synchronously.
14. Power saving mode
Please press C,Fn-24 custom function setting.
1. Set the master unit
Set the speedlite wireless select to master.Setting method: press the < >button by select
dial to master, then press the select setting button to confirm. Press the ZOOM button , (CH),
master flash icon or(R AT I O)will firingto the communication channel or slave setting ,at
this time ,you can set slave unit communication channel number(1,2,3,4)or slave unit group
(A,B,C) via select dial, then press select setting button to confirm setting .
11.Volume adjustment
By pressing < >button for three levels to adjust the volume ,could be setted from C.Fn"Custom
function setting”and ON or OFF for the voice from C.Fn-20.

-20--21-
Point: if master unit set the (RATION A: B), or disabled group C flash, group C will not flash.
If set the flash with three group to (A), they will be controlled as one flash of slave group by
master unit.
Multi-speedlite, wireless lighting configurations
master unit.Press the testing flash button of master unit to test whether the flash is normal; if slave
unit do not flash, please inspect the angle and distance between and master unit.
SLAVE
MASTER
Outdoors
Indoors 15m(49.2Ft)
10m(32.8Ft)
8m(26.2Ft) 12m(39.4Ft)
EN
EN
3. Multi-Speedlite, Wireless Lighting Configurations
You can create two or three slave unit group to meet multi-directional shooting, the manual flash
output and stroboscopic is set by master speedlite.
⑴. Wireless flash with two slave group
Set communication channel: 1,2,3,4
Set groups: Set two flashes to A, B
Set master unit: set communication channel, set the controlled group A: B of master unit, or set
the flash output of each group, then you can flash shooting.
⑵.Wireless flash with three slave group
Set communication channel: 1,2,3,4
Set groups: Set two flashes to A, B, C
Set master unit and shooting: set communication channel, set the controlled group A: B: C of
2. Set the slave unit
Set the speedlite wireless select to SLAVE. Setting method :press the < >button by select dial to
slave, then press the select setting button to confirm. Press the ZOOM button ,(CH)or (A) will firing to
the communication channel or slave setting ,at this time ,you can set slave unit communication
channel number(1,2,3,4)or slave unit group(A,B,C) via select dial, then press select setting button to
confirm setting .When there has other photographers use the wireless control and you do not want to
be disturber by them, please change the channel no. to avoid different signal.
The use of external charging box
You can buy external charging boxes and connect it to the charging port of Speedlite, after flash,
the charging box will charge the speedlite.You can set C.Fn-00 to meet you higher need .
High-speed continuous shooting
The Speedlite can realize the high-speed continuous shooting function, please set the in the
continuous shooting form and then shoot. Please: The number of the photos that can be continuous
shot is releated with the output level .Please use the fully charged battery.
Ⅸ.The advanced application
Reflection flash
Bounce flash means to take photos by making flash light
head aimed at wall or ceiling and using the light reflected
back from the ceiling or wall to light the desired object,so
that the shade behind the object can be decreased to get
more natural shooting effect .If the wall or ceiling is too far ,
the bounce flash may be too weak to get enough exposure .
The wall or ceiling should be even and white in order to get
efficient reflection ;if the reflection surface is not white ,
color cast may appear in photo.
-22- -23-
EN
EN
Set S1/S2 mode
S1 Mode: When the flash is in S1 mode, it will work with the first work of the master flash
synchronously, with the result consistent with the use of radio slave, To use this mode correctly,
the master flash should be set at manual flash and TTL flash system with preflightfunction and
the red-reduction function with multiple flashes should not be used .
S2 Mode: It is also called“ pre-flash cancel mode”. This mode is similar with S1mode,but it can
neglect the pre-flash given by TTL flash .Therefore ,it can support the main flash working in TTL
mode. In particular, if S1 mode cannot flash correctly and synchronically with your internal flash,
you can try to use S2 mode.The following situation shall be avoided when the S1 and S2 modes
are used: the red eye reduction function of the main light is used;the order mode(Nikon) or
wireless mode(Canon) of the master is used ;the ST-E2 is used as the flash controller.
By pressing the < >button to chose S1 or S2 ,that is S1 or S2 mode. These twomodes are suitable
to be used as off-camera auxiliary light, so as to create a variety of lighting effects. They are suitable
for manual flash environment and TTL flash environment respectively .Under these two modes, the
way to adjust the output level is like that in M mode.

Flash Exposure Compensation
You can use the exposure compensation function of the camera to compensate flash output so as to
make shooting effect better meet your requirements .You can also make compensation of flash
brightness with the (LEFT)(RIGHT) button within the range of +-6ev ,,with the precision of 1/3ev.
Every press the button,the compensation setting will be displayed on LCD panel .
Rear curtain Sync
You can use slow-speed shutter to produce trailing smear for the object and the flash light will flash
at the moment when the shutter is going to be shut, which means the rear-curtain sync function .
(For the rear curtain sync setting ,refer to your camera manual for setting).You can turn on or turn
off the rear curtain sync by pressing the rear curtain sync hotkey on panel of flash.
Note :when flash is used as slave unit ,the rear curtain sync function can not be set on the speedlite.
Exposure Bracketing FEB
The FEB function is set on the camera or speedlite.For the specific setting method ,refer to your
camera instructions .After the FEB is set ,after 3 photos are taken ,exposure compensation will
be made automatically in the sequence of ,for example ,“normal-under-over”.This function helps
you improve the success rate of photo taking .
The setting method on the flash :press the (UP)(DOWN) button to adjust the exposure bracketing
amount .
Note :For FEB,set the camera's drive mode to single shooting.Be sure the flash is ready before shooting.
Creating a Catchlight
With the catchlight panel, you can create a catchlight in the subject's eyes to add life to the facial
expression.
Wide-angle diffusion board
Pull out the wide-angle diffusion board, push back the reflection board and arrange them as per the
figure ,the flash scopes will extent and the flash effect will be softer and more natural.
Pull out the wide-angle diffusion board Push back the wide-angle diffusion board
FEL Lock(Canon )
To use this function, cover the subject, for which flash exposure will be locked at the center of the
viewfinder of camera, press the button (*)of the flash exposure lock, and the flash light will pre-flash
and the camera will calculate the appropriate flash output data .Now you have some time for
decomposition ,after which ,you can take photo.(The function can be used only when it is supported
by your camera. For the setting method ,refer to your camera instructions.)
-24- -25-
EN
EN

High-speed sync
With high-speed sync(FP flash),The flash can synchronize with allshutter speeds. This is
convenient when you want to use aperture priority for fill-flash portraits.
if you set a shutter speed that is the same or slower than the camera'smaximun flash sync
speed,will not be displayed in the viewfinder.
With high-speed sync,the faster the shutter speed,the effective flashrange will become. Check
the LCD panel for the effective flash range.
To return to normal flash,press the < >button again. The< > icon will disappear.
Stroboscopic flash cannot be set.
< >
Auto Zoom for Image Size
EOS DIGITAL cameras have one of three image sizes.The lens'effective focal length will differ
depending on the camera's image size, the speedlite automatically recognizes the EOS
DIGITAL camera's image size and automatically sets the flash coverage for lens focal lengths
from 24mm to 105mm.
When the Speedlite is attached to a compatible camera,< >will appear on the Speedite's
LCD panel.
Select
Press the< >button so that
< >is displayed
In the viewfinder,check that the< >
icon is displayed
< >
-26- -27-
EN
EN

Guide No. 60/190 (at 200mm focal length, ISO 100 in meters/feet)
1 - 199 Hz
1-100
SpecificationⅩ.
Type
Type on-camera speedlite
Flash coverage
20 - 200mm (14mm with wide panel)
Auto zoom (automatically set flash covered coverage of
proper focal length and image size)
· Manual zoom
· Swinging/tilting flash head (bounce flash)
Exposure Control
Exposure control system ETTL,Manual flash,frequency flash
Manual, FEB: ±6 stops in 1/3-stop increments
(Manual and FEB can be combined)
Multi flash
Flash Recycling (with size-AA alkaline batteries)
Flash exposure
compensation
Recycling time
Flash-ready indicator
Normal flash: Approx. 0.1 - 5 sec. / Red pilot lamp lights
Quick flash: Approx. 0.1 - 2.5 sec. / Green pilot lamp lights
Wireless Flash
Transmission method Optical pulse
Flash NO.
-28- -29-
EN
EN
Channel
Wireless options OFF, Master, and Slave
Controllable slave groups 3 (A, B, and C)
Power Source
Power Source
Battery life
(Approx. flash count)
Weight 406 g
Power off after certain period of idle operation
100 - 700 flashes (with size-AA alkaline batteries)
Four size-AA alkaline batteries and lithium batteries also usable
Power saving
Dimensions 215 x 79 x 63 mm
Flash exposure lock use (FEL) button or (*)button
Rear-curtain Sync Provided
Lamp light
High Speed Sync Provided(Mode list)
Flash exposure
confirmation

-30--31-
Flash Index of different focal length range (ISO 100, in meters / feet)
EN
EN
The Speedlite does not fire.
1. The batteries are installed in the wrong orientation. Install the batteries in the correct orientation.
2. The Speedlite's internal batteries are exhausted: If the flash recycling time takes 30 sec. or longer,
replace the batteries. Install the Speedlite's internal batteries even when you use an external
power source.
3. The Speedlite is not attached securely to the camera.
Attach the Speedlite's mounting foot securely to the camera.
4. The electrical contacts of the Speedlite and camera are dirty.
Clean the contacts
The slave unit does not fire.
1. The slave's wireless mode is not set to <SLAVE>.
Set it to <SLAVE>.
2. The slave unit(s) is not positioned properly.
Place the slave unit within the master unit's transmission range.
Point the slave unit(s)'s sensor toward the master unit.
The power turns off by itself.
Auto power off took effect:Press the shutter button halfway or press the test firing button
XI. Possible problems during use and solutions
1/128 1.3/4.32.5/8.2 2.7/8.93.2/10.5 3.7/12.14.4/14.44.7/15.4 5.1/16.7
2.3/17.55.2/1 7 5.3/1 7. 4
Flash
output
Flash coverage (mm)
1/1
1/2.
1/4
1/2.
1/16
1/32
1/64
15/49.2 28/91.930/98.4 36/118.1 42/137.850/164 53/173.9 58/190.3
10.6/34.819.8/65 21.2/69.625.5/83.7 29.7/97.435.4/116.1 37.5/123 41/134.5
7.5/24.6 14/45.9 15/49.2 18/59.1 21/68.9 25/82 26.5/86.9 29/95.1
5.3/17.4 9.9/32.5 10.6/34.812.7/41.7 14.8/48.6 17.7/58.1 18.7/61.420.5/67.3
3.8/12.5 7/23 7.5/24.6 9/29.5 10.5/34.412.5/41 13.3/43.614.5/47.6
2.7/8.9 4.9/16.15.3/17.46.4/21 7.4/24.38.8/28.99.4/30.8 10.3/33.8
1.9/6.23.5/11.5 3.8/12.54.5/14.8 5.3/17.4 6.3/20.76.6/21.77.3/24
14 24 28 35 50 70 80 105
20
26/85.3
18.4/60.4
13/42.7
9.2/30.2
6.5/21.3
4.6/15.1
3.3/10.8
135 200
59/193.6
41.7/136.8
29.5/96.8
20.9/68.6
14.8/48.6
10.4/34.1
7.4/23.3
60/196.9
42.4/139.1
30/98.4
21.2/69.6
15/49.2
10.6/34.8
7.5/24.6

The entire LCD panel blinks.
1.The wide panel has been pulled out for bounce flash, Retract the wide panel.
The periphery or bottom of the picture looks dark.
1. When you set the flash coverage manually, the setting was a higher number than the lens
focal length, resulting in a dark periphery.Set the flash coverage that is a lower number than the
lens focal length or set it to auto zoom.
2. If only the bottom of the picture looks dark, you were too close to the subject. If the subject is
closer than 2 m/6.6 ft, tilt the flash head downward by 7° (bounce flash).
The flash exposure is underexposed or overexposed.
1. There was a highly reflective object (glass window, etc.) in the picture. Use FE lock.
2. The subject looks very dark or very bright.
Set flash exposure compensation. For a dark subject, set a decreased flash exposure. And for a
bright subject, set an increased flash exposure.
-32-
EN
The latest version of this manual can be obtained from http://www.travor.cn.
The functionality of this manual is obtained in accordance with the test conditions of company.
Without notice if the design and specifications are changed.

旅行家闪光灯是专用的高能闪光灯,可以作为机载闪光灯、无线多灯闪光系统的主控
单元或 从属单 元。
一、感谢您购买旅行家产品。
1、请不 要近距 离对人 体的眼 睛使用 闪光灯 闪光, 否则有 可能对 人体视 网膜造 成伤害 。
2、请不 要对需 要高度 注意力 的人使 用闪光 灯闪光 ,否则 有可能 引发安 全事故 。
3、请勿让本产品淋雨或受潮,以免发生火灾或触电。
4、处理 电池时 ,请将 电池的 触点包 裹好以 避免短 路,并 请遵守 好当地 有关处 理电池
的规定 。
5、请将 电池或 容易误 吞的东 西远离 儿童存 放,如 果误吞 了物体 ,请立 即与医 生联系 。
6、请勿 自行拆 卸或维 修本产 品,如 果接触 本产品 内部的 高压电 路,可 能会触 电。
7、长期不使用本产品时,请取出所有电池。
8、如发现 以下情 况,请 立即取 出电池 并停止 使用:
8.1、本产 品跌落 或受到 强烈冲 击,使 产品的 内部裸 露;
8.2、电池 内部腐 蚀性液 体泄漏 ,此时 应带手 套取出 电池;
8.3、产品 发出奇 怪的气 味,发 热或冒 烟;
8.4、当本 产品充 电充满 时(充 电指示 灯亮),按 下< >按钮, 闪光灯 不闪光 。
二、警告:
-1- -2-
中文
中文
使用闪 光灯之 前,请 阅读此 使用说 明书和 相机手 册以熟 悉闪光 灯的操 作。

1、为防 止闪光 灯灯 过热 并损坏 ,请勿 进行20次的连续闪光或10次的频 闪闪光 。连续 闪
光后, 要让闪 光灯至 少冷却1 5分钟。 如果您 在闪光 次数超 过后马 上进行 多次闪 光,内
部的防 过热功 能可能 会被激 活,使 充电时 间变成8至2 0秒左右。如果发生这种现象,请
让闪光 灯冷却 约15分钟 ,闪光 灯便会 恢复正 常。
2、因为电池触点的外形不规则,使用碱性电池以外的AA型 电池可 能会导 致电池 接触不 良。
3、更换 电池时 需注意 以下情 况:
3.1、如 果在连 续闪光 多次后 更换电 池,小 心电池 可能会 发热或 烫手。
3.2、请 使用4节相 同品牌 的新电 池。更 换电池 时,请同时 更换4节。
3.3、您也可以使用A A型镍氢( Ni- MH)或 锂电池 。
4、为确保其覆盖镜头焦距,需手动设置闪光覆盖范围,这样照片就不会出现阴影边缘。
如果使 用市售 的同步 电缆连 接相机 和闪光 灯的PC端 子,需 手动设 定闪光 覆盖范 围。
5、在频闪模式,到闪光停止为止快门应保持开启状态。使用下面的公式计算快门速度,
然后用 相机进 行设置 。
头
三、注意事项: 四、产品特点
-3- -4-
闪光次 数/闪光频 率=快门速 度
例如:如果 闪光次 数是10,闪 光频率 是5HZ ,快门速 度则至 少2秒。
中文
中文
中文
大尺寸 ,高清LCD液 晶显示
本产品配备大尺寸,高清LCD液晶 显示, 使用便 捷,便 于您清 晰、直 观的查 看或者 设置闪
光灯各项功能。
主控和 从控模 式(Master和Slave)
有主控 功能, 可控制C家 闪光灯 闪光, 在从控 模式下 能接受C家 主控指 令信号 。
多种触 发同步 方式
本产品可通过相机机顶触发、佳能主控闪光灯指令触发、PC同步 触发、S1和S2模 式(S1
为闪光 立即触 发、S2为避 预闪触 发)。
国产大 指数GN60@ISO100闪光 灯
新一代 高指数 手动闪 光灯, 支持ETTL、M、Multi模式 。
ZOOM覆盖范 围广泛
支持灯头自动及手动变焦,可以使 灯头覆 盖距在a uto、2 0~2 00m m之间变动;可支持全幅、
中幅相 机。
Table of contents


