TRENDnet TK-V201S User manual

Quick Installation Guide
TK-V201S
TK-V401S
1.01

Table of Contents
Version 05.12.2010
English 1
1. Before You Start 1
2. How to Install 2
Technical Specifications 8
Troubleshooting 9

ENGLISHFRANÇAISDEUTSCHESPAÑOL
РУССКИЙ
1. Before You Start
1
?2 x VGACompatible Monitors (TK-V201S) / 4 x VGACompatible Monitors
(TK-V401S)
?Windows 7(32/64-bit)/Vista(32/64-bit)/XP(32/64-bit)/2000/2003 Server/Me/98SE
?KVM Switch (Optional)
Package Contents
?TK-V201S/TK-V401S
?Multi-Language Quick Installation Guide
?PowerAdapter (9V DC, 0.5A)
?1 x VGAMale-to-Female Cable (1.2m/6ft)
System Requirements

ENGLISHFRANÇAISDEUTSCHESPAÑOL
РУССКИЙ
2. How to Install
To Computer
To Video Splitter
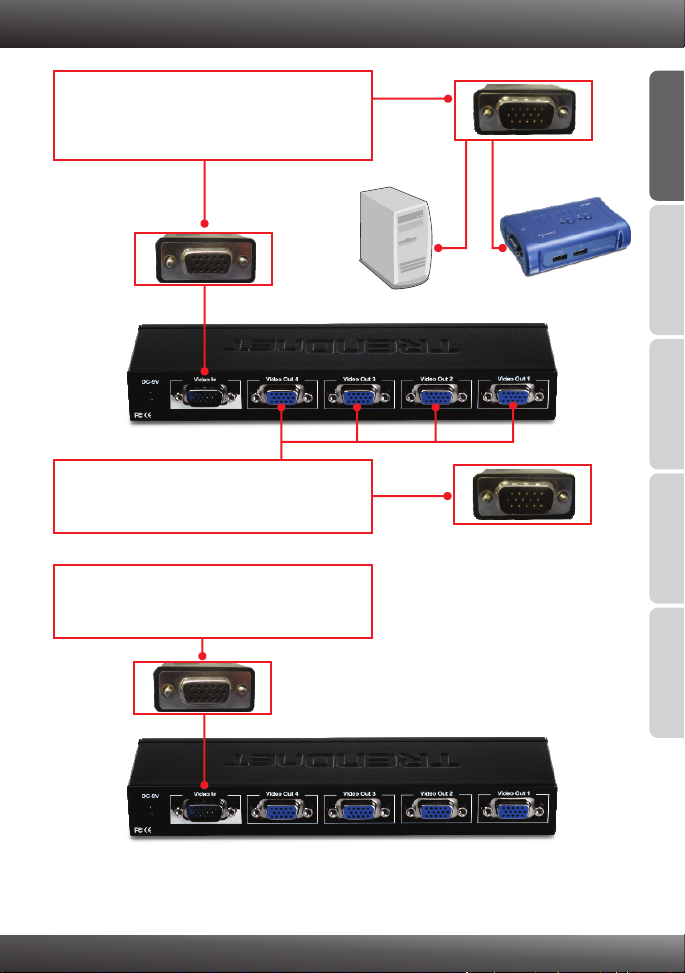
1. Properly turn OFF your computer and monitors.
2. Use the provided VGAcable to connect your
computer to the VIDEO IN port on the video
splitter (TK-V401S shown).
2
Connecting a Single Computer

ENGLISHFRANÇAISDEUTSCHESPAÑOL
РУССКИЙ
3
Connecting to KVM Switch
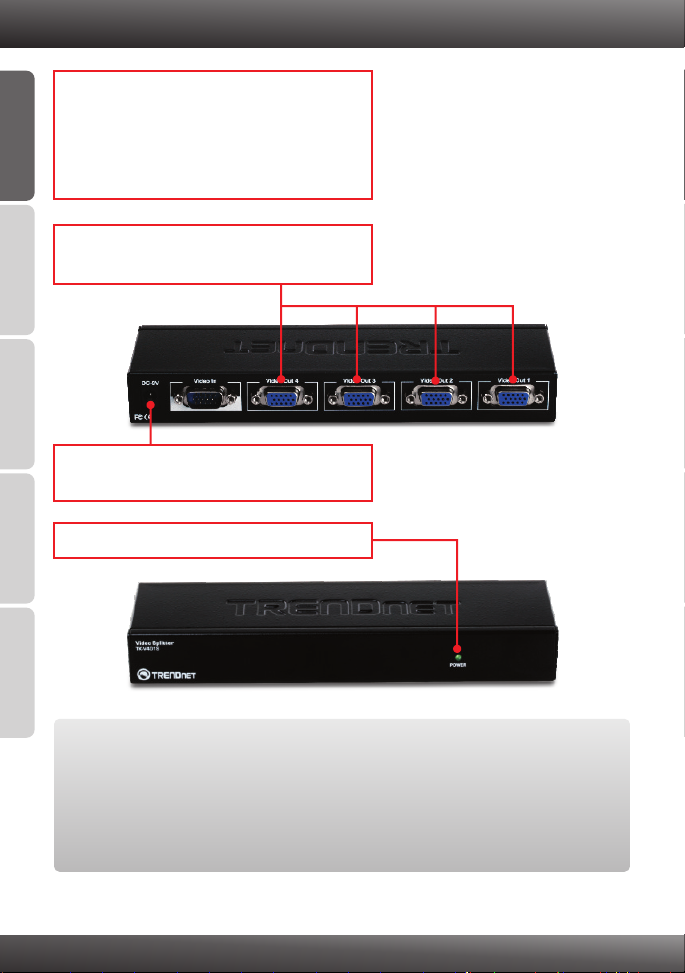
6. Verify the Power LED is lit.
ServerPC Server
3. Connect your monitor(s) to any of the VIDEO
OUT ports on the video splitter.
4. Connect the included power adapter to the
video splitter and then to a power outlet.
5. Turn on your computer and all connected
monitors.

ENGLISHFRANÇAISDEUTSCHESPAÑOL
РУССКИЙ
4
1. Connect one end of the provided VGAcable to
the VIDEO IN port on the video splitter
(TK-V401S shown).
3. Connect your monitor(s) to one of the VIDEO
OUT port(s) on the video splitter.
5. Refer to your KVM switch's quick installation
guide for connecting your computer to the KVM
switch.
4. Connect the included power adapter to the
video splitter and then to a power outlet.
6. Turn on your computers and all connected
monitors.
2. Connect the opposite end of the provided VGA
cable to the Console port on the KVM switch.
7. Verify the Power LED is lit.
KVM switch

ENGLISHFRANÇAISDEUTSCHESPAÑOL
РУССКИЙ
Note:
1. You can only daisy chain the video splitter with another TK-V201S or TK-V401S.
2. You can daisy chain up to 4 splitters together.
Daisy-Chain
5
Master Video Splitter
Slave Video Splitter

ENGLISHFRANÇAISDEUTSCHESPAÑOL
РУССКИЙ
6
To Master Video Splitter
KVM switch
Computer
1. Use the provided VGAcable to connect your
computer or KVM Switch to the VIDEO IN port
on the first (master) video splitter
(TK-V401S shown).
2. Connect one end of a second VGAcable to one
of the VIDEO OUT ports on the first (master)
video splitter.
3. Connect the opposite end of the second VGA
cable to the VIDEO IN port on the second
(slave) video splitter.
To Slave Video Splitter
OR

ENGLISHFRANÇAISDEUTSCHESPAÑOL
РУССКИЙ
7
4. If you have a third video splitter, connect one
end of the VGAcable to the VIDEO OUT port
on the second video splitter. Then connect the
opposite end of the VGAcable to the VIDEO IN
port on the third splitter. Repeat for each
additional video splitter.
5. Connect your monitor(s) to any of the VIDEO
OUT port on the video splitter.
6. Connect the included power adapter to each
video splitter and then to a power outlet.
7. Verify the Power LED is lit.
Your configuration is now complete.
Register Your Product
To ensure the highest level of customer service and support, please take a moment to
register your product Online at: www.trendnet.com/register
Thank you for choosing TRENDnet.

Hardware 8 computers
Video Input 1 x USB keyboard TypeA
2 x 15-pin VGAHDB Female
TK-V201S
TK-V201S
4 x 15-pin VGAHDB Female
TK-V401S
TK-V401S
Resolution
WUXGA, HD, UXGA, SXGA+, SXGA, WSXGA,
WXGA, XGA, SVGA, VGA, QVGA, and Multisync
supported
Cable Distance 65 m (210 ft.) max.
CE, FCC
Dimension
(L x W x H) 205 x 65 x 26 mm (8 x 2.5 x 1 in.)
200g (7.05oz)
400g (14.1oz)
131 x 65 x 26mm (6.3 x 2.5 x 1in.)
Temperature Operation: 0ºC~40ºC (32ºF~104ºF)
Technical Specifications
Video Output
1920 x 1440 Max.
Signal Distance
Daisy-Chain (Cascade) Up to 3 levels
Cables (included) 1 x 15-pin VGAcable (male to female), 1.2 m (4 ft.)
9V DC, 0.5A
LEDs Power
Power
Weight
Humidity
Storage: -20ºC~60ºC (-4ºF~140ºF)
8
TK-V201S
TK-V401S
Certifications
0~90% non-condensing

9
Troubleshooting
1. My monitors and my PC are on, but I still do not see anything on my monitors.
1. Verify everything is properly connected. See section 2.
2. Verify the power adapter is connected to the video splitter.
3. Verify the Power LED is on.
4. Try plugging the monitor into another Video OUT port.
5. Your monitor could be defective. Try plugging another monitor into the video
splitter
2. Does the video splitter support DVI adapters?
The video splitter does not support DVI-to-VGAadapters.
3. How many video splitters can I daisy-chain together?
You can daisy chain up to 4 video splitters together
4. Does the video splitter support extended desktop?
The video splitter does not support extended desktop. The video splitter supports
cloning only.
If you still encounter problems or have any questions regarding the
TK-V201S/TK-V401S, please contact TRENDnet'sTechnical Support Department.

10
Limited Warranty
- 2 Years Limited Warranty
AC/DC PowerAdapter, Cooling Fan and Power Supply carry a 1 year limited warranty
TRENDnet warrants its products against defects in material and workmanship, under normal
use and service, for the following lengths of time from the date of purchase.
TK-V201S/TK-V401S
If a product does not operate as warranted during the applicable warranty period, TRENDnet
shall reserve the right, at its expense, to repair or replace the defective product or part and
deliver an equivalent product or part to the customer. The repair/replacement unit's warranty
continues from the original date of purchase.All products that are replaced become the
property of TRENDnet. Replacement products may be new or reconditioned. TRENDnet
does not issue refunds or credit. Please contact the point-of-purchase for their return policies.
TRENDnet shallnot beresponsible forany software,firmware, information,or memorydata of
customer contained in, stored on, or integrated with any products returned to TRENDnet
pursuanttoanywarranty.
Therearenouserserviceable partsinsidetheproduct. Donotremoveorattemptto servicethe
product byanyunauthorizedservicecenter. This warrantyisvoidedif (i)theproducthasbeen
modifiedorrepairedbyanyunauthorizedservicecenter,(ii)theproductwassubjecttoaccident,
abuse, or improper use (iii) the product was subject to conditions more severe than those
specifiedinthemanual.
Warranty service may be obtained by contacting TRENDnet within the applicable warranty
period and providing a copy of the dated proof of the purchase. Upon proper submission of
requireddocumentationaReturnMaterialAuthorization(RMA)numberwillbeissued.An RMA
number is required in order to initiate warranty service support for all TRENDnet products.
ProductsthataresenttoTRENDnetforRMAservicemusthavetheRMAnumbermarkedonthe
outsideofreturnpackagesandsenttoTRENDnetprepaid,insuredandpackagedappropriately
forsafeshipment.Customersshippingfrom outsideoftheUSAandCanadaareresponsiblefor
return shipping fees. Customers shipping from outside of the USAare responsible for custom
charges,includingbutnotlimitedto,duty,tax,andotherfees.

11
WARRANTIES EXCLUSIVE: IF THE TRENDNET PRODUCT DOES NOT OPERATE AS
WARRANTED ABOVE, THE CUSTOMER'S SOLE REMEDY SHALL BE, AT TRENDNET'S
OPTION, REPAIR OR REPLACE. THE FOREGOING WARRANTIES AND REMEDIES ARE
EXCLUSIVEANDARE IN LIEU OFALL OTHER WARRANTIES, EXPRESSED OR IMPLIED,
EITHERINFACTORBYOPERATION OFLAW, STATUTORYOR OTHERWISE, INCLUDING
WARRANTIES OF MERCHANTABILITY AND FITNESS FOR A PARTICULAR PURPOSE.
TRENDNET NEITHER ASSUMES NOR AUTHORIZES ANY OTHER PERSON TO ASSUME
FOR IT ANY OTHER LIABILITY IN CONNECTION WITH THE SALE, INSTALLATION
MAINTENANCEORUSEOFTRENDNET'SPRODUCTS.
TRENDNET SHALL NOT BE LIABLE UNDER THIS WARRANTY IF ITS TESTING AND
EXAMINATION DISCLOSE THAT THE ALLEGED DEFECT IN THE PRODUCT DOES NOT
EXISTORWASCAUSEDBYCUSTOMER'SORANYTHIRDPERSON'SMISUSE,NEGLECT,
IMPROPER INSTALLATION OR TESTING, UNAUTHORIZED ATTEMPTS TO REPAIR OR
MODIFY, OR ANYOTHER CAUSE BEYOND THE RANGE OFTHE INTENDED USE, OR BY
ACCIDENT,FIRE,LIGHTNING,OROTHERHAZARD.
LIMITATION OF LIABILITY: TO THE FULL EXTENT ALLOWED BY LAW TRENDNET ALSO
EXCLUDES FOR ITSELF AND ITS SUPPLIERS ANY LIABILITY, WHETHER BASED IN
CONTRACTORTORT(INCLUDINGNEGLIGENCE),FOR INCIDENTAL,CONSEQUENTIAL,
INDIRECT,SPECIAL,ORPUNITIVEDAMAGESOFANYKIND,ORFORLOSSOFREVENUE
OR PROFITS, LOSS OF BUSINESS, LOSS OF INFORMATION OR DATE, OR OTHER
FINANCIALLOSSARISINGOUTOFORINCONNECTIONWITHTHESALE,INSTALLATION,
MAINTENANCE, USE, PERFORMANCE, FAILURE, OR INTERRUPTION OF THE
POSSIBILITY OF SUCH DAMAGES, AND LIMITS ITS LIABILITY TO REPAIR,
REPLACEMENT,ORREFUNDOFTHEPURCHASEPRICEPAID,ATTRENDNET'SOPTION.
THIS DISCLAIMER OF LIABILITY FOR DAMAGES WILL NOT BE AFFECTED IF ANY
REMEDYPROVIDEDHEREINSHALLFAILOFITSESSENTIALPURPOSE.
GoverningLaw:ThisLimitedWarrantyshallbegovernedbythelawsofthestateofCalifornia.
SomeTRENDnetproductsincludesoftwarecodewrittenbythirdpartydevelopers.Thesecodes
aresubjecttotheGNUGeneralPublicLicense("GPL")orGNULesserGeneralPublicLicense
("LGPL").
Go to or Download section and look for
the desired TRENDnet product to access to the GPL Code or LGPL Code. These codes are
distributed WITHOUT WARRANTY and are subject to the copyrights of the developers.
TRENDnet does not provide technical support for these codes. Please go to
or for specific terms of
eachlicense.
http://www.trendnet.com/gpl http://www.trendnet.com
http://www.gnu.org/licenses/gpl.txt http://www.gnu.org/licenses/lgpl.txt
PWP05202009v2

Certifications
This equipment has been tested and found to comply with FCC and CE Rules.
Operation is subject to the following two conditions:
(1) This device may not cause harmful interference.
(2) This device must accept any interference received. Including interference that may
cause undesired operation.
NOTE: THE MANUFACTURER IS NOT RESPONSIBLE FORANYRADIO ORTV
INTERFERENCE CAUSED BY UNAUTHORIZED MODIFICATIONS TO THIS
EQUIPMENT. SUCH MODIFICATIONS COULD VOID THE USER’SAUTHORITY TO
OPERATE THE EQUIPMENT.
Waste electrical and electronic products must not
be disposed of with household waste. Please
recyclewherefacilitiesexist. CheckwithyouLocal
AuthorityorRetailerforrecyclingadvice.
ADVERTENCIA
En todos nuestros equipos se mencionan claramente las caracteristicas del adaptador de alimentacón
necesario para su funcionamiento. El uso de un adaptador distinto al mencionado puede producir
daños fisicos y/o daños al equipo conectado. El adaptador de alimentación debe operar con voltaje y
frecuencia de la energia electrica domiciliaria existente en el pais o zona de instalación.

Copyright ©2010. All Rights Reserved. TRENDnet.
Product Warranty Registration
Please take a moment to register your product online.
Go to TRENDnet’s website at http://www.trendnet.com/register
This manual suits for next models
1
Table of contents