manuals.online logo
Brands
  1. Home
  2. •
  3. Brands
  4. •
  5. Troy-Bilt
  6. •
  7. Lawn Mower
  8. •
  9. Troy-Bilt 830 Series User manual

Troy-Bilt 830 Series User manual

Other manuals for 830 Series

3

Other Troy-Bilt Lawn Mower manuals

Troy-Bilt 12AG836E711 Guide

Troy-Bilt

Troy-Bilt 12AG836E711 Guide

Troy-Bilt 13074-GTX 18 Owner's manual

Troy-Bilt

Troy-Bilt 13074-GTX 18 Owner's manual

Troy-Bilt 13A-130F063 User manual

Troy-Bilt

Troy-Bilt 13A-130F063 User manual

Troy-Bilt 13AP91KT563 User manual

Troy-Bilt

Troy-Bilt 13AP91KT563 User manual

Troy-Bilt Wide-Cut E753B User manual

Troy-Bilt

Troy-Bilt Wide-Cut E753B User manual

Troy-Bilt 466 User manual

Troy-Bilt

Troy-Bilt 466 User manual

Troy-Bilt 466 User manual

Troy-Bilt

Troy-Bilt 466 User manual

Troy-Bilt J860 Series User manual

Troy-Bilt

Troy-Bilt J860 Series User manual

Troy-Bilt Super Bronco User manual

Troy-Bilt

Troy-Bilt Super Bronco User manual

Troy-Bilt Smart Touch 569 User manual

Troy-Bilt

Troy-Bilt Smart Touch 569 User manual

Troy-Bilt 809 User manual

Troy-Bilt

Troy-Bilt 809 User manual

Troy-Bilt 546 User manual

Troy-Bilt

Troy-Bilt 546 User manual

Troy-Bilt 998Q User manual

Troy-Bilt

Troy-Bilt 998Q User manual

Troy-Bilt LTX-1842 User manual

Troy-Bilt

Troy-Bilt LTX-1842 User manual

Troy-Bilt 12AI839 Series Guide

Troy-Bilt

Troy-Bilt 12AI839 Series Guide

Troy-Bilt Automatic Lawn Tractor User manual

Troy-Bilt

Troy-Bilt Automatic Lawn Tractor User manual

Troy-Bilt T-106 User manual

Troy-Bilt

Troy-Bilt T-106 User manual

Troy-Bilt TB16R User manual

Troy-Bilt

Troy-Bilt TB16R User manual

Troy-Bilt 11A-436N063 User manual

Troy-Bilt

Troy-Bilt 11A-436N063 User manual

Troy-Bilt TBE304 User manual

Troy-Bilt

Troy-Bilt TBE304 User manual

Troy-Bilt 80 User manual

Troy-Bilt

Troy-Bilt 80 User manual

Troy-Bilt J609H User manual

Troy-Bilt

Troy-Bilt J609H User manual

Troy-Bilt TB200 User manual

Troy-Bilt

Troy-Bilt TB200 User manual

Troy-Bilt PONY User manual

Troy-Bilt

Troy-Bilt PONY User manual

Popular Lawn Mower manuals by other brands

Toro 20047 Operator's manual

Toro

Toro 20047 Operator's manual

Toro Greensmaster TriFlex 3300 Operator's manual

Toro

Toro Greensmaster TriFlex 3300 Operator's manual

Global garden products 72 Workshop manual

Global garden products

Global garden products 72 Workshop manual

EINHELL 01045 operating instructions

EINHELL

EINHELL 01045 operating instructions

Toro Greensmaster 3120 Operator's manual

Toro

Toro Greensmaster 3120 Operator's manual

Baroness LM315GC Owner's operating manual

Baroness

Baroness LM315GC Owner's operating manual

GreenWorks Tools 25157 user manual

GreenWorks Tools

GreenWorks Tools 25157 user manual

Etesia MVEHH user manual

Etesia

Etesia MVEHH user manual

Husqvarna LTH125 owner's manual

Husqvarna

Husqvarna LTH125 owner's manual

Gravely 915034 - ZT1640 Owner's/operator's manual

Gravely

Gravely 915034 - ZT1640 Owner's/operator's manual

Jacobsen 63281 Technical manual

Jacobsen

Jacobsen 63281 Technical manual

GreenWorks Pro MO802524 Operator's manual

GreenWorks Pro

GreenWorks Pro MO802524 Operator's manual

Toro TimeMaster 20976 Operator's manual

Toro

Toro TimeMaster 20976 Operator's manual

Deutz-Allis 3000 Series parts manual

Deutz-Allis

Deutz-Allis 3000 Series parts manual

Craftsman 917.9998C owner's manual

Craftsman

Craftsman 917.9998C owner's manual

jobmate YT9108 user manual

jobmate

jobmate YT9108 user manual

Yard force GM R40A instructions

Yard force

Yard force GM R40A instructions

Husqvarna R 419TsX AWD Operator's manual

Husqvarna

Husqvarna R 419TsX AWD Operator's manual

manuals.online logo
manuals.online logoBrands
  • About & Mission
  • Contact us
  • Privacy Policy
  • Terms and Conditions

Copyright 2025 Manuals.Online. All Rights Reserved.

Safety • AssembJy • Operation • Tips &Techniques • Maintenance • TroubJeshooting • Parts Lists =Warranty
0A OR'S MANUAL
®
m m Iw m _ i_m
'Shownwith OptionalElectricStart
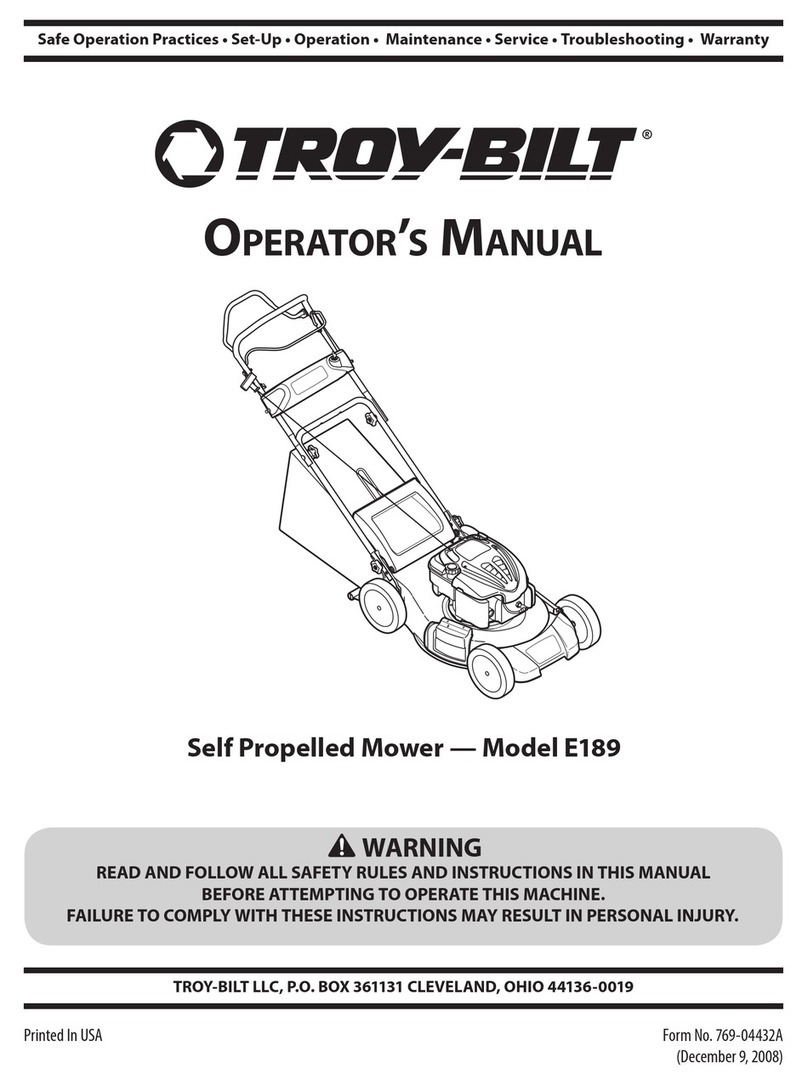
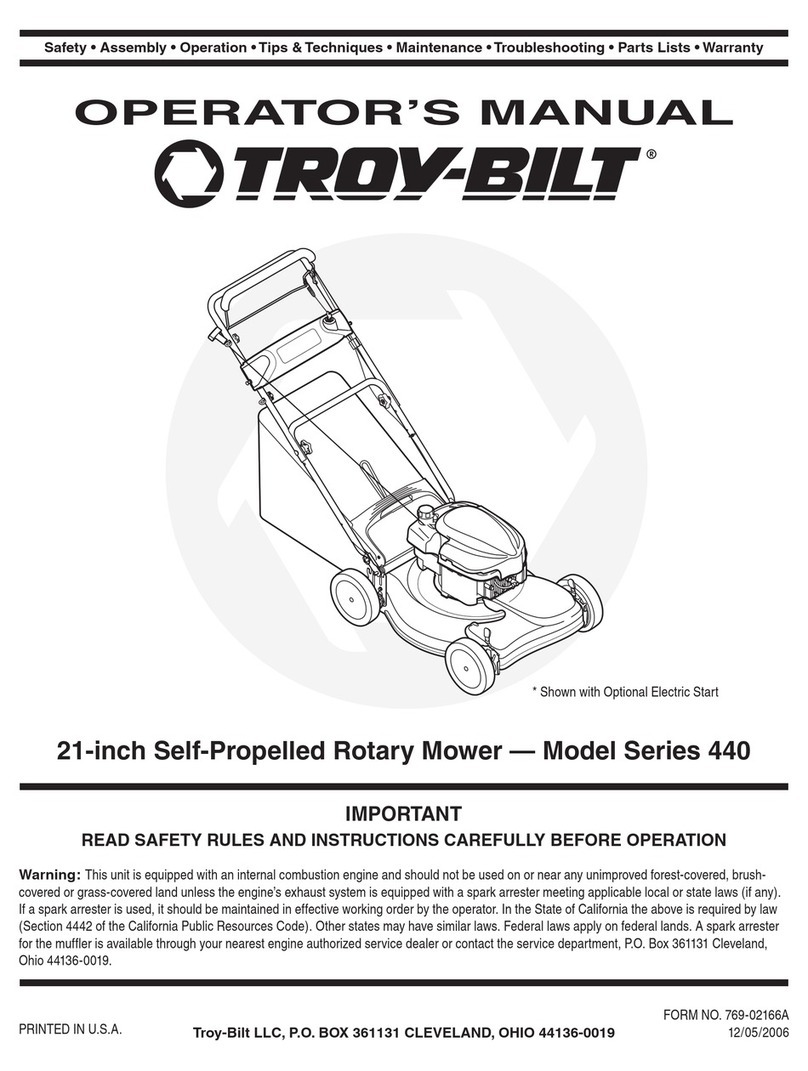
21-inch Rotary Mower -- Model Series 830
IMPORTANT
READ SAFETY RULES AND iNSTRUCTiONS CAREFULLY BEFORE OPERATION
Warning: Thisunitisequippedwithan internalcombustionengineandshouldnotbeusedon or nearanyunimprovedforest-covered,brush-
coveredor grass-coveredlandunlesstheengine'sexhaustsystemisequippedwitha sparkarrestermeetingapplicablelocalorstatelaws(ifany).
If a sparkarresterisused,itshouldbemaintainedineffectiveworkingorderbytheoperator.Inthe StateofCaliforniatheaboveisrequiredbylaw
(Section4442oftheCaliforniaPublicResourcesCode).Otherstatesmayhavesimilarlaws.Federallawsapplyonfederallands.A sparkarrester
forthemufflerisavailablethroughyournearestengineauthorizedservicedealeror contacttheservicedepartment,RO.Box361131Cleveland,
Ohio44136-0019.
FORMNO.769-02163A
PRINTEDIN U.S.A TROY-BILT LLC, P.O. BOX 361131 CLEVELAND, OHIO 44136-0019 12/14/2006
This Operator's Manual is an important part of your new lawn mower, it will help you assemble,
prepare, and maintain the unit for best performance. Please read and understand what it says.
Table of Contents
Slope Gauge ........................................................ 3
Safe Operation Practices ................................... 4
Setup and Adjustment ....................................... 6
Operating Your Lawn Mower .............................. 8
Maintaining Your Lawn Mower ......................... 10
Troubleshooting ................................................ 14
Off=Season Storage and Safety Labels .......... 15
Parts List ........................................................... 16
Troy-BiltLLCreservestherighttochangeproductspecifications,designs,andequipmentwithoutnoticeandwithoutincurringobligation.
Finding and Recording lVlodel Number
BEFOREASSEMBLINGYOURNEWEQUIPMENT,
pleaselocatethe modelplateon the equipmentand
copythe informationto the samplemodelplatepro-
videdto the right.Youcan locatethe modelplateby
standingattheoperatingpositionand lookingdown
atthe rearofthe deck.Thisinformationwillbe neces-
saryto usethemanufacturer'swebsite,to obtain
assistancefromtheCustomerSupportDepartment,
orwhen contactingan authorizedservicedealer.
P. O. BOX 361131
www.troybilt.com CLEVELAND, OH44136
330-558-7220
866=840=6483
Customer Support
Please do NOTreturn the unit to the retailer from which it was
purchased, without first contacting Customer Support.
Ifyou havedifficultyassemblingthisproductorhaveanyquestionsregardingthe controls,operation,or
maintenanceof this unit,you canseek helpfromtheexperts.Choosefromthe optionsbelow:
.Visitwww.troybilt.corn
0
0
Phonea CustomerSupport Representativeat 1-866-840-6483.
The enginemanufactureris responsiblefor allengine-relatedissues with regardto performance,power-rating,specifications,
warranty,and service. Pleasereferto the enginemanufacturer'sOwner's/Operator's Manual,packedseparatelywith your
unit, for more information.
2
09
(D
0
_d
c
>.
E
o>.
I:D
-C
GO
CD
09
I:D
C
(D
o
(D
Ob
09
I:D
E)b
(D
GO
05
CD
o03
-5
03
0
0
E
c
o>.
0
o
o
Sight and hold this levelwith a vertical tree...
|
15°
WARNING: EngineExhaust,some of its constituents,and certainvehiclecornpo-
nents containor emit chemicals knownto Stateof Californiatocause cancerand
birth defectsorother reproductiveharm.
DANGER: Thismachinewas builtto be operatedaccordingto the rulesfor safeoperationin this
manual.As with any type of powerequipment,carelessnessorerror onthe partof the operator
can resultin seriousinjury.Thismachine iscapable ofamputating handsand feet and throwing
objects. Failuretoobserve the followingsafety instructionscould resultin seriousinjury or death.
iWARNING
I Thissymbolpoints
outimportantsafety
instructionswhich,if
notfollowed,could
endangerthe personal
safetyand/or property
i ofyourselfandothers
Readandfollowall
instructionsinthis
manualbeforeat-
i temptingto operate
i this machine.Failure
i to complywiththese
i instructionsmay result
i in personalinjury.When
youseethis symbol.
HEED iTS WARNING!
Your Responsibility
Restrictthe use
ofthis powermachine
to personswho read.
understand
i andfollow the warnings
and instructions
i inthis manual
I andon the machine.
Children
Tragicaccidentscan occurifoperatorisnotalerttopresence
ofchildren.Childrenareoftenattractedto mowerandmowing
activity.Theydonot understandthe dangers.Neverassume
thatchildrenwill remainwhereyoulastsawthem.
1. Keepchildrenoutofthe mowingareaandunderwatchful
careof aresponsibleadultotherthanthe operator.
2. Bealertandturnmoweroffif achildentersthearea.
3. Beforeand whilemovingbackwards,lookbehindanddown
forsmallchildren.
4. Useextremecarewhenapproachingblindcorners,
doorways,shrubs,trees,orotherobjectsthatmayobscure
yourvisionofachildwhomayrunintothemower.
5. Keepchildrenawayfromhot orrunningengines.Theycan
sufferburnsfroma hotmuffler.
6. Neverallowchildrenunder14yearsoldtooperateapower
mower.Children14yearsold andovershouldreadand
understandoperationinstructionsandsafetyrulesin this
manualandshouldbetrainedandsupervisedbya parent.
General Operation
1. Readthis operator'smanualcarefullyin its entiretybefore
attemptingtoassemblethismachine.Read,understand,
andfollow allinstructionsonthe machineandin the
manual(s)beforeoperation.Becompletelyfamiliarwith
thecontrolsandthe properuseofthismachinebefore
operatingit.Keepthis manualin a safeplaceforfuture
andregularreferenceandfor orderingreplacementparts.
2. Thismachineisa precisionpieceof powerequipment,
nota plaything.Therefore,exerciseextremecautionat all
times.Yourunithasbeendesignedto performonejob: to
mowgrass.Do notuseit for anyotherpurpose.
3. Neverallowchildrenunder14yearsoldto operatethis
machine.Children14yearsoldandovershouldreadand
understandthe instructionsinthismanualandshould
betrainedandsupervisedbya parent.Onlyresponsible
individualswhoarefamiliarwiththeserulesofsafe
operationshouldbeallowedtousethis machine.
4. Thoroughlyinspectthe areawherethe equipmentisto
beused.Removeall stones,sticks,wire,bones,toys
andotherforeignobjects,which couldbetrippedoveror
pickedupandthrownbythe blade.Thrownobjectscan
causeseriouspersonalinjury.Planyourmowingpattern
toavoiddischargeofmaterialtowardroads,sidewalks,
bystandersandthe like.Also,avoiddischargingmaterial
againsta wallor obstruction,whichmaycausedischarged
materialto ricochetbacktowardthe operator.
5. Tohelpavoidbladecontactora thrownobjectinjury,
stayinoperatorzone behindhandlesandkeepchildren,
bystanders,helpersandpetsatleast75feet frommower
whileit isin operation.Stopmachineifanyoneenters
6. Alwayswearsafetyglassesor safetygogglesduringopera-
tionandwhile performinganadjustmentor repairtoprotect
youreyes.Thrownobjectswhichricochetcancauseserious
injurytothe eyes.
7. Wearsturdy,rough-soledworkshoesand close-fitting
slacksandshirts. Shirtsand pantsthat coverthe armsand
legsandsteel-toedshoesarerecommended.Neveroperate
this machinein barefeet,sandals,slipperyor light-weight
(e.g.canvas)shoes.
8. Do notputhandsorfeet nearrotatingpartsor undercutting
deck.Contactwithbladecanamputatehandsandfeet.
9. A missingor damageddischargecovercancauseblade
contactor thrownobject injuries.
10.Manyinjuriesoccurasa resultofthe mowerbeingpulled
overthefoot duringafall causedby slippingortripping.
Do notholdontothe mowerifyouare falling;releasethe
handleimmediately.
11.Neverpullthe mowerbacktowardyouwhileyouare
walking.If youmustbackthe mowerawayfromawallor
obstructionfirstlookdownandbehindtoavoidtrippingand
thenfollowthesesteps:
a. Stepbackfrommowertofully extendyourarms.
b. Besureyou arewellbalancedwithsurefooting.
c. Pullthe mowerbackslowly,no morethanhalfway
towardyou.
d. Repeatthesestepsasneeded.
12.Do notoperatethe mowerwhileunderthe influenceof
alcoholor drugs.
13.Do notengagethe self-propelledmechanismon unitsso
equippedwhilestartingengine.
14.Thebladecontrolhandleisa safetydevice.Neverattempt
tobypassits operation.Doingsomakesthe safetydevice
inoperativeandmay resultinpersonalinjurythrough
contactwiththe rotatingblade.The bladecontrolhandle
mustoperateeasilyin bothdirectionsandautomatically
returntothe disengagedpositionwhenreleased.
15.Neveroperatethe mowerinwet grass.Alwaysbe sureof
yourfooting. Aslipand fallcan causeseriouspersonal
injury.Ifyoufeelyouarelosingyourfooting,releasethe
bladecontrolhandleimmediatelyandthe bladewillstop
rotatingwithinthreeseconds.
16.Mowonlyindaylightor goodartificiallight.Walk,neverrun.
17.Stopthe bladewhencrossinggraveldrives,walksor roads.
18.If the equipmentshouldstarttovibrateabnormally,stopthe
engineandcheckimmediatelyforthe cause.Vibrationis
generallyawarningoftrouble.
area.
4
19.Shuttheengineoffand waituntilthe bladecomestoa 6. Extinguishallcigarettes,cigars,pipesandothersources
completestopbeforeremovingthegrasscatcherorunclog-
gingthe chute.
Thecuttingbladecontinuesto rotatefora fewsecondsafter
the engineisshutoff. Neverplaceany partofthe body in
the bladeareauntilyouaresurethe bladehasstopped
rotating.
20. Neveroperatemowerwithoutpropertrail shield,discharge
cover,grasscatcher,bladecontrolhandleorothersafety
protectivedevicesin placeandworking.Neveroperate
mowerwith damagedsafetydevices.Failureto dosocan
resultin personalinjury.
21. Mufflerandenginebecomehotandcancause aburn.Do
nottouch.
22.Only usepartsandaccessoriesmadeforthismachineby
manufacturer.Failuretodo socan resultin personalinjury.
23. Ifsituationsoccurwhichare notcoveredinthis manual,
usecareandgoodjudgment.Contactyourdealerfor
assistance.
Slope Operation
Slopesare amajorfactorrelatedto slip andfall accidents,which
can resultin severeinjury.Operationonslopesrequiresextra
caution.Ifyoufeel uneasyon aslope,do notmowit. Foryour
safety,usetheslopegaugeincludedaspartofthismanualto
measureslopesbeforeoperatingthisunitona slopedor hilly
area.If theslopeisgreaterthan15degrees,donot mowit.
Do:
1. Mowacrossthefaceofslopes;neverupanddown.Exercise
extremecautionwhenchangingdirectiononslopes.
2. Watchfor holes,ruts,rocks,hiddenobjects,or bumps
whichcancauseyouto slipor trip.Tallgrass canhide
obstacles.
3. Alwaysbesureofyourfooting.A slipand fallcan cause
seriouspersonalinjury.Ifyoufeelyou arelosingyour
balance,releasethe bladecontrolhandleimmediately,and
the bladewill stoprotatingwithin3 seconds.
Do Not:
1. Donotmowneardrop-offs,ditchesor embankments,you
couldloseyourfootingor balance.
2. Donotmowslopesgreaterthan 15degreesasshownon
the slopegauge.
3. Donotmowonwet grass.Unstablefootingcouldcause
slipping. Service
Safe HandlingOf Gasoline:
1. Toavoidpersonalinjuryor propertydamageuseextreme
carein handlinggasoline.Gasolineis extremelyflammable
andthevaporsareexplosive.Seriouspersonalinjurycan
occurwhengasolineisspilledonyourselforyourclothes,
which canignite.Washyourskin andchangeclothes
immediately.
2. Useonlyan approvedgasolinecontainer.
3. Neverfillcontainersinsideavehicleoron atruckortrailer
bedwitha plasticliner.Alwaysplacecontainersonthe
groundawayfromyourvehiclebeforefilling.
4. Removegas-poweredequipmentfromthe truckor trailer
andrefueliton theground.If thisis notpossible,then refuel
suchequipmenton atrailerwitha portablecontainer,rather
thanfromagasolinedispensernozzle.
5. Keepthenozzlein contactwiththe rimof thefueltank or
containeropeningatall timesuntilfuelingiscomplete.Do
notuseanozzlelock-opendevice.
ofignition.
7. Neverfuel machineindoorbecauseflammablevaporswill
accumulatein the area.
8. Neverremovegascap oradd fuelwhileengineishot or
running. Allowengineto coolatleasttwo minutesbefore
refueling.
9. Neveroverfillfueltank.Filltankto nomorethan_f2inch
belowbottomoffillerneckto providefor fuelexpansion.
10.Replacegasolinecapandtightensecurely.
11.If gasolineis spilled,wipeit offthe engineand equipment.
Moveunitto anotherarea.Wait5 minutesbeforestarting
engine.
12.Neverstorethe machineorfuel containernearanopen
flame,sparkorpilotlightas onawaterheater,space
heater,furnace,clothesdryeror othergasappliances.
13.Toreducefire hazard,keepmowerfreeofgrass,leaves,
or otherdebrisbuild-up.Cleanupoil orfuel spillageand
removeanyfuel soakeddebris.
14.Allowamowertocoolat least5 minutesbeforestoring.
General Service:
1. Neverrunanengineindoorsor inapoorlyventilatedarea.
Engineexhaustcontainscarbonmonoxide,an odorless
anddeadlygas.
2. Beforecleaning,repairing,or inspecting,makecertainthe
bladeandall movingpartshavestopped.Disconnectthe
sparkplugwireandgroundagainsttheengineto prevent
unintendedstarting.
3. Checkthe bladeandenginemountingboltsatfrequent
intervalsforpropertightness.Also,visuallyinspectblade
fordamage(e.g.,bent,cracked,worn)Replacebladewith
theoriginalequipmentmanufacture's(O.E.M.)bladeonly,
listedin thismanual."Useof partswhich donotmeetthe
originalequipmentspecificationsmayleadto improper
performanceandcompromisesafety!"
4. Mowerbladesaresharpandcancut.Wrapthebladeor
weargloves,anduseextracautionwhenservicingthem.
5. Keepallnuts,bolts,andscrewstight tobesurethe equip-
mentisin safeworkingcondition.
6. Nevertamperwithsafetydevices.Checktheirproper
operationregularly.
7. Afterstrikinga foreignobject,stopthe engine,discon-
nectthe sparkplugwireandgroundagainsttheengine.
Thoroughlyinspectthe mowerfor anydamage.Repairthe
damagebeforestartingandoperatingthe mower.
8. Neverattempttomakeawheelorcuttingheightadjust-
mentwhilethe engineis running.
9. Grasscatchercomponents,dischargecover,and trail
shieldaresubjecttowearanddamagewhichcould
exposemovingpartsor allowobjectstobethrown.For
safetyprotection,frequentlycheckcomponentsand re-
placeimmediatelywithoriginalequipmentmanufacturer's
(O.E.M.)partsonly,listedinthismanual."Useofparts
whichdo notmeetthe originalequipmentspecifications
mayleadtoimproperperformanceand compromise
safety!"
10.Donot changetheenginegovernorsettingor over-revthe
engine.Thegovernorcontrolsthe maximumsafeoperating
speedofthe engine.
11.Maintainor replacesafetylabels,as necessary.
12.Observeproperdisposallawsand regulations.Improper
disposaloffluidsand materialscanharmtheenvironment.
Ii =
Pract=ces
WARNING
This symbol points
out importantsafety
instructions,which if
notfollowed,could
endangerthe personal
safety and/or property
of yourself and others.
Readand followall
instructionsin this man-
ual beforeattemptingto
operatethis machine.
Failureto complywith
these instructions may
resultin personalinjury.
Whenyou seethis
symbol.
HEED IT'S WARNING!
Your Responsibility
Restrictthe use
of thispowermachine
to personswho read.
understand
and followthe warnings
ana instructions
in this manual
and onthe machine.
\
5

.
1. Removegrasscatcherand anypacktngmatertal
"_ whichmaybe betweenupperandlowerhandles.
L,,_ a. Removehandknobsfromhandlemountmg
[--__9 )bracketsand pullupandbackonupperhandle
asshowntnRgure3-1.Makecertatnthelower
handleisseatedsecurelyintothehandlemounting
,_ _ _ brackets.
etupand b Tightenhandknobssecuringupperhandleto
,_ ,," - .. lowerhandle.Makesurethateachcarriageboltis
Aa =us ment seatedproperlytnthehandle.
2. Replaceandtightenhandknobsremovedearlier
securinglowerhandleto handlebrackets,Figure3-2.
NOTE:ThisOperator's
Manual coversseveral
models.Lawn Mower
featuresvary by
model.Not all features
discussed (orengines
pictured) in this manual
are applicableto all
LawnMower models.
NOTE:Stand behind
the mower as ifyou
were goingto operate
it. Yourrighthandcor-
respondsto the right
sideof the mower;your
eft handcorresponds
to the left side ofthe
mower.
NOTE: Forshipping
I purposesyour mower
i is setwith the wheels
qa low cutting height
position.Forbest
results raisethe cutting
positionuntil it isdeter-
minedwhich height is
best for your lawn.refer
toAdjustment section
for instructions.
iMPORTANT
i DO NOTcrimpthe
cableswhen liftingthe
handle up.
Figure3-1:Unfoldhandleandtightenhardware.
f
Figure3-2:Securehandleto handlemountingbrackets.
3. Theropeguideisattachedtotherightsideofthe
upperhandle.Loosenthewingnutwhichsecuresthe
ropeguide.SeeFigure3-3.
a. Holdthebladecontrolagainstupperhandle.
b. Pullstarterropeoutoftheengine.Releasethe
bladecontrol.
c. Slipstarterropeintoropeguide.
d. Tightenwingnut.
4. Securecablestothelowerhandleusingthecabletie.
Pullcabletietightandcutoff excess.
5. Toassemblethegrasscatcher(ifneeded),placebag
overframewiththeblackplasticsideatthebottom.
Slipplasticchanneloverhooksonframe.All channels
exceptforcentertopofbagattachfromtheoutside.
Thecenterofbagattachesfromtheinside.
6. Beforeattachingthegrasscatcher,themulching
bafflemustberemoved.RefertoFigure3-5.
a. Lift reardischargedoor.
b. Removemulchingbaffle.
7. Toattachgrasscatcher,refertoFigure3-4.
a. Lift reardischargedoor.
b. Placegrasscatcheronthepivotrod.Letgo
ofdischargedoorsothatit restsonthegrass
catcher.
,\
\\ \\
Figure3-3:Pull recoilstarterthroughropeguideandtighten. \ J
Figure3-4:Liftdischargedoorandplacegrasscatcheronrod.
6
WARNING:Neveroperate mowerunless 10.Toconverttosidedischarge,makesuregrass
the hooks on the grass catcher arefirmly catcherisoff oftheunitandreardischargedooris
seatedon the pivotrod and the rear closed.
dischargedoorrestsfirmly againsttop of the grass
catcher.
8. ThebatterypackwithintheElectricStartermustbe
charged8to 10hoursbeforeuse.Referto"Charging
Battery"in theMaintenancesectionforinstructions.
9. Followthestepsbelowtoinstallthemulchingbaffle:
a. Liftthereardischargedoorandliftthegrass
catcherupandoff ofthepivotrod,if installed.
b. InsertthemulchingbaffleasshowninFigure3-5
and releasethereardischargedoor.
a. Onthesideof themower,lift themulchingplug.
b. Slidetwo hookson sidedischargechuteunder
hingepinonmulchingplugassembly.SeeFigure
3-6.Lowerthemulchingplug.Donotremove
sidemulchingplugatanytimeevenwhenyou
arenotmulching. Setup and
f -_ r
J
Figure3-5:Themulchingbaffle Figure3-6:Installingthesidedischargechute.
Adjustments
Cutting Height
Thecuttingheightadjustmentleverislocatedabovethe
rearleft wheel.SeeFigure3-7.
a. Pulltheleveroutandawayfromthe mower.
b. Movethe leverforwardor backfordesiredcutting
height.
c. Releaselevertowardsmowerdeck.
Drive Control
Theadjustmentwheelislocatedin thedrivecontrol
handlehousingand isusedtotightenor loosenthe
drivebelt.Youwillneedto adjustthedrivecontrolif
themowerdoesnotpropelitselfwiththedrivecontrol
engagedor ifthemower'swheelshesitatewiththedrive
controlengaged.If eitheroftheseconditionsoccur,
WARNING
Never operate mower
unless the hooks on
the grass catcherare
firm!y seated on the
pivot rod and the rear
discharge door rests
firmly against top of
the grass catcher.
rotatetheadjustmentwheelclockwiseto tightenthe
cableorcounterclockwiseto loosenthecable.See
Figure3-8. CUTTING HEIGHT
f'- For roughoruneven
lawns movethe height
adjustmentleverto a
higher position.This will
helpprevent scalpingof
the grass.
IDRIVE CONTROL
'pl,Forsome peo ethe
'dr! cont ot
Me ro!mayn
be in acomfortable
position Youcan adjust
thehandle byt_ghten_ng
Figure3-8:Theadjustmentwheelonthedrivecontrol, the adjustmentwheel.
7
KnowYour Lawn Mower
0erat|n
P g i
Your Lawn
-w-r
WARNING
Made controJ
mechanism is
safety device: NeVer
attempt to bypass its
operations. i
Use extreme care i
when handing
gas01me.Gasol!ne is
extremelyflammable
and the vapors are
explosive.Neverfuel
the machme mdoors
lor wh"etheeng'ne
lishot or running
Exbngu_shc_garettes,
c=gars,pipesand
other sources of
igntion
l
IMPORTA
f DriveContr01 "_
Xx4 C0ntrol
Startert
HeightAdjustmentLever
1 ShownwithOptional
ElectricStart
Figure4-1:Themajorcomponentsonthemower.
Nowthat youhavesetupyourlawnmowerforoperation, Mulching Plug
it'simportanttobecomeaquaintedwith itscontrolsand The mulchingplugisusedformulchingpurpose.Instead
features, ofcollectingthegrassclippingsin thegrasscatcher,your
mowerhastheoptionofrecirculatingtheclippingsback
Blade Control tothelawn.Makesurethatthereardischargedooris
The bladecontrolisattachedtotheupperhandleof closedandthegrasscatcherisremovedfromunitwhile
themower.Depressandsqueezeitagainsttheupper mulching.
handletooperateunit.Release ittostopengineand
blade. Electric Starter (if Equipped)
The ignitionswitchislocatedon theleftsideofthe
WARNING:The bladecontrolisa safety electricstarterhandlepanel.Itis necessarytochargethe
device. Donot bypassitsoperation, batteryfor8 to 10hoursbeforeinitialuse.Refertothe
Maintenancesectionformoreinformation.
Drive Control
Thedrivecontrolislocatedontheupperhandle. Gas and Oil Fill-Up
Squeezethedrivecontrolleverto engagethedrive
system.Releaseittodisengagethedrivesystem.To 1. Checkoil levelandaddoil if necessary.Followengine
manualforthis.
slowdownwhenapproachingan obstacle,makinga
turn,or stopping,releasethelever. 2. Servicetheenginewithgasolineasinstructedinthe
This unit isshipped enginemanual.SeeEnginemanualforlocationof gas
without gasolineor Cutting Height Adjustment Lever andoilfill.
o n the eng ne F Thecuttingheightadjustmentleverislocatedabovethe
. . _ WARNING:Useextremecarewhen
up gaso!lne andon! _ Adjustmentleftrearwheel.section.TOadjustthecuttingheight,referto the _ handling gasoline. Gasoline isextremely
flammable andthe vaporsare explosive.
as instructedIntl
accompanyingengine Recoil Starter Neverfuel the machine indoorsor while the engineis
manual BEFORE hot or running Extinguish cigarettes, cigars, pipes
• The recoilstarterisattachedtotherightupperhandle. " • " . ".. " " "
eratln our mower and other sources of _gmt_on
op g y •Standbehindtheunitandpullthe recoilstarterropeto
startthe unit
8
_ARNING:Theoperationofany lawn
mower canresultinforeign objects being
thrown intothe eyes,whichcandamage
youreyesseverely.Alwayswearsafetyglasses
whileoperating the moweror whileperformingany
adjustments or repairs on it.
Starting Engine
,_ WARNING:Be sure no one otherthan the
operator isstanding near the lawnmower
while starting engineor operatingmower.
Never run engineindoorsor inenclosed,poorly
ventilated areas. Engine exhaustcontains carbon
monoxide, an odorless and deadlygas. Keephands,
feet, hair and looseclothing awayfrom anymoving
partson engineand lawnmower.
1. Pushprimer(ifequipped)threetimes.Waitabout
two secondsbetweeneachpush.SeeFigure4-2.In
temperaturearound55°For below,primefivetimes.
Donotprimetorestarta warmengine.
2. Standingbehindthe mower,squeezethebladecontrol
againstupperhandle.SeeFigure4-2.
3. Recoil Start: Grasprecoilstarterhandleandpull
ropeoutwitha rapid,continuous,fullarmstroke.See
Figure4-2.Keepinga firmgripon thestarterhandle,
lettheroperewindslowly.Repeatuntilenginecranks.
Lettheroperewindeachtimeslowly.
Electric Start (If Equipped): Turnignitionkeytothe
righttostarttheengine.SeeFigure4-2.Releasethe
keyaftertheenginestarts.
Honda Engine (if Equipped):
1. Placethefuelvalveleverfoundontheleft sideofthe
engineintotheON(OPEN)position.
2. Movethechokelever(Ifequipped)alltheway
backwardintothechokeposition.SeeFigure4-2
inset.
3. Standingbehindthe mower,squeezethebladecontrol
againstupperhandleasshownin Figure4-2.The
chokewill nowbegintoslowlyreturntotheoffchoke
positionafteractivatingthebladecontrol.Therefore,
quicklymoveontostepfourbelow.
4. Holdingthesetwo handlestogetherfirmly,grasprecoil
starterhandleand pullropeoutwitha rapid,continu-
ous,fullarmstroke.Keepingafirm griponthestarter
handlelettheroperewindslowly.Repeatuntilengine
cranks.Lettheroperewindeachtimeslowly.
,_ WARNING:Wait for the bladeto stop
completely before performing any work
on the mower or to removethe grass
catcher.
Stopping Engine
1. Releasebladecontroltostoptheengineandblade.
2. Disconnectsparkplugwirefromsparkplugand
groundagainsttheengine.
0perat |n_q
Your Lawn
MOWer
Ii
\
Figure4-2:Startingthemower.
Using Your Lawn Mower
J
,_ WARNING:Neveroperate your mower
without either the rear door or the entire
grass catcherassembly firmly secured.
Besurelawnisclearofstones,sticks,wire,or other
objectswhichcoulddamagelawnmoweror engine.
Suchobjectscouldbeaccidentlythrownbythe mower
inanydirectionandcauseseriouspersonalinjurytothe
operatorandothers.
_ARNING:Ifyou strike aforeign object,
stop the engine.Removewirefrom the
spark plug, thoroughly inspectmower
for anydamage,and repair damagebefore restart-
ingand operating. Extensive vibration of mower
during operationisan indicationof damage.The
unit should be promptlyinspectedand repaired.
Using as Mulcher
Formulchinggrass,removethegrasscatcherandside
dischargechutefromthemower.Foreffectivemulching,
do notcutwetgrass.If thegrasshasbeenallowedto
growin excessoffourinches,mulchingisnotrecom-
mended.Usethegrasscatchertobagclippingsinstead.
Using Grass Catcher
Youcanusethegrasscatchertocollectclippingswhile
youareoperatingthemower.Refertosetupsectionfor
instructionson attachingthegrasscatcher.
WARNING
The operation of any
lawn mower can result
, = •
in foreign objects
being thrown into
the eyes,which can
damage your eyes
severely. Nways wear
safety glasseswhile
operatingthe mower,
or while performing
any adjustments or
repairs on it.
Be sureno one other
than the operatoris
standing near the
lawn mower while
starting engineor
operating mower.
Never run engine in-
doors or in enclosed,
poorlyventilated
areas. Engine exhaust
contains carbon
monoxide, an odor-
less and deadly gas.
Keep hands, feet, hair
'and looseclothing
away from any moving
parts on engine and
lawn mower.
9
"x Lubrication
I _ 1. Lubricatepivotpointson thebladecontrolat least
_"_ oncea seasonwth ghto Thebade centre must
l
l
l
Figure5-1:Lubricationareasonthemower.
FliNG
d'sconnect spark p ug,
and groundagainst
engine before clean,
ing' lubricating,or
performing any kind of
maintenance on your
l
operatefreelyinbothdirections.SeeFigure5-1.
2. Lubricatethewheelsatleastoncea seasonwith
lightoil (or motoroil). Ifwheelsare removedforany
reason,lubricatesurfaceoftheaxleand innersurface
ofthewheelwith lightoil.
3. Lubricatethetorsionspringandpivotpointontherear
dischargedoorandsidemulchplugperiodicallywith
lightoil topreventrust.SeeFigure5-1.
4. Thetransmissionis pre-lubricatedandsealedatthe
factoryanddoesnotrequirelubrication.
5. Followtheaccompanyingenginemanualforlubrica-
tionscheduleandinstructionforenginelubrication.
Deck Care
1. Disconnectsparkplugwire.Draingasolinefromlawn
mowerorplacea pieceof plasticunderthegascap.
2. Tipmowersothat itrestson thehousing.Keepthe
sidewiththeaircleanerfacingup.Holdmowerfirmly.
_ ARNING:Nevertip the mower more
than 90degrees inany directions and do
not leavethe mowertipped for any length
of time. Oil candrain intothe upper partofthe engine
causing a starting problem.
3. Scrapeandcleantheundersideofthedeckwitha
suitabletool.Donotspraywithwater.
4. Putthemowerbackonits wheelsontheground.If
youhadputplasticunderthegascapearlier,make
suretoremoveitnow.
IMPORTANT:The use "
of a pressurewasher
or gardenhose to
clean yourunit is not
recommended.These R
may cause damageto
electnc componentsi
Spindles pulleys bear-
.
!ngs,orthe eng,ne.The
useofwater will result
in shortenedlife and
reduce servceabTty.
Figure5-2:Replacingthe rearflap.
General Recommendations
• Alwaysobservesafetyruleswhenperforming
anymaintenance.
• Thewarrantyon thislawnmowerdoesnotcover
itemsthathavebeensubjectedtooperatorabuse
or negligence.Toreceivefullvaluefromwarranty,
operatormustmaintainthe lawnmoweras
instructedhere.
• Changingofengine-governedspeedwillvoid
enginewarranty.
• Alladjustmentsshouldbecheckedat leastonce
eachseason.
Periodicallycheckall fastenersand makesurethese
aretight.
Engine Care
• Maintainoil levelasinstructedin enginemanual.
Serviceaircleanerevery25 hoursundernormal
conditions.Cleaneveryfewhoursunderextremely
dustyconditions.Refertoenginemanual.
Cleansparkplugandresetthegap oncea season.
Checkenginemanualforcorrectplugtype andgap
specifications.
Cleanengineregularlywitha clothorbrush.Keepthe
coolingsystem(blowerhousingarea)cleantopermit
properaircirculation.Removeallgrass,dirtand
combustibledebrisfrom mufflerarea.
Replacing Rear Flap
1. Lift upreardoor.
2. Bend(bow)therearflapinwardon eachsideto
reeasetabsfromthehees nthe hande mountng
,_ WARNING:Alwaysstop engine,discon- brackets SeeFgure5-2
,al IlL nectspark plug, and ground against . .
3 Repacewth newfapbybendngtherearfapand
,ll"lm_ entJinebeforecleanintJ,lubricatintJor •
= = = .. .
slidingintoplace
doingany kind of maintenanceon yourmachine.
l i
10