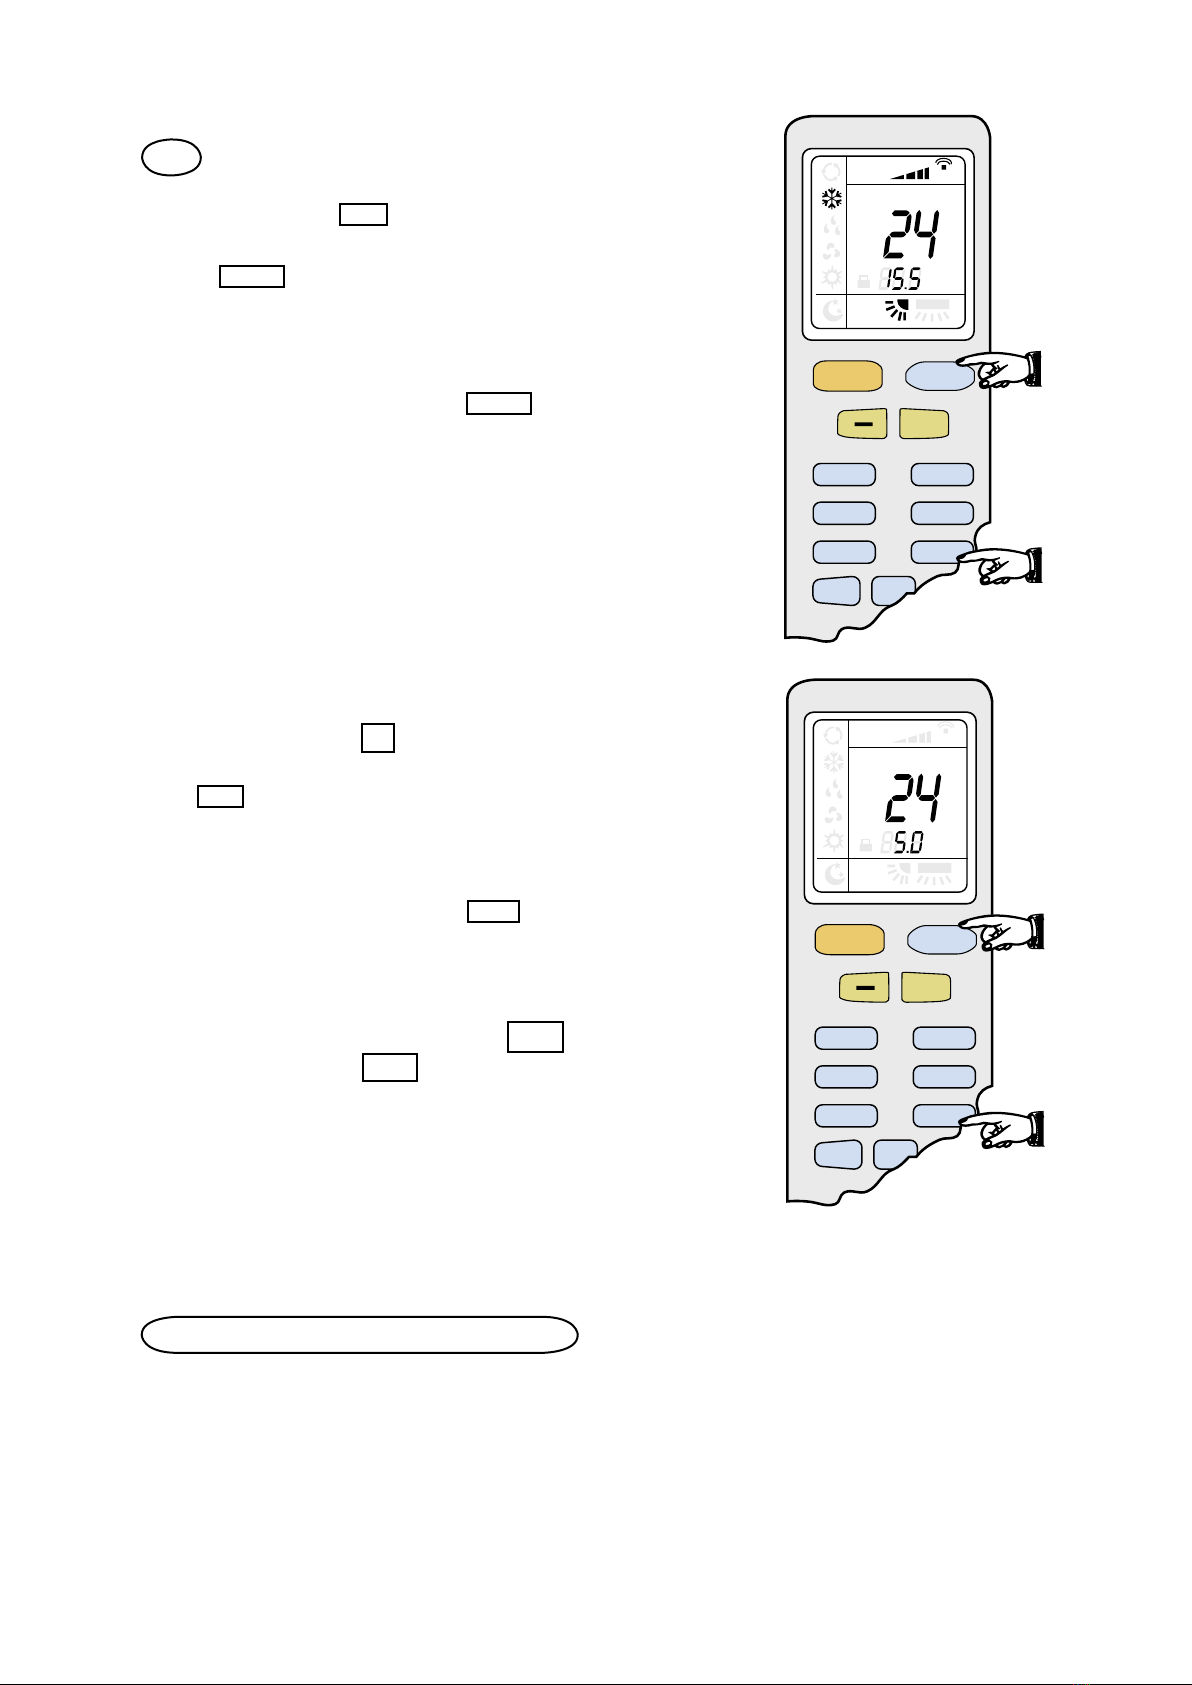
Unical Air UND A 9H User manual

MANUALE DI USO E MANUTENZIONE
UND A 9H -UND A 12H
UND A 18H -UND A 24H

3
Carefully read the warnings and correctly carry out the procedures
CAUTION !
Don’t try to install the conditioner alone;
always contact specialized personnel.
- In case of default or bad working always contact authorized and specialized staff;
removing parts or the maintenance of the appliance could expose the user to danger due to electric shock. The
conditioner doesn’t have parts whose maintenance can be carried out by the user.
-In case of removal contact authorized personnel for the dismounting and the new installation.
-Never insert your fingers or various objects in the outlets of the air flow and in the intake grills.
There is a fan inside the device that turns at high speed and could cause serious personal injuries. Particular care
with children.
-Never remain directly exposed to the flow of cold air for a long time.
The direct and prolonged exposition to cold air could be dangerous for your health.
Particular care should be taken in the rooms where there are children, old or sick people.
- In case of bad working of the conditioner (i.e. smell of burnt) immediately stop it, unhook the automatic
switch and contact authorized skilled staff.
The prolonged use of the device in such conditions could cause fire or electrocution.
WARNINGS !
-During the installation of the indoor and outdoor units the access to the working area should be forbidden to
children.
Unforeseeable accidents could happen.
-Never block or cover the intake grill and the outlet grill of the air flow.
The obstruction of these openings causes a reduction in the operative efficiency of the conditioner with possible
consequent failures or damages.
-Never use the conditioner to conserve food, plants, precision devices, works of art.
The quality of the conserved objects could be deteriorated.
-Never expose animals or plants to the direct air flow.
A long direct exposition to the flow of cold air of the conditioner could have negative effects on plants and
animals.
-Never direct the air flow of the conditioner toward fireplaces or other heating devices.
A direct air flow toward the fire could provoke an incorrect combustion and cause fires.
-During the use of the device, ventilate the room every now and then.
An insufficient ventilation could be the origin of lack of oxygen in the room.
-Don’t put the conditioner in contact with water.
The electrical insulation could be damaged and thus causing electrocution.
-Check the installation conditions to find out possible damages.
After a prolonged use ask the specialized staff to control the installation conditions of the conditioner.
-Never use inflammable gases near the conditioner.
-Always use the appliance with the air filter mounted.
The use of the conditioner without air filter could cause an excessive accumulation of dust or waste on the inner
parts of the device with possible subsequent failures.
-Unhook the automatic switch if you foresee not to use the device for a long time.

ON/OFFMODE
COOLHEAT
FANSWING
+
BLOWTIMER
LIGHT
SLEEP
TURBO
Wall Air-Conditioner
INDOOR UNIT OUTDOOR UNIT
Air intake
grill
Flap
Air intake
Air outlet
WALL AIR-CONDITIONER
FUNCTION SELECTOR
The conditioner is made up of two units connected between themselves through copper pipes (properly insula-
ted) and an electrical power cable.
The indoor unit is installed on the walls of the room to be conditioned.
The outdoor unit is installed on the floor or on the wall on suitable brackets.
Technical data of the air conditioner are printed on the tabels placed on the indoor and outdoor units.
Air outlet
REMOTE CONTROL
RUN: the conditioner is in stand-by; through remote control it is possible to set the wished working mode.
TEST: the conditioner is in test function; it can be used only by authorized staff during the installation or in
case of troubleshooting.
AUTO: the conditioner is in automatic function; it is possible to switch the conditioner on if the remote control
is not working. For the automatic function see paragraph 2.1.
Lift the front panel of the unit to reach the manual control of the con-
ditioner.
Positions of the selector:
STOP: the conditioner doesn’t receive any signal from the remote
control; it is possible to choose this position in case the conditioner
should remain inactive for a long period.
4
HEAT COOL SET.
TEMP
RUN
INDICATOR DRY WINDOW
RECEIVER
DISPLAY
N:B: There are outdoor units that presents only AUTO and STOP mode.

Wall Air-Conditioner REMOTE CONTROL – PUSHBUTTONS AND MAIN FUNCTIONS1
It is used to switch the conditioner on and off.
When the remote control is on, the message
OPER
appears on
the display.
Selection of working mode as to the sequence:
(AUTOMATIC WORKING)
(COOLING)
(DEHUMIDIFICATION)
(FAN)
(HEATING)
The two pushbuttons set the wished temperature between
16° C and 30° C.
The temperature raises or decreases by pressing + or - res-
pectively.
Selection of fan speed as to the sequence:
AUTO FAN (automatic)
FAN (low)
FAN (middle)
FAN (high)
Activation or deactivation of the movement of the “Flaps”.
It activates the function “SLEEP”.
This function automatically adjusts the temperature to opti-
mize the climate of the room making it comfortable during
the night sleep and thus favouring the saving of energy.
Timed start/stop programming.
Selection of cool mode directly.
Selection of heat mode directly.
Selection of turbo mode.
Selection of blow mode, anti-mould.
Display lighting.
-
+
ON/OFF
MODE
SWING
FAN
The remote control has been designed for an easy and fast use.
USE OF THE REMOTE CONTROL
1. Direct the remote control toward the conditioner.
2. Check that there are no objects between the remote control
and the receiver on the conditioner.
3. The signal of the remote control can be sent from a max.
distance of 10 mt.
4. Never leave the remote control exposed to the rays of the
sun
N.B.The unit confirms the correct reception of each pushbutton with a beep.
5
ON/OFF MODE
COOL HEAT
FAN SWING
+
BLOW TIMER
°C
%
AIR HEALTH BLOW
HUMIDITY
FILTER
TURBO
LIGHT
FAN
AUTO
HOUR
ON/OFF
OPER
LIGHTSLEEPTURBO
ON/OFF MODE
COOL HEAT
FAN SWING
+
BLOW TIMER
°C
%
AIR HEALTH BLOW
HUMIDITY
FILTER
TURBO
LIGHT
FAN
AUTO
HOUR
ON/OFF
OPER
LIGHTSLEEPTURBO
TURBO
BLOW
LIGHT
SLEEP
TIMER
COOL
HEAT

6
2 WORKING MODE
The conditioner is designed to create the ideal cli-
matic conditions for the wellbeing of the people in
the room.
It is able to cool and dehumidify (and heat in the
models with heat pump) the air in a completely
automatic way.
The air sucked by the fan enters from the grill of
the front panel and passes through the filter, which
keeps the dust. Then it is conveyed between the
flaps of a "heat exchanger" and cooled and dehumi-
dified or heated through a flapped coil.
The heat removed from the room is drained outside.
When the cycle is finished the fan gives back the
fresh air in the room; the outlet direction of the air is
regulated by the flaps, which are motorized up and
down, and by the vertical deflectors (right and left),
manually moved.
Filter Heat exchanger
Fan
The device can automatically select the ideal temperature as to the user's desire.
Press pushbutton
MODE
to access this mode
In the
“AUTO”
working the electronic control auto-
matically selects the working mode as to the room
temperature (taken by the probe which is incorpora-
ted in the indoor unit):
· if the room temperature falls under 20° C, a hea-
ting cycle is activated. It remains in function till the
temperature doesn’t rise above 22° C;
· if the room temperature exceeds 25° C a cooling
cycle is activated. It remains in function till the tempe-
rature doesn’t fall under 23° C.
The
“AUTO”
mode can be activated also selecting
the pushbutton placed inside the front panel of the
indoor unit.
“AUTO” SYSTEM OF AUTOMATIC ADJUSTMENT
2.1
To optimize the working of the conditioner, adjust
the temperature (1), the speed (2) (see chapter 2,6)
and the direction of the air flow (3) by pressing the
pushbuttons indicated in the figure.
ON/OFF MODE
COOL HEAT
FAN SWING
+
BLOW TIMER
°C
%
AIR HEALTH BLOW
HUMIDITY
FILTER
TURBO
LIGHT
FA N
AUTO
HOUR
ON/OFF
OPER
LIGHTSLEEPTURBO
1
3
2

COOL MODE
Press the key
MODE
until the symbol
appears on the
display: a completely automatic function of alternating coo-
ling cycles and air fan is activated. This allows the humidity
and the room temperature to be kept constant without relevant
variations in temperature (the temperature can also be set by
the user.
The working is completely automatic and the device
adjusts the speed of the fan.
This function reduces the humidity of the air to make
the room more comfortable.
DEHUMIDIFICATION
2.3
2.2
Example:
If the room temperature is higher than 27°C, set a value
between 24°C and 27°C on the remote control. Close cur-
tains and windows to protect the room from the sun.
Press the key or until the symbol
appears on the display, the conditioner cools the room
and at the same time reduces the humidity in the air.
The cooling cycle is activated by setting the keys
“TEMP”
+ or - at a temperature lower than that of the
room.
Example: the room temperature is 28° C, if we set the
cooling at a temperature lower than 27°, the compressor
will immediately start. The device automatically adju-
sts the working cycles of the compressor keeping the
wished temperature in the room.
COOLING
To optimize the functioning of the conditioner adjust the
temperature (1), the speed (2) (see chapter 2,6) and the
direction of the air flow (3) by pressing the keys indica-
ted in the figure.
To optimize the functioning of the conditioner adjust
the temperature (1), the speed (2) (see chapter 2,6) and
the direction of the air flow (3) by pressing the keys
indicated in the figure.
The dehumidification “DRY” automatically selects the cooling keeping the temperature set and the room tem-
perature on balance.
7
ON/OFF MODE
COOL HEAT
FAN SWING
+
BLOW TIMER
°C
%
AIR HEALTH BLOW
HUMIDITY
FILTER
TURBO
LIGHT
FA N
AUTO
HOUR
ON/OFF
OPER
SLEEPTURBO
1
3
2
ON/OFF MODE
COOL HEAT
FAN SWING
+
BLOW TIMER
°C
%
AIR HEALTH BLOW
HUMIDITY
FILTER
TURBO
LIGHT
FA N
AUTO
HOUR
ON/OFF
OPER
SLEEPTURBO
1
3
2

COOL MODE
8
Press the key or until the symbol
,
appears on the display, the conditioner heats the room
at an economic consumption level thanks to the “heat
pump”. With the
“HEAT”
function the room is heated
using the warmth of the external air at a low temperature.
With the keys
“TEMP”
+ or – set a temperature higher
than the room temperature to start the heating cycle.
CAUTION: during the working with the heat pump the
conditioner can automatically activate a defrost cycle,
which is essential to free the condensing unit from an
excessive deposit of frost.
Examples:
· The room temperature is 18° C, if we set the heating
at a temperature higher than 19° C, the compressor starts
immediately..
· When the temperature is lower than 14°C, set a value
between 16°C and 20°C on the remote control.
· Don’t use the heating mode when the outdoor tempera-
ture is lower than - 5°C.
HEATING
2.5
To optimize the functioning of the conditioner adjust the
temperature (1), the speed (2) (see chapter 2,6) and the
direction of the air flow (3) by pressing the keys indica-
ted in the figure.
To optimize the functioning of the conditioner adjust the
temperature (1), the speed (2) (see chapter 2,6) and the
direction of the air flow (3) by pressing the keys indicated
in the figure.
2.4 FAN
Press the key
MODE
until the symbol , appears on
the display, the conditioner works in fan mode only.
ON/OFF MODE
COOL HEAT
FAN SWING
+
BLOW TIMER
°C
%
AIR HEALTH BLOW
HUMIDITY
FILTER
TURBO
LIGHT
FA N
AUTO
HOUR
ON/OFF
OPER
SLEEPTURBO
2
1
ON/OFF MODE
COOL HEAT
FAN SWING
+
BLOW TIMER
°C
%
AIR HEALTH BLOW
HUMIDITY
FILTER
TURBO
LIGHT
FA N
AUTO
HOUR
ON/OFF
OPER
SLEEPTURBO
2
3
1

ON/OFF MODE
COOL HEAT
FAN SWING
+
BLOW TIMER
°C
%
AIR HEALTH BLOW
HUMIDITY
FILTER
TURBO
LIGHT
FA N
AUTO
HOUR
ON/OFF
OPER
SLEEPTURBO
COOL HEAT
FAN SWING
BLOW TIMER
SLEEPTURBO
The key
SWING
activates the “FLAP” and the air flow
is directed alternatively from up to down and vice-versa,
in order to guarantee an even diffusion of the air in the
room.
· In mode cooling, orient the flaps in horizontal direction;
· In mode heating, orient the flaps downward as the
warm air always tends to rise upward.
The deflectors are positioned manually and placed under
the flaps. They allow to direct the air flow rightward or
leftward.
Caution: never position “Flaps”, manually, the delicate
mechanism activating them could be seriously dama-
ged!
ADJUSTMENT OF THE DIRECTION OF THE AIR FLOW
DANGER!
Never insert your hand or objects in the air outlet of
the units!
These units contains a fan that turns at high speed.
“Flap” movement “Flaps”
This mode is activated by selecting the key
SLEEP
.
The symbol appears on the display. The function
“SLEEP”
automatically adjusts the temperature to make
the room more comfortable during the night sleep.
In cooling or dehumidification mode the set tempera-
ture is progressively increased of 2° C during the first
two hours of working. In heating mode the set tempera-
ture is progressively decreased of 2° C during the first 2
hours of working.
“SLEEP” FUNCTION
2.8
· The air flow in outlet is uniformly distributed in the
room.
· it is possible to position the direction of the air in the
optimal solution.
“SWING” CONTROL OF THE AIR FLOW
2.7
2.6 ADJUSTMENT OF THE FAN SPEED
By pressing the key
FAN
you can chose the wished fan speed among:
“AUTO - (LOW) - (MID.) - (HIGH)” when the “COOL” - “HEAT” functions are selected.
T h e “AUTO” mode sets the automatic electronic control of the speed of the fan. The
temperature is adjusted at an optimal level, in constant reference with the conditions of the room climate. The
speed of the fan increases when a greater cooling or heating effect is required.
9

10
This mode is activated by selecting the key
In COOLING and DRY function there are still water
exit inside the indoor unit when the air conditioner is
turned off.
With BLOW function, Unical air Conditioners can
make its fan continue to work in breeze state for about
10 minutes when it is turned off.
Dry water to remain the inside of unit clean and dry.
BLOW
2.9
ON/OFF MODE
COOL HEAT
FAN SWING
+
°C
%
AIR HEALTH BLOW
HUMIDITY
FILTER
TURBO
LIGHT
FA N
AUTO
HOUR
ON/OFF
OPER
BLOW
When the TURBO is turned on, the whole units runs
at the high fan speed to make the ambient temperature
swiftly approach to the setting temperature. Turn off the
TURBO, the whole units runs at the setting fan speed.
TURBO (optional)
2.10
To press + and - button, can lock or unlock the key-
board, after locked, the symbol of the lock
will be displayed as this time, to press any key, the
symbol will flash for 3 times.
After it is unlocked, the symbol will disappear.
LOCK (optional)
2.11
ON/OFF MODE
COOL HEAT
FAN SWING
+
°C
%
AIR HEALTH BLOW
HUMIDITY
FILTER
TURBO
LIGHT
FA N
AUTO
HOUR
ON/OFF
OPER
ON/OFF MODE
COOL HEAT
FAN SWING
+
°C
%
AIR HEALTH BLOW
HUMIDITY
FILTER
TURBO
LIGHT
HOUR
ON/OFF

· The use of the Timer is advised whenever you want to program the timed start in order to avoid the
conditioner to work unnecessarily when you are out of the house.
· Never program a too high temperature in heating and a too low one in cooling.
· Try not to frequently open and close doors and windows; the continuous warmth exchange with the outside
hinders the conditioner work.
· it is better not to install the units in places directly exposed to the sun.
· Use the function "SLEEP" during the night.
TRICKS TO SAVE ENERGY
3
TIMED STOP (fig. 1)
The timed stop is programmed with the appliance on.
Pressing
TIMER
at every selection of the key + or - the
Timer goes on of 0,5 HR. (30 minutes) till it reaches the
24 hours.
Press the key + or - more times till on the display you
can read the time in hours which passes between the
programming and the timed stop: press
to confirm!
TIMED START (fig. 2)
To program the timed start, the appliance should be off
Press : every time you press the key + or - the
Timer goes on of 0,5 HR.
(30 minutes) till it reaches the 24 hours.
Press the key + or - more times till on the display you
can read the time in hours which passes between the
programming and the timed start: press
to confirm!
IMPORTANT
Before proceeding with the timed start:
· program the working mode with the key
MODE
and
the fan speed with the key
FAN
.
· switch the conditioner off (with the key ON/OFF).
TIMER
2.12
The function allows to automatically activate or deactivate the conditioner at the wished time and thus saving a lot of
energy.
11
ON/OFF MODE
COOL HEAT
FAN SWING
+
BLOW TIMER
°C
%
AIR HEALTH BLOW
HUMIDITY
FILTER
TURBO
LIGHT
FA N
AUTO
HOUR
ON/OFF
OPER
SLEEPTURBO
fig. 1
ON/OFF MODE
COOL HEAT
FAN SWING
+
BLOW TIMER
°C
%
AIR HEALTH BLOW
HUMIDITY
FILTER
TURBO
LIGHT
FA N
AUTO
HOUR
ON/OFF
OPER
SLEEPTURBO
fig. 2
OFF
TIMER
ON
TIMER
TIMER

· Connect the conditioner to a suitable electric line, which should be protected by a thermal-magnetic safety
switch suited to the electrical input of the appliance.
· Never use the plug to stop the unit.
· It is sometimes possible during operation to hear a noise similar to running water; this effect is caused by the
refrigerant flowing in the pipes and is quite normal.
· When the conditioner starts or stops, particularly in heating, it is possible to hear some creakings caused by the
thermsl expansion of the unit parts.
WARNINGS AND IMPORTANT SAFETY INFORMATION
Never carry out maintenance which involves opening the machine: it could be dangerous due to the
presence of live parts and the gas contained in the refrigerating circuit. Always contact a specialized
Technical Service.
4
MAINTENANCE
CLEANING THE CONDITIONER
Remove the front panel of the unit (fig. 1) lifting it till its greatest stroke and then unhooking it from the hinges to
make the cleaning easier.
Clean the indoor unit using a cloth with lukewarm water (not higher than 40°C) and neutral soap. Never use
aggressive solvents or detergents.
If the battery of the outdoor unit is clogged, remove the leaves and the waste and then remove the dust with air
jet or a bit of water.
5
5.1
Before starting any cleaning disconnect the machine.
CLEANING OF THE FILTERS FOR WALL AIR CONDITIONER MODELS
The cleaning of the filters is essential for a good efficiency
of the conditioner.
ANTIDUST FILTERS
Open the front panel operating on the sides of the front grill in
the points indicated by the arrows (Fig. 1) and pull toward you.
Remove the filters by delicately extracting them downward (Fig.
2).
If the antidust filter is very dirty, it should be cleaned with a
vacuum cleaner or even washed with lukewarm water and neu-
tral soap.
Before inserting the filter again, it should be completely dry. It is
better to dry it in a ventilated place, but far from warmth sources
and direct sun exposition.
Never start the conditioner without filters.
ACTIVATED CARBON FILTERS (Optional)
The activated carbon filters, situated beneath the air filters (see
Fig. 3), absorb odours and smoke from the room and should be
changed regularly.
Fig. 1
Fig. 2 Antidust filter
Fig. 3
5.2
12

1. If the conditioner doesn’t work, control the voltage of the mains:
· Is the plug inserted properly?
· Has the automatic circuit-breaker intervened?
· Has there been a power failure?
Note: if there is a power failure, the conditioner switches off: when the power returns, the air conditioner
will restart automatically.
2. If the cooling (or heating) effect seams less
than normal:
· Has the temperature been correctly set on the control
· Has a door or a window been opened?
· Is the indoor unit directly exposed to the sunlight?
· Are the filters clogged?
· Are there obstacles hindering the free air circulation from the indoor unit or to the outdoor unit?
IF THE CONDITIONER DOESN’T WORK
When: · There is no confirmation beep from
the indoor unit.
· The liquid crystal display doesn’t
activate.
How: · Take off the small lid downward as
from the drawing.
· Place the new batteries respecting the
symbols + and -.
N.B. · Use only new batteries.
· Remove the batteries from the remote
control when the conditioner is not
used.
1,5 V
1,5 V
+
_
+
_
OPEN
_
+
Size AAA 1,5V
REPLACING THE BATTERIES
7
8
END OF SEASON MAINTENANCE
· Disconnect the automatic switch or the plug.
· Clean and replace the filters.
· On a sunny day let the conditioner work in ventilation for some hours, so that the inside of the unit dry
completely.
6
WARNING! Do not throw flat batteries with common rubbish, they should be disposed of in the special contai-
ners situated in the collection points.
Unical garantisce la conformità dei climatizzatori alle norme relative alla sicurezza del prodotto secondo le Direttive Europee.

Leggere attentamente le precauzioni ed eseguire correttamente le procedure.
ATTENZIONE !
Non tentare di installare da se il climatizzatore;
rivolgersi sempre a personale autorizzato.
- In caso di guasto o mal funzionamento rivolgersi sempre a personale di servizio autorizzato;
qualsiasi tentativo di rimozione di parti, o di manutenzione dell’apparecchio può esporre l’utente al pericolo di
scosse elettriche. Il climatizzatore non contiene parti la cui manutenzione può essere effettuata dall’utente.
-In caso di trasloco, rivolgersi a personale autorizzato alla rimozione e alla nuova installazione.
-Non inserire le dita o oggetti vari nei bocchettoni di uscita del flusso d’aria e nelle griglie di aspirazione.
All’interno dell’apparecchio vi è un ventilatore che gira ad alta velocità, che potrebbe causare gravi lesioni
personali. Far particolarmente attenzione ai bambini.
-Non rimanere direttamente esposti al flusso d’aria fredda per lunghi periodi di tempo.
L’esposizione diretta e prolungata all’aria fredda può essere nociva alla salute.
Far particolarmente attenzione nelle camere dove vi siano bambini, persone anziane o persone ammalate.
- In caso di mal funzionamento del climatizzatore (es. odore di bruciato) arrestare immediatamente
il funzionamento dell’apparecchio, sganciare l’interruttore automatico dedicato e rivolgersi a personale di ser-
vizio autorizzato.
L’uso continuato dell’apparecchio in tali condizioni può essere all’origine di incendi o folgorazioni.
AVVERTENZE !
-Durante le operazioni di installazione degli apparecchi interno ed esterno, evitare l’accesso ai bambini
sul luogo di lavoro.
Possono verificarsi incidenti imprevisti.
-Non bloccare o coprire la griglia di aspirazione e di mandata del flusso d’aria.
L’ostruzione di tali aperture causa una riduzione dell’efficienza operativa del condizionatore, con conseguenti
possibili disfunzioni o danni.
-Non usare il climatizzatore in applicazioni quali la conservazione di alimenti, piante, apparecchi di
precisione, opere d’arte.
La qualità degli oggetti conservati potrebbe subire un deterioramento.
-Non esporre animali o piante al diretto flusso d’aria dell’apparecchio.
Una lunga esposizione diretta al flusso d’aria fredda del climatizzatore può avere influenze negative su
piante ed animali.
-Non dirigere il flusso d’aria del climatizzatore verso camini o altri apparecchi di riscaldamento.
Un flusso d’aria diretto verso il fuoco può provocare una combustione non corretta e provocare incendi.
-Aerare di tanto in tanto la stanza nel corso dell’utilizzo dell’apparecchio.
Un areazione insufficiente può essere all’origine di insufficienza di ossigeno nella stanza.
-Non esporre il climatizzatore a contatto con l’acqua.
L’isolamento elettrico potrebbe subire danni, con conseguenti possibili folgorazioni.
-Verificare le condizioni di installazione per individuare eventuali danni.
Dopo un uso prolungato, richiedere a personale di servizio specializzato di controllare le condizioni di
installazione del climatizzatore.
-Non usare gas infiammabili nelle vicinanze del climatizzatore.
-Utilizzare sempre l’apparecchio con il filtro per l’aria installato.
L’uso del climatizzatore senza filtro dell’aria può causare un eccessivo accumulo di polvere o detriti sulle
parti interne dell’apparecchio, con conseguenti possibili disfunzioni.
-Sganciare l’interruttore automatico se si prevede di non utilizzare l’apparecchio per lunghi periodi di tempo.
14

Climatizzatore d'aria a parete
UNITÀ INTERNA UNITÀ ESTERNA
Griglia di
entrata
dell’aria
Aletta “Flap”
Entrata
dell’aria
Uscita dell’aria
ON/OFFMODE
COOLHEAT
FANSWING
+
BLOWTIMER
LIGHT
SLEEP
TURBO
MODELLO A PARETE
SELETTORE DELLE FUNZIONI
Il climatizzatore è costituito da due unità collegate tra loro da tubazioni in rame (isolate adeguatamente) e da un
cavo elettrico di alimentazione.
L’Unità Interna viene installata su una parete dell’ambiente da climatizzare.
L’Unità Esterna viene installata a pavimento o a parete, sulle apposite staffe.
I dati tecnici del climatizzatore sono riportati sulle apposite etichette poste sull’unità interna ed esterna.
Uscita
dell’aria
TELECOMANDO
RUN: il climatizzatore é in stand-by; tramite il telecomando é possibile impostare la modalità di funzionamento
desiderata.
TEST: il climatizzatore é in funzione test; é utilizzabile solamente dal personale autorizzato al momento dell’in-
stallazione o in caso di ricerca guasti.
AUTO: il climatizzatore é in funzione automatico; é possibile accendere il climatizzatore nel caso il telecoman-
do non fosse funzionante. La funzione automatico é illustrata dettagliatamente nel paragrafo 2.1.
N:B: Alcune unità interne possono presentare solo la funzione AUTO e STOP.
Sollevare il pannello frontale dell’unità per accedere al comando
manuale del climatizzatore.
Posizioni del selettore:
STOP: il climatizzatore non riceve più alcun segnale dal teleco-
mando; é possibile scegliere questa posizione nel caso il climatiz-
zatore dovesse rimanere inattivo per un lungo periodo.
HEAT COOL SET.
TEMP
RUN
INDICATOR DRY WINDOW
RECEIVER
DISPLAY
15

Il telecomando è stato studiato in modo da rendere facile e rapido l’utilizzo del climatizzatore.
TELECOMANDO - TASTI E FUNZIONI PRINCIPALI1
16
Si utilizza per accendere e spegnere il climatizzatore.
Quando il telecomando è acceso sul display compare
la scritta
OPER
.
Seleziona la modalità di funzionamento secondo la
sequenza:
(FUNZIONAMENTO AUTOMATICO)
(RAFFREDDAMENTO)
(DEUMIDIFICAZIONE)
(VENTILAZIONE)
(RISCALDAMENTO)
I due pulsanti impostano la temperatura desiderata
fra 16° C e 30° C.
La temperatura aumenta o diminuisce premendo
rispettivamente + o - .
Selezione della velocità di ventilazione, secondo la
sequenza:
AUTO FAN (automatica)
FAN (bassa)
FAN (media)
FAN (alta)
Attivazione o disattivazione del movimento delle
alette “Flap”.
Attiva la funzione “SLEEP”.
Questa funzione regola automaticamente la tempe-
ratura per ottimizzare il clima dell’ambiente, ren-
dendolo confortevole nella fase del sonno notturno e
favorendo il risparmio di energia.
Programmazione dell'accensione / spegnimento tem-
porizzata.
Seleziona direttamente la modalità raffreddamento.
Seleziona la modalità TURBO.
Seleziona la modalità BLOW, anti-muffa.
Illuminazione del Display.
ON/OFF MODE
COOL HEAT
FAN SWING
+
BLOW TIMER
°C
%
AIR HEALTH BLOW
HUMIDITY
FILTER
TURBO
LIGHT
FAN
AUTO
HOUR
ON/OFF
OPER
LIGHTSLEEPTURBO
ON/OFF MODE
COOL HEAT
FAN SWING
+
BLOW TIMER
°C
%
AIR HEALTH BLOW
HUMIDITY
FILTER
TURBO
LIGHT
FAN
AUTO
HOUR
ON/OFF
OPER
LIGHTSLEEPTURBO
-
+
SLEEP
TIMER
MODE
SWING
FAN
HEAT
COOL
UTILIZZO DEL TELECOMANDO
1. Dirigere il telecomando verso il climatizzatore.
2.Verificare che non vi siano oggetti interposti tra il telecomando e il
ricevitore posto sul climatizzatore.
3.Il segnale del telecomando può essere trasmesso da una distanza massi-
ma di 10 mt.
4.Non lasciare il telecomando in zone direttamente esposte ai raggi solari.
N.B. L’Unità conferma la corretta ricezione di ogni tasto premuto con un bip.
TURBO
BLOW
ON/OFF
LIGHT

2MODALITÀ DI FUNZIONAMENTO
Il climatizzatore è un apparecchio progettato per
creare le condizioni climatiche ideali per il benesse-
re delle persone nell’ambiente.
E’ in grado di raffreddare, deumidificare (e riscal-
dare nelle versioni pompa di calore) l’aria in modo
totalmente automatico.
L’aria, aspirata dal ventilatore, entra dalla griglia del
pannello frontale e passa attraverso il filtro, che ne
trattiene la polvere; viene quindi convogliata tra le
alette di uno “scambiatore di calore” e raffrescata e
deumidificata o riscaldata, per mezzo della serpenti-
na alettata.
Il calore sottratto all’ambiente viene smaltito
all’esterno.
A ciclo ultimato, il ventilatore restituisce l’aria
fresca (o calda in pompa di calore) nell’ambiente;
la direzione di uscita dell’aria viene regolata dalle
alette “Flap” motorizzate nel senso verticale e dai
deflettori manuali nel senso orizzontale.
Filtro Scambiatore di
calore
Ventilatore
L’apparecchio è in grado di selezionare automaticamente
la temperatura ideale a seconda delle condizioni ambientali.
Si accede a questa modalità premendo il tasto
MODE
: sul display verrà visualizzato il simbolo
Nel funzionamento
“AUTO”
il controllo
elettronico seleziona automaticamente la modali-
tà di funzionamento a seconda della temperatura
ambiente (rilevata dalla sonda incorporata nell’Uni-
tà Interna):
· se la temperatura ambiente scende al di sotto di
20° C si avvia il ciclo in riscaldamento, che rimane
in funzione finché la temperatura non sale al di sopra
dei 22° C;
· se la temperatura ambiente supera 25° C si avvia il
ciclo in raffreddamento, che rimane in funzione fin-
ché la temperatura non scende al di sotto dei 23° C.
La modalità
“AUTO”
si può attivare anche selezio-
nando il tasto posizionato all’interno del pannello
frontale dell’Unità Interna.
“AUTO”: SISTEMA DI REGOLAZIONE AUTOMATICO
Per ottimizzare il funzionamento del climatizzatore é
opportuno regolare la temperatura (1), la velocità (2)
(vedi capitolo 2,6) e la direzione del flusso dell’aria
(3) con la pressione dei tasti segnalati in figura.
ON/OFF MODE
COOL HEAT
FAN SWING
+
BLOW TIMER
°C
%
AIR HEALTH BLOW
HUMIDITY
FILTER
TURBO
LIGHT
FA N
AUTO
HOUR
ON/OFF
OPER
LIGHTSLEEPTURBO
1
3
2
2.1
17

Premere il tasto
MODE
finché sul display non
compare il simbolo
:
si attiva una funzione totalmen-
te automatica di alternanza di cicli di raffreddamento e
ventilazione dell’ambiente, che consentono di mantene-
re costante l’umidità e la temperatura, senza variazioni
rilevanti della stessa (questa può anche essere anche
impostata dall’utente).
Il funzionamento é completamente automatico: l’appa-
recchio regola la velocità del ventilatore.
Questa funzione riduce l’umidità dell’aria per rendere
l’ambiente più confortevole.
DEUMIDIFICAZIONE
18
2.3
2.2
Esempio:
Quando la temperatura ambiente supera i 27°C, imposta-
re sul telecomando un valore compreso tra 24°C e 27°C.
Chiudere tende e finestre per riparare dal sole il locale.
Premere il tasto
COOL
o finché sul display non
compare il simbolo . Il climatizzatore raffresca l’am-
biente e contemporaneamente riduce l’umidità dell’aria.
Il ciclo in raffreddamento viene attivato impostando i
tasti
“TEMP”
+ o - ad una temperatura inferiore a quella
dell’ambiente.
Esempio: supponiamo che la temperatura del locale
sia di 28° C, se noi impostiamo il raffreddamento ad
una temperatura minore di 27°, questo farà partire
immediatamente il compressore. L’apparecchio, infatti,
regola automaticamente i cicli di funzionamento del
compressore, mantenendo la temperatura desiderata
nell’ambiente.
RAFFREDDAMENTO
Per ottimizzare il funzionamento del climatizzatore é
opportuno regolare la temperatura (1), la velocità (2)
(vedi paragrafo 2,6) e la direzione del flusso dell’aria
(3) con la pressione dei tasti segnalati in figura.
Per ottimizzare il funzionamento del climatizzatore é
opportuno regolare la temperatura (1), la velocità (2)
(vedi paragrafo 2,6) e la direzione del flusso dell’aria
(3) con la pressione dei tasti segnalati in figura.
La deumidificazione “DRY” seleziona automaticamente il raffreddamento, nell’equilibrio costante tra la tem-
peratura impostata e la temperatura del locale.
ON/OFF MODE
COOL HEAT
FAN SWING
+
BLOW TIMER
°C
%
AIR HEALTH BLOW
HUMIDITY
FILTER
TURBO
LIGHT
FA N
AUTO
HOUR
ON/OFF
OPER
SLEEPTURBO
1
3
2
ON/OFF MODE
COOL HEAT
FAN SWING
+
BLOW TIMER
°C
%
AIR HEALTH BLOW
HUMIDITY
FILTER
TURBO
LIGHT
FA N
AUTO
HOUR
ON/OFF
OPER
SLEEPTURBO
1
3
2
MODE

Premere il tasto
HEAT
o finché sul display non
compare il simbolo
,
il climatizzatore riscalda l’am-
biente in modo economico, grazie alla funzione “pompa
di calore”. In funzionamento
“HEAT”
il riscaldamento
dell’ambiente è prodotto utilizzando il calore dell’aria
esterna a bassa temperatura.
Perché si avvii il ciclo in riscaldamento impostare con i
tasti
“TEMP”
+ o - una temperatura superiore alla tempe-
ratura ambiente.
ATTENZIONE: il climatizzatore, durante il funziona-
mento pompa di calore, può attivare automaticamente
un ciclo di sbrinamento, indispensabile per poter liberare
l’unità condensante da un eccessivo deposito di brina.
Esempi:
· Supponiamo che la temperatura del locale sia 18° C,
se noi impostiamo il riscaldamento ad una temperatura
superiore di 19° C, questo farà partire immediatamente
il compressore.
· Quando la temperatura è minore di 14°C, impostare
sul telecomando un valore compreso tra 16°C e 20°C.
· Non utilizzare la modalità riscaldamento quando la
temperatura esterna è inferiore a - 5°C.
RISCALDAMENTO
2.5
Per ottimizzare il funzionamento del climatizzatore é
opportuno regolare la velocità (2) (vedi capitolo 2,6) e
la direzione del flusso dell’aria (3) con la pressione dei
tasti segnalati in figura.
Per ottimizzare il funzionamento del climatizzatore é
opportuno regolare la temperatura (1), la velocità (2)
(vedi capitolo 2,6) e la direzione del flusso dell’aria (3)
con la pressione dei tasti segnalati in figura.
2.4 VENTILAZIONE
Premere il tasto
MODE
finché sul display non
compare il simbolo , il climatizzatore funziona in sola
ventilazione.
19
ON/OFF MODE
COOL HEAT
FAN SWING
+
BLOW TIMER
°C
%
AIR HEALTH BLOW
HUMIDITY
FILTER
TURBO
LIGHT
FA N
AUTO
HOUR
ON/OFF
OPER
SLEEPTURBO
2
1
ON/OFF MODE
COOL HEAT
FAN SWING
+
BLOW TIMER
°C
%
AIR HEALTH BLOW
HUMIDITY
FILTER
TURBO
LIGHT
FA N
AUTO
HOUR
ON/OFF
OPER
SLEEPTURBO
2
3
1
MODE

Movimento “Flap” Alette “Flap”
Questa modalità si attiva selezionando il tasto
SLEEP
.
Sul display compare il simbolo la funzione
“SLEEP”
regola automaticamente la temperatura ren-
dendo l’ambiente più confortevole nella fase del sonno
notturno.
In modalità raffreddamento o deumidificazione la tem-
peratura impostata viene aumentata progressivamente
di 2° C durante le prime due ore di funzionamento. In
modalità riscaldamento la temperatura impostata viene
diminuita progressivamente di 2° C durante le prime 2
ore di funzionamento.
FUNZIONE “SLEEP”
2.8
COOL HEAT
FAN SWING
BLOW TIMER
SLEEPTURBO
· Il flusso d’aria in uscita viene distribuito unifor-
memente nell’ambiente.
· É possibile selezionare la direzione dell’aria nella
posizione ottimale.
“SWING” CONTROLLO DEL FLUSSO DELL’ARIA
2.7
ON/OFF MODE
COOL HEAT
FANSWING
+
BLOW TIMER
°C
%
AIR HEALTH BLOW
HUMIDITY
FIL
TER
TURBO
LIGHT
FA N
AUTO
HOUR
ON/OFF
OPER
SLEEP
TURBO
Con il tasto
SWING
si attivano le alette “FLAP” e il
flusso dell’aria viene direzionato alternativamente dal-
l’alto verso il basso e viceversa; in modo da garantire la
diffusione uniforme dell’aria nell’ambiente.
· in modalità raffreddamento è consigliabile orientare le
alette nel senso orizzontale;
· in modalità riscaldamento è consigliabile orientare le
alette verso il basso, dato che l’aria calda tende
sempre a salire verso l’alto.
I deflettori vengono posizionati manualmente. Sono
collocati al di sotto delle alette “Flap” e consentono di
dirigere il flusso dell’aria verso destra o verso sinistra.
Attenzione: non posizionare mai manualmente le alette
“Flap”, il delicato meccanismo che le aziona potrebbe
venire seriamente danneggiato!
REGOLAZIONE DELLA DIREZIONE DEL FLUSSO DELL’ARIA
PERICOLO!
Non inserire mai mani o oggetti di alcun gene-
re nell’uscita d’aria delle unità !
Queste unità contengono un ventilatore che
gira ad alta velocità.
2.6 REGOLAZIONE DELLA VELOCITÀ DEL VENTILATORE
Premendo il tasto
FAN
è possibile scegliere la velocità desiderata di ventilazione fra:
“AUTO - (LOW) - (MID.) - (HIGH)”.
La modali- tà “ AU TO ” imposta il controllo elettronico automatico della velocità del ventilato-
re. La temperatura viene regolata ad un livello ottimale, in costante riferimento alle condizioni del clima dell’ambien-
te. La velocità del ventilatore aumenta nelle condizioni in cui si renda necessario un maggior effetto di raffreddamento
o riscaldamento.
20

21
Questa modalità si attiva premendo il tasto
Nel funzionamento COOL (raffrescamento) e DRY
(deumidificazione) avviene la creazione di condensa
nello scambiatore interno: se viene attivata la funzione
BLOW, quando il climatizzatore viene spento il venti-
latore interno continua a ruotare per asciugare lo scam-
biatore, eliminando le goccioline residue di condensa,
altrimenti causa di formazione di muffe e batteri.
Il ventilatore verrà disattivato automaticamente dopo
circa 10 minuti.
BLOW
2.9
ON/OFF MODE
COOL HEAT
FAN SWING
+
°C
%
AIR HEALTH BLOW
HUMIDITY
FILTER
TURBO
LIGHT
FA N
AUTO
HOUR
ON/OFF
OPER
BLOW
Questa modalità permette al climatizzatore di rag-
giungere più rapidamente la temepratura desiderata in
ambiente; il ventilatore dell'unità interna ruoterà alla
massima velocità.
Disattivando la funzione TURBO, il ventilatore tornerà
a girare alla velocità selezionata.
TURBO (optional)
2.10
Premendo il tasto + e - contemporaneamente è possibile
bloccare i tasti del telecomando.
Sul display apparirà l'icona
Ripremere i tasti + e - per riabilitare la tastiera.
BLOCCO TASTI (optional)
2.11
ON/OFF MODE
COOL HEAT
FAN SWING
+
°C
%
AIR HEALTH BLOW
HUMIDITY
FILTER
TURBO
LIGHT
FA N
AUTO
HOUR
ON/OFF
OPER
ON/OFF MODE
COOL HEAT
FAN SWING
+
°C
%
AIR HEALTH BLOW
HUMIDITY
FILTER
TURBO
LIGHT
HOUR
ON/OFF
This manual suits for next models
3
Table of contents
Languages:
Other Unical Air Air Conditioner manuals
Popular Air Conditioner manuals by other brands

Mitsubishi Electric
Mitsubishi Electric PEFY-P-NMLU-E installation manual

Kenmore
Kenmore 407.83126 Use & care guide

Sencor
Sencor SAC MT9020C Translation of the original manual

Panasonic
Panasonic CS-RE9JKE Service manual

Samsung
Samsung AM FN1DEH Series installation manual

LG
LG MFL62541004 installation manual