UpLiving Q6 User manual
POWER YOUR LIFE


Info@UpLivingGoods.com
- 02 -
Notice
1.
Not recommended to use for PPTs, Word, Excel, or business presentations.
2.
To connect the UpLiving mini projector with a tablet or smartphone, please use Wi-Fi
screen mirroring feature or use external HDMI adaptor. For HDMI adaptor connection,
Android phones need to support MHL for which an MHL to HDMI cable is required,
iPhone & iPad need a Lightning to HDMI cable adaptor.
3.
To connect the mini projector to PCs or laptops, please adjust the PC/ laptop display
resolution to 1920 *1080 for the best clarity.
4.
Please note that it is only suitable for use in dark rooms.
5.
Dolby is not supported. Please turn of Dolby digital on your device.
FCC-Statement
This device complies with part 15 of the FCC rules. Operation is subject to the
following two conditions, (1) this device may not cause harmful interference, and (2)
this device must accept any interference received, including interference that may
cause undesired operation.
Changes or modifications not expressly approved by the party responsible for
compliance could void the user's authority to operate the equipment.
NOTE: The equipment has been tested and found to comply with the limits for a Class
B digital device, pursuant to part 15 of the FCC Rules. These limits are designed to
provide reasonable protection against harmful interference in a residential
installation. This equipment generates uses and can radiate radio frequency energy
and, if not installed and used in accordance with the instructions, may cause harmful
interference to radio communications.
However, there is no guarantee that interference will not occur in a particular
installation. If this equipment does cause harmful interference to radio or television
reception, which can be determined by turning the equipment off and on, the user is
encouraged to try to correct the interference by one or more of the following
measures:
▪Reorient or relocate the receiving antenna.
▪Consult the dealer or an experienced radio/TV technician for help
with important announcements.

Info@UpLivingGoods.com
- 03 -
Radiation Exposure Statement
The equipment complies with FCC radiation exposure limits set forth for an
uncontrolled environment. This equipment should be installed and operated
with a minimum distance of 20cm between the radiator and your body.
This transmitter must not be co-located or operated in conjunction with any
other antenna or transmitter.
Accessory List
▪
1 x AV-Signal Cable
▪
1 x Remote Control (batteries not included)
▪
1 x HDMI-Cable
▪
1 x Power Cable
▪
1 x User Manual
▪
1 x Operation Guide

Info@UpLivingGoods.com
- 04 -
Safety Notice
1.
Please read the user manual carefully before using the projector.
2.
Please use standard power cord with ground wire, to ensure stable
power supply.
3.
Please use the same power voltage as marked on the projector.
4.
Please do not disassemble the projector by yourself, otherwise the
warranty will be void.
5.
Please do not look into the lens when the projector is working,
otherwise it may hurt your eyes.
6.
Please do not cover the projector ventilation holes with any material.
7.
Please keep the projector away from water or any other liquid as it is
not waterproof.
8.
Please don't put the projector in wet or moist conditions to prevent
electric shock.
9.
Please turn off and unplug from the power supply if not using the
projector for a long time.
10.
Please use the original packing foam or other anti-shock material
when relocating the projector.
11.
Please contact DBPOWER customer support if you encounter any
problem with the projector.
12.
This mini projector comes with a full 12-month warranty.
13.
Please contact us if you want to know more information about the
warranty. (Warranty service does not include the frame, manual,
packing and subjective ideas about the video, sound or image
aspects))

Info@UpLivingGoods.com
- 05 -
Remote Control
1.
Power On / Off
2.
Mute
3.
Rewind
4.
Play / Pause
5.
Fast Forward
6.
Arrow Keys
7.
Back
8.
Menu
9.
Source
10.
Volume –
11.
Volume +
Caution
Do not submerge the remote control in water.
Do not put the remote control near fire or in wet/hot places.
Do not use old and new batteries together in the remote control.
Please take the batteries out when not using the remote control for a long time to
avoid battery leakage.
Please point the remote control at the IR receiver.
Please use the remote control within 6 meters distance and 30-degree angle.


Info@UpLivingGoods.com
- 09 -
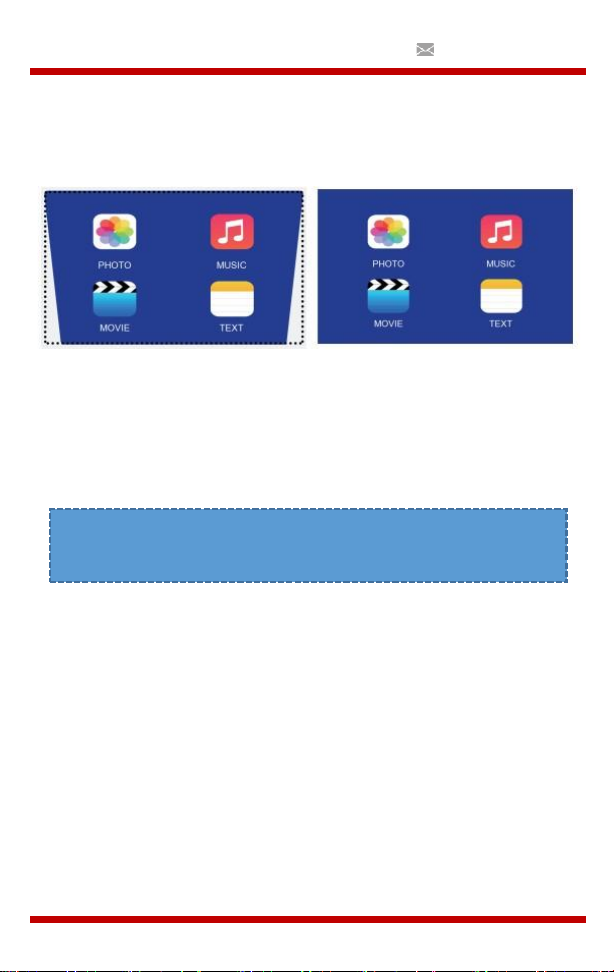
3.
Multimedia Boot Screen
Na 5-10 seconden wordt het multimediascherm weergegeven.
4.
Focus & keystone-correctie
a.
Als het beeld wordt weergegeven als een trapeziumvorm, kunt u dit
aanpassen met de keystone-correctiefunctie door op knop 3 te drukken.
Dit zou het weergavebeeld moeten normaliseren.
b.
Afbeelding scherpstellen
Make sure the projector is horizontal to the projector screen and adjust
the focus by turning the focus ring.
You can display the
video or the menu
screen to check the
adjustment.
Info@UpLivingGoods.com
- 10 -
Optical Adjustments
The projector uses an optical keystone correction function, so the image can
be adjusted as below:
However, this projector does not have a horizontal keystone correction
function. The projector must be placed horizontally to the projection screen.
If you encounter the problem as shown above, it is probably because the
projector has not been placed horizontally to the projection screen, or the
projection screen is not vertically positioned.
Solution: Adjust the projector's position so that it is horizontal to
the screen.


Info@UpLivingGoods.com
- 15 -
3.
HDMI connection
Use the HDMI slot to connect computers and HDMI compatible devices.
Once connected, select the HDMI signal source.
Supported Resolutions:
•
576P
•
480P
•
720P
•
1080P
•
640x480
•
800x600
•
1024x768
•
1280x1024
•
1280x720
•
1440x900
•
1366x768
•
1920x1080
•
1280x800
•
1440x960
•
680x1050


Info@UpLivingGoods.com
- 17 -
Menu settings
1. Gebruikershandleiding afstandsbediening
Druk op de toets “ " om het hoofdmenu te openen en druk vervolgens
op “" om elk submenu te openen.
Druk op “" om het submenu te selecteren, pas vervolgens de
parameters naar wens aan en druk op de “OK " -toets om te bevestigen.
2. Functie van submenu’s:
a.
Afbeelding submenu’s:
Beschikbare aanpassingen: Beeldmodus / Kleurtemperatuur / Hoogte-
breedteverhouding / Ruisonderdrukking / Scherm / Weergaveverkleinen.
b.
Geluidssubmenu's:
Beschikbare aanpassingen: Geluidsmodus / Balans / Automatisch Volume
/ Surround Sound / Bluetooth
c.
Submenu's instellen:
Beschikbare aanpassingen: OSD-Taal / Fabriek Herstellen / Roteren /
OsdDuration / Slaap Timer / Software Update (USB)
Info@UpLivingGoods.com
- 18 -
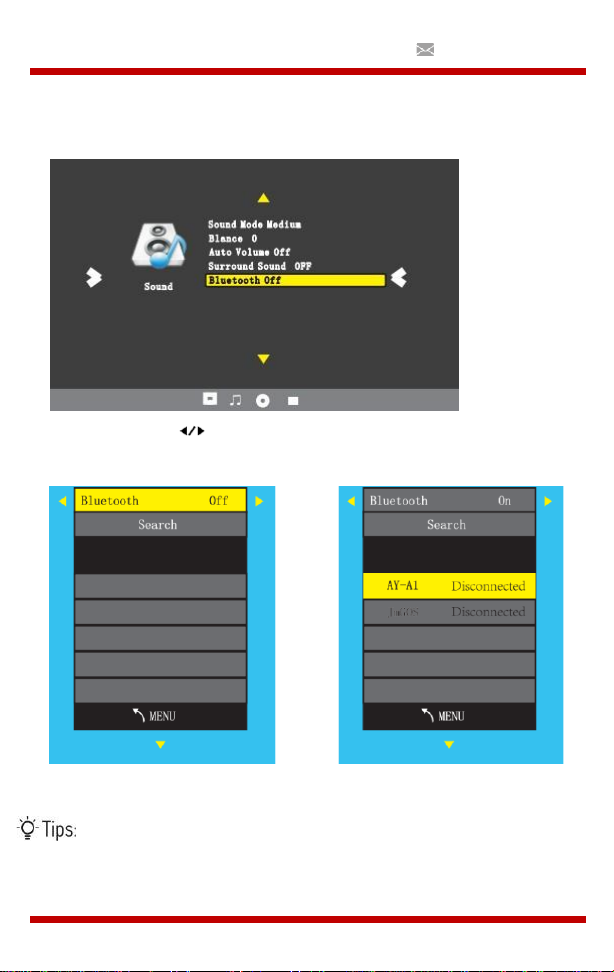
Connect to Bluetooth Speaker
1. Enter Sound menu –> Bluetooth
2. Choose the “" button to turn on Bluetooth.
3. Choose Search and press OK to scan for nearby Bluetooth speakers.
4. Select the right Bluetooth speaker of the list and click OK.
When turning on the projector, it will automatically try to
connect with the latest connected Bluetooth speaker.
Table of contents
Languages:


