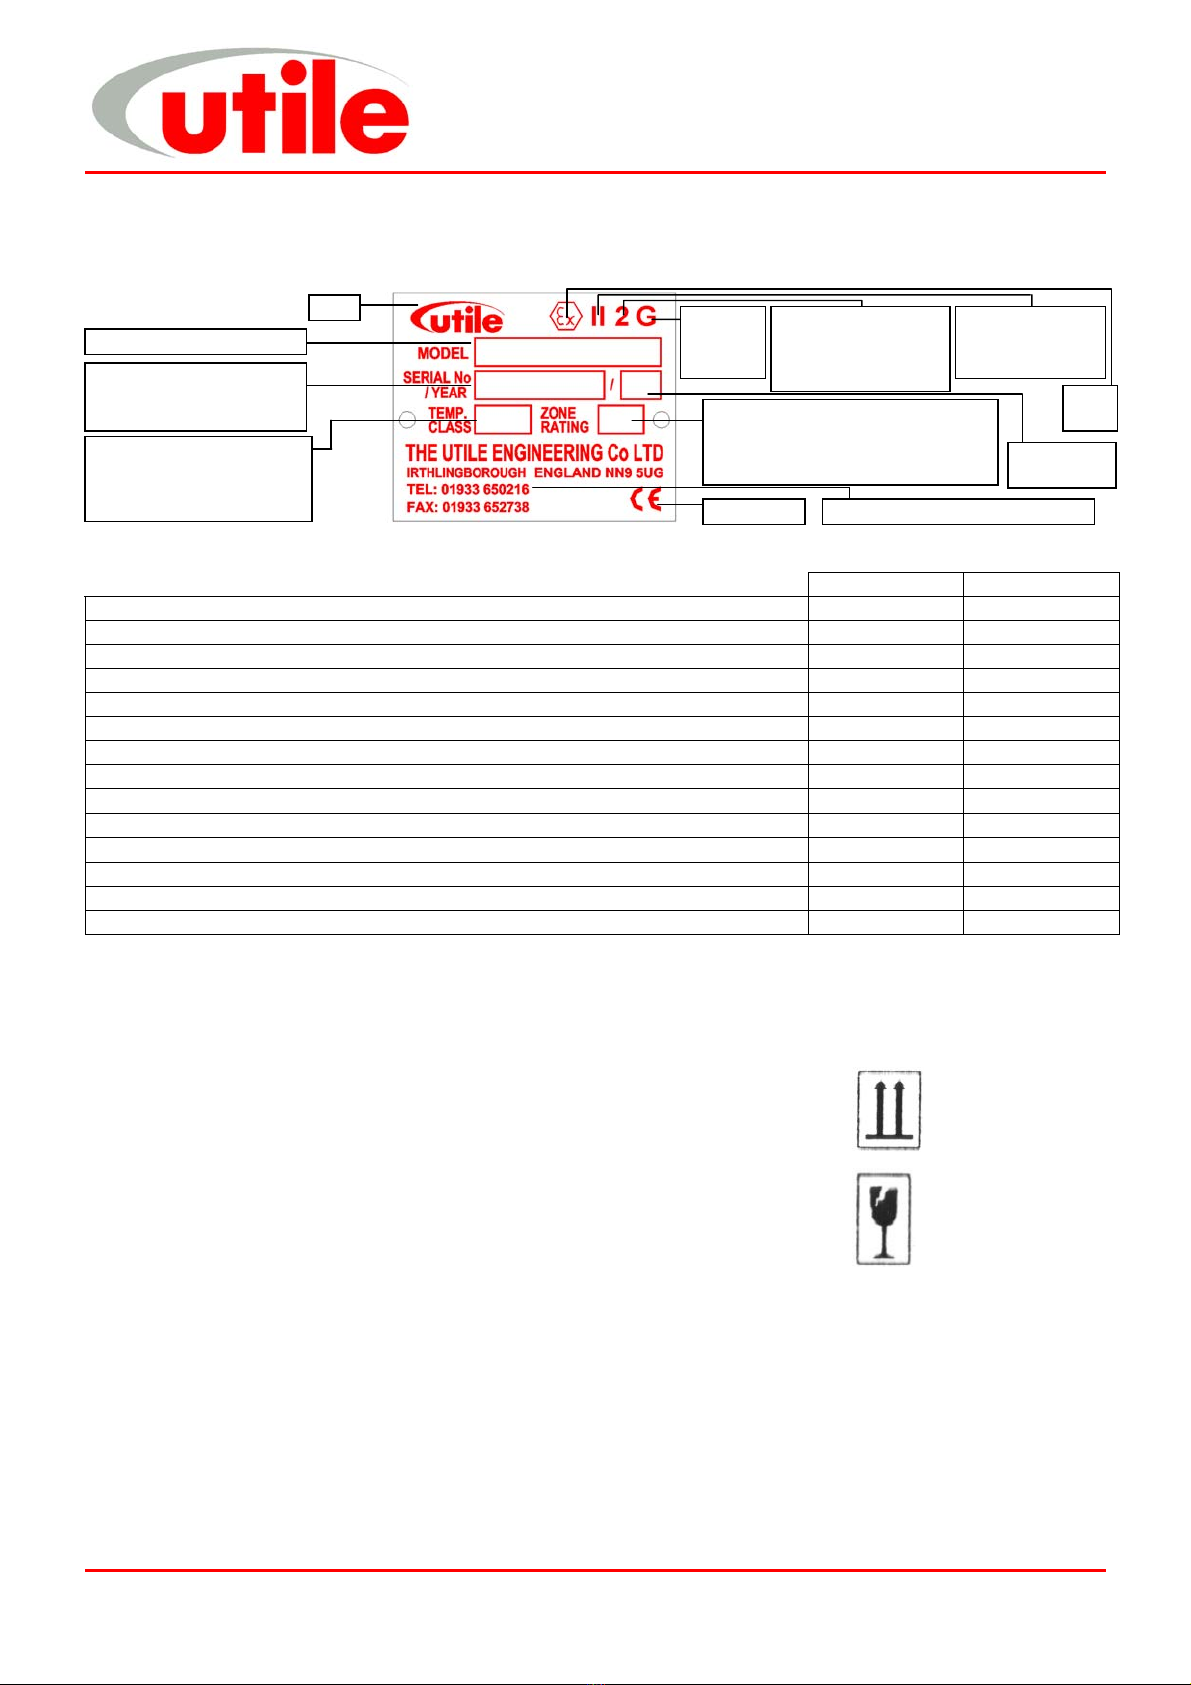
The Utile Engineering Co. Ltd. 25/06/04
Irthlingborough, Northamptonshire. England
Tel: +44 (0) 1933 650216
Fax: +44 (0) 1933 652738 4 IC188
Read the installation and operating instructions carefully.
Rotating machinery and pressurised components, which may contain toxic, flammable or otherwise hazardous
media are potentially dangerous equipment if not operated and maintained correctly. It is imperative that all users
of such equipment fully educate themselves to the potential dangers and satisfy themselves that the personnel
responsible for installing, testing, commissioning, operating and maintaining the plant are competent to do so.
Instruction manuals are provided for guidance but must assume some basic level of competence by users. If there
are any doubts or ambiguities concerning correct procedures, ask Utile Engineering. DO NOT TAKE RISKS.
Certain machinery can generate high levels of noise which can be harmful if exposed to it for lengthy periods of
time. Various codes of practice are in existence and users must ensure that adequate precautions are taken to
prevent a health hazard to employees or third party.
Equipment with internal pressures above or below ambient pressures can create a hazard. Before attempting to
investigate problems, service or maintain equipment, it must be safely depressurised or pressurised to ambient
conditions. Also since the gaseous medium may be flammable, toxic, corrosive or otherwise hazardous it may be
necessary to purge the installation with an inert gas, such as nitrogen. Special precautions are necessary for
certain gases and the user must ensure that adequate procedures are implemented.
Moving parts of machinery must not be touched and all such parts must be adequately guarded. Suitable guards
are provided and must be securely retained in position at all times.
Before commencing maintenance, servicing or making other adjustments, the prime mover and other equipment
must be isolated electrically or otherwise immobilised to prevent accidental start-up. In this vein, a fully qualified
electrician should carry out all electrical work and all electrical equipment should be isolated before it is touched
and pneumatic or hydraulic controls depressurised and made safe. Procedures must also exist to ensure that
electrical or other inputs cannot be restored accidentally during the maintenance or service period.
Safety trips, emergency stop-buttons and other such devices (if fitted) are to be checked regularly to ensure that
they continue to function correctly and will protect the installation and personnel in the event of an emergency.
NO attempt should be made to touch the machine whilst it is rotating. Particular care is needed when checking
rotor clearances. Any movement of rotors may trap fingers.
Most machines, certain pipes and ancillaries become hot during operation whilst certain machines with sub-zero
inlet temperatures may result in very cold surfaces. If it is possible for personnel to come into contact with such
surfaces unknowingly or accidentally they should be guarded.
If severe vibration is observed, the cause of this should be immediately investigated and the situation rectified.
Excessive vibration can lead to fatigue and other failures. Similarly, if during operation a significant change is
noticed in the level of vibration, noise, temperature or any other parameter, the cause of such changes must be
determined, and the cause rectified. Inlet filters must be inspected regularly so that liquid or debris is not allowed to
enter the machine, which could cause damage and consequently injury to personnel.
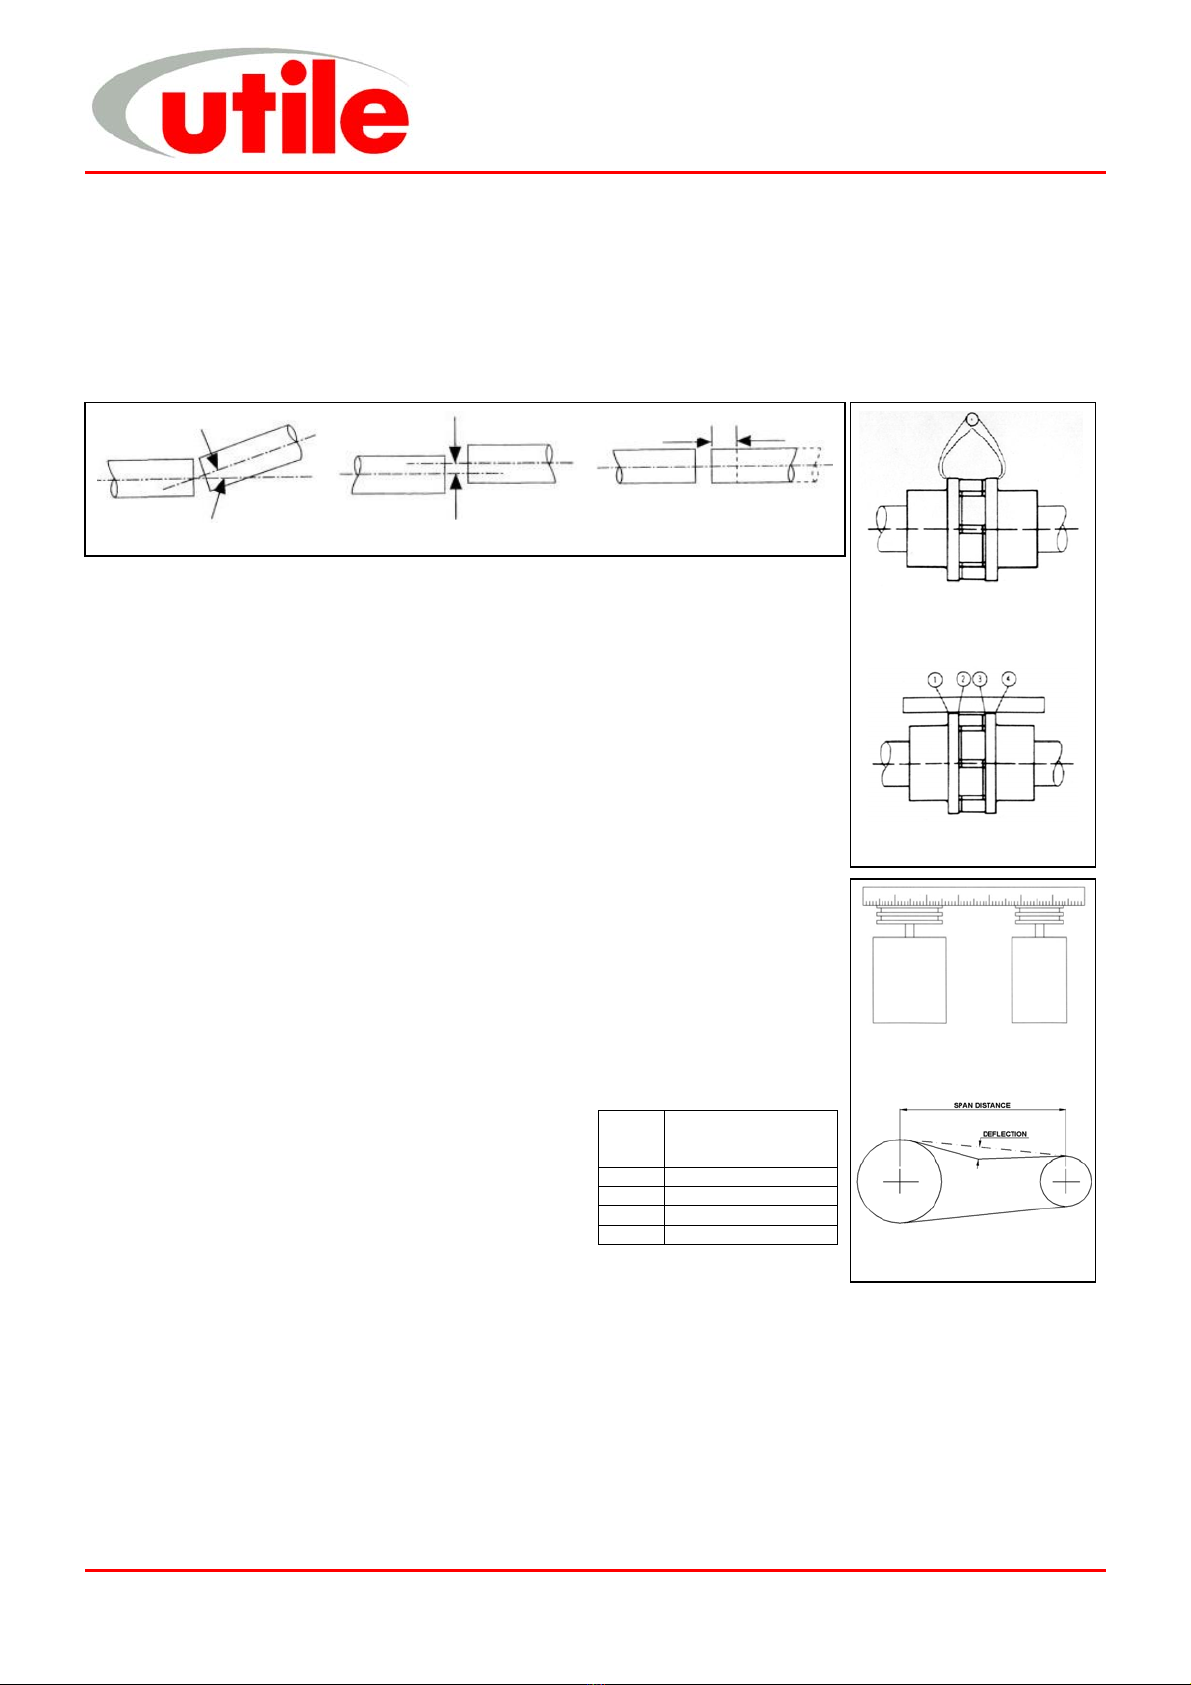
During routine maintenance, coupling alignment should be checked for misalignment.
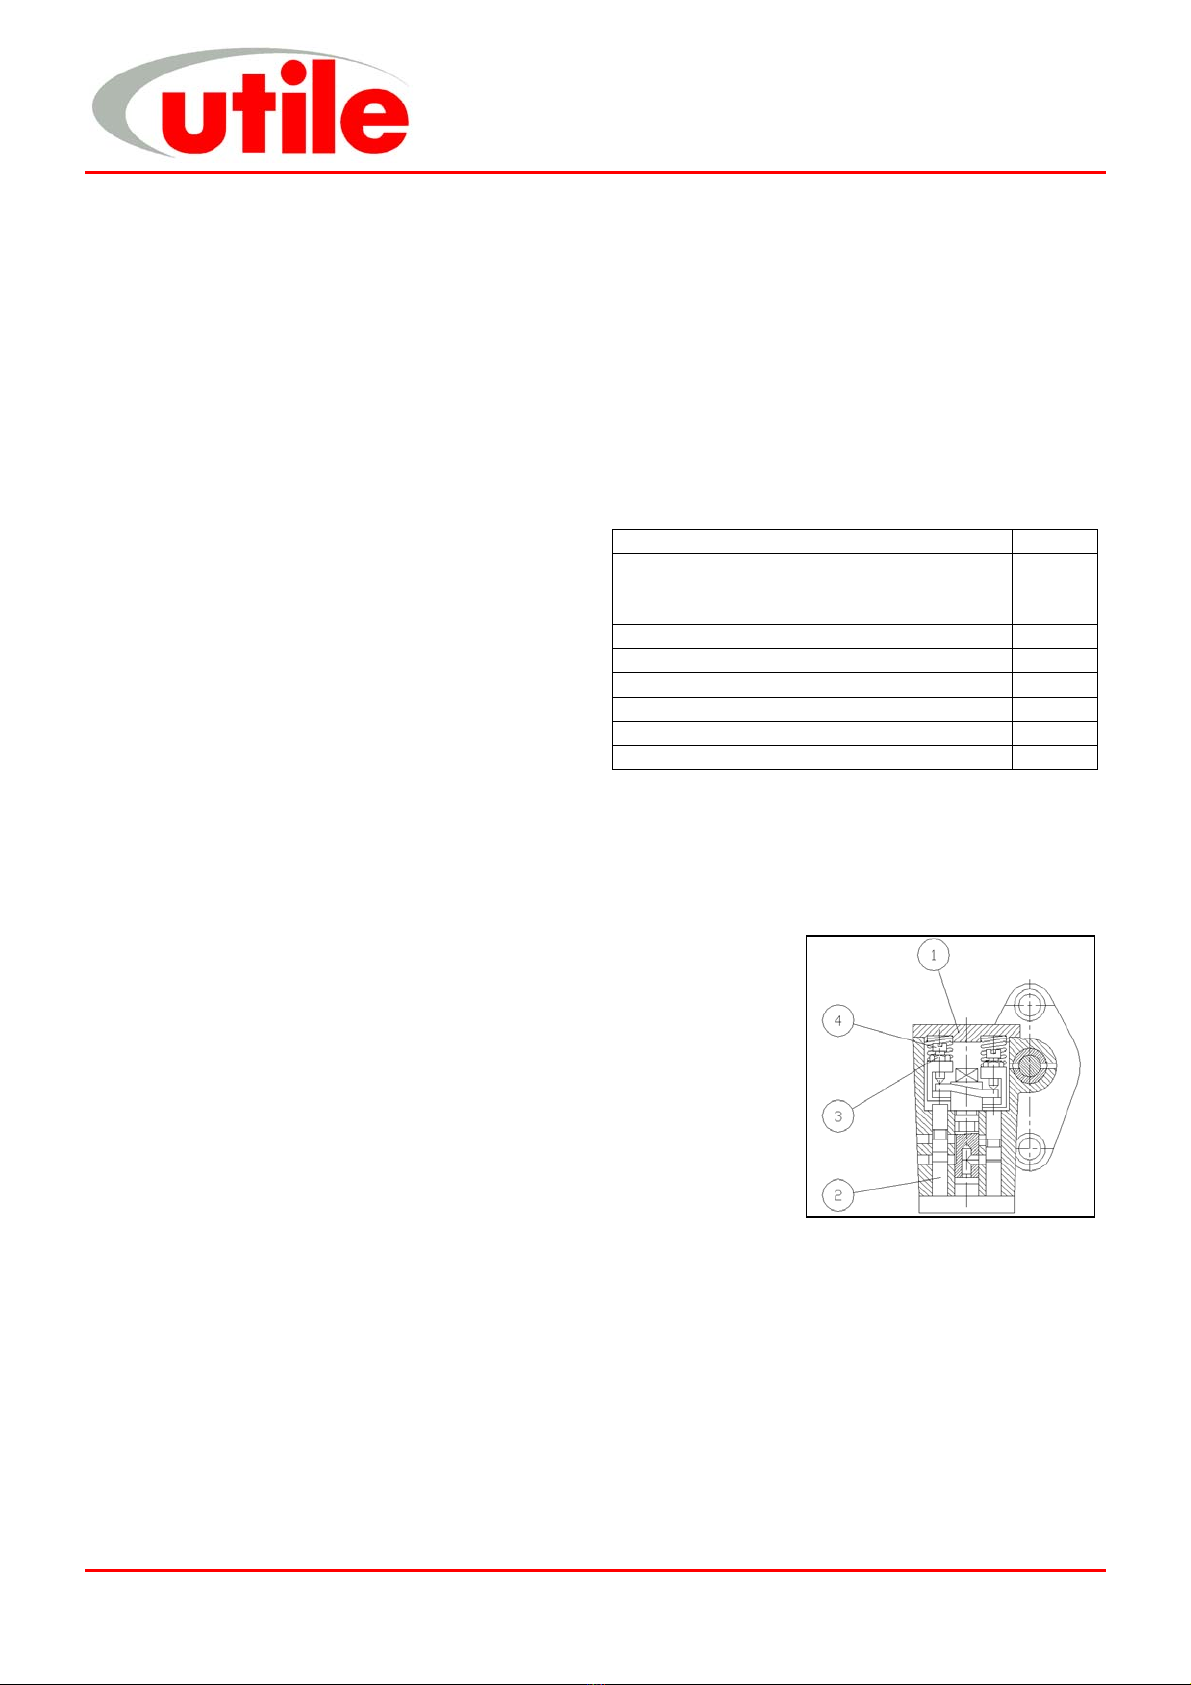
Only approved lubricants must be used and quantities, etc must be checked regularly.
Before restarting after servicing, all nuts, set screws, etc must be checked for tightness, check all joints, for leaks
and carry out purging as necessary before introducing the process gas. Also, before start-up, check the machine
inlet and outlet isolating valves are open both non-return valves (if fitted) are the correct orientation.
Adjacent pipework and equipment must not impose undue forces and moments on the machinery flanges.
All welding work must be carried out be an approved gas coded welder.
In order to prevent reverse rotation of machines, it is ESSENTIAL that a non-return valve be installed in the inlet
pipework. Otherwise a hazardous situation can arise during a normal shutdown or if the prime mover power supply
is interrupted for a period of time.
The environment around the installation may need to be monitored in order to detect gas leaks etc., and
consideration must be given to the installation of gas detecting equipment, and the class of electric equipment.
All personnel working in or passing through the area should be adequately warned by signs and trained to exercise
appropriate safety precautions. Ensure the correct personal protective equipment is worn at all times.
Health and Safety