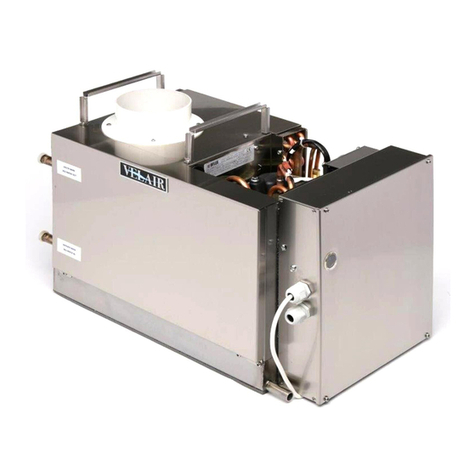
VelAir Compact 7SC 230V-50Hz Guide

Instruction manual
Pag. 1 of 26
Date 2018-11-27
User & Installation MANUAL
Air Conditioning System
Via Milite Ignoto, 8/A
16012 Busalla (GE) Italy
Tel. +39 (0) 10 9620 244/239
Fax +39 (0) 10 9620 333
Web site: www.ultraflexgroup.it
eMail: [email protected] Rev 06
SELF-CONTAINED UNITS
ØCompact 7SC 230V-50Hz
ØCompact 7SC 110 V - 60Hz

Installation manual
Pag. 2 of 26
rev 06
INDEX
1.0 INTRODUCTION
.................................................................................................................................................................
3
2.0 PACKAGING AND IDENTIFICATION
............................................................................................................................... 4
3.0 GENERAL NOTICES
...........................................................................................................................................................
5
3.1.1
SAFETY MEASURES
.....................................................................................................................................................
5
3.1.2
PROHIBITIONS
.............................................................................................................................................................
5
3.1.3
RESPONSIBILITY
...........................................................................................................................................................
6
4.0 INSTALLATION
.................................................................................................................................................................... 7
4.1.1
HYDRAULIC CONNECTIONS
..................................................................................................................................... 8
4.1.2
AIR DUCTS CONNECTION
....................................................................................................................................... 11
4.1.3
ELECTRICAL CONNECTION
...................................................................................................................................
........................................................................................................ 15
5.0
OPERATING
...................................................................................................................................................................... 16
5.1
ALARMS AND TROUBLESHOOTING 17
...............................................................................................................................
6. 0 WORKING LIMITS
............................................................................................................................................................
17
7.0 WARRANTY.............................................................................................................................................. 18
8.0 CONTROL PANEL MANUAL ...................................................................................................................20
We would like first of all to thank you for deciding to grant your preference to our product.
We are sure you will be satisfied because it represents the best technology of boat air conditioning. By
implementing the suggestions that are contained in this manual, thanks to the product that you have
purchased, you can enjoy high thermal comfort with a great energy saving.
Document is confidential by law and may not be copied or transferred to any third party without the
express permission of the manufacturer. The manufacturer reserves the right to make changes at any
time to their models, without prejudice to the essential features described in this manual.

Installation manual
Pag. 3 of 26
rev 06
1.0 INTRODUCTION
This manual has been prepared with the aim to give you all the explanations to be able to properly install
the "SELF-CONTAINED UNIT" and to better manage the device. Improper installation procedures can result in
unsatisfactory performance and / or premature failure of this air conditioning unit.
We invite you to read it carefully before operating the product. If there are any statements or procedures
described in this manual, that you do not understand, contact UFLEX for assistance:
Phone: +39 010 9620 -244 or -239 E-
mail: [email protected]
Keep the manual in a dry location to prevent deterioration, for at least 10 years for any future reference.
In the interest of product improvement, specifications and design of the SELF-CONTAINED UNIT will be
subject to change without giving notice.
NOTE: This unit complies with European directives for EMC 2004/108 / CE.
2.0
PACKAGING AND IDENTIFICATION
The packaging is made of suitable materials to protect the machine from the stress of transport and
handling.

Installation manual
Pag. 4 of 26
rev 06
All units are delivered complete and
in perfect condition, however, to
control the quality of transport
services, check the following:
•
Upon receipt check if the box
is damaged, if that is the case,
accept the goods with reservations
and keep photographic evidence of
any damage found.
•
Unpack and check the
presence of the individual
components.
•
Check that all components
have not been damaged during
transport.
IMPORTANT! Lift the unit avoiding to
catch it in sensitive parts such as tubing and air adapters.
When the load is lifted off the ground stay away from below and surrounding area.
During transport operations respect the symbols on package and avoid to place in a vertical position the
product. In fact, the refrigerator compressor is mounted on vibration dampers, and there may be a shift of
the compressor or piping connecting outside their seats.
Not dispose of, abandon or leave within the reach of children packaging materials (cardboard, staples,
plastic bags, etc..) as it can be a potential source of danger.
3.0 GENERAL NOTICES
3.1.1
SAFETY MEASURES
This instruction manual is an integral part of the appliance and therefore must be kept with care and must
ALWAYS accompany the appliance even in case of its sale to another owner or user or to a transfer to
another plant. In case it is damaged or lost, request another copy from the Technical Service of the area.
During all operations on the device it is necessary to observe the precautions specified in this manual and
on the labels attached to the appliance, as well as all the precautions suggested by common sense, and
the safety regulations currents at the place of installation.
Please read this manual carefully before proceeding with any operation (installation, maintenance, use)
and follow scrupulously the instructions contained in the individual chapters. Failing to comply with the
instructions contained in this manual and use the appliance outside the operating limits specified will void
the warranty Make known these instructions to all staff interested at the machine.
The manufacturer assumes no responsibility for damage to people or property arising from the failure to
compliance with the rules contained in this booklet.

Installation manual
Pag. 5 of 26
rev 06
In case of replacement of parts, use only original spare parts.
You should always use personal protective elements to perform actions on the devices.
The installation and maintenance of air conditioning equipment may be dangerous because within these
devices there are pressurized refrigerant gas and electrical devices. Therefore the installation, initial start-up
and subsequent maintenance must be carried out by authorized and qualified personnel only.
In case of leakage of refrigerant fluid, it is mandatory to ventilate the room, considering also that refrigerant
fluid when exposed to flame produces toxic gas.
When refilling the system, after eventual leakage and repair, be sure that inside the refrigerant circuit does
not enter any substance, such as air, other than the specified refrigerant (R410A). The presence of air or
other foreign substances in the circuit of refrigerant may cause an abnormal increase of pressure or
breakage, resulting in personal injury.
In the case of water spills from sweater circuit, switch off immediately compressor and seawater pump and
shut off Manual Valves in order to stop the seawater flow.
During the cold period if the unit is not in use, drain all the hydraulic circuits connected to the unit, as well as
seawater condenser to prevent them from freezing.
Some parts of the appliance produce heat during operation. The room installation must ensure adequate
ventilation and proper heat dissipation.
3.1.2
PROHIBITIONS
We remember that the use of products that use electricity and water involves the observance of some
basic safety rules such as:
•
It is forbidden the use by children and unassisted disabled people.
•
Do not touch the appliance when barefoot or with wet or damp parts of the body.
•
It is prohibited any operation before disconnecting the unit from the mains supply by moving the
power switch to "off".
•
Do not modify safety devices or adjustment without permission and instructions from the
manufacturer.
•
Do not pull, detach or twist the electrical cables coming from the appliance, even if it is
disconnected from the mains power supply.
•
It is forbidden to open the access panels to the internal parts of the unit without having first
disconnected the unit from the mains by putting the system power switch to "OFF position".
•
Do not dispose, abandon or leave within the reach of children the packaging material because it
can be a potential source of danger.
•
It is forbidden to use refrigerant and water pipes for grounding the unit.
•
It is forbidden to disperse R-410A into atmosphere: R410A is a fluorinated greenhouse gas, referred to
in the Kyoto’s Protocol, with a Global Warming Potential (GWP) = 1975.
3.1.3
RESPONSIBILITY
UFLEX S.r.l. disclaims any liability for damage to people, animals or property resulting from the installation, use
or maintenance improper of the product, or due to failure of compliance with standards and directives
mentioned in this manual.

Installation manual
Pag. 6 of 26
rev 06
Room thermostat
Air distribution
Seawater
discharge
Air suction
Seawater inlet
4.0 INSTALLATION
Selection and installation of components are left to the responsibility of the installer who must operate
according to the rules of good technique and the legislation in force.
Before connecting the pipes make sure that these do not contain stones, sand, rust, scale or other foreign
objects that could cause damage or failure to the system.
To achieve a successful installation and optimum operating performance, carefully follow the instructions
provided in this manual.
The failure to apply the rules indicated, which may cause malfunction of the appliance, raise the
manufacturer from any form of guarantee and liability for damage caused to people, animals or things.
IMPORTANT! The appliance must be installed in a protected area and in such a way that the accessibility to
the unit is possible only by removing the protection by means of a tool.
IMPORTANT! The appliance must be installed in such a way as to facilitate maintenance.

Installation manual
Pag. 7 of 26
rev 06
4.1.1
HYDRAULIC CONNECTIONS
The following is a summary of how to install the unit on a sea water circuit and condensate drain:
CORRECT SYSTEM INSTALLATION
The minimum nominal diameter of the connecting pipes should be 1/2 ".
WRONG SYSTEM INSTALLATION EXAMPLES:

Installation manual
Pag. 8 of 26
rev 06
SEA WATER CIRCUIT
Installing seawater electric-pump
The sea water electric-pump is needed to circulate the amount of water required in the heat exchanger.
This pump is normally centrifugal type and not self-priming type, so it must be mounted so that it is always at
least 20 cm below the waterline. The electric-pump should be fixed through silent blocks possibly in a sound
insulated environment.

Pag. 9 of 26
Installation manual
rev 06
IMPORTANT! Turn off the air conditioning always when the sea is very rough in order to avoid pump
unpriming.
It is required a sea water filter between the sea water intake and electric-pump, in order to protect it from
any foreign matter. Failure to install a sea water filter void the warranty of the pump and the unit.
Seawater circuit must be installed with a slope upwards: from the seawater intake, through the filter at the
pump inlet to the condenser unit compact entrance.
The unit overboard discharge must be installed as close as possible to the waterline to reduce noise and to
be able to check visually the flow / output of the water circuit running.
Self-contained installation
Connect the self-contained heat exchanger
unit in the following manner:
NOTE: to allow the maintenance or repair
operations it is essential that each hydraulic
connection is provided with the respective
shut off valve.
DRAIN
The air treatment involves the separation of condensate water from humidity of air treated. This condensate
must be discharged in the bilge or in a special tank (a kit Uflex, as an accessory, is available in case it is
required a drain pump; it consists of drain pump, min and max level switches, to be connected to PCB).
Since while operating the air conditioner sucks and then creates a slight vacuum in the environment, the
drain pipe that goes directly or in the bilge or in a tank, it could suck it up and bring unpleasant smells into
the cabin. To avoid this, it is appropriate to make a trap for blocking the air.
NOTE: The direct discharge at side is
not recommended because of
sucking bad smells from the outside
caused by the exhaust gas of its
own or other engines.
Each self-contained unit has two
outlets, and it is recommended to
use both in order to evacuate
quickly the water from the drain
pan.

Pag. 10 of
26
Installation manual
rev 06
Outlet nozzles
Air suction
Display
4.1.2
AIR DUCTS CONNECTION
Electrical box
IMPORTANT! All nozzles can be ducted allowing the highest air flow rate, however in case of restricted space
for installation, only one nozzle can be ducted while the other shall be closed.
The diameter of the duct should not be less than the diameter of the outlet nozzle.
·
SELF CONTAINED AIR COMPACT 7SC 230V-50Hz÷ COMPACT 7SC 115V-60Hz (up to 7.000 BTU/h) ducts
diameters 100 mm

Installation manual
rev 06
Pag. 11 of 26

Installation manual
rev 06
Pag. 12 of 26
Suction
The ambient air is sucked through one or more grids of appropriate size. The grid dimensions should respect
the suction area of the unit.
Air distribution
The system need a correct air flow in order to work efficiently. It Is therefore important to get the correct
distribution without bottlenecks , by maintaining the original nozzle diameter and not exceeding the
recommended length of pipes.
The air ducts should be insulated type and must be well stretched to allow a good air flow.

Installation manual
rev 06
Pag. 13 of 26
AIR FILTER
The air conditioner sucks air from the environment through an air-gas exchanger equipped with aluminium
fins having small pitch. A filter must be located upstream the exchanger in order to protect it from dust.
NOTE: the filter must be easy reachable to be extracted for the normal operations of cleaning and / or
replacement whenever required.

Installation manual
rev 06
Pag. 14 of 26
4.1.3
ELECTRICAL CONNECTION
Warning
It is important that the electrical system is done according to the rules, respecting the data provided in
chapter Technical data and it shall be properly grounded.
FIXING
The electrical box is connected to the unit by a 700 mm cord for easy installation in case of limited available
space.
ELECTRICAL BOX
TERMINAL BOARD:
, L Line supply voltage 230 VAC/1ph/50-60
Hz
1, L1 power to seawater pump (Fuse 5A)
P remote activation (digital input)
AIN MCU (CONTROL LOGIC)
COMPRESSOR RUN CAPACITOR
CP : contact for remote compressor activation, when closed the unit works normally and can be managed
via thermostat display or Remote Control, when CP is open the unit goes into stand-by and cannot be
activated by thermostat display or Remote Control, SB is shown on the display to indicate this condition.
Important: in case of connecting two or more units in parallel the CP digital inputs of each unit must be kept
separated.
EMC FILTER

Installation manual
rev 06
Pag. 15 of 26
5.0
OPERATING
From remote controller it is possible to select the On / Off mode, the cooling, heating mode, to change the
set point temperature ( + / - ), to select the fan speed ( min, med, max, auto).
The room thermostat must be installed in a proper position, away from heating sources. The set point
temperature and real value are shown on the thermostat display.
ON/OFF
DISPLAY
The room thermostat has to be connected with the MCU through the 6 m length cable (supplied with the
unit).
For the supplied display user interface please read carefully the specific display instructions

Installation manual
rev 06
Pag. 16 of 26
Control Panel PIN Out
Blue Grey Red Black
5.1
ALARMS AND TROUBLESHOOTING
In case of faults, the following alarms code will appear on the two digits panel integrated in the electrical
box
E1: Ambient temperature: sensor fault
E2: Evaporator coil temperature: sensor fault
E3: Sea water inlet temperature: sensor fault
E4: Condensator temperature: sensor fault
E5: DC internal Blower fault
E7: Comunication error between MCU and room thermostat
LP: Low pressure commutator alarm
HP: High pressure commutator alarm
LT: Evaporator Low temperature on heating mode
In case of E1 – E7 alarms switch Off the unit then Switch On again, if the alarm is still On call an authorized
Uflex – VELAIR Service Center
In Cooling mode the HP alarm reason could be an obstruction in sea water circuit, or a sea water pump
fault. Check the outboard sea water discharge, and in case of poor flow check and clean the sea water
circuit components

Installation manual
rev 06
Pag. 17 of 26
In Heating mode the HP alarm reason could be a poor air flow outlet. Check the air ducts are clean and free
from obstructions, check and clean the inlet air filter
The LP alarm reason is usually a refrigerant leak, check the refrigerant circuit to detect eventual leaks
The LT alarm reason could be a poor sea water flow, or a very low sea water temperature ( below 5 C° ).
Check first the sea water flow as described above.
6. 0 WORKING LIMITS
The unit operates correctly within the following ranges:
·
Summer cooling mode: 15°C < sea water temperature < 40°C
·
Winter heating mode: 5°C < sea water temperature < 20°C
Should working conditions be out of these ranges, in your particular application, please contact Uflex
before installation in order to find a suitable solution.
·
Localized situations: in some regions, it is common to experience a tremendous presence of jellyfish or
seaweed concentrated in back bay marinas for some periods of time. This can clog strainers, water pumps
and heat exchangers in a little while, causing shut-down faults and sometimes equipment damage. In such
particular conditions, please seek the advice of a local Uflex service representative. Any possible
modification to the overall system (self-contained, pumps, strainers, etc.) that could overtake the problem
must be approved by Uflex, otherwise warranty coverage will decline.
·
The pump is not self-priming: any damage incurred due to a pump running dry is not covered under
warranty. Air conditioning system must be switched off, as well as pumps, whenever there is a risk of pump
unpriming, due to particular seawater conditions related to the boat type and its speed. The compressor
could be damaged if the seawater flow through the heat exchanger is considerably reduced.
This air conditioning system is designed to work under normal operation conditions. Where failure or
malfunctions could lead to an abnormal operating condition that could cause injury or damage to any
equipment or other property, additional precautions must be designed into the control system. Other
devices (limit or safety control) or systems intended to warn of, or protect against failure or malfunction,
must be incorporated into and maintained as part of the system.
7.0
WARRANTY
The Uflex warranty policy is extended to cover the VELAIR Marine Air Conditioning products manufactured
or supplied by Uflex srl.
Uflex warrants that products are free from defects in material or workmanship for their normal use for a
period of two (2) years.
This limited warranty is to be administered and serviced through a Uflex Authorized Dealer/Service in
accordance with the Uflex warranty policy.

Installation manual
Pag. 18 of 26
rev 06
As alternative, the defective product should be returned freight prepaid to the Uflex facility and must be
accompanied by an Uflex issued Return Goods Authorization number. Upon receipt, the product will be
examined to determine the cause of defect. If the product is determined to have a defect in workmanship
or material, it will be repaired or replaced at the Uflex discretion. And then shipped back ex works.
This guarantee does not cover labor, nor installation/disinstallation time.
All parts repaired or replaced under warranty condition are guaranteed to be free from defects for 90 days
after repair/replace or the remainder of the original warranty, whichever is longer.
To locate the nearest Uflex Authorized Dealer/Service please call:
➢
Europe: Uflex at +39-010-9620.239 /244
➢
USA: Uflex USA at +01(941) 351-2628
➢
Rest of the World: Uflex at +39-010-9620.239 /244
or visit our web site at: www.Ultraflexgroup.com and www.uflexusa.com
7.1.1
Installation / Validation & Commissioning
The Uflex Marine Air Conditioning Products have to be installed by authorized installers or the installation has
to be reviewed and approved by an authorized installer.
All installation/application releases should be commissioned, validated and documented. In case of OEM
installations this applies only for the first released representative application.
For commissioning and validating procedure, please write to the Uflex Team ([email protected]t) or refer to
your Uflex service/dealer. They will get in touch with Uflex Team
7.1.2
Limitations and Exclusions
This warranty is limited to repair & replacement only. It does not cover:
✓
Claims for direct or indirect Damages
✓
Failure of the Uflex equipment due to normal wear, accident, misuse, abuse, lack of reasonable and
necessary maintenance, unauthorized installation or repair by the end-customer
✓
Transportation damages. This should be claimed directly with the forwarding company.
✓
Repair costs due to failure of Uflex equipment due to negligence, improper installation or
nonrespecting the installation guidelines (installer fault) will not be funded
✓
Limited warranty is extended only to the original application and is not transferable.
✓
Any intervention by a third part not specifically and previously authorized by Uflex to repair, will void
the Uflex warranty and it will not be reimbursed.
7.1.3
Owners Responsibilities
The responsibility of the owner of the equipment includes the following:
1.
Operate the equipment according to the manufacturer’s instructions.
2.
Perform regularly maintenance.
3.
Provide easy accessibility for service.
4.
Check and reset circuit breakers and fuses before calling for service.
5.
Keep the unit clean and free of dirt.
6.
Keep the condenser coil free of sediment and scale.
7.
Keep clean the air filter on heat exchanger.
8.
Proof of purchase is required for all units.
9.
Ask the installer of your Uflex air conditioning system or your Uflex dealer for a copy of the Validation
Report.

Installation manual
Pag. 19 of 26
rev 06
8.0 CONTROL PANEL MANUAL
Compliance
This unit complies with the following European Directives:
•
Low voltage 2014/35/EU; •Electro-magnetic compatibility 2014/30/EU;
Symbols
The pictograms in the next chapter provide the
necessary information for correct, safe use of the
appliance in a rapid,
unmistakable way.
Editorial pictograms
U User
-
Refers to pages containing instructions or
information
for the user.
I Installer
-
Refers to pages containing instructions or
information
for the installer.
S Service
for the CUSTOMER TECHNICAL ASSISTANCE
SERVICE installer.
Safety pictograms
Warning
-
The operation described may cause physical
harm if not carried out in accordance with safety
regulations.
Dangerous electrical current
-
Make personnel aware that the operation
described may lead to electrical shocks if not
carried out in accordance with safety regulations.
High temperature danger
-
Of safety regulations, the risk of burns caused by
contact with components with high temperatures.
Prohibition
-
Refers to prohibited actions.
-
Refers to pages containing instructions or information

Installation manual
Pag. 20 of 26
rev 06
Cooling on
Alarm indicator (solid light)
Panel off indicator
Temp + is for increasing the set
temperature
Temp - is for decreasing the set
temperature
Heating / Cooling: for changing the
operation mode between heating and
cooling
Sets the regulation ventilation speed
between a minimum and maximum value
to an entirely automatic mode
Minimum speed operation: limits
ventilation speed to a contained level and
the set temperature is adjusted
automatically.
Maximum speed operation: Allows for the
maximum ventilation speed to be set
ON/Stand-By: for activating the device or
for putting it in stand-by.
Medium speed: limits ventilation speed to
a more contained value
Automatic operation
Medium ventilation speed
Maximum ventilation speed
Minimum ventilation speed
Heating on
8.1 Velair touch control panel with room probe
Velair touch control panel is an electronic thermostat
with a room temperature probe for controlling
VELAIR air conditioning units, both On-Off and
VSD – Inverter type of units
The control panel has a memory, so settings will not be
lost if the appliance is switched off or in the power
supply is cut.
After 20 seconds from the last action, the panel
brightness will be reduced and the room
temperature will appear on the display. Press
any key to restore maximum brightness.
8.2 Display
Any statuses and alarms are also shown on the
display by using 8 specific symbols:
8.3 Key function
The various functions are set using 8 backlit keys:
This manual suits for next models
1
Table of contents
Other VelAir Air Conditioner manuals
Popular Air Conditioner manuals by other brands

ACS
ACS Marvair 8AA1024A-8AA1060A product manual

GE
GE AGE07 Owner's manual and installation instructions

Admiral
Admiral AW-05CM1FLU use and care manual

Mitsubishi Electric
Mitsubishi Electric MSC-GE20VB operating instructions

Frigidaire
Frigidaire LRA257ST21 Use & care guide

Diplomat
Diplomat DX-80CHRC instruction manual