7
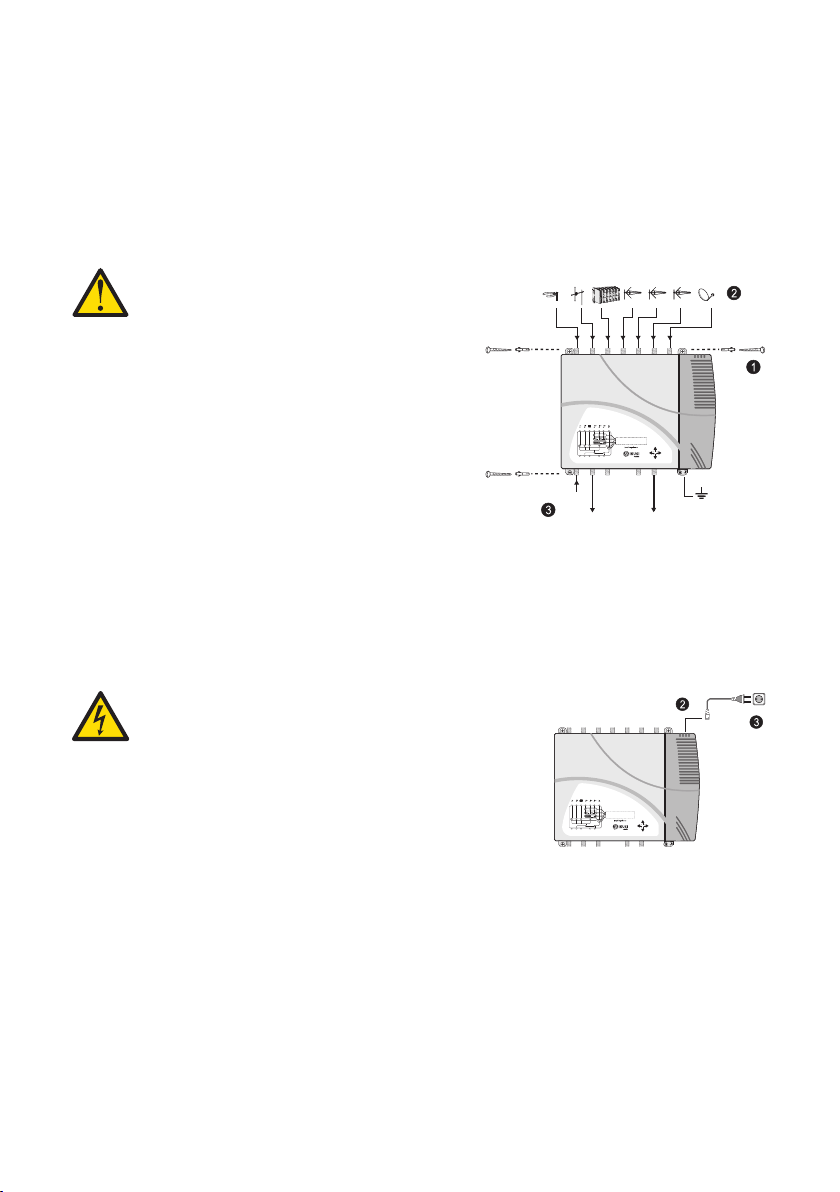
Configuration and setting
FReprogrammable as many times as required.
J10 tuneable UHF filters with the capacity to process 1 to 5 channels each.
JSignal processing:
FTerrestrial inputs with low noise figure (< 6 dB).
FSatellite input with low noise figure (< 9 dB).
FAutomatic signal level equalisation.
FAutomatic gain control.
JExtra functions:
FInternal configuration cloning with transferral to another equipment.
FEquipment locking by security code.
JDimensions : 290 mm x 240 mm x 20 mm
JWeight: 2 kg
ONE118 (3 models) (see data sheet in page 20)
Recommended for small and medium-sized installations made up of 10 UHF filters delivering an
output level of 118 dBμV.
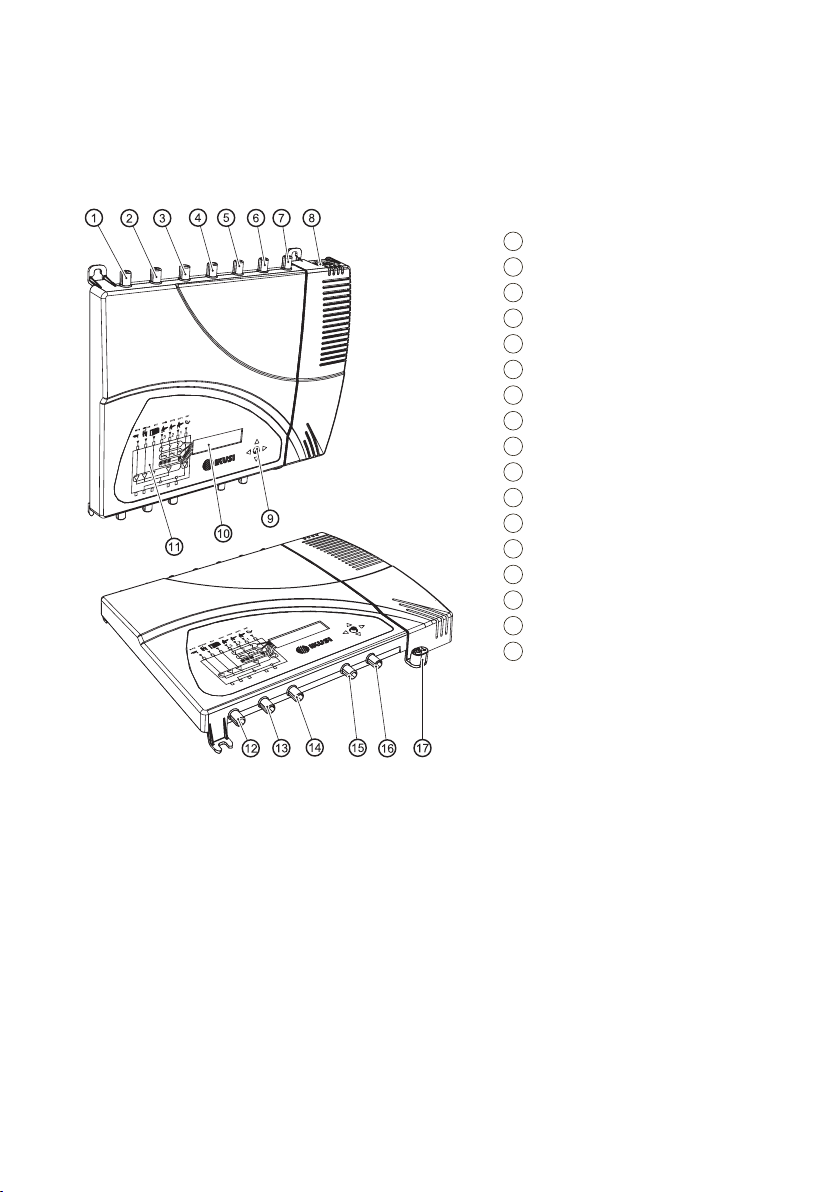
JInputs:
F5 terrestrial inputs = BI-FM, BIII-DAB, UHF1, UHF2, UHF3
FBI-FM gain = 35 dB
FBIII-DAB gain = 40 dB
FUHF gain = 55 dB
JOutputs:
F1 TV output
F1 Test output
FVHF/UHF output level = 118 dBμV 1
1IMD3-60 dB, DIN 45004B (see channel reduction table in Technical Annex)
ONESAT (3 models) (see data sheet in page 21)
Recommended for small and medium-sized installations, comprising 10 UHF filters it includes
one satellite input and two mixed television-satellite outputs. CTI compliant.
Compatible with UNICABLE TM
JEntradas:
F6 terrestrial inputs= BI-FM, BIII-DAB, UHF1, UHF2, UHF3, VHF-UHF/EXT.
F2 satellite IF inputs.
FBI-FM gain = 30 dB (2 outputs) or 35 dB (1 output).
FBIII-DAB gain = 35 dB (2 outputs) or 40 dB (1 output).
FUHF gain = 55 dB (2 outputs) or 60 dB (1 output).