Verify Location SAZO GPS User manual

SAZO GPS
Personal Locator System
USER MANUAL

INDEX
Chapter 1. SAZO………………………………………………..………5
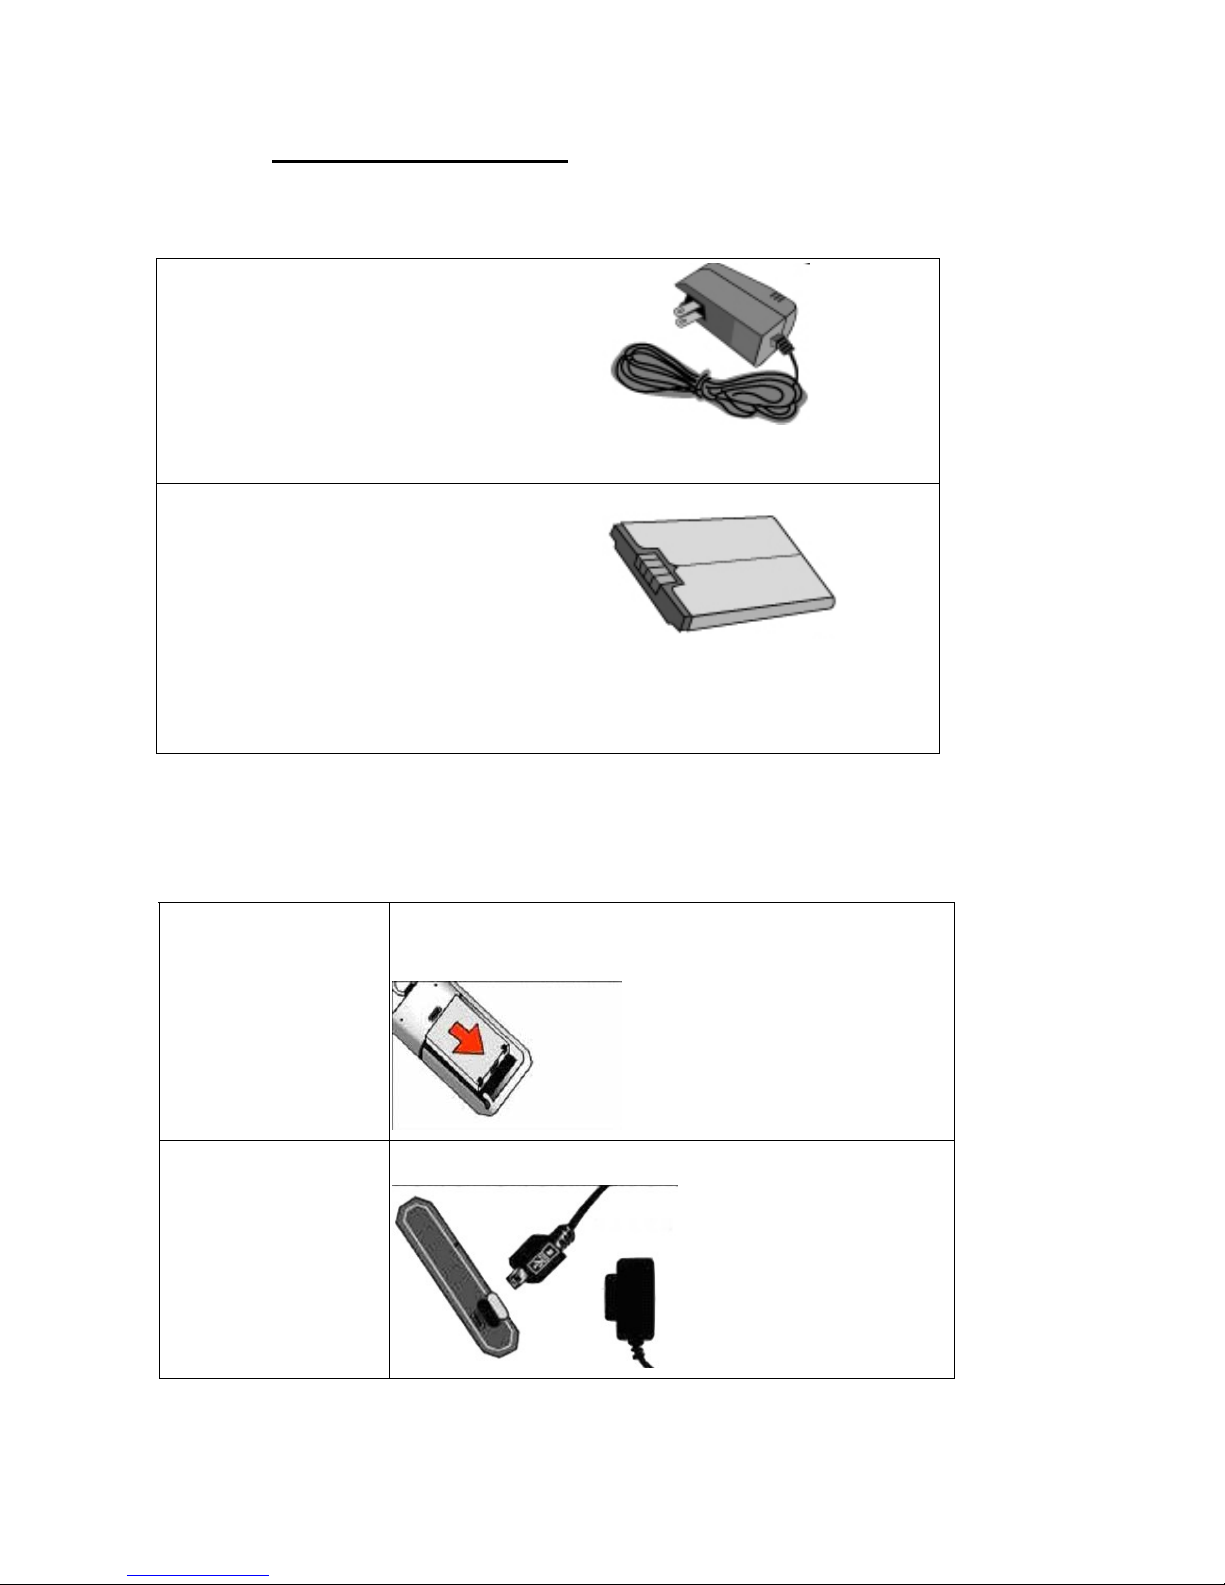
1-1 SAZO accessories…………………………………………………………………………..5
1-2 Important Observations……………………………………………………………………..6
1-2-1 Positioning errors……………………………………………………………………..6
1-2-2 Setting of emergency call……………………………………………………………6
1-2-3 Lag of message announcement…………………………………………………….6
1-2-4 Password management and regular change………………………………………6
1-2-5 Daily maintenance…………………………………………………………………….7
1-2-6 Other suggestions…………………………………………………………………….8
Chapter 2. Operating…………………………………………………..9
2-1 Overview the “SAZO”………………………………………………………………………….9
2-2 Features overview……………………………………………………………………………10
2-3 Operating instruction…………………………………………………………………………11
2-3-1 Power up………………………………………………………………………………11
2-3-2 Switch off……………………………………………………………………………...12
2-3-2 In-bound and out-bouncall………………………………………………………..….12
2-3-4 Adjust handset volume……………………………………….……………..………..14
2-3-5 Ringer/ vibrate settings…………………………………………………….………..14
2-3-6 Emergency panic alert……………………………………………………….………15
2-3-7 Remove the ripcord/ lanyard…………..…………………………………………….16
2-3-8 Low battery power warning…………………………………………………………..17
2-3-9 Charger LED indicator………………………………………………………………..17
2-3-10 Restore the default setting………………………………………………………….17
2-3-11 Settings via cell phone/ telephone…………………………………………………18
2-3-12 Single location report………………………………………………………………..19
2-3-13 Regular location report………………………………………………...……………20
2-3-14 Silent monitoring……………………………………………………….……………20
2-3-15 Defaults setting………………………………………………………….…………..21
2-3-16 “Geo-fencing” instruction……………………………………………….…………..22

Chapter 3. Troubleshoot……………………………………………24
Chapter 4. Specification..............................................................26
Chapter 5. Warranty article…………………………………………27

- 5 -
1-1 SAZO accessories
Charger
The power-charger is designed specifically
for this product, you can identify whether
the recharging process is complete or not
by the top indicator on the charger’s panel.
Battery
Lithium battery is designed specifically for
this product,.
※ Recommend consumer using company-made specific parts of this product.
Installation Installation
Insert SIM then Battery.
◎Ensure that battery is correctly inserted with full power
contained.
Insert Charger
◎Ensure that battery is full charged.

- 6 -
1-2 Important Observations
1-2-1 Positioning errors
Location provided will have a tolerance from the real position depending where the device
is located, this is due to external factor; and the location position indicated is a reference
guide only.
1-2-2 Setting of emergency call
This product has emergency call ability; we strongly recommend that user completes the
setting prior to first using this product to ensure functions setting are correct.
After the settings are complete, SAZO will send the setting information to 1st emergency
number (primary) for confirmation. We recommend setting the most important person’s
number first as the emergency call No1. for immediate notification and safety demands.
1-2-3 Lag of Message Announcement
This product sends its location and status information by SMS from anyone of the network
providers, and during peak period or significant occasions like Christmas, New Year, etc.
the networks do get very busy. This may cause a delay in the receipt and sending of the
SMS message procedure.
1-2-4 Password management and regular change
This product can allow two way voice communication and. To change or access your
setting you will need to verify your password (PIN); this process is to protect personal
privacy, information and safety, It is your responsibility to keep this safe.
1-2-4-1 Default of password
The default password (PIN) value is “0000”, please reset it immediately after purchasing
this product. We strongly recommend not to use “0000”, or a personal ID number that is
easy to derive.
After the password is changed, no person including company system administrator can
retrieve this or has access to it. Only the user who knows the password (PIN) has access to
the device, please safeguard the password.

- 7 -
1-2-4-2 Regularly change password
It is highly recommend that the user change password regularly (90 days) and safeguard it
without disclosing it to others. Verify Location or its associated companies cannot be
liable for any breach or determent caused from password being revealed.
1-2-5 Daily maintenance
It is recommended to only use company-made standard parts and accessories for this
product. Any damage or disorder caused from using on-company-made parts will be
beyond the warranty scope.
This product is an electronic communication device; user needs to take caution when
performing the following maintaining points to keep the product in a good operation
condition.
1-2-5-1 Battery
Maintain battery power by charging the battery. The most proper operating temperature of
battery is within 20-30oC; temperature beyond this range will reduce the battery’s operation
lifetime.
1-2-5-2 Button keys
The button keys are probably the most used parts of this product. The dust accumulated in
the seam can be wiped out by tiny brush or blown out by air-spraying. Also consumer can
use palm vacuum to clean it.
Only clean the keypad surface while the product is turned off with battery taken out and the
external power line (charger) removed.
Avoid water leaking onto or into the casing, and from the button key seam; this will damage
the circuit board. If water is splashed onto the outer casing, DO NOT SWITCH ON the
product. Contact local agent for advice.

- 8 -
1-2-5-3 If splashed or wetted
Do NOT switch ON while it is wet, if the power is switched on this will cause severe
damage to the unit.
1-2-5-4 What to do if splashed:
Step 1: Remove power line and battery.
Step 2: Pour out any access water inside this product, and then find a soft napkin or cloth to
wipe, taking care not to erode the parts surface.
Step 3: Dry up this product by fan and send it to the local agent or shop at the earliest .
Under no circumstance use a hair-dryer to blow-dry as this may cause deformation
of mechanism by heat.
1-2-6 Other Suggestions
Away from high temperature
Do not expose the cell phone in an overheated environment for long durations, (i.e. placing
it under the windscreen inside the car’s cabin), as this is likely to deform the outer casing
and may damage internal parts.
1-2-6-1 Personal privacy
Under legislation it is strictly forbidden to use this product for the purpose of covert
operation or where other’s privacy may be compromised, (i.e. making wiretap or tracking
without consent, etc). Verify Location or its associated companies cannot be liable for
any breach or determent caused by users.

- 9 -
2-1 Overview
GSM blue LED
Emergency SOS
Mic
Send and Receive Key
Fast dial key 2 / volume up & down
Fast dial 3
Fast dial1/ Vibration& Ring
switch
Lanyard panic socket
Power switch Charger socket
Lanyard

- 10 -
2-2 Features overview
• GPS location.
• LBS location. (Depend on the local network operator service)
• Easy to use voice menu settings.
• Secure log in and PIN protected management system.
• Out-bound call fast dial pre-set for 3 numbers.
• Quick notification of emergency to 3 numbers.
• Emergency notification via SMS and Web.
• Low battery notification by SMS for 3 setting numbers.
• Ripcord/lanyard alert.
• Regular location reports.
• Silent monitoring.
• Incoming call vibration/ Ring select.
• Volumes adjust.

- 11 -
2-3 Operating instruction
2-3-1 Power Up Units
2-3-1-1 Under normal conditions: Press and hold the power button for up to 5
seconds both the red and blue LED indicator lights up, release the power
button. The booting process will be start, and be complete within about 60
seconds.
2-3-1-2 Emergency switch on: If your SAZO unit is in an off state you are still able to
send out an SOS/Panic alert.
Under off state, press and hold the SOS button for 5 seconds or remove the
Rip-cord/lanyard, both the red and blue LED indicator light up. The booting
process will start and complete within about 60 seconds.
Press the power switch
Press the SOS button
Remove the panic
lanyard

- 12 -
2-3-2 Switch off: Simply press and hold the power button to turn off the SAZO GPS.
2-3-3 In-bound and Out-bound calls
When receiving a call the SAZO will ring (or vibrate) as a normal mobile:
Step 1: Press the last key (receiving key) on the lower panel to talk with the caller.
Step 2: After completing the call, press the key (hang-up key) again to hang up.
Press the power switch
Receive/ Hang up

- 13 -
Out-bound calls
Step 1: Select and press the preset dial keys 1,2 or 3 once.
Step 2: Press the send and receive key within 2 seconds; this will now dial out to the
selected contact. (If you do not press the dial out key within this period the device will
treat this as error).
STEP1: STEP2:
Select the preset
number
Press the
Receive/ Hang up

- 14 -
2-3-4 Adjust headset volume
There is 3 levels of volume adjustment. The default settings are on level two. During
a call you may press the 2nd preset key once to decrease the microphone volume to
level 1 (minimum), or twice to increase the volume to level 3 (maximum).
MAX MID MIN
Press one time
Press two times
2-3-5 Ringer/Vibrate settings.
Step 1: Under standby status, press and hold the Receive/ Hang up key, then press
the 1st fast-dialing key to switch over the vibration/ ring mode alert.
Step 2: After each switchover, the SAZO will demonstrate the switched mode, for
example: when switching to the vibrate mode the device will automatically vibrate to
notify user that the mode is switched to vibration mode; and when switching to ring
mode and the cell phone will automatically ring up to notify user that the mode is
switched to ring mode.
Volume adjust
There are three different modes﹕
1. Only vibrate, 2. Only ring 3. Vibrate first
and ring next etc...
Press and hold the
Receive/ Hang up key
Press the 1st dial key
to switch

- 15 -
2-3-6 Emergency panic alert
There are two ways of setting off the panic alert.
6-1 Press the SOS key:
Step 1: In a compromising situation the user would press the SOS emergency keys
(Panic buttons) on the top and hold for 3 seconds.
Step 2: After the SAZO vibrates, the red and blue LED indicator flash together. The
SAZO will initials send out an enhanced cell location to all allocated persons and scan
for a GPS signal, when the GPS signal is obtained, the SAZO will send the real GPS
co-ordinates to all allocated persons via SMS and set up a log on the web application.
Step 3: After it has sent out messages to the three emergency call numbers, the unit
will automatically dial the 1st emergency/SOS number, If the is no reply the SAZO will
automatically dial the 2nd emergency/SOS If there is no response SAZO will
automatically dial to 3RD emergency call number and if there is no response it will go
back to the first number and repeat the process.
Step 4 : When there is a response from one of the emergency/SOS allocated persons,
the SAZO will into open the Silent Monitoring function for 60seconds.
After 60 seconds you will be given the option to continue the call or end by “ to repeat
press star key(*), to end call press the hash key(#) ”.
If press the star key(*) and the SAZO will maintain the Silent Monitoring function for a
further 60 seconds. If press the hash key (#), the SAZO will hang up automatically.
Press and hold the SOS key for 3seconds

- 16 -
2-3-7 Remove the ripcord/lanyard:
Step 1: In a compromising situation the user removes the panic lanyard for more
then 3 seconds.
Step 2: After the SAZO vibrates, the red and blue LED indicator flash together. The
SAZO will initials send out an enhanced cell location to all allocated persons and scan
for a GPS signal, when the GPS signal is obtained, the SAZO will send the real GPS
co-ordinates to all allocated persons via SMS and set up a log on the web application.
Step 3: After it has sent out messages to the three emergency call numbers, the unit
will automatically dial the 1st emergency/SOS number, If the is no reply the SAZO will
automatically dial the 2nd emergency/SOS If there is no response SAZO will
automatically dial to 3RD emergency call number and if there is no response it will go
back to the first number and repeat the process.
Step 4 : When there is a response from one of the emergency/SOS allocated persons,
the SAZO will into open the Silent Monitoring function for 60seconds.
After 60 seconds you will be given the option to continue the call or end by “ to repeat
press star key(*), to end call press the hash key(#) ”.
If press the star key(*) and the SAZO will maintain the Silent Monitoring function for a
further 60 seconds. If press the hash key (#), the SAZO will hang up automatically.
Remove the panic
lanyard

- 17 -
2-3-8 Low battery power warning
If the battery power becomes lower than 3.4 volts, SAZO will send out a the low power
notification SMS to the SOS number, and shut down the GPS function to save on
battery power until the battery is adequately charged.
2-3-9 Charger LED indicator
When charging the battery, the power on/off switch will light up until battery has
charged.
2-3-10 Restore the default setting
Forgot your P.I.N????
If you have forgotten your password there is NO process to retrieve it, even the
supplier/administrator has access to this.
In case the user has forgotten the password (PIN), they may revert back to the default
PIN of “0000”.
When this has been completed the device will send out three messages that contain
the settings of four preset -dialing call numbers and the three emergency call number
as well as notice of password being changed back to the default of “0000”, to the 1st
emergency call number (Primary).
NOTE: It is recommended that you change the default (PIN) password
immediately after restoring the default setting.

- 18 -
Step 1: As illustrated below, whilst the device is switched off, press and hold both the
“Receive/ Hang up” key and the “power switch” key at the same time.
Step 2: Hold and wait until the reboot (vibrate once); after hearing beep sound, release
both the keys and the password-restored process is completed.
Step 3: Your SAZO Locator will send out a confirmation message immediately after
completing the password-restored procedure.
2-3-11 Settings via cell phone/telephone
Step 1: Dial the SAZO cell number (SIM card).
Step 2: You will hear the vocal instruction: “To connect call press “1” for settings
press “2”.
If you press 1 you will be connected to the SAZO user as an ordinary mobile cell
phone.
Step 3: After pressing “2”, you’ll hear: “Please enter your PIN”; you are required to
input the default (0000) or your updated PIN; if the password inputted is incorrect
you will hear: “incorrect password, re-enter the password”. After three error inputs
consecutively, system will hang up automatically.
Power Key
Send and Receive

- 19 -
Voice menu chart
FUNCTION KEY NOTE
For Single location
report
1 The requesting phone should not withhold
their number when calling in, as the Sazo
will not send any information back.
For regular location
report
2 Settings are in 10 minute intervals 0~9,
where 0= No report and 1= 10 minutes
For Silent monitoring 3
For defaults setting 4 All settings of unit, i.e. SOS, pre-define
calls
Repeat * Star key to repeat options
End the call # Hash to end call
2-3-12 Single location report
Step 1: Dial the SAZO cell number (SIM card).
Step 2: You will hear the vocal instruction: To connect call press “1” for settings
press “2”.
Step 3: After pressing “2”, you will hear: “Please enter your PIN”; you are
required to input your PIN; if the PIN entered is incorrect you will hear: “incorrect
password, re-enter the password”. After three error inputs consecutively, system
will hang up automatically.
Step 4: After inputting the correct PIN, you’ll hear: “For single location report
press 1, For regular location report press 2, For silent monitoring press 3, for the
defaults settings press 4, to repeat press star key, to end the call press hash
key.
Step 5: Press “1” to request single referenced location. System will vocally
confirm: “Information has been sent to your cell phone” and hang up
automatically.
Step 6: after a short interval the authorized inquiring cell phone will receive the
positioning information sent by the SAZO.
NOTE: The requesting phone should NOT withhold their number when
calling in as the Sazo will not send any information back.

- 20 -
2-3-13 Regular Location request in real Time.
Step 1: Dial the SAZO cell number (SIM card).
Step 2: You will hear the vocal instruction: To connect call press “1” for settings
press “2”.
Step 3: After pressing “2”, you will hear: “Please enter your PIN”; you are
required to input your PIN; if the PIN entered is incorrect you will hear: “incorrect
password, re-enter the password”. After three error inputs consecutively, system
will hang up automatically.
Step 4: After inputting the correct PIN, you’ll hear: “For single location report
press 1, For regular location report press 2, For silent monitoring press 3, for the
defaults settings press 4, to repeat press star key, to end the call press hash
key.
Step 5: Press “2” to ask for regular location reporting the settings.
Step 6: After press “2” and hearing a beep tone please enter the interval timing
in intervals of 10 minutes i.e. enter 0~9, “0” is no report, “1” is for 10 minutes, “2”
for 20 minutes, “3” for 30 minutes…etc. Maximum set into 90 minutes.
Step 6: after a short interval the authorized 1st fast-dial programmed number will
receive a confirmation of the regular location detail settings.
NOTE: The requesting phone should NOT withhold their number when
calling in, as the Sazo will not send any information back.
2-3-14 Silent monitoring
Step 1: Dial the SAZO cell number (SIM card).
Step 2: You will hear the vocal instruction: To connect call press “1” for settings
press “2”.
Step 3: After pressing “2”, you will hear: “Please enter your PIN”; you are
required to input your PIN; if the PIN entered is incorrect you will hear: “incorrect
password, re-enter the password”. After three error inputs consecutively, system
will hang up automatically.

- 21 -
Step 4: After inputting the correct PIN, you’ll hear: “For single location report
press 1, For regular location report press 2, For silent monitoring press 3, for the
defaults settings press 4, to repeat press star key, to end the call press hash
key.
Step 5: Choose option “3” this will open up a silent call so the SAZO will not
have a ring alert and you will now be able to monitor the surrounding vicinity of
the user. (You may hang up once monitoring complete).
2-3-15 Defaults setting
To query fast dialing and emergency call numbers and report back the current
product’s settings.
Step 1: Dial the SAZO cell number (SIM card).
Step 2: You will hear the vocal instruction: To connect call press “1” for settings
press “2”.
Step 3: After pressing “2”, you will hear: “Please enter your PIN”; you are
required to input your PIN; if the PIN entered is incorrect you will hear: “incorrect
password, re-enter the password”. After three error inputs consecutively, system
will hang up automatically.
Step 4: After inputting the correct PIN, you’ll hear: “For single location report
press 1, For regular location report press 2, For silent monitoring press 3, for the
defaults settings press 4, to repeat press star key, to end the call press hash
key.
Step 5: Press “4” (For your default settings).
Step 6: The voice-guiding service will respond: “Information has been sent to
your cell phone” and hang up automatically.
You will receive the settings in three SMS responding messages. In the
following format:
The 1st SMS contents:
SET OK, T1: 0771234567, T2: 077912345678, T3: 07712345678
Table of contents