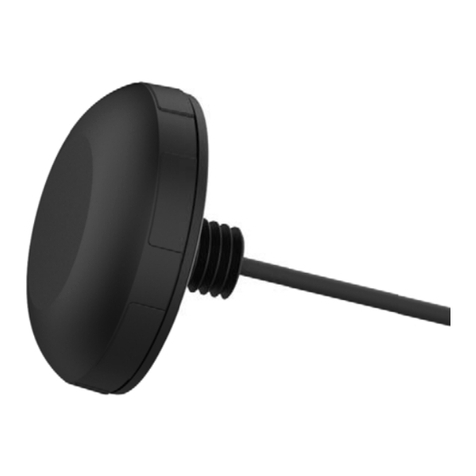
Trackerwave TWR1W User manual

WiFi Gateway Reader
1
INTRODUCTION ABOUT TRACKERWAVE
PRODUCT
INTRODUCTION
The Wifi Gateway Reader TWR1W is a Real Time Location Services (RTLS)
device which has been designed and developed by Trackerwave Pvt. Ltd.
It supports Bluetooth 5.0 BLE, Wi-Fi. The intended use of this device is
for gathering and aggregating RTLS data from various sensors in the
facility and synching the information with cloud system. The system
helps in tracking assets and personnel along with environment
monitoring in a multi campus enterprise.
Reader is an IoT device installed in identified positions of the healthcare
facility to track patients, assets and staff. Ovitag Readers are proven to
offer industry best ranges, thus reducing the installation points.
These readers are easy to install and configure, also support WiFi. All
reader models update firmware over the cloud, minimizing
maintenance and support activities.
Biomedical engineers can map the readers in the facility to the software
suite using the mobile application which is downloadable from Play
Store/AppStore for easy configuration.
The readers are certified to support concurrent Tags, with built in WiFi
fault tolerance.

WiFi Gateway Reader
2
CONTENTS IN THE PACKAGE
INSTRUCTIONS FOR USE............................................3
OPERATING INSTRUCTIONS .......................................5
DOWNLOAD AND INSTALL MOBILE APP .......................8
SYNCHRONISING DATA.............................................8
CONFIGURATION ....................................................9
OVITAG WEB APPLICATION.....................................21
CLEANING AND MAINTENANCE ................................23
SAFETY AND PRODUCT INFORMATION NOTES..............23
MATTERS NEEDING ATTENTION ...............................24
CAUTION ............................................................24
WARRANTY INFORMATION .....................................25
SUPPORT ............................................................28
END USER LICENSE AGREEMENT...............................28
CERTIFICATIONS AND REGULATIONS
The Wifi Reader device has undergone following compliance;
RoHS compliance, CE certification, FC and ISO-27001-2013 standard.

WiFi Gateway Reader
3

WiFi Gateway Reader
4
TECHNICAL SPECIFICATIONS
S.No
Pararmeter
Specification
1.
Network Interface
WIFI IEEE802.11b/g/n
2.
Bluetooth
BLE5.0/2.4GHz
3.
CPU
ARM® Cortex® @240MHz
4.
DRAM
8MB
5.
Flash Memory
16MB
6.
Power Input
100-240V 0-5A 50-60Hz 22-32VA
7.
Power Output
2Pin 2.1mm 5v,2A DC
8.
Dimensions
8.4cm: 8.8cm: 3.1cm
9.
Weight
58grams
10.
Operating
Temperatures
-40°C / +70°C
11.
Bluetooth Range
20 Meters

WiFi Gateway Reader
5
INSTRUCTIONS FOR USE
Power Schematic: Connect and power the device as shown below.
Please power up your device continuously using the DC adaptor 5V, 1A.
LED Indication: (Visible on top of enclosure)
Red LED ON --> Configuration is not successful
Red LED OFF --> Configuration is successful
OPERATING INSTRUCTIONS
Installation Steps
1. Drill two holes on the false ceiling 36.5 mm apart
2. Drill a cable channel with 9 mm diameter for running the Power
adapter wire.

WiFi Gateway Reader
6
3. Fasten the screws in nails with 15 mm distance from the false
ceiling
4. Connect the power adapter to the power behind the false ceiling
and run the cable through the 9mm channel.
5. Connect the 2pin DC jack cable to the reader
6. Place the reader fixing hole to the screws in false ceiling and twist
to lock firm.
Direction of Reader Antenna
The antenna of the reader is in alignment with the balloon icon on the
reader case. It is ideal to face the antenna to open indoor space for better
signal reception.
Wifi Reader Top View

WiFi Gateway Reader
7
Wifi Reader Bottom View
Wifi Reader Side View
Network Requirements
OvitagTM Readers supports WIFI networks in IEE802.11 b/g/n with
WPA/WPA2 security settings. The indoor locations where readers are
placed should have good WiFi Signal for data upstream communication.
The reader should be installed higher from floor level on the ceiling, so
that the signals gets dispersed through the room.

WiFi Gateway Reader
8
Reader Installation Map
Readers have to be installed on suggested locations by qualified
personnel for RTLS in false ceiling as per the following instructions on
Floor plan applicable to the location. The direction of reader antenna is
depicted in the floor map and the readers should be strictly aligned.
DOWNLOAD AND INSTALL MOBILE APP
You can setup the device through the TW Service Application for android
or iOS devices.
Search for “ TW Service app” in play store/ app store.
SYNCHRONIZING DATA
By using TW Service app, configure the gateway properties like SSID name,
SSID Password, Port number and IP Address. Once the connection is
verified successfully then the data will be synced and syncing information
will be displayed in cloud system.

WiFi Gateway Reader
9
CONFIGURATION
Configure Reader Using Service App
Pre-requisite: Enable the Bluetooth in smart phone, on which the TW
Service app is installed.
Step 1: Open our Trackerwave service app, enter the username and
password as given below and click Login.
User name and password will be provided by
Trackerwave Pvt. Ltd.

WiFi Gateway Reader
10
Step 2: Click the “Reader” tab to view the list of readers and select the
reader device id to configure.
Step 3: Ensure that the selected reader is powered on and the user is
within 5 meters distance from the reader. If Bluetooth is not turned on,
then app promotes to turn on the Bluetooth.

WiFi Gateway Reader
11
Go back and reselect the reader then only the Bluetooth
icon has enabled.
Step 4: The system displays the default gateway, SSID Name and
Password configured for the customer’s facility in the UI.
If the default configuration SSID Name and Password are
correct, no need to edit in gateway near pen icon, follow
the steps without edit any details - move to
错误
!
未找到
引用源。

WiFi Gateway Reader
12
Step 5: Edit SSID Name and password by clicking on the edit icon (pen icon)
as shown in below image.
The WiFi SSID (CASE SENSITIVE), password (CASE
SENSITIVE) and URL (gateway server IP address) should
be entered as instructed by the account manager.
Step 6: “Gateway details updated successfully” message will be displayed
once the details are edited.

WiFi Gateway Reader
13
Step 7: Now, go back and select the reader again so the new configuration
will be updated. The updated configuration will be applicable to all
readers no need to change every time.
Step 8: Click on the Bluetooth icon then it will scan the nearby reader’s
device id. The reader can be uniquely identified by the serial number
behind the reader.

WiFi Gateway Reader
14
Step 9: Click the pair icon on the right side of scanned reader id (select
the reader id which you want to pair).
Step 10: Enter an allocated pair key (CASE SENSITIVE) to connect with
Bluetooth as given below and click OK.
Pair Key: T6@cK

WiFi Gateway Reader
15
Step 11: Click the paired reader id, then the id will be displayed near
Bluetooth icon in in reader page. Please ensure the selected reader and
paired reader is one and the same.
Step 12: Please ensure the configuration of SSID Name, password and
gateway IP Address are correct then click the Sync button. (without
moving away from the reader).
Then “Reader details sent successfully” message will be displayed as
shown in the below image.

WiFi Gateway Reader
16
Step 13: Configuration message will be sent via Bluetooth to the reader.
The system shall show a confirmation message on successful reader
update.
Step 14: Configure all readers with same setting one by one by pairing the
reader one by one.
Step 15: Please ensure that all the readers are configured with
appropriate WiFi and Gateway information.

WiFi Gateway Reader
17
Configure Reader Using Bluetooth Terminal App
Bluetooth terminal app shall be used to configure the Trackerwave
Gateway Readers, where Customer account and Service app has not yet
made available, i.e. This could happen in case of a controlled Proof of
Concept or trail.
Step 1: Install the “BLUETOOTH TERMINAL” app from play store (android).
Step 2: Open the Bluetooth terminal and click the scan button.

WiFi Gateway Reader
18
Step 3: Displays list of Reader device IDs.

WiFi Gateway Reader
19
Step 4: Select the reader device ID which you want to configure.
Step 5: Enter the below Password to connect with that device id.
T6@cK
Table of contents
Other Trackerwave GPS manuals


