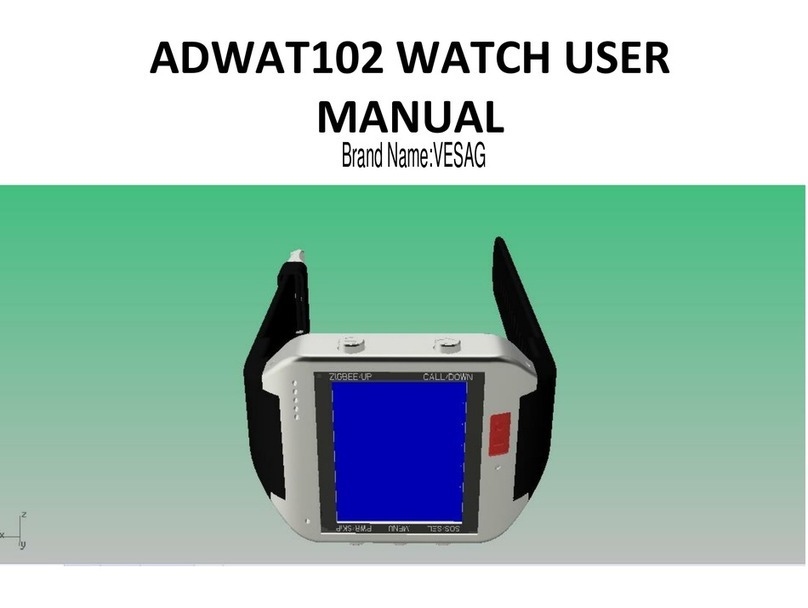
VESAG ADWAT102C User manual

ADWAT102CWATCH USER
MANUAL
1

ACTIVATION PROCESS
•Goto http://www.vesag.com/
•Click on New user link which is next to login.
•Enter the given customer id and press tab so that the mobile no,
username and email id will pop up.
•Change the username to a new username, enter password, verify
password and enter the three security questions and answers and the call
in password which is used for call centre purpose.(Make sure you note
the details you entered especially the username and password)
•Make sure the agreement is checked and then click on submit.
•If the submit button do not work , please click on agreement and click YES
button on the pop up window and then click submit again.
•Once you submit, it will take you to login page where you can just put the
new username and password and login.
2

CONTENT
I. GENERAL
1. Notices
2. About the Watch
3. Product Features
4. Product Specifications
5. Others
II. USAGE PREPARATIONS
1. Accessories
2. Appearance and Interface
3. Interface Definition
III. BATTERY USAGE
1. Charge the Battery
2. Notice
IV. OPERATION METHOD OF BASIC FUNCTIONS
1. Setting Up The Watch
2. Location Inquiry
3. Adjust Receiver Volume
4. Function Settings
5. Zigbee Interface
6. Medicine Reminder
7. Time Zone
8. ECG Interface
9. Low-Voltage Alarming Functions 3

o Vesag watch is a perfect combination of CDMAand GPS
technologies. This model, with its precise dimensions and
compact appearance, expresses the advanced workmanship
in the CDMAand GPS field. It is a typical design combining
communication products and GPS services.
I.GENERAL
4

1.1.NOTICES
•Please read this user manual carefully and always
use correct operation methods to prevent any
possible errors.
• This user’s manual is for reference only. If some
contents and operation steps are inconsistent with
those for the actual product, the latter will prevail.
5

1.2.ABOUT THE WATCH
•Vesag watch as a personal remote positioning device made up
of GPS module and CDMA module, is compact in
dimensions with high accuracy. This watch is portable and
one can wear it on the wrist or as a pendant. The location of
the wearer can be tracked with this watch through the built-
in GPS tracker. Medicine reminders can be set in it to remind
the patient of the time when he has to take some medicine or
has to go in for some health check up. While the health is
being monitored, an alarm from the watch can signal bad
health. In case this happens, the elderly and your loved ones
in problem can be taken to the hospital on time and their life
can be saved. Web portals can be used to set reminders in the
digital health monitoring watch.
6

1.3.PRODUCT FEATURES
•Inbuilt GPS Module
•Internet positioning service center, used to receive and send positioning
information
•The modem supports Quad frequency bands, i.e.
CDMA Band Class 0 and Band Class 1.
•High-sensitivity, new workmanship and the most advanced GPS chip
•Can work effectively in limited space such as urban canyon
•Low energy consumption
•Fast signal acquisition
•Supports single positioning and continuous tracking;
•Supports alarming and remote monitoring
•Supports fast dial button
•Supports the location information inquiry by SMS and Internet
•May monitor without disturbing the tracked person and realizes real-time
tracking.
•Can position the holder by call or SMS
7

1.4.PRODUCT SPECIFICATIONS
8
Wireless module: Telit DE910 DUAL 800/1900 MHz 1xRTT and EV-DO Rev. A support.
GPS: GPS One, Standalone GPS and GLONASS support. Software based Wi-Fi and Cell tower triangulation.
Short Range Wireless: Texas Instruments CC2530 ZigBee System on chip. Interacts with any ZigBee Pro devices
Processor and Memory: ARM Cortex M3, 32Bit 72MHz frequency, 512K flash memory and 2MB EEPROM.
Display: OLED, Size: 1.69”, 160*128 Pixels, Color Depth: 262,144 colors.
Battery: 650 mAH, 3 to 4 days standby time. 3 Hours talk time
Dimensions (L*W*H): 58.9*46.5*13.9 mm Strap: 132.9mm and 85.5mm
Sensors
Accelerometer.
±2 / ±4/ ±6 / ±8/ ±16 g linear acceleration full scale
Gyroscope
±245 / ±500 / ±2000 dps angular rate full scale
Magnetometer
±2 / ±4 / ±8 / ±12 gauss magnetic full scale
UV Sensor
The UV Index is a number linearly related to the intensity of sunlight reaching the earth. Values range from 1 to 11
Ambient Light Sensor
100 mlx resolution possible, allowing operation under dark glass
Proximity Sensor
Proximity detection adjustable from under 1 cm to over 50 cm
Temperature Sensor
High Accuracy Temperature Sensor. ±0.4 °C; (max), –10 to 85 °C
Humidity Sensor
Precision Relative Humidity Sensor, ±3% RH (max), 0 –80% RH

II.USAGE PREPARATION
9

•Main unit
•USB cable
•Charger
•Headset cable (optional)
•Battery
2.1.ACCESSORIES
10

2.2.APPEARANCE AND INTERFACE
Appearance and Buttons
•Five buttons are equipped with
this watch.
•The bottom left and right buttons
are for emergency SOS(RED
button) and call centre(GREEN
button) respectively.
•The upper left button is to
switch-on and hold-on.
•The middle left button serves
interface switch and menu.
•The upper right button is for
switching on Zigbee and ECG.
11

2.3.INTERFACE DEFINITION
•CDMAand GPS signal
strength is indicated on
the upper left corner of
the main interface .
•The middle left button is
used to switch among
interfaces like
(Analog/Digital/Menu).
•The display or wallpaper
would be the time in
digital or analog model as
shown in the picture.
12

III.BATTERY USAGE
13

3.1.CHARGE THE BATTERY
•Please use up the battery until its
discharged and then charge the battery for
at least 12 hours for initial use in order to
keep the quality of the battery.
•The normal charging time of this product is
4-5 hours.
•Put the charging pin in the terminal and
connect the charger to 100V/220V AC
power supply to charge the battery. Then
the power indicator on the upper right
corner of the terminal screen will keep
strolling as shown in the picture.
•When the battery is fully charged, the
power indicator will stop strolling and if the
battery is charged on switch-off mode, the
picture indicates that the charging is done.
14

3.2.NOTICE
•Always use the charger offered by the supplier. Dangers or
damages of the product caused by usage of any unconfirmed
charger will not be compensated and repaired.
•The battery should be charged in time before the terminal
automatically shuts down or being alarmed with low power.
•The standby duration and call duration offered by the
supplier is calculated in perfect functional mode, in practice,
working hours of the battery may vary due to difference of
internet service, functional mode and usage mode.
•Disconnect the terminal from charger as soon as possible
after the battery is well charged.
15

IV.OPERATION METHOD OF
BASIC FUNCTIONS
16

• An sms would be sent to the user’s mobile as
soon as the activation is done.
•Note: All alarming information thereafter
including SOS, low power, electronic fence, etc
will be returned to that number.
CALL FUNCTION
•Since predetermined number is set, no other calls
would work on this watch.
•Incoming calls can be rejected by pressing the
upper left button and received by pressing
bottom left button(RED).
•When an emergency button is pressed, an alert
will be sent to the Emergency team and the
customer’s next of kin.
•The Emergency and the VESAG Call center team
would be available 24/7.
4.1.SETTING UP THE WATCH
17

•The location information is
always displayed on the screen of
the watch with latitude and
longitude.
•When the sos button is pushed,
the call center will immediately
contact the caller and give their
location information. This will be
passed to the caller’s next of kin
as well if required.
•The guardian may inquire the
location information of the
wearer by web portal on the dash
board with the location displayed
on the map as shown in picture.
4.2.LOCATION INQUIRY
18

4.3.ADJUST RECEIVER VOLUME
•The upper and bottom right buttons are used to adjust the receiver volume while
on a call.
4.4.FUNCTION SETTINGS
•Function settings include: Zigbee, Alarm, Time zone and ECG.
•Enter setting interface by pressing the menu button(middle left) for twice.
•Press upper right button or bottom right button to toggle the menu.
•Press the bottom left button(Red button) to save the setting.
•Press the menu button (middle left button) to withdraw from that interface.
19

4.6 MEDICINE REMINDER
•One can view the alarm or the groups of alarms which are set through the web
portal and also check the medicines added to a particular group of alarm number by
selecting with the red button and scrolling down the menu using the buttons on the
right hand side.
•There are 18 groups of alarms and each group can have 5 different reminders at
the same time as shown in the picture above.
•If there is only one medicine in a particular time, it would show the time, medicine
name and anything else like address or phone number according the wearer’s
choice when the alarm rings.
•When the clock alarms, the interface will switch to reminder interface automatically.
•Press the upper or bottom left buttons or the bottom right button to stop
alarming; otherwise the clock will alarm every 4mins. 20
Table of contents
Other VESAG Watch manuals