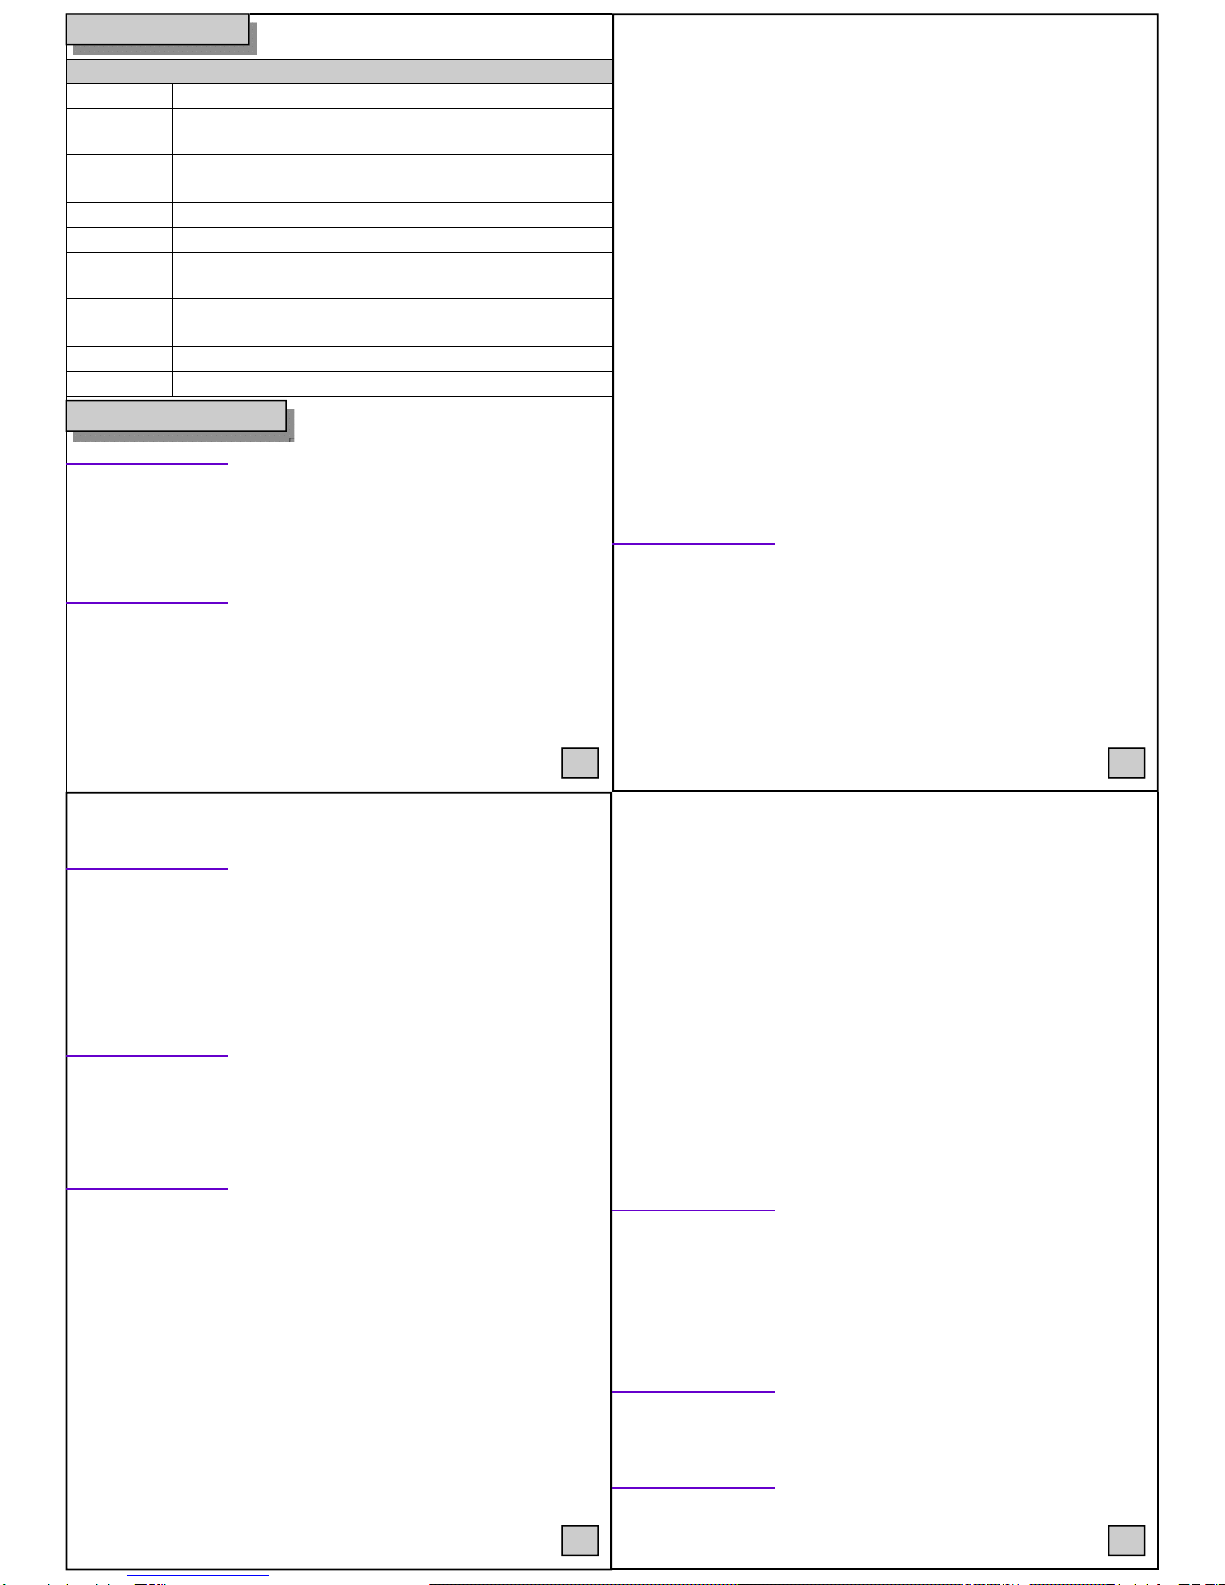
LENS ■DC ■VIDEO
EXPOSURE ■SHUTTER
■ACCE
■AGC
■DEFOG
■SENS-UP
■BACKLIGHT
■BRIGHTNESS
WHITE BAL ■ATW
■INDOOR
■AWC→SET
■OUTDOOR
■MANUAL
DAY&NIGHT ■COLOR ■AUTO ■EXT ■B/W
NR ■2DNR ■3DNR ■SMART NR
SPECIAL ■CAM TITLE
■LANGUAGE
■D-EFFECT
■DEFECT
■MOTION
■RS485
■PRIVACY
ADJUST ■SHARPNESS
■NTSC/PAL
■MONITOR ■OSD ■LSC
RESET ■FACTORY
EXIT
OSD MENU
Function Menu
How to use the camera
LENS
1.When the SETUP menu screen is displayed, select LENS by
using the UP and Down buttons so that the arrow indicates
LENS
►DC/VIDEO: Select Auto Iris Lens.
EXPOSURE
1.Using this function, you can control screen brightness.
►SHUTTER: MANUAL/AUTO.
* MANUAL
NTSC: 1/30 ~ 1/50000, X2 ~ X30.
PAL: 1/25 ~ 1/50000, X2 ~ X30.
* FLK: Select this when you picture flicker.
* AUTO: Select this mode to control the shutter speed
automatically. Shutter speed is automatically controlled
depending on the brightness of the screen.
►AGC: You can adjust it LOW,MIDDLE and HIGH level. The
higher the gain level, the brighter the screen but the higher the
noise.
►SENSE-UP: When it is night, the camera automatically
detects the light level and maintains a clear picture.
►BRIGHTNESS: You can control the brightness .
►ACCE: If there are bright area and dark area on the screen at
the same time, this function makes both areas to be in clear image
- OFF, LOW, MIDDLE, HIGH 4step.
►DEFOG: Carry out defog function.
- OFF,LOW,MIDDLE,HIGH 4step.
►BACKLIGHT: This function allows you to get a clear
pictures of objects even the objects in strong backlight.
* BLC : GAIN: LOW,MIDDLE,HIGH
AREA: Area set (size & position).
* HSBLC: When it is night, the camera automatically detects
the light level and maintains a clear picture.
*SELECT: AREA 1~AREA 4 *DISPLAY: select area ON/OFF
*LEVEL: Masking level set *MODE: ALL DAY and NIGHT
*BLACK MASK: Mask ON/OFF
WHITE BAL.
►ATW: Select this when the color temperature is between
2400°K and 11,000°K.
►AWC→SET: To find the optimal setting for the current
luminance environment in this mode, set the point the camera
towards a sheet of white paper and press the SET button. If the
environment changes, readjust it.
►OUTDOOR: Select this when color temperature is around
5,100°K.
►INDOOR: Select this when the color temperature is
* SENSITIVITY: When the number is high, the detection
around 3,100°K.
►MANUAL: Select this to fine-tune White Balance manually.
DAY & NIGHT
You can display pictures in Color or Black and White.
►AUTO: Switched Color and B/W automatically.
- DELAY: You can select the duration time about changing the
day/night mode.
►COLOR: The picture is always displayed in color.
►B/W: The picture is always displayed in B/W.
NR
This function reduces the background noise in a low luminance
environment.
*2DNR(noise reduction) *3DNR
* SMART NR (3DNR+ motion detection)
SPECIAL
Select a desired mode using the UP and DOWN buttons.
►CAM TITLE: If you enter a title, the title will be appear on
the monitor.
►D-EFFECT
* FREEZE: You can stop the image or reactive it.
* MIRROR
- MIRROR: you can flip the image horizontally.
- V-FLIP: you can flip the image vertically.
- ROTATE: you can rotate the image on the screen.
* D-ZOOM
- PIP: PIP display ON/OFF - D-ZOOM: X2.0~X64
- PAN&TILT: Set to change PIP position.
* NEG.IMAGE: ON/OFF
►MOTION
* SELECT: Select AREA1~AREA3.
* DISPLAY: Select AREA ON/OFF.
sensitivity is increased to recognize even small movement.
* MOTION VIEW: ON/OFF.
►PRIVACY: Hide an area you want to hide on the screen.
* SELECT: AREA1~8 * DISPLAY: Select AREA ON/OFF
* COLOR: 1~16 color step * DEFAULT: Factory Reset
►LANGUAGE: ENGLISH/CHINESE.
►DEFECT: CMOS correction to compensate for defects that
can be occur at the low light conditions.
*LIVE DPC: Auto defect. *LEVEL: Level of Auto defect.
*STATIC DPC: Manual defect. *LEVEL: Manual defect value.
*START: Start defect.(Close the lens to shield the light, Select
the START ).
*SENS-UP: Sense up value.
►RS485: This function sets up the camera communication
status when controlling the camera through an external device.
►VERSION: Version of camera.
ADJUST
►SHARPNESS: Adjust the sharpness of the image.
►MONITOR: CRT monitor and LCD monitor.
* LCD: Set GAMMA,BLUE GAIN,RED GAIN.
►OSD: TEXT COLOR & OUT LINE A adjustable.
►LSC: Lens shading compensation.
►NTSC/PAL: Select NTSC/PAL.
RESET
►FACTORY: Resets the camera setting to the factory defaults.
Language and Communication status is not initialized.
EXIT
Press the ENTER button in the EXIT menu to save the
current settings and exit the MAIN SETUP menu.
5 6
7 8