Victoria GDI-TW2SQ User manual

IMPORTANT SA FETY INSTRUCTIONS
FOR AUDIO PRODUCTS-READ THOROUGHLY
When using electrical products, basic precautions should always b e followed including:
1. Read Instructions - All the safety and operating instructions sho uld be read before the
product is operated.
2. Retain Instructions - The safety and operating instructions should be retained for
future reference.
3. Heed Instructions - Al l warnings on the prod uct and in the operating instruc tions
should be adhered to.
4. Follow Instructions - All operating and user instructions should be followed.
5. Cleaning - Unplug thi s product from t he wall outlet before cleaning. Do not use liquid
cleaners or aerosol cleaners. Use a dry cloth for c leaning.
6. Attachments - Do not use attachments not recommended by the product manufacturer
as they may c ause hazards.
7. Water a nd Moisture - Do not use this pro duct near water-for example, near a bath tub,
wash bowl, kitchen sink, or laundry tub, in a wet basement, or near a swimming pool,
etc.
8. Accessories - Do not place this product on an surface. The product may fall, causing
serious injury to a child or adult, and serious damage to the product. Use only with a
stand, bracket, or table recommended by the manufacturer, or sold with the product. Any
mounting of the product should follow the manufacturer's instructions, and should use a
Mounting accessory recommended by the manufacturer.
9. Transporting - This product should b e moved with care to avoid damage or injury.
10. Ventilation - Slots and openings in the cabinet are provided for ventilation, to ensure
reliable ope ratio n of the pr oduct and to protect it from overheating. These openings
must not be blocked or covered. The openings should never be blocked by placing the
product on a bed, sofa, rug, or similar surface. This product should not be placed in a
built-in installation such as a bookcase or rack unless proper ventilation is provided or
the manufacturer's instructions have been adhered to.
11. Power Sources - This product sh ould be operated only from the type of power source
indicated on the marking label. If you are not sure of the type of power supply to your
home, consult your product dealer or local power company. For products intended to
operate from battery power, or other sources, refer to the operation instructions.
12. Power - Cord Protection - Power-supply cords should be routed so that they are not
likely to be trapped in any way.
13. Lightning - For added protection for this prod uct during a lightning storm, or when it is
left unattended and unused for long periods of time, unplug it from the wall outle t and
disconnect the antenna or cable system. This will preve nt damage to the produ ct due
to lightning and power-line surges.
14. Power Lines - An outside antenna system should not be located in the vicinity of
overhead pow er lines or other electric light or power circuits, or where it can fall into
such power lines or cir cuits. When installing an outside antenna system, extreme care
should be taken to keep from touching such power lines or circuits as contact with
them might be fatal.
1
MODEL: GDI-TW2SQ
PHONO/ CD Recorder with Cassette
player and AM/FM STEREO Radio
R0.0

15. Overloading - Do not overload wall outlets, extension cords, or integral convenienc e
receptacles as this can result in a risk of fire or electric s hock.
16. Object and Liquid Entry - Never push objects of any k ind into this product through
openings as they may to uch dangerous voltage points or short-out p arts that could
result in a fire or electric shock. Never spill liquid of any kind on the product.
17. Servicing - Do not attempt to service this product yourself as opening or removing
covers may expose you t o dangerous voltage or other hazards. Refer all servicing to
qualified service perso nnel.
18. Damage Requiring Service - Unplug this product from the wall outlet and refer
servicing to qualified service personnel under the following conditions:
a. If the pow er-su pply cord or plug is damaged.
b. If liquid has spilled, or objects have fallen into the product.
c. If the pro duct has been exposed to rain or water.
d. If the produ ct does not operate normally by following the operating instructions. Adjust
only those controls that are covered by the operating instructions, as an improper
adjustment of other controls may result in damage and will often require extensive
work by a qualified technician to restore the product to its normal operation.
e. If the product has been dropped or damaged in any way, and the product exhibits a
distinct change in performance-this indicates a need fo r service.
19. Replacement Parts - When repla cement parts are required, be sure the service
technician has used replacement parts specified by the manufacturer or have the same
characteristics as the original part. Unauthorized substitutions may result in fire, electric
Shock, or other hazards.
20. Safety Check - Upon completion of any service or repairs to this product, ask the
service technician to perform safety checks to determine that the product is in proper
operating condition.
21. Wall or Ceiling Mounting - The product should be mounted to a wall or ceiling onl y
as recommended by the manufacturer.
22. Do not install near a ny heat sources such as radiator s, heat registers, stoves, or other
apparatus that produce heat.
23. Do not defeat the safety purpose of the polarized. A polarized plug has two blades with
one wider than the other.
24. Refer all servicing to qualifi ed service personnel. Servicing is required when the
apparatus has been damaged in any way, such as power-supply cord or plug is
damaged, liquid has been spilled or obj ects have fallen into the apparatus, the
apparatus has been exposed to rain or moisture, does not operate normall y,
or has been dropped.
Precautions
Safety Information
Caution:
1. Use of controls and adjustments or performance of procedures other than those s pecif ied
herein may result in ha zardous radiation exp osure .
2. If this pr oduct develops trouble, contact qualified service centers, and do not use the
product in defective state.
Safety Precautions
WARNING:
To reduce the risk of fire or electric shock, do not expose this applianc e to rain o r moisture.
CAUTION
No user serviceable parts inside. Refer servicing to qualified service personnel.
RISKS OF ELECTRIC SHOCK- DO NOT OPEN!
To reduce the risk of electric shock, do not remove cover or back.
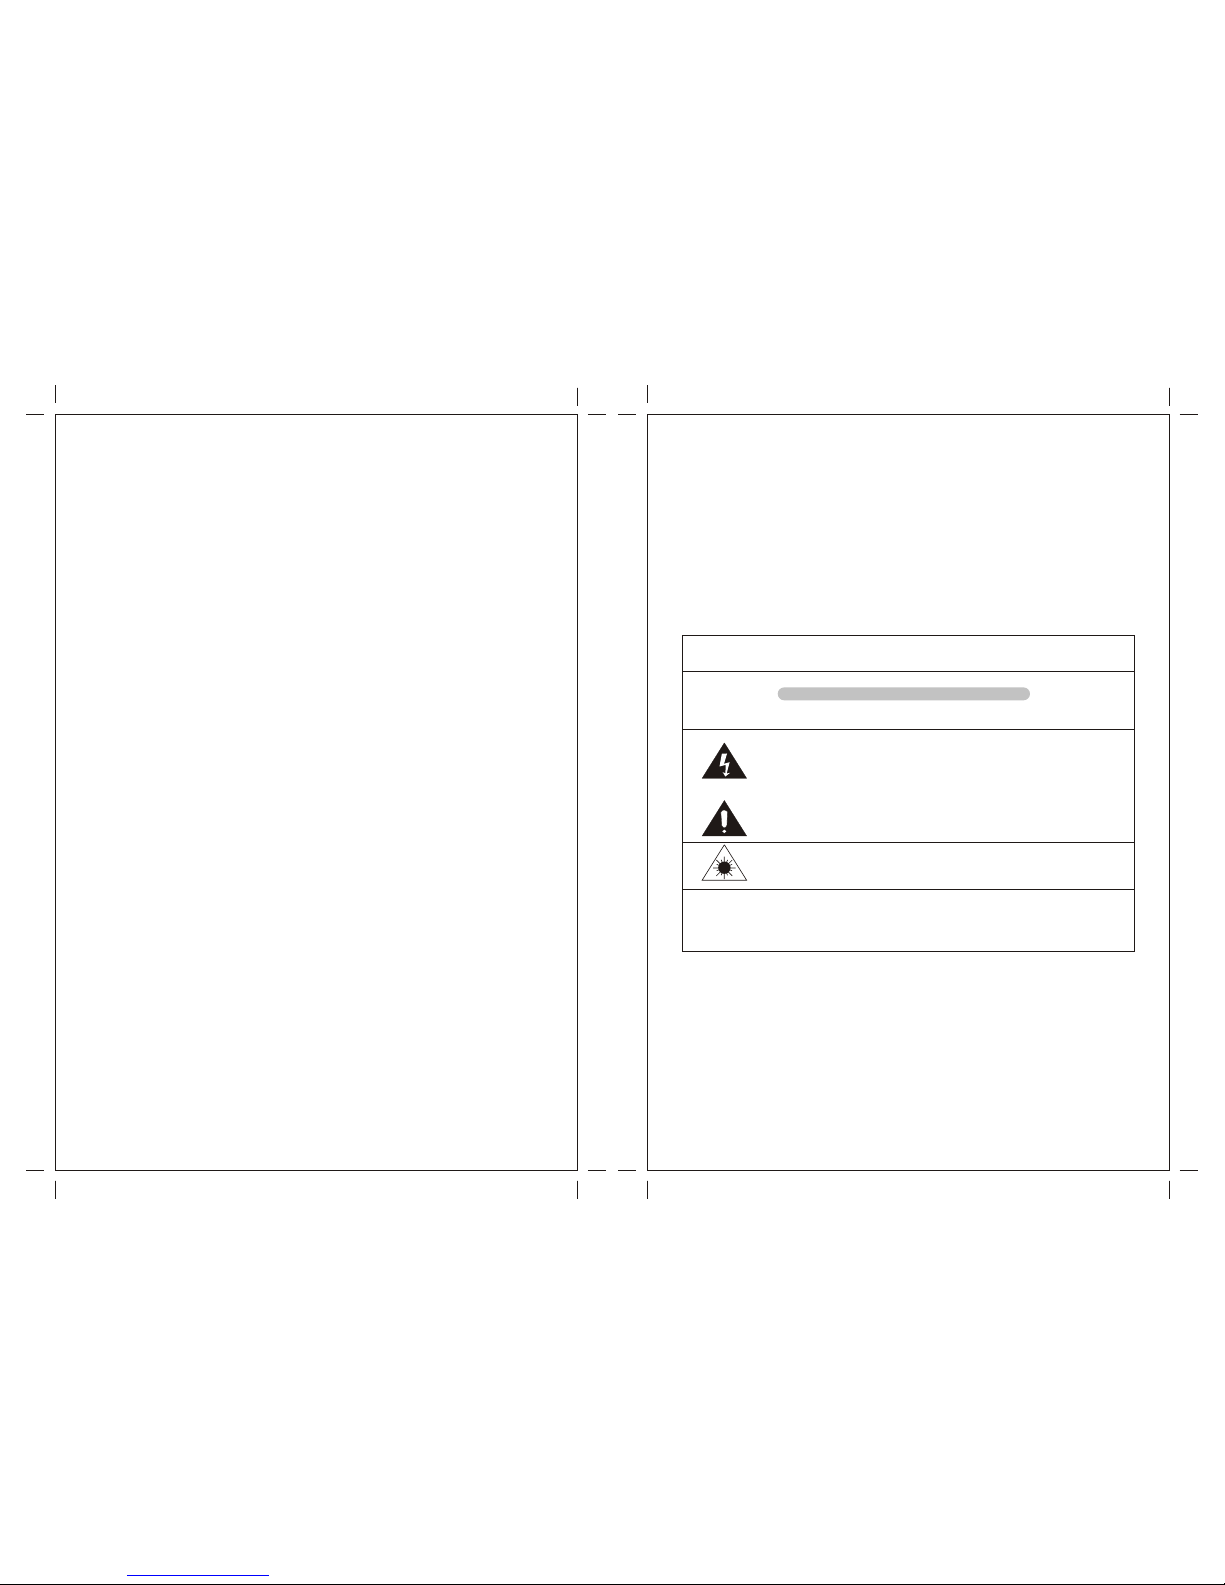
Lightning flash with arrowhead symbol, within an equilateral triangle, is
intended to alert user to the presence of uninsulated “dangerous voltage”
within the product's enclosure that may be of sufficient magnitude to
constitute risk of electric shock to persons.
The exclamation point within an equilateral triangle is inten ded to alert
user to the p resence of important operating and maintenance (servicing)
instructions in the literature accompanying the appliance.
Caution:
For compact disc units only: invis ible laser radiation when open and
interlock failed or defeated. avoid direct e xposu re to laser beam.
(See markings on the ba ck of the u nit)
Caution:
To prevent electric shock, match wi de blade of plug to wide slot, fully insert.
2 3
WARNING
This product may contain chemicals listed in Proposition 65 (http://www.oehha. ca.
gov/prop65/prop65_list/Newlist.h tml) that may be known to cause cance r, birth
defects or other reproductive harm.

Before Use
1. Choose unit installation location carefully. Avoid placin g it in dir ect sunlight or close to a
source of heat. Also avoid loca tions subject to vibrations and e xcess ive dust, cold or
moisture. Keep away from sources that hum, such as transformers or motors.
2. Do not open the cabinet as this might result in damage to the circuitry or electrical shock,
if a foreign object should get into the set, contact your dealer.
3. Be sure no t to handle discs with dirty fingers. Never insert a disc that has a crack on the
surface.
4. When removing the power plug from the wall outlet, always pull directly on the plug, never
pull the cord.
5. To keep the laser pickup cle an, do not touch it, and do not forget to close the disc tray.
6. Do not att empt to clean the unit with chemical solvents as this might damage the finish.
Use a clean, dry cloth.
7. In order t o shut off the power to this product completely, unplug the power cord from the
wall outlet. Be sure to unplug the unit if you do not int end to use it for an extended period
of time, such as a vacation.
8. Keep this manual in a safe place for future reference.
Beware of Condensation
When the player (or a compact disc) is moved from a cold to a warm p lace or is used after a
sudden temperatur e change, there is a danger of condensation. Water vapor in the air could
condense on the mechanism or the laser pickup. If droplets of water form on thes e parts,
correct playback will be impossible because the las er cannot read the information f rom the
disc correctly. To prevent this, if you are going to use the player in a c ondition where
condensation could occur, you should leave the p layer for 1 or 2 hours after plugging it into
an AC outlet depending on the amount of condensation. If this is done, the p layer will
stabilize at the temperature of its surroundings.
Handling Records
Do not touch the record' s grooves. Only handle records by the edges or the label with
clean hands. Grease or dirt can leave a residue on the record’s surface that will gradually
deteriorate the quality of your re cord.
Use soft anti-static cloth to gently wipe the record surface when the record has become
dirty when not in use.
Store records upright on their edges. Flat storage can make it become curved.
Avoid placing it in direct sunlight or close to a source of heat su ch as radiators, stoves.
Also avoid location subject to vibration and excessive dust, heat, cold or moisture.
How to Replace the Stylus
Caution:
Do not remove or bend the stylus.
Do not touch the needle, which could injure your hand.
Turn off the unit's power before you replace the stylus.
Keep out of th e reach of children.
Avoid direct sunlight or other heat sources .
Removing old stylus
1. Set a screwdriver at the tip of the stylus and push
down to the direction “A ”.
2. Remove the stylus by pulling it forward and down.
Installing a new s tylus
1. Hold the t ip of the s tylus and insert the o ther edge by
Pressing in the direction “B”.
2. Push up in the direction “C” until it locks at the tip.
4 5

Discs
Depending on the quality of the disc and the condition of the recording, some CD-R/CD-
RW discs may not be playable.
Always place the disc on the disc tray wi th the label side upward(compact discs can be
played or recorded only on on e side)
To move a disc from its storage case, press down on the center of the case and lift the
disc out, holding it ca reful ly by the e dges.
If the disc becomes dirty, wip e the surface from the center
Hole outward towards the outer edge with a soft, dry cloth.
Never use such chemicals as record spray, antistatic sprays or fluid, benzine or thinner
to clean the discs. Such chemicals will do irreparable damage to the disc's plastic
surface.
Discs should be returned to their cases after use to avoid dust and scratches that could
cause the laser pick up “skip”.
Do not expose discs to direct sunlight or high humidity and temperature for exten ded
periods. Long exposure to high temperatures will warp the disc.
Printabl e CD-R and CD-RW discs are not recommended, as the label side might be sticky
and damage the unit.
Use a soft oil-based felt-tipped pen to write the information on the label side. Never use a
ball-point or hard-tipped pen, as this may cause damage to th e recorded side.
Do not use CDs with an irregular shape(octagonal, heart shaped, business card size,
etc).CDs of this sort can damage the unit:
If you have any doubts about CD-R/CD-RW discs, read the precautions supplied w ith the
disc, or contact the disc manufacturer directly.
6 7
Connections
Caution:
Switch off the power to all equipm ent before making connections.
Read the instructions of each compo nent you intend to use with this unit.
Be sure to insert each plug securely. To pr event hum and noise, avoid bundling the signal
interconnection c ables toget her with the AC power cord.
A FM Antenna
While in FM mo de, tune in an FM station and extend the lead to find the best position for
the reception. Thi s antenna may need to be repositioned if you move your unit to a new
location.
B LINE IN
You can connect a CD player, cassette tape deck or MP3 player, etc. to this unit.
Connect the component with RCA pin cords. Make sure to connect the white plug to the
white jacks(Left) and the red plug to the red jacks(Right)
C AC Power Cord
Plug this power cord int o an AC wall socke t.
LINE OUT
( 1) Plug the Power Cord into a standard 120V~60Hz outlet.
2 ) Plug the RCA Cables into the Line Out jacks located at the rear of the unit making sure that the
r ed RCA Cable is inserted into the red jack and the white RCA Cable is inserted into the white
jack.
3 ) Plug the other ends o f the RCA Cable into the auxiliary input (A UX) on your TV, home
e ntertainment receiver or other music system, again being sure that the correct col or coded jacks
a re used.
4 ) Turn the unit on using the On/Off/Volume Knob. Do not turn up the volume on your U nit.
I nstead adjust the volume on your TV or home entertainment re ceiver.
A
B
C
LINE OUT
D
D

Parts of the Turntable
A Turntable
B Turntable Transportation Screw
When you transport the unit, turn the screw co unter clock wise to secure the turntable.
Before use, turn the screw cl ockwi se with a coin or screwdriver to release the turntable
plater from a secure position.
C Cue-lever
Use this lever to lift the tone arm.
D Tone arm hold
E Speed selector
F Tone arm
G 45 RPM adaptor
1 POWER
Press this button to turn the unit on or off.
NOTE: If you experience a malfunction during operation, you may power off
The unit and r e-sta rt.
2 PHONO
Press the PHONO button and select PHONO to pl ay a record.
3 AUX
Press the AUX button and select AUX to listen to the external source connected to the
AUX IN jacks.
4 FM/AM
Press the FM/AM button to listen to the radio .
5 CD
Press the CD button to play a CD.
6 TAPE
Press the TAPE button to play cassette.
7 Remote Sensor
When operating the remote control unit, point it towards the R EMOTE SENSOR.
9
Unit Functions
8
A
G
B
C
E
D
F
Remove the white plastic
needle guard before use
1 2
3 4
5
6
7 8
9
10
11
13
14
15
16
17
18
19
20
21
22
23
25
12
12 24
26
REMOTO
SENSOR
VOLUME
REC LEVEL
ERASE
FINALIZE
TRACK
INCREMENT
AUTO/
MANUAL
AM/FM
CD
PHONO
TAPE
AUX
RECOR D
AUX IN

Display panel (frequency)
When the unit is on, this display will l ight.
TRACK INCREMENT
During recording, use this button to divide tracks.
RECORD
Use this button to enter record pause mode.
Display
Speakers (stereo)
STOP
Use this button to stop playback or recording.
PLAY/PAUSE
Use this button to start playback or pause recording, finalizing and era sing.
OPEN/CLOSE
In CD,PHONO or AUX mode, use this button to open and close the disc tray.
This button does not work in FM/AM mode.
VOLUME
Turn this knob to adjust the volume sound. (NOTE : Th e volume control lev el is from 00
to 32.)
DISC Tray
Press the FF button once to go the start of the next track.
Press the FR button once to go back to the start of the current track. Pres s the FR bu tton
twice to go ba ck to the s tart of the previous track.
REC LEVEL
In record pause mode, use this knob to adjust the recording level.
FINALIZE
Use this button to finalize a CD-R/CD-RW dis c.
ERASE
Use this button to erase a CD-RW disc.
TUNING
In FM/AM mode, turn this knob to tune in a station.
10 11
Remote Control Unit
Remote Control Unit can operate th e unit from a distance.
When operating the remote control unit, point it towards the front panel of the unit.
Even if th e remote control unit is operated within the effective range, remote control
operation may be impossible if there are any obstacles between the unit and the remote
control.
If the remote control unit is operated near other appliances which generate infrared rays,
or if ot her remote control devices using infrared rays are used near the unit, it may
operate incorrectly. Conversely, the other appliances may operate incorrectly.
Battery Installation
1. Remove the battery co mpart ment cover.
2. Insert two “AAA” batteries. Make sure that the batteries are inse rted with polarity “+” and
“-” poles positioned correctly.
3. Close the cover.
Battery Replacement
If the distance required between the remote control unit and m ain unit decreases, the
batteries are exhausted. In this case, please replace the batteries with new ones.
Precautions concerning batteries
Be sure to insert the batteries with correct positive “+ ” and negative “-” polarities.
Use batteries of the same type, never use different types of batteri es together.
Rechargeable and non-re-chargeable batteries can be used. Refer to the precautions on
their labels and do not mix together.
When the remote control unit is not to be used for a long time (more than a month),
remove the batteries from the remote control unit to prevent them from leaking. If they
leak, wipe away the liquid inside the battery comp artme nt and replace the batteries with
new ones.
Do not heat or disassemble ba tteri es and never dispose of old batteries by throwing them
in a fire.
8
9
10
11
12
13
14
17
15
16
18
20
19
21
22
23
PHONES
For private listening, first reduce the volum e level to minimum. Then insert the plug from
your headpho nes into the PHONES jack, and adjust the vo lume by turning the VOLUME
knob. The sound from speakers will be cut off while the headphones are plu gged in.
AUTO/MANUAL
Use this button to select the mode of track number assignment.
CASSETTE EJECT
24
25
26

REMOTO
SENSOR
VOLUME
REC LEVEL
ERASE
FINALIZE
TRACK
INCREMENT
AUTO/
MANUAL
AM/FM
CD
PHONO
TAPE
AUX
RECORD
AUX IN
Preparation for Use
1. Connect the AC po wer cord to AC outlet.
2.Remove white protective needle cover by ge ntly pulling towards front of unit.
3. Release TONE ARM by gently pus hing hold-down clip to the right. This will unlock tone
arm from its arm rest. Re-lock the h old-down clip when moving th e unit to another
location.
Basic Operation
adjust the desired sound level.
1. Press the POWER switch to turn t he unit on.
2. Select the source by pressing the
Corresponding button.
3. Rotate the VOLUME kno b clockwise or counterclockwise
to
4. Listening through Earphones/Headphones
(Not included).
13
EARPHONE
Wait until the “---bu sy ” disappears on the
display before next step.
PLAY/PAUSE
Use this button to play/pause recording, finalizing and erasin g.
STOP
Use this button to stop playback or recording.
U
V
Remote Control
OPEN/CLOSE
In CD,PHONO or AUX mode, use this button to
open and close the disc tray.This butto n does not
work In FM/AM mode.
A
CD
Press the CD button to play a CD.
REPEAT
In CD mode, use this button to select a repeat
Mode of CD.
PROGRAM
In CD mode, u se this button to prog ram tracks.
SHUFFLE
In CD mode, u se this button for shuffle playback.
DISPLAY
In CD mode, u se this button to chan ge the display.
MANUAL/AUTOINCREMENT
Use this button to select the mode of track number assignment.
TRACK INCREMENT
During recording, use this button to divide tracks.
Record
Use this button to record CD.
REC VOL+/REC VOL -
Use this button to adjust the record volume.
FINALIZE
Use this button to finalize a CD-R/CD-RW dis c.
ERASE
Use this button to erase a C D-RW disc.
Clear
In CD mode, u se this button to clea r programmed tracks.
PHONO
Press the PHONO button and select PHONO to pl ay a record.
AUX
Press the AUX button and select AUX to listen to the external source connected to the
AUX IN jacks.
Radio
Press the FM/AM button to listen to the radio .
B
C
D
E
F
G
H
I
J
K
L
M
N
O
TAPE
Press the TAPE button to play cassette.
MUSIC SKIP
In CD mode, u se these buttons to sk ip tracks. Hold down these buttons to search for a
Part of a tra ck.
VOL+/VOL-
Use this button to adjust the volume
P
Q
R
S
12
REPEAT SHUFFLE
PROGRAM
OPEN/
CLOSE
CLEAR
DISPLAY PHONO
TAPE
AUX
RADIO
CD
RECORD REC VOL- REC VOL+
MANUAL/
AUTOINCREMENT INCREMENT
TRACK
FINALIZE ERASE
VOL-
VOL+
A
FN
O
B
P
Q
G
H
E
C
M
D
L
K
I
J
T
R
U
S
12
3
4

REMOTO
SENSOR
VOLUME
REC LEVEL
ERASE
FINALIZE
TRACK
INCREMENT
AUTO/
MANUAL
AM/FM
CD
PHONO
TAPE
AUX
RECORD
AUX IN
Listening to the Radio
1. Select FM or AM using the FM /AM button.
2. Tune to the desired frequency.
The TUNED indica tor lights when a stat ion is correctly tuned in.
The STEREO indicator lights when a FM stereo broadcast is tuned in.
The volume reading is 00-32 b ut no sound is heard until 18, the volu me will change along
With the number.
.
If the reception is poor
AM broadcast
Re-position t he unit to find the best position for AM stations.
FM broadcast
Extend and reposition the FM antenna so that you ca n receive the station clearly.
Listening to a Record
1. Press the PHONO button once
to select PHONO.
2. Gently open the dust cover.
Be carefully not to pinch your finger.
3. Put the re cord on the turntable.
When playing a 45 RPM record,use the included adaptor.
4. Select the speed.
5. Gently push the clamp er to the r ight to release the tone arm.
14 15
3
6
5
4
Adapter Transportation sc rew
Listening to TAPE
1.Load Cassette Tape into the unit (located
on side of the unit) Playback will
automatically begin.
2.Press button halfway to Fast Forward the
Tape.
Press button lightly and playback will
resume.
3.Press button all the way to end playback
and eject Tape.
1
23
1
2
REMOTO
SENSOR
VOLUME
REC LEVEL
ERASE
FINALIZE
TRACK
INCREMENT
AUTO/
MANUAL
AM/FM
CD
PHONO
TAPE
AUX
RECORD
AUX IN
1

REMOTO
SENSOR
VOLUME
REC LEVEL
ERASE
FINALIZE
TRACK
INCREMENT
AUTO/
MANUAL
AM/FM
CD
PHONO
TAPE
AUX
RECORD
AUX IN
6. Raise the cue le ver to lift the tone arm off the tone arm support.
7. Move the t one arm gently to the edge of the recor d (or the s tarti ng point of a track).
The turntable will begin to turn.
8. Gently lower the tone arm by slowly releasing the cue lever.
You can lower the tone arm manually if the cue lever has not been raised.
Please do not place anything on top of the turntable cover, especially while playing a
record.
When the end of the vinyl record is reac hed, after the t one arm staying at the end position
about 30 seconds, the t one arm automatically returns to the tone arm holder a nd the
rotation stops.
To stop playback manually, slightly lift the tone arm using the cue lever and return it to the
tone arm holder.
Playing records with the dust cover down will prevent dust fro m setting on the turnt able.
Listening to a CD
1. Press the CD button.
Never place more than on e disc on the tray.
The disc must be placed in the center of the disc tray. If the disc is not correctly loaded, it
may not be possible to open the tray again once it has closed, so you should ensure the
disc is always centered on the tray.
Do not force the tray by hand during open ing and closing operations.
4. Press the OPEN/CLOSE butto n to close the tray.
“--- BUSY CD” blink s for a few seconds.
When no disc is set, “NO DISC” appears
On the display.
2. Press the OPEN/CLOSE butto n.
3. Place a disc on the tray wi th the printed label facing up.
It takes a few seconds for the u nit to load the disc. No buttons will work during loading.
Wait until the total number of the tracks and the total play time of the disc are displayed.
The disc type indicator shows the type of disc currently loaded.
16 17
8
7
CD
CD
TR
1
2
4
5

REMOTO
SENSOR
VOLUME
REC LEVEL
ERASE
FINALIZE
TRACK
INCREMENT
AUTO/
MANUAL
AM/FM
CD
PHONO
TAPE
AUX
RECORD
AUX IN
5. Press the PLAY/PAUSE button ( ) to start playback.
B To skip to the next or a previous track.
During playback, repeatedly press the SKIP button ( or ) un til the desired track is
found.
The selected track will be played from the beginning.
In the stop mode, press the SKIP button ( or ) repeatedly until the track you want
to hear is found, and press the PLAY/PAUSE button ( ) to start playback from the
selected track.
Press the ( ) button once, and the CD player goes to the previous track.
C Search for a part of a t rack.
During playback, hold down the SKIP button and release the button when the part you
want to Listen to is found .
D To stop playback
Press the STOP button ( ) to stop playback.
DISPLAY
To susp end playback temporarily (pause mode).
Press the PLAY/PAUSE button ( ) during playback. Playback stops at the current
position.To resume playback, press the PLAY/PAUSE button ( ).
18 19
A
REPEAT SHUFFLE
PROGRAM
OPEN/
CLOSE
CLEAR
DISPLAY PHONO
TAPE
AUX
RADIO
CD
RECORD REC VOL- REC VOL+
MANUAL/
AUTOINCREMENT INCREMENT
TRACK
FINALIZE ERASE
VOL-
VOL+
Display
D
B
C
A
You can press the Display button on th e Remote Control to ch ange the display.

Each time the DISPLAY button is pressed, th e display changes as follows: REPEAT PLAYBACK
Each time the REPEAT button i s pressed, the repeat mode is changed as follows:
REPEAT ALL (Repeat ALL the Tracks)
Press the REPEAT button once during playback.
All the tracks of the disc will be playe d repeatedly.
REPEAT 1(Repeat one track)
Press the REPEAT button twice during playback.
The track being played will be played repeatedly. If you press the MUSIC SKIP button
and select another track, the track you select will be played repeatedly.
It is also po ssible to select a track to be repeated in the stop mode. Press the
REPEAT button twi ce and then select the track number by pressing th e MUSIC SKIP
button. Press the PLAY button to start playback.
If one of the following buttons is pressed, repeat mode will be cancelled:
OPEN/CLOSE,FM/AM, PHONO, AUX.
Repeat playba ck works with fi nalized discs only.
20 21
CD REPEAT 1 ALL
CD
TR
CD-R REPEAT 1 ALL
CD
CD-RW REPEAT 1 ALL
CD
CD-R REPEAT 1 ALL
CD
TR
Unfinalized CD-R/CD-RW, stopped
CD-RW REPEAT 1 ALL
CD
NO TOC CD-RW
AUTO TRACK
REC
PHONO AUX
TAPE
-dB 30 12 6 3 0 OVER
L+R
During recording
TR
TR
TR
TR
REPEAT SHUFFLE
PROGRAM
OPEN/
CLOSE
CLEAR
DISPLAY PHONO
TAPE
AUX
RADIO
CD
RECORD REC VOL- REC VOL+
MANUAL/
AUTOINCREMENT INCREMENT
TRACK
FINALIZE ERASE
VOL-
VOL+
Repeat
You can press the Repeat button on the Remote Control to change t he repeat mode.

SHUFFLE PLAYBACK
The tracks can be playe d randomly. Press the SHUFFLE button during playback. (In the
stop mode, press the SH UFFLE button and the PLAY button)
when the SHUFFLE playback of all the tracks has been finished , the unit stops and the
shuffle playback mode is cancelled.
If you press the ( ) button during shuffle playback, next track will be randomly s elect ed
and played. If you press the ( ) button, the currently played track will be played from
the beginnin g. A track cannot be replay during shuffle playback.
Shuffle playback doesn't wor k during programmed playback.
If one of the following buttons is pressed, shuffle mode will be cancelled:
SHUFFLE in the stop mode, OPEN/CLOSE , FM/AM, PHONO, AUX.
Shuffle playback works with finalized discs only.
PROGRAMMED PLAYBACK
Press the Program button to program the order tracks are played back.
Up to 32 tracks can be programmed in the desire d order.
Insert a disc and select “CD” before beginning programming.
Shuffle playback does not work during programmed playback.
Programmed playback works with finalized discs only.
1 Press the P ROGRA M button in the stop mode.
“PROGRAM” indicat or blinks, and “P-01” appears on the display.
2 Press the M USIC SKIP button ( or ) to select a track.
REPEAT SHUFFLE
PROGRAM
OPEN/
CLOSE
CLEAR
DISPLAY PHONO
TAPE
AUX
RADIO
CD
RECORD REC VOL- REC VOL+
MANUAL/
AUTOINCREMENT INCREMENT
TRACK
FINALIZE ERASE
VOL-
VOL+
Shuffle
REPEAT SHUFFLE
PROGRAM
OPEN/
CLOSE
CLEAR
DISPLAY PHONO
TAPE
AUX
RADIO
CD
RECORD REC VOL- REC VOL+
MANUAL/
AUTOINCREMENT INCREMENT
TRACK
FINALIZE ERASE
VOL-
VOL+
Program
REPEAT SHUFFLE
PROGRAM
OPEN/
CLOSE
CLEAR
DISPLAY PHONO
TAPE
AUX
RADIO
CD
RECORD REC VOL- REC VOL+
MANUAL/
AUTOINCREMENT INCREMENT
TRACK
FINALIZE ERASE
VOL-
VOL+
22 23
NO TOC CD-RW
PROGRAM
CD
TR
NO TOC CD-RW
PROGRAM
CD
TR
REC
NO TOC CD-RW
SHUFFLE
CD
TR
Press the Shuffle button on the Remote Control to play tracks in random order.

3 Press the P ROGRAM button.
The track is programmed, and “P-02 ” is displayed.
Repeat steps 2 and 3 to program more tracks.
You can program up to 32 tracks.
To cancel the program mode, press the STOP button ( ) .
4. When the s elect ion of track numbers has bee n finished, press the PLAY button ( ) to
Start program playback.
To check the programmed order
In the stop m ode, press the MUSIC SKIP button repeatedly to show the track numbers
that have been stored i n memory.
To add a track to the end of the program
In the stop m ode, press the PROGRAM butt on.
Select a track number by pressing the MUSIC SKIP button, and then press the
PROGRAM button.
The track is added to the end of the program.
To delete the last track from the program.
In the stop m ode, press the CLEAR button to delete the last track from the pro gram.
To clear the program
If one of the following buttons is pressed, the programmed contents will be cleared:
OPEN/CLOSE, FM/AM, PHONO, AUX, STOP in the stop mode.
REPEAT SHUFFLE
PROGRAM
OPEN/
CLOSE
CLEAR
DISPLAY PHONO
TAPE
AUX
RADIO
CD
RECORD REC VOL- REC VOL+
MANUAL/
AUTOINCREMENT INCREMENT
TRACK
FINALIZE ERASE
VOL-
VOL+
Program
REPEAT SHUFFLE
PROGRAM
OPEN/
CLOSE
CLEAR
DISPLAY PHONO
TAPE
AUX
RADIO
CD
RECORD REC VOL- REC VOL+
MANUAL/
AUTOINCREMENT INCREMENT
TRACK
FINALIZE ERASE
VOL-
VOL+
REPEAT SHUFFLE
PROGRAM
OPEN/
CLOSE
CLEAR
DISPLAY PHONO
TAPE
AUX
RADIO
CD
RECORD REC VOL- REC VOL+
MANUAL/
AUTOINCREMENT INCREMENT
TRACK
FINALIZE ERASE
VOL-
VOL+
REPEAT SHUFFLE
PROGRAM
OPEN/
CLOSE
CLEAR
DISPLAY PHONO
TAPE
AUX
RADIO
CD
RECORD REC VOL- REC VOL+
MANUAL/
AUTOINCREMENT INCREMENT
TRACK
FINALIZE ERASE
VOL-
VOL+
Clear
24 25
NO TOC CD-RW
PROGRAM
CD
TR
CD-RW
CD
TR

RECORDING to CD
Record from the PHONO, TAPE or AUX source s to the CD recorder
1. To record from a recor d, select PHONO.
2. To record from an external source, press the AUX button and connect the cable to the
AUX IN jack s at the ba ck, Select AUX.
3.
4. Load a recordable CD-R or CD-RW disc into the unit.
To record from a cassette tape.
27
About CD-R and CD-RW discs
CD-R discs can be recor ded once only.Once they have been used for recording, they cannot
be erased or re-recorded. However, if space is available on the disc (and the disc ha s not
been finalized), additional material can be recorded.
By contrast, a CD-RW disc can be used in much the same way as a CD-R disc, but the last
track or tracks recorded can be erased, and t he space on the d isc can be re-used for other
recordings.
However, you should note that an audio CD created using a CD-RW disc may not p lay back
satisfactorily on every audio CD-player.
CD-R, by contrast, may be played satisfactorily on the m ajority of audio CD players.
Press the TAPE button and partially insert the TAPE into the side of the unit
Press the RECORD button and finish inserting the Tape
NOTE: Tape begins to play as soon as inserted. Thus Press the Record button to begin to
record BEFORE the Tape is completely inserted
26
Recording Operation Steps
Load an empty or no n-
finalized CD-R or CD-RW
Load an empty or no n-
finalized CD-R or CD-RW
Select Recording SourceSelect Recording Source
Activate Recordin gActivate Recordin g
Test and Adjust Recording
Level
Test and Adjust Recording
Level
Start RecordingStart Recording
Track DivisionTrack Division
Finalizing Recorded DiscFinalizing Recorded Disc
Select Auto/Manual Track
Increment Mode;
Set Auto Track Increment
Sensitivity
Select Auto/Manual Track
Increment Mode;
Set Auto Track Increment
Sensitivity
Please refer to the deta iled operation instructions foll owed.
For CD-R or CD-RW,If it is recorded and finalized, the disc is possible to be played by
ordinary CD players; If it is recorded but not finalized, the disc will not be possible to be
played by ordinary CD players.
REMOTO
SENSOR
VOLUME
REC LEVEL
ERASE
FINALIZE
TRACK
INCREMENT
AUTO/
MANUAL
AM/FM
CD
PHONO
TAPE
AUX
RECORD
AUX IN
1 2 3 4
A
6
B
7
10
Press the OPEN/CLOSE button( ), place a disc on
the disc tray with the printed label side up, a nd then
press the OPEN/CLOSE button( ) to close the disc
tray.
NOTE: Make sure “NO TOC” and “C D-R”(or “CD-RW')
indicators lights on the display, or the RECORD
function will not work.
The display will show “ Busy CD” and the disc is
reading, wait until the reading is compl ete before next
step.

6. Once you have selected the Mode for Track Assignment, press the RECORD button. No
button will work if "busy" is displayed. Wait a few second s until "busy" disappears from
the display.
No button will work while “busy” is displaye d. W ait a few seconds until “busy”
disappears from the display.
7.If necessary, adjust the recording level using the REC LEVEL knob, t
Play the source to be recorded and adjust the recor ding level so that the loudest sound
does not exceed the “OVER ” indicator on the peak leve l meter.
NOTE: Pressing the RECORD button will not start the recording. In order to begin
recording you must press the PLAY/PAUSE button >II for the CD player.
At this step, you m ay begin recording or you may play from the au dio source to check the
REC LEVEL.
he display will sh ow
from -70 to 00 to +7.
8. Start Recording
IF PHONO is selected, ge ntly lower the tone arm onto the album
where you want to be recording and press the CD's PLAY/PAUSE
>II button to begin recording
IF TAPE is selected, press the CD's PLAY/PAUSE >II button before
you completely insert the Tape to begin recording
IF AUX (external source) is selecte d, play the source to be recorded
And press the CD's PLAY/PAUSE >II button to begin recording
29
NO TOC CD-RW
AUTO TRACK
REC
PHONO
-dB 30 12 6 3 0 OVER
L+R
TR
Press the PLAY/ PAUSE button to start re cording.
*Recommended*:
Record an album in “-20db” mo de;
Record a tape in “- 30db” mode;
Record a external source in “-40db” mode.
28
NO TOC CD-RW
AUTO TRACK
PHONO AUX
TAPE
-dB 30 12 6 3 0 OVER
L+R
TR
NO TOC CD-RW
AUTO TRACK
PHONO AUX
TAPE
-dB 30 12 6 3 0 OVER
L+R
TR
NO TOC CD-RW
AUTO TRACK
PHONO AUX
TAPE
-dB 30 12 6 3 0 OVER
L+R
TR
NO TOC CD-RW
REC
PHONO AUX
TAPE
-dB 30 12 6 3 0 OVER
L+R
TR
NO TOC CD-RW
PHONO AUX
TAPE
NOTE: pause the recording by pressing the CD's >II button to allow for time to adjust your
vinyl or tape
5. Select the Mode (Manual or Automatic) for Track Assignment
A. Manual ( TRACK INCREMENT button)
The TRACK INCREMENT button will record a new track when pressed while recordi ng. IF the
current track has not co mplet ed recording and the TRACK INCREMET button is pushed, the
unit will advance to a new track.
The Manual Track Increment mode is the most accurate mod e to separate songs tracks.
To set the Manual mode, push the AUTO/MANUAL button until --- is displayed on the LCD
screen. Once the --- is displayed and r ecord ing has begun, you will have to push t he
TRACK INCREMENT button to begin a new track. IF the button is not pushed during the
recording, all the songs recorded will b e recorded as a single track.
B. Automatic (AUTO/MANUAL button)
The AUT O/MAN UAL button is used to set the recording feature for both Manual and
Automatic setting s. As descr ibed above --- should be di splay ed for the Manual Track
Increment mode. Automatic settings are -20dB , -30dB or -40dB. The unit should begin a
new track when a drop in sound level is detected below at -20dB , -30dB or -40dB for 2
seconds or more. To set the Automatic setting simply press the AUTO/MANUAL button and
scroll thru the settings: --- , -20dB , -30dB and -40dB , accordingly.
NOTE: when using Automatic mode, during the recording of a song it is possible for a new
track to be initiated d ue to a drop in sound level over a period of seconds. IF you must ensur e
tracks are accurately initiated, Manual mode is suggest ed.

REMOTO
SENSOR
VOLUME
REC L EVEL
ERASE
FINALIZE
TRACK
INCREMENT
AUTO/
MANUAL
AM/FM
CD
PHONO
TAPE
AUX
RECORD
AUX IN
REMOTO
SENSOR
VOLUME
REC LEVEL
ERASE
FINALIZE
TRACK
INCREMENT
AUTO/
MANUAL
AM/FM
CD
PHONO
TAPE
AUX
RECORD
AUX IN
FINALIZING
As has been e xplained earlier, in order for
A disc to become a standard CD, it must
have a Table of Contents(TOC) written to it.
This process is known as fi nalizing.
1. Press the FINALIZE button in the stop mode.
“FiN-d” appears on the d isplay.
To cancel the finalizing process, press the
STOP button ( ).
2. Press the PLAY ( ) button to star t finalizing.
When the operation has been finished, the NO TOC
indicator turns off and the display returns to the
track/time display.
During finali zing, no buttons work.
Never turn the power off or unplug the power cord.
Although finalized CD-R discs may be played on ordinary
CD players, remember that finalized CD-RW discs may not
Played on ordinary CD players.
3. The CD disc tray will open automatically once the FINALIZATION process is
completed.
The display will show " --- Busy" during finalize,
wait until the busy disappears to complete the finalizing.
The finalize time is subject to the contents of record,
it may take few minutes in some cases.
31
STOP RECORDING
Press the STOP button ( ) to stop recording.
.
PAUSE RECORDING TEMPOARILY
Press the PLAY/PAUSE button ( ) . “ Busy” briefly appears on the display, and the
recording is paused.
To restart recording, press the PLAY/PAUSE button ( ) .
You cannot restart recording while “busy” is displayed.
Remember that every time recording is paused or stopped, a new track number will
always be assigned. It is not possible to record in two “stages” within one track.
SETTING TRACK MANUALLY on RECORDING
It is possible to divide the recording into tracks while recording.
While recording is taking place, press the TRACK INCREMENT button. Th e current track
number will be advanced by one .
The TRACK INCREMENT button work s regardless of the MANUAL/AUTO REC setting.
The display will show “Busy”, after th e “Busy”
disappears, then press CD button The display
Will show the record tra ck time.
30
2
1
A
B
C
IMPORTANT
Once your recording to your CD has been completed there is a FINAL STEP - FINALIZING.
This step is required i n order for you to play and listen to your CD recordings on de vices other
than your Tunewriter.

Er All
Select this to erase al l the tracks.
To cancel the erasing or unfin alizi ng process, press the STOP button ( ).
4.
The remaining time for the operation appears in the display. When the operation has
been finished, the display returns to the track/time display.
During erasing/unfinalizing, no buttons will work.
Never turn the power off nor unpl ug the power cord.
This operation cannot be undone. If you are going to erase a track or tracks, make sure
that they are recordings that you really want to erase.
(1). Press and hold the “Erase” button until the display shows “Erase All”.
(2). Press play ( ) button to begin th e erase process.
(3). Display will show 0 000000 to confirm the disc is clear.
A copied CD-RW disc fr om another unit can't be erase d one by one in this unit, you can
only erase entire disc.
33
Erase or Unfinalize a CD-RW
It is possible to erase the last recorded track, it is also po ssible to erase a whole disc.
Erase procedures are possible only on an unfinalized CD-RW d isc. If a CD-RW disc has
been finalized, unfinalize it prior to erasu re. Remember that it is not possible to perform any
Erase or unfinalize procedures on a CD-R disc.
1. Press the CD button to select “CD”.
2. Load a reco rded CD-RW.
3. Press the ERASE button in the stop mode.
“Er” and the l ast track number appear when the disc hasn't been finalized. Each time the
ERASE button is pressed, the display changes as follows:
“Er” and the number of the last track recorded on the disc
Select this to erase the last track on the disc.
This will not appear when only one track is recorded on the disc.
(1). Wait until “Busy” disap pears on the display.
(2). Press the ( ) button to begin erasing the last track.
(3). Repeat to press Eras e button to continue t he next track.
32

SPECIFICATIONS
AMPLIFIER section
Output Power………………………… ….... 5 W + 5 W
Frequency Respons e………… ……….… .60 to 20, 000 Hz
TUNER section
FM Section
Frequency Range…… …………… ….……8 7.5 to 108 MHz
AM Section
Frequency Range…… …………… …..…. .530 to 1710 KHz
CD PLAY ER section
Frequency Respons e………… ……….… .60 to 20, 000 Hz +/-4 dB
Signal-to-Noise Ratio……………….….…55 dB (IEC-A)
RECORD PLAYER section
Motor…………………………………..…....DC servo motor
Drive System………………………. .….…. Belt Drive
Speeds……………………………….…..…33-1/3 rpm, 45 rpm and 78 rpm
Wow &Flutter………………………...….…Less than 0.35% (WTD)
S/N Ratio…………………………….… …...M ore than 50 dB
Cartridge Type……………………………..Ceramic Stereo Cartridge
Stylus………………………………………..402-M208-165
SPEAKER SYSTEM section
Type……………………………………...….1-way
Impedance…………………………..….....4 ohms
Input Power……………… ……………..... .Max. 10 W
GENERAL
Power Requirements……………….…..…AC 120 V~ 60 Hz
Power Consumption……………………....42 W
Dimensions(W x Hx D)………………...….20.1''x12.2''x13.6''(approx.)
Weight……………………………….…..... 29.1 Ibs. (approx.)
Standard Accessories……………...……..Operating Instruction Booklet
45 rpm Adapter
CASSETTE DECK section
Track System…………………………...….4 Track, 2 channel stereo
Tape Speed…………………… …………. ..4.8 cm/sec
Wow and Flutter……………… ……….. ….0.4 % (WRMS)
Frequency Respons e………… …..…… ...12 5 to 6300 H z +/-6 dB
34 35
Troubleshooting Guide
Problem Cause Solution
Power does not come on when
the power switch is pressed.
Unit is unplugged. Connect the unit to the AC
power supply.
No sound comes out of the
speakers.
The volume is turned down
(to MIN).
The input selector does not
match the playback source.
Adjust the volume.
Re-select the desired
input source.
The sound is noisy. The unit is too close to a TV
set or another similar
appliance.
Turn off the TV or other
appliance, and relocate
the unit.
The tape does not move. The cassette tape is not
inserted properly.
Insert the cassette tape
correctly.
No sound from tape.
The tape heads are dirty. Clean the tape heads.
The sound is distorted or faint.
Cannot listen to any station, or
signal appears weak.
The station is not tuned-in
properly.
A TV set is being used
nearby and is interfering with
the radio reception.
Properly tune-in the
desired station.
Turn-off the interfering TV
set.
The sound is distorted. The antenna is not oriented
properly.
Re-orient the antenna
until reception improves.
CD stops immediately after
starting, or unit pauses or
stops during play.
The CD is inserted upside
down.
The CD is dusty or dirty or
there is condensation on the
CD.
Insert the CD with the
printed side right-side up.
Carefully clean and dry
the CD.
No sound. The CD player is paused.
Specific CD is noisy, or
playback stops or skips.
The CD is scratched,
damaged or warped.
The disc is very dirty.
The CD should be
changed.
Carefully clean the CD.
Press the PLAY/PAUSE
button.
Can't record or show “NO
DISC” on the display.
The CD-RW has recorded. Erase the contents of
the CD-RW.
PHO NO PL AYER
The sound is noise when
playing the record.
The stylus is not placed in
the middle center.
Place the stylus in the
middle center.
For Cust omer ser vice please cont act your poi nt of sal e or send us an emai l to info@ gr acedi gi tal.net
You can al so vi si t us onl ine for further product infor mat ion at : www.gr acedi gital audi o.com
Grace Digi tal Inc. Pow ay , CA USA
This manual suits for next models
1
Table of contents
Other Victoria Turntable manuals