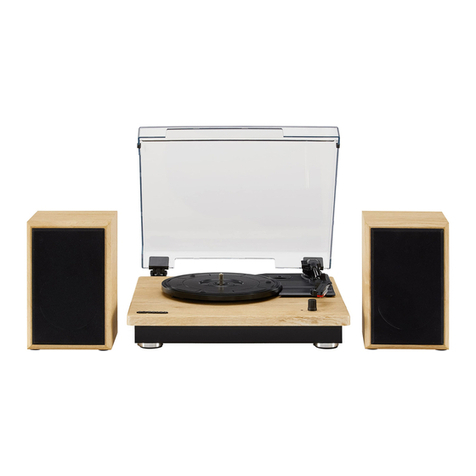
Teres 200 Series User manual

Teres 200 Series
Turntable Manual
14-Feb-2007

I. Bearing Assembly
The Teres bearing was designed to
have a lot of viscous damping. This
damping helps swamp the effects of
stylus drag, resulting in better speed
stability. For this reason heavy oil (30
weight) is provided. With heavy oil
the bearing will turn smoothly but
there will be a lot of resistance. This
is by design.
lease read this information carefully
before assembling your bearing. The
Teres bearing has been machined with
very close tolerances. The radial
clearance in the bearing is only 4 to 5
ten-thousandths. This tight tolerance
results in superb stability reducing
rocking to microscopic levels.
However, with these tolerances it is
imperative that the bearing is clean
and that proper procedure is used for
assembly. The objective is to have the
bearing completely full of clean oil,
including the recess in the top of the
bearing housing. If air becomes
trapped in the bearing it will not seat
properly. The bearing must be
assembled dry to avoid trapping air.
Note: Your bearing assembly may
come partially assembled. If any
components are already installed they
do not need to be removed and the
step may be skipped. The procedure:
1. Using the included 6-32 screw
attach the bearing ground wire
(bare wire extending from the
sensor cable) to the bottom of the
brass bearing housing. ointing the
crimp connector toward the center
of the bearing will make it easier to
install the bearing into the base.
2. Attach the brass bearing housing to
the base using the supplied 1-1/8"
nut. Hold the bearing housing
tightly in one hand and tighten the
bearing nut with a large wrench or
pliers. The bearing nut should be
snug but not excessively tight.
3. Clean the bearing housing and
spindle thoroughly. Wiping down
the bearing surfaces with rubbing
alcohol on lint free cloth works well.
4. Fill the recess in the bottom of the
spindle with oil and press in the ball
bearing. This displaces air in the
recess and will hold the ball bearing
in place. Be sure to completely wipe
away any excess oil.
5. If not already installed place the
brass thrust plate in the bottom of
the bearing housing with the white
Delrin button facing upward. The
thrust plate needs to be held flat as
it is lowered into the bearing. A
simple method is to attach a small
loop of tape to the end of a pencil.
Then stick the thrust plate to the
pencil and lower it in place. Be
sure that the Delrin button is facing
up!
6. Carefully pour 3.8ml of oil into the
bearing housing without getting any
oil on the sides of the bearing. The
oil level should be just slightly
below the top edge of the lower
journal as shown in the illustration.

7. Insert the spindle into the bearing.
The spindle will stop about 3/4"
before it is fully seated. And if no
air is trapped it will not feel spongy
or pop up when released. If air is
trapped you must start over.
8. lace the platter on the spindle.
The platter will generally slide onto
the spindle with only a small
amount of downward force.
However, in some cases the
clearances are a little tighter and it
will take more force to seat the
platter. Once the platter is in place
wait for the spindle displace the
extra oil and fully seat. This will
take 1 to 2 hours so be patient.
When fully seated the gap between
the platter and the base will be
about 0.140” (slightly more than
1/8th inch). WARNING, do not spin
the platter until the bearing has
fully seated!
9. With the correct amount of oil the
recess at the top of the bearing will
be at least partially full of oil. If
there is excess oil remove the
platter and wipe up the excess. See
section III for instructions for
platter removal.
10. Once the bearing has fully seated
visually check for clearance (about
1mm) between the strobe disk and
the sensor.
11. Thread the chrome record
centering pin into the top of the
spindle. Tighten the centering pin
with pliers will keep it from backing
out while using the clamp.
II. Turntable Setup
1. Insert the armboard mounting bolt
into the bottom of the base and
thread into the armboard. Using
the included allen wrench tighten
the armboard bolt just enough to
hold armboard steady but loose
enough that it can be adjusted by
hand.
2. Install the tonearm and cartridge
and adjust the overhang by
rotating the armboard.
3. After the overhang adjustment is
complete tighten the armboard
bolt. Tighten only enough to hold
the armboard firmly in place. Do
not over tighten!
4. Install motor and battery option as
described in the Motor manual.
5. lace the black Delrin washer
packaged with the record clamp
over the record centering pin. The
Delrin washer must be placed
directly on the platter and under
the record.
III. Operation
The Teres controller utilizes an
embedded microcontroller that makes
operation simple and elegant. To start
the motor press the controller button
or give the platter a push. The red
LED comes on when the motor is
coming up to speed. After 10-15
seconds the green LED should also
come on indicating that the speed is
within 1%. The green LED will flash
several times before coming on steady.
After the green light has been on for
about 4 seconds then the red LED will
turn off indicating that the speed is
locked in.
To turn off the motor press the

controller button again or slow down
the platter by hand.
Holding the pushbutton down for more
than one second will switch between
33.3 and 45 rpm.
I . Platter Removal
To avoid damage to the bearing
surfaces the platter must be removed
without pulling the bearing shaft out
of the bearing assembly. The removal
process requires two small blocks of
wood (or some other suitable material)
roughly ¾” thick. Both blocks must be
the same thickness. A piece of wood 8
to 14” long is also required. Use the
following procedure:
1. Carefully raise the platter up just
high enough to slide blocks of
wood under the platter. lace the
blocks on opposite sides of the
platter to provide even support.
2. Lay a piece of wood on top of the
centering pin and press down
firmly until the spindle has been
pushed down and out of the
platter
3. Lift the platter off of the bearing.
Be sure that the bearing spindle is
fully disengaged from the platter
before lifting.
. Drive Belts
Teres turntables come with a drive
belt fabricated from ½” mylar tape.
We prefer the sound of mylar tape but
there is not a clear consensus about
the best drive belt material. Other
materials such as silk thread, fly
fishing line and rubber belts have
been used with good results.
I. Additional Information
Detailed product information and
updates are available from the Teres
web page.
Http://www.teresaudio.com
Other Teres Turntable manuals
