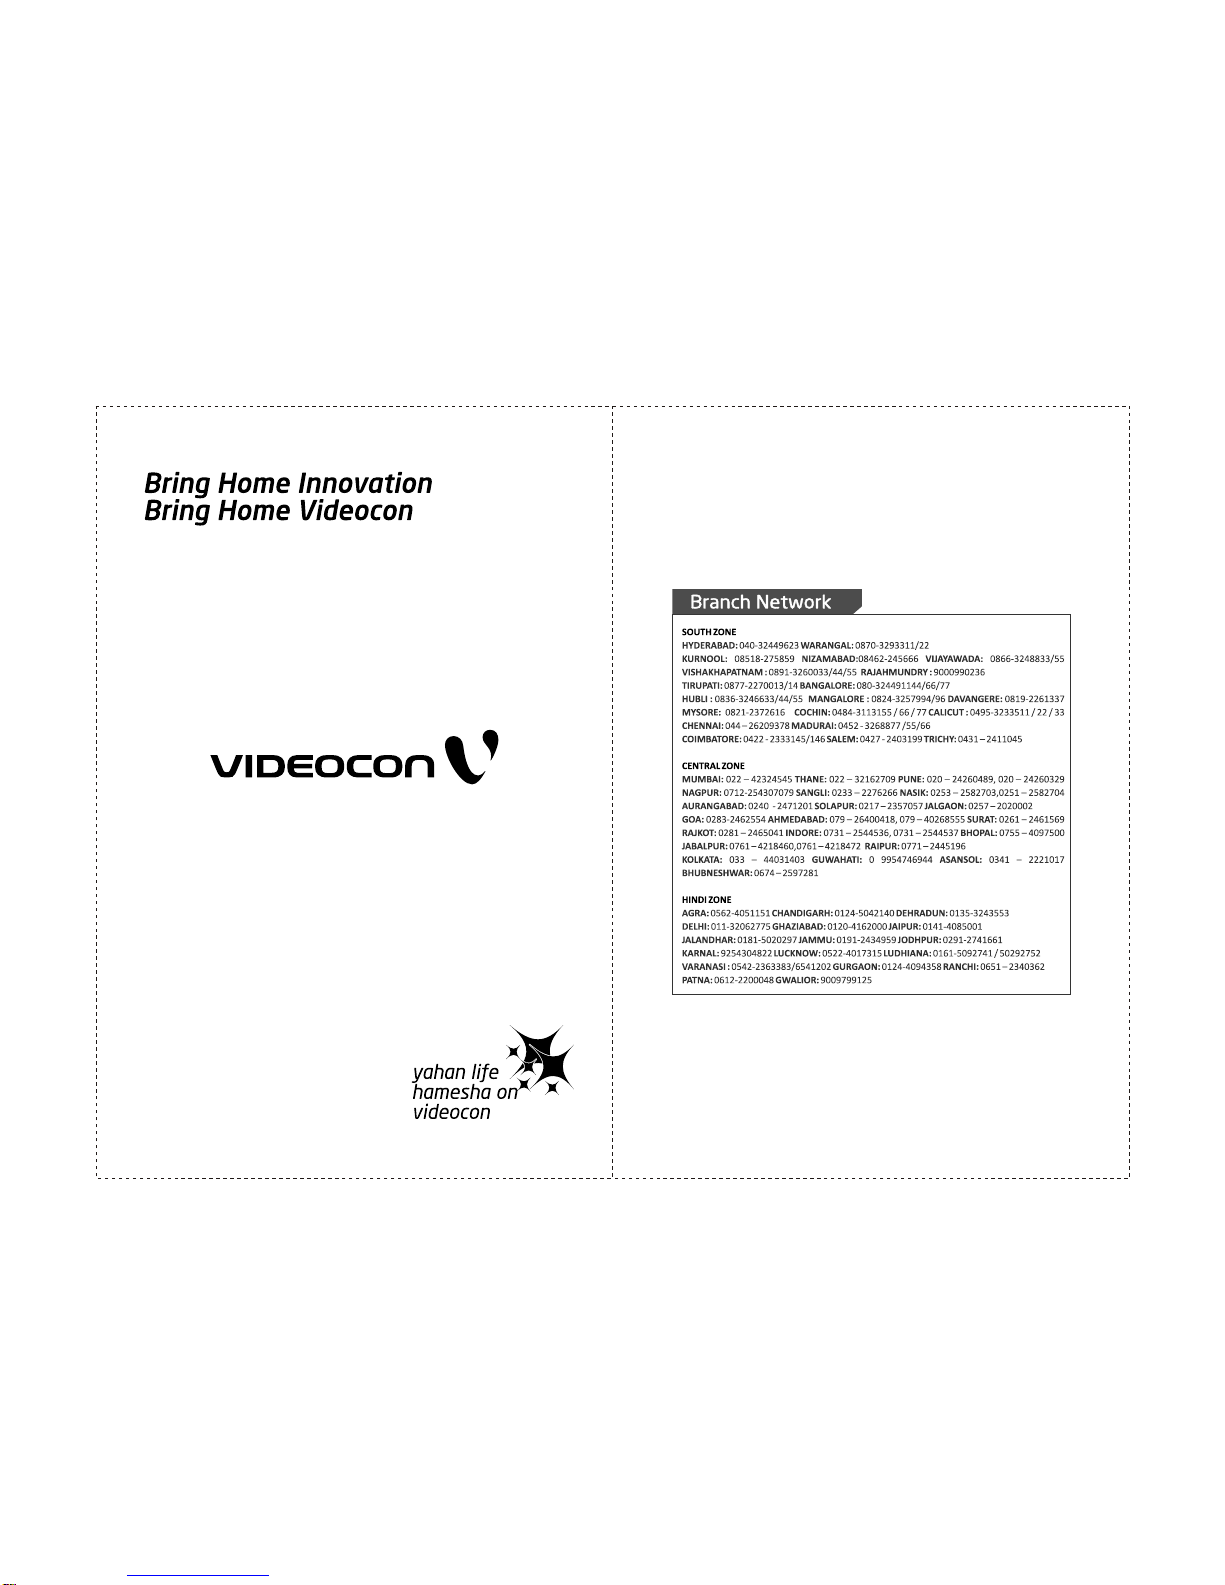
Videocon NANO-1BST-2CST User manual

Cover 3
Cover2

POWER
This set operates on AC 110 to 270V, 50 /60 Hz supply.
In the event of thunderstorms or power cuts please pullout the aerial and
mains plugs.
WARNING
To prevent fire or shock hazard do not expose the set to rain or moisture.
Do not place the set in enclosure or very close to the walls.
AERIAL
Connect the aerial cable to the socket available on back cover.
For the best reception an outdoor antenna should be used.
Recommended 75 Ohms coaxial cable to eliminate interference and noise.
Aerial cable should not be bundled to the power cord.
SERVICE
Never remove the back cover of the set as this can expose you to very
high voltage and other hazards. If the set does not operate properly
unplug it and Call your dealer.
BATTERY INSTALLATION
Remote control handset is powered by two batteries.
Size is UM-4 AAA or equivalent with correct polarity as indicated
by + and symbol.
NOTE: To avoid the damage from possible battery leakage, remove the
batteries if you do not plan to use the remote control handset for an
extended period of time.
2
Installation
1
Message from the Vice Chairman & CEO
Dear Customer,
It gives me great pleasure to welcome you to the VIDEOCON family.
Our sincere endeavour is to provide you with best quality products & impeccable
service, thus laying the foundation for a binding relationship with you. One that stands
the test of time to grow stronger with our every interaction.
At Videocon, we have set ourselves a goal to continuously challenge ourselves and
contribute towards good health, happiness and a bigger cause - a greener tomorrow.
Our initiative is to help create a tomorrow that promises clean air, pure water and a
green earth.
With extensive research, creativity and technology, we present a whole new range of
products - designed super efficient, built super sensitive to your needs. They forward
the urgent cause of environmental protection by becoming the machines of the
future, today.
That is the Videocon philosophy. That is Eco Logic.
Warm Regards,
(Vice Chairman & CEO)

34
9. SLEEP
Sets the sleep timer.
1. POWER
Switches the set ON to
Standby or Standby to ON.
4. SENSI EYE (Optional)
Switches ON/OFF the process of automatic
2. DIRECT PROGRAM NO.
Select program number
SELECTION KEYS (0-9)
brightness and contrast control.
5. LOCK (Optional)
8. DSB (Optional)
13. ECO VISION (Not Applicable)
Selects Lock menu after Press and hold key.
10. QV
Returns to previous viewed program
19. MENU
Select & deselects main menu.
Return from submenu to main menu.
11. CHANNEL UP/DOWN
Selects program or Menu item.
Switches set ON from standby.
6. SOUND (Optional)
17. WOOFER (Not Applicable)
18. VOLUME UP/DOWN
Adjust the Volume.
Adjust Menu settings.
Direct access to sound menu.
3. 1-9, 10-99, 100-200 (Not Applicable)
Direct program selection.
7. SELECTABLE SOUND (Optional)
Recalls preferred sound settings.
14. VOL PP (Not Applicable)
15. MSG (Not Applicable)
16. (Not Applicable)COD
20. SCAN (Optional)
Rolls through to review the tuned channels.
21. ZOOM (Optional)
Views picture in different vertical size.
22. MUSIC (Optional)
Switches set to music mode or
comes out of music mode.
23. SELECTABLE PICTURE
Recalls preferred picture settings.
24. PICTURE (Optional)
Direct access to picture menu.
25. FAV / GRP (Optional)
Select different group views.
26. CALL
Uses to exit from any display.
Displays the current viewing program / status.
27. TV/AV MODE (Optional)
Selects TV or AV mode.
28. MUTE / TORCH (Optional)
Switches sound ON/OFF or
12. PCST (Not Applicable)
Sets programmable commercial skip timer.
Location and Function of Controls on Remote hand set
switches Torch ON/OFF with press and hold
P
S
MUTE/TORCH
Location and Function of Controls on TV set
8
10 654321
FRONTPANEL
REAR PANEL
14
7
8
9
SIDE PANEL
4
5
6
CH+
CH-
VOL+
VOL-
MENU
TV/AV
79
1. MAIN POWER SWITCH
Switches the set ON or OFF.
2. REMOTE CONTROL SENSOR
Receives remote instructions.
3. POWER INDICATOR
LED indication shows the standby
status of the set.
4. CHANNEL UP / DOWN
Switches set ON from standby.
Select program or Menu item.
VOLUME UP / DOWN
Adjust the volume
Adjust Menu settings.
5. MENU
Selects or deselects Main Menu.
Return from submenu to main menu.
Note : 1) You must connect the Audio / Video outputs of external equipments
by matching the colours of plug and socket.
2) Do not connect Video I/P of AV1 & Y, Cb, Cr I/P of DVD mode at a time
Note :
The Actual configuration or position of controls of your TV may be different depending
on TV model.
6. TV / AV - Switch to TV/AV (Optional)
7. VIDEO IN (Yellow colour socket) (Optional)
8. AUDIO L IN (White colour socket) (Optional)
9. AUDIO R - IN (Red colour socket)
(Optional)
10. SENSI EYE (Optional)
Adjust the picture according to
surrounding conditions.
11. Video, Audio-L, Audio - R OUT (Optional)
12. Video, Audio-L, Audio - R IN (Optional)
13. DVD in (Cr,Y,Cb) (Optional)
11
IN
(Optional)
13
12
OUT
IN
DVD IN
Cr
Cb
Y
11
14. RF Cable Socket
(Since audio & Video I/P are common for AV1 & DVD mode)
3) For AV out no Audio output available for external AV input.
4) For NANO 2CST models only AV in provided on Rear side
5) S.No. 12, 13 Not provided for NANO 2CST model.
R

5
Communication between you and set takes place on the screen through operator menu.
MENU SELECTION
1. Press key to display PICTURE MENU.
2. Press / key to select deferent Submenu.
3. Press / key to select feature in selected Submenu.
4. Change the settings of the selected feature by / key.
MENU
CH+ CH-
VOL-VOL+
VOL-
VOL+
Basic Operation
To come out of menu press MENU or CALL key.
MUSIC MODE OFF
AVL OFF
FOR MONO MODELS
BASS
TREBLE
BALANCE
SURROUND OFF
AVL OFF
80
40
0
FOR STEREO MODELS
CONTRAST
BRIGHTNESS
COLOR
TINT
SHARPNESS
COLOR TONE NORMAL
DNR OFF
BLK STRETCH OFF
100
50
50
0
50
BLUE BACK ON
CH NO 1
SWAP TO - - -
SWAP NOW
GROUPING OFF
GAME
LANGUAGE ENGLISH
CH NO. 1
CH SKIP OFF
FINE TUNE 48.25MHz
CH SEARCH
AUTO SEARCH
COLOR-SYS PAL
SOUND-SYS B/G
PLUG N PLAY OFF
CLOCK - - : - - AM
ON CH
ON TIMER
OFF TIMER OFF
DISPLAY
ALARM OFF
- - : - -
- - : - - AM
- - : - - AM
6
Basic Operation
1) PICTURE MENU :
BRIGHTNESS : User can adjust brightness to set
bright level of the picture which is displayed on TV
screen.
CONTRAST : User can adjust contrast to set contrast
level of the picture which is displayed on TV screen.
COLOUR : User can adjust colour to set colours of the picture which isdisplayed on TV screen.
SHARPNESS : User can adjust sharpness to set sharpness level of the picture which
is displayed on the screen.
TINT : This is applicable for NTSC playback only.
COLOUR TONE : It allows you to adjust the background colour of the picture from red to blue
or vice versa.
CONTRAST
BRIGHTNESS
COLOR
TINT
SHARPNESS
COLOUR TONE NORMAL
DNR OFF
BLK STRETCH OFF
100
50
50
0
50
2)SOUNDMENU
AVL(AutomaticVolumeLeveller)
When this option is mode ON, then volume level gets
automatically adjusted. This feature acts as Automatic
Volume leveller which lowers the sound output when
sound modulation is high or by rising the sound output
whensoundmodulationsislow.
BASS,TREBLE(Optional):
Thiswillgiveyoutoaccess thelow&highfrequencies.
BALANCE(Optional):
You can balance volume between left (L) & Right (R)
speakerbypressingV+/V- key.
SURROUND (Optional) : User can select the
SurroundfeaturetoON/OFFbyVOL+/-keys.
DNR (Digital Noise Reducer) : This feature will appear as you scroll down the cursor in picture
menu. If the signal received Reduce feature to reduceby TV is weak, you can activate Noise
any static and ghosting that may appear on the screen.
BLK STRETCH : This feature gives more black effect.
CH NO. 1
CH SKIP OFF
FINE TUNE 48.25MHz
CH SEARCH
AUTO SEARCH
COLOR-SYS PAL
SOUND-SYS B/G
PLUG N PLAY OFF
MUSIC MODE (Optional)
Set MUSIC MODE ON when you want to listen music only .When music mode set to ON OSD
display will show “MUSIC MODE” and video will disappear.
You can directly access MUSIC MODE by key on remote hand set.
MUSIC
To exit from Music Mode press music key once again.
3)TUNINGMENU:
CH No. : You can see program number in TUNING
menu and by using VOL+/- key you can select
next/previouschannel.
MUSIC MODE OFF
AVL OFF
FOR MONO MODELS
BASS
TREBLE
BALANCE
SURROUND OFF
AVL OFF
80
40
0
FOR STEREO MODELS

78
Basic Operation
CH SKIP : You can skip unwanted programs with this feature. The skipped programs will not
be selected by CHANNEL UP / DOWN key on remote or TV set, but it can be selected by
pressing skipped program no. by direct digit selection keys on remote. The program no. will
change colour to red for skipped channel indication. To unskip the channel, select CH SKIP in
TUNINGmenuandmakeitOFF.
FINE TUNE : This allows to fine tune the channels manually in case of weak or distorted
signals. For the fine tuning, select FINE TUNE in install menu and for adjustments use
VOLUMEUP/DOWNkey.
CHSEARCH : Usingthis featureyou caneasilysearch therequired channel.Itallows manual
searchingtotunenextorprevious channelfromcurrentchannel.
AUTO SEARCH : This feature is useful to tune all the channels in the frequency range
available to you and store them. Auto tuning starts from program no. 1. To stop auto tuning,
press MENU or CALL key. If any program skips during AUTO SEARCH retune the set with
AUTOSEARCHorCHSEARCH.
COLOUR-SYS : By using VOLUME UP/DOWN key, you can set colour system in
AUTO/NTSC-4.43/NTSC3.58/PALmode.Trytochangethesettingtillpropercolourinpicture.
SOUND-SYS:SoundsystemB/Gis followedbyIndia.
PLUG N PLAY : When the television is intially powered on, plug and play is the basic setting
proceed automatically. Make it ON, if you need to tune all the available channels every time
aftersetswitchONfrommains.TostopplugandplaypressMENUorCALLkey.
4)TIMERMENU
CLOCK : You can set time by using 0 to 9 keys in
AM/PM. You can change AM/PM status by Vol+/- key.
In ALARM ON condition it shows warning message
beforesetgoestostdby.
ON CH : Used to switch on set using ON TIMER to the
requiredprogramnumber.
ONTIMER&OFFTIMER
You can set ON/OFF timer by using 0 to 9 keys. Your TV set will switch ON/OFF automatically
atthetimeyouselect.
DISPLAY : Clockdisplay willappearcontinuously onthe screenbymaking displayON &it will
disappearbymakingDisplayoff.
ALARM:InAlarmon conditionGOODBYisdisplaybeforesetgoestostandby.
CLOCK - - : - - AM
ON CH
ON TIMER
OFF TIMER OFF
DISPLAY
ALARM OFF
- - : - -
- - : - - AM
- - : - - AM
5)INSTALLMENU:
BLUE BACK : When blueback is ON, sets the screen in
pleasant blue colour, if no signal is being received in
TV/AV mode. Blueback gets disabled as soon as the
transmissionresumes. Italsoactivatedautomatically with
poor reception of signal. For watching TV in case of weak
signalreception,youcanOFFtheblueback.Setgets OFF
automatically if blueback is present more than
approximately10minutes.
BLUE BACK ON
CH NO 1
SWAP TO - - -
SWAP NOW
GROUPING OFF
GAME
LANGUAGE ENGLISH
Basic Operation
(A)
RUNS WKTS OVERS
TV 100 10 25
VS
USER
SCORE BOARD
SET LEVEL
START
(B)
0:00 R:00 W:00
PRESS CALL TO EXIT
SWAPPING : This feature is used to swap two channels. In SWAP TO set program number
which is to be swapped with current program by using direct 0 to 9 keys from remote handset.
NowselectSWAPNOWto swapthetwoprograms.
GROUPING(Optional):
Using this feature you can sort out your FAVORITE channels in Groups like MUSIC, MOVIE,
NEWS, SPORTS, EDUCATION, FAVORITE by 1-6 digit keys respectively procedure to group
channels.
Selectdesired groupfromGROUPING parameteron desiredchannelnumber.Thencome out
ofmenu.
Now press & hold FAV/GRP key for 2 sec. & use 1 to 6 keys to select desired group.Then use
CHUp/Downkeytoviewchannels inthatgroup.
TocomeoutofthatmodepressFAV/GRPfor2sec.
Proceduretoerasechannels
Aftercompletionof AUTOPROGRAMallgroupedchannelswill beerased.
GAME (Optional) : The game available is Cricket. TV VS
USERasshowninfig.
As soon as this fig. (A) appears press VOL Up key to enter
into game. You can set target RUN by setting SET LEVEL
option.Fourkeyswillbeused toplaygame.
OFFSIDESHOT:CHDOWNkey
LEGSIDESHOT:CHUPkey
CENTERSHOT:VOL/ DOWNkey
MAKEBATSMANRUN:VOLUPkey.
Asshowninfig.(B)
O-StandsforOvers
R-StandsforRuns
W-StandsforWickets
Initially wait for some time delay till bowler starts bowling ball in 3 different ways i. e. offside
center&legsideball.
When ball crosses half way pitch i. e. When it just comes in front of batsman then user has to
pressCHUP/CHDown&VOLdownkey.
Failure to give shot at proper time would make him bowled and then wickets are updated
accordinglyatthetopsideof the screen.
Onceuser hits ballin anydirectionhe cannow hasoptionof takingonerun orgoingfor SIXER
orFOURRUNorhemay nottakeRUNatall.

109
Basic Operation
If ball goes for a SIX then it will be displayed for a shorttime intervals "SIXER" on the screen &
scoreisupdated.
So if user wants to take a single RUN after hitting the ball, he has to press now VOL + key
continuously.Failuretotakingrun properlywouldmakehimRUNOUT.
After taking run or after runout or being caught or bowled or hitting sixer the sequence gets
repeated. This enter sequence continues till the required target is achieved, or till 25 overs are
completed or all the 10 wickets are gone. If user failed to achieve target or all the 10 wickets are
gone then it shows display, TV WON THE MATCH. It also shows game details about RUN,
WKTS,OVERS.
Note:
1) After10oversthespeedatwhichthebowlerbowlswill increase.
2) Randomlytheposition ofthefielder neartothe pitchonoff sideatthe farendchanges andhe
moves.
3) Forwardtotakeacatchwhentheusertriestohit a centershotforeitheroffsideorlegsideball.
4) So the user should take enough care not to go for a straight shot for these ball under this
conditionnottogethimselfcaughtout,ifheiscareful enoughtoplaythenhecanscorefourruns.
5) Scoresabove200cantbeachieved.
LANGUAGE (Optional) : Go to the language option by
CHANNEL UP / DOWN key and select appropriate
language by VOLUME UP / DOWN key. You can select
ENGLISH, HINDI, MARATHI and GUJRATI language,
which will be used for displaying menus and
indications in selected language.
LOCKMENU (Optional):
This feature prevents unauthorised use of your TV set as it can be operated only by remote
handset.
PressholdLockkeyfromremotetoenterintoLockmenu.
TVLOCK
This feature is used to lock all the TV operations, when TV lock is ON, display OSD shows "TV
LOCK".
AVLOCK
AVLOCKwhensetto ON, willlocktheAVOperations.
PANELLOCK
Panel lock when set to ON will lock the front panel operations and will not allow to do any
operationthroughit.
VOLUMELOCK
Usingthisfeatureyoucan setvolumeatrequiredlevel beyondwhichyoudonot wants toincrease
further.Tolockthevolumemakeit ON.
CHLOCK
Used to lock unwanted channels. Select Lock code and enter password 9008 (Default). SET
Code will appear. Here set required user password. It will ask now to enter lock code. Enter the
preseted password. Now you will be in CH Lock menu with 3 options CH LOCK, LOCK
PROGRAM &STATUS.
CHLOCKwhen setto ON,selected channelsin LOCKPROGRAM willget locked.LOCK CHwill
allow you lock to required channel. STATUS option will allow you to set status of channel i. e.
VIEWorBLOCK.WhenCH LOCKisONtunningmenugetslocked.
TV LOCK OFF
AV LCOK OFF
PANEL LOCK OFF
VOLUME LOCK OFF
LOCK CODE - - -
Basic Operation
SLEEPTIMER
Thisfunctioncanbeusedto switchOFFtheTVduringbedtime.Repeatedlypressing
of key on remote hand set will change sleeping time. You can set SLEEP TIMER in
stepsof5within0-180min.
CHANNELSCAN(Optional)
Toscanalltheprogram,pressthekey ontheremotehand set.Press keyagain
todiscontinuethescanning.
QUICKVIEW
Thisis usedto togglebetween currentchannel andlast viewedchannel. PressQ.V.on remote
handsettousethisfunction.
SELECTABLE PICTURE : 5 selectable picture modes CUSTOM-STANDARD-GAME-
MOVIE-SPORTS.Thesemodescan beaccessed bydirect keyonremote.Pressthis
keyrepeatedlytoswitchtodesired picturesetting.
SELECTABLE SOUND (Optional) : 4 selectable sound CUSTOM-VOICE-MUSIC-
THEATRE. These modes can be accessed by direct key on remote. Press this key
repeatedlytoswitchtodesiredsound setting.
SLEEP
SCAN SCAN
MUSIC MODE (Optional)
Set MUSIC MODE ON when you want to listen music only .When music mode set to
ON OSD display will show “MUSIC MODE” and video will disappear.
You can directly access MUSIC MODE by key on remote hand set.
MUSIC
SENSIEYE (Optional) :The SensiEye featurecanbe
switchedONfromtheremotehandsetonlybypressing
SensiEye key.On thefirstpress ofthe key, featurewill
be OFF displayed on the screen. On the second press
the feature is activated without any display on the
screen.
On the third press, feature remains activated and the
display of Sensi Eye is displayed on screen whenever
intensity of ambient light changes. In this feature with
change in ambient light, picture setting will change viz
Brightness, Contrast. When Sensi Eye feature is
switched ON, you can not make any change in the
settings of picture menu and Selectable Picture key
willnotwork.
After making this feature OFF, you can change the
settinginpicturemenuasper yourchoice.

1211
Technical Specifications
PICTURE TUBE
RECEIVING SYSTEMS
CHANNEL COVERAGE LOW VHF BAND E2 - E4, HIGH VHF BAND E5 - E12,
UHF BAND E21-E69, HYPER BAND S21-S41
POWER SOURCE 110V ~ 270V, 50/60Hz, AC
ANTENNA INPUT 75 Ohms Unbalanced
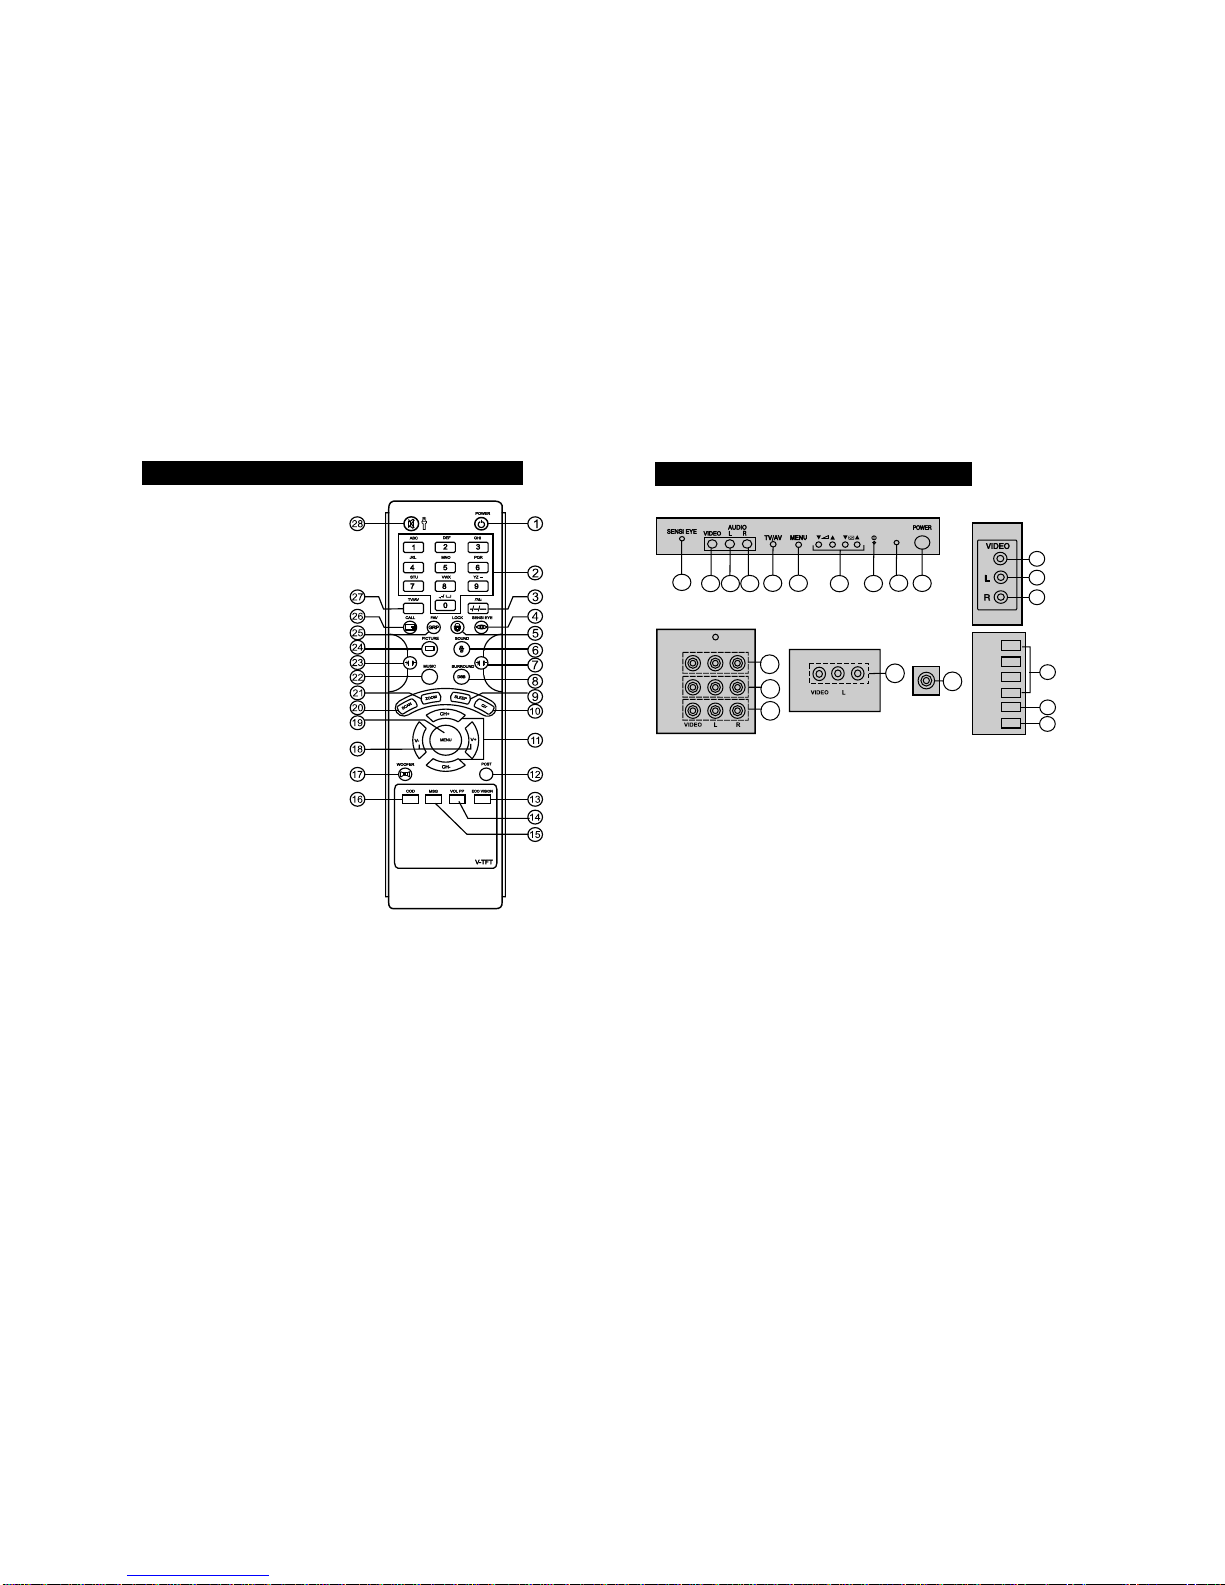
ACCESSORIES INSTRUCTION MANUAL, REMOTE CONTROL
NOTE : Design and Specifications are subject to change without prior notice.
36/38/51cms High Contrast Quick Start type
PAL B/G, NTSC Play back (NT 3.58,NT4.43), CCIR and CATV
54cms Slim/Ultraslim
AVR RANGE 110V ~ 270V, 50/60Hz, AC
In your TV receiver the most up-to-date devices are incorporated to eliminate
interference. Local Radiations, however, can create disturbances which visibly affect your
picture. Proper installation, a good aerial and following the advice of your dealer are your best
safeguards against these disturbances.
The most common type of television disturbance are as follows :-
IGNITION
Black/White spots or horizontal streaks may appear, picture may flutter or drift. This is usually
caused by interference from automobile ignition system, neon lamps, electrical drills and other
electrical appliances.
GHOSTS
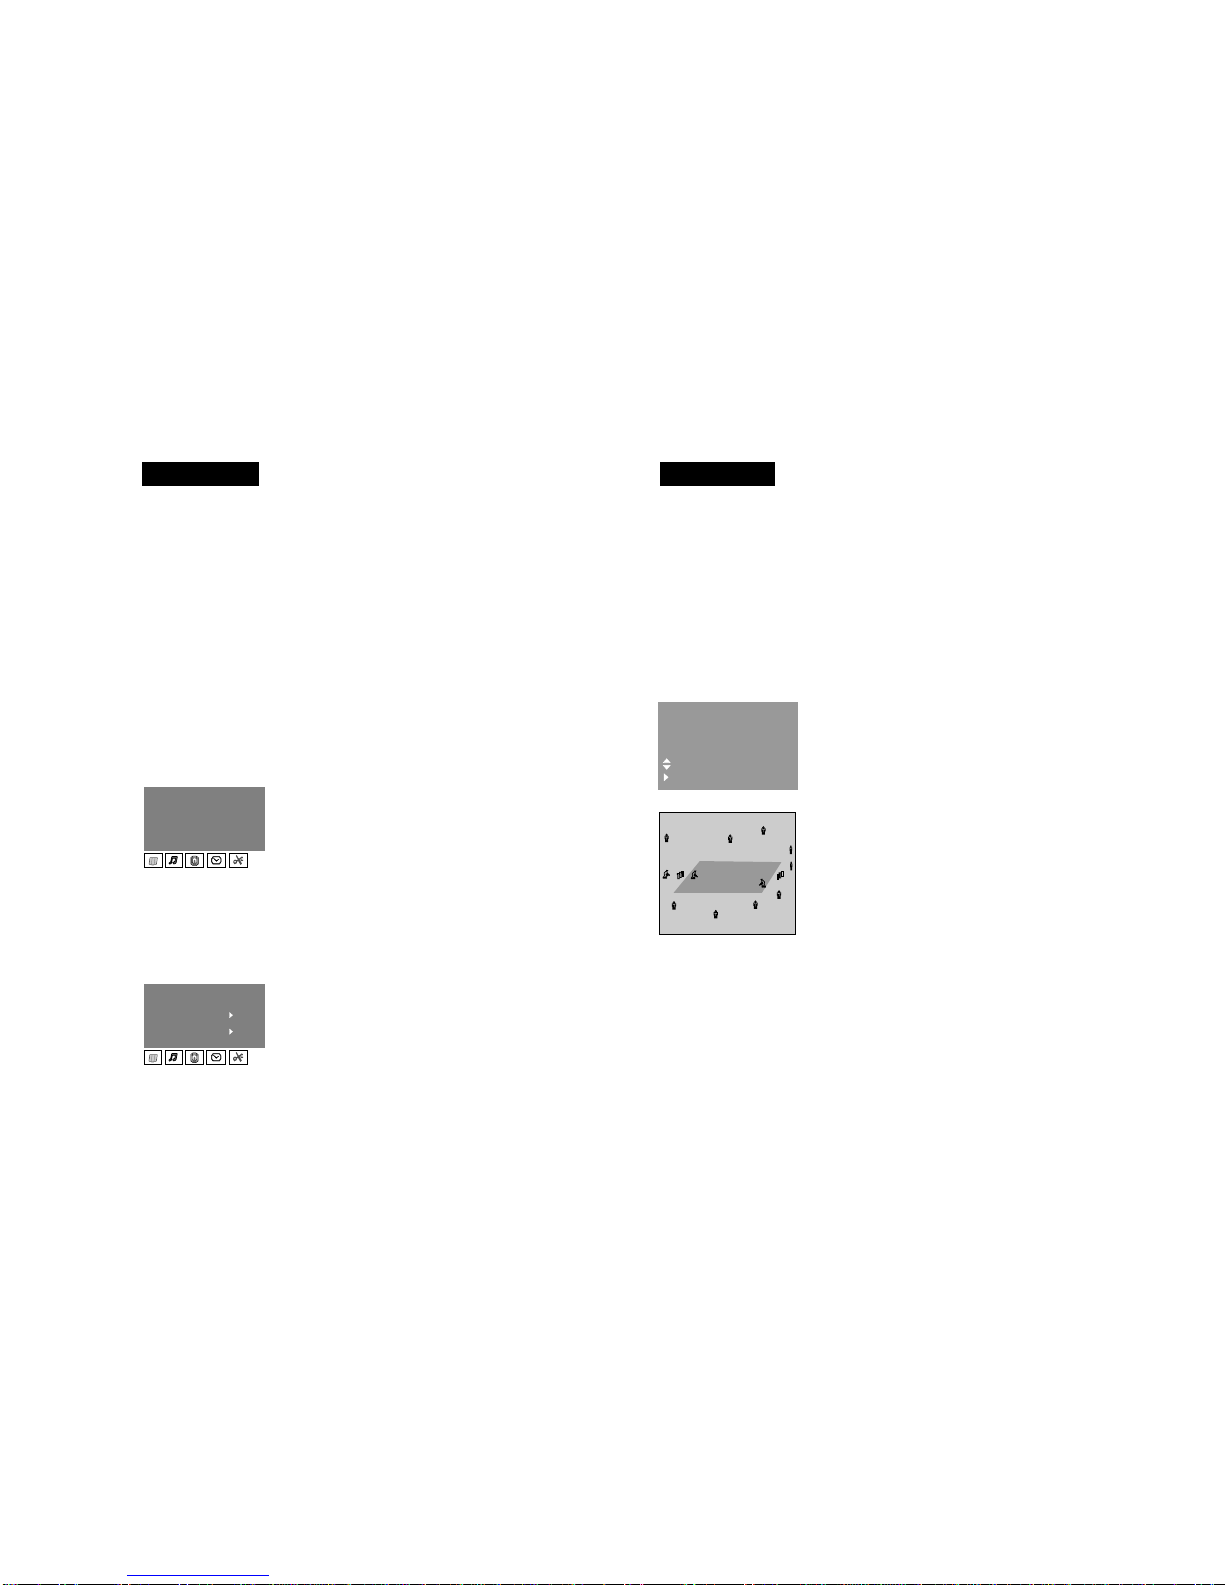
Ghosts are caused by the television signal
following two paths. One is the direct path and the
other is reflected from tall buildings, hills or some
other objects. Changing the direction or position of
the antenna may improve the reception.
SNOW
If your receiver is located in the fringe area of a
television station where the signal is weak, your
picture may be marred by the appearance of small
dots. When the signal is extremely weak, it may be
necessary to install a special antenna to
improve the picture.
RADIO FREQUENCY INTERFERENCE
This interference produces moving ripples or
diagonal streaks, and in some cases, causes loss
of contrast in the picture.
PICTURE SIZE VARIATION
A slight picture size variation is quite normal when you adjust the Contrast or Brightness
control.
The cause of Interference
SAFETY PRECAUTIONS
If the screen is set brightly, such unevenness in
colour may occur depending upon the nature of the
picture.
The proper colour can be restored by reducing the
contrast. Consult your local dealer.
THESE ARE NOT FAILURES
Plastic deformation sound A low squeaking sound at the back side of set is due
to deformation of plastic parts because of
temperature variations.
Unevenness in colour sometimes
develops in part of the screen
To prevent damage to the TV which may result in a fire or electrical shock, do not
expose the TV set to rain or excessive moisture. For safety, do not place vessels or
any container which contain fluids including water, on or near the TV.
HIGH VOLTAGE : Do not remove the rear cover as live parts and High voltage
components are accessible when the rear cover is removed.
Adequate ventilation is essential to prevent premature failure of electrical
components.
Avoid exposing the TV set to direct sunlight and other sources of direct heat.
Remove the AC plug from the wall outlet when the TV set is not used for a prolonged
period of time.
Do not use this set if abnormal operation occurs.
Ex : Smoke, odd sound or smells. Turn the power switch off and disconnect the AC
plug, if you notice any unusual operation.
CABINET AND PICTURE TUBE CARE : The cabinet can be kept in good condition
by simply wiping with a clean, dust free cloth moistened with mild detergent and
water. Do not use solutions containing benzol, petroleum or a chemical cloth.
For safety, remove the AC plug from the wall outlet when cleaning.
CAUTION : When the cabinet, or picture tube are scratched (with a nail or hard
object) or struck by similar materials, it may become deformed.
All colour television receivers are sensitive to magnetic influences usually
caused by either moving the receiver from one place to another or using certain
electrical appliances near the receiver. This residual magnetism, as it is called,
sometimes causes distortion which give rise to ‘blotchy’ areas of colour in the
picture. To avoid these effects, the receiver incorporates an automatic degaussing
switch. This circuit removes any residual magnetism in the metal parts of the
picture tube and ensures that each time the receiver is turned ‘ON’ using the main
switch, the purity of the colours displayed on the screen remains true and lifelike.
If the unit is moved or made to face a different direction, the main switch must be
OFF at least 30 minutes in order for the automatic degaussing circuit to operate
properly.
DEGAUSSING

13
Symptoms Solutions
No picture, no sound Be sure power cord is plugged in.
Try a different channel. If OK, probably station trouble.
Check aerial connection on back of set.
Check aerial for broken wires.
Poor sound, picture OK Try different channel, If OK, Probably station trouble.
If aerial is indoor type, re-orient aerial.
Poor picture, sound OK Try a different channel. If OK, Probably station trouble.
Check aerial connection on back of set.
Check aerial for broken wires.
Spots appear on the screen
May be interference from cars, motorcycles, electric trains,
high tension lines, neon signs, hair dryers etc.
Lines appear on the screen May be radiation from other TV receivers, personal
computers, and TV games, as well as interference from
radio station.
Double or triple images May be due to broadcast waves reflected from mountains
or buildings.
Check if the direction of the antenna has changed due to
Snowy picture The aerial lead-in may be broken or disconnected.
Check-if the direction of the antenna has changed.
Many apparent malfunctions are caused by slight misadjustments of the regular controls or by
some other equally simple cause. If any difficulty arises in the operation of your receiver, first
check through the illustrated list of symptoms and corrections. Should the difficulty persist
unplug the reciever and contact your dealer / Local service centre.
Before you call the service personnel just check the following points yourself.
You may actually need not a technician at all.
Adjust brightness controls.
strong winds, etc.
Remote control does not work The batteries in the remote control may be exhausted.
The batteries may be improperly installed.
Point remote handset at infra-red sensor of the set.
Simple Trouble Shooting
A

Manufacturer of this Videocon Brand CTV undertake that the product is warranted against manufacturing defects for a period of 1 year from the date of purchase as
per the terms and conditions mentioned here below. In the event of any complaint contact our nearest Videocon service centre.
The 1 year Warranty scheme is applicable on selected CTV models only.
Manufacturer will not be responsible for any injury, loss or damage, direct or consequential, arising out the use of inability to use this color television set.
BC

D
M/S. TEKCARE INDIA PRIVATE LIMITED,
15KM STONE, AURANGABAD- PAITHAN ROAD,
VILLAGE CHITEGAON, TALUKA PAITHAN,
AURANGABAD - 431105 MAHARASHTRA, INDIA.
WEBSITE: www.servicedelight.com
THIS PAGE IS INTENTIONALLY LEFT BLANK
Blank page line add
Table of contents
Other Videocon TV manuals