Vion A4000.2 User manual

on/off
“No bullshit” - instructions for the Vion A4000.2 electronic barometer/barograph
Power
There are 3 ways to power the A4000.2.
- Batteries. 4 pieces AA alcaline batteries. The batteries will last around 5 months. If you use the backlight 2.900
times for 20 seconds the battery life is reduced to 4 months.
- USB. The USB connector is located on the left hand side.
- 12 Volt can be applied through the dedicated 12 Volt connector on the left hand side. A 12 Volt connector with
cable is included with the unit. The cord with the white stripe is to be connected to the positive (+) on your power
supply. The unit will function if you supply as little as approximately 6 Volt on the 12 Volt input.
When supplying power using the USB or the 12 Volt connector you may leave the batteries inside as backup.
If the remaining power in the batteries is low the BATTERY LOW icon will switch on, even if USB or 12 Volt power
supply is present.
Switch the A4000.2 barometer on using the on/off switch on the left side.
If you switch it off all data in the memory is lost - don’t worry - it’s not your life’s history that’s lost.
Initial setup
Switching A4000.2 on displays shortly the instructing text “Please proceed with initialization”.
Then “SET” is displayed and you can choose:
Langue (language), heure (hour, time), unités (units), altitude, pression (pressure) and OK.
Select “langue” press the OK button and if you want English then select “anglais” using the + button and press OK.
If you already now are quite annoyed over the buzzer sound go directly to the OK using the + or - buttons and
press the OK button. Now press the orange MODE button for a while and select “buzzer”.
Adjust volume to zero “0”. What a relief!
Warning: This also disables the audio signal for alarms!
Getting back to the SET menu hold down the MODE button for a while and select “set”.
Now you can continue the initialization; set the time and date, the units for pressure, altitude and temperature. Press
the return button (MEM.) to get back to the SET menu.
Now choose altitude and pressure or get back to this later…

LAUD
LACOL
NI .PMET
.XAM
.RLA .MEM .NIM
ma
mp
aPh
gHnI
deR
ATTAGER
.RHCTAM .TMOTSUC
Upper screen
MOON PHASE icon shows the current moon phase* for
approx. 3 seconds, then the symbol “circles” for 5 seconds
to show you the direction of changes in the moon phase.
*) Please see below regarding the moon phase issue!
ALARM CLOCK icon is shown, if you have set the alarm
clock.
Either LOCAL icon or DUAL icon will be shown.
LOCAL: A4000.2 shifts between showing time (approx. 6
seconds) and date (approx. 3 seconds).
DUAL: A4000.2 shifts between showing local time (approx.
6 seconds) and dual time (approx. 3 seconds).
MATCH R., REGATTA and CUSTOM T. These icons are used when you start one of the 3 timers.
IN icon and TEMP icon. To tell you that the temperature shown is indoor temperature. Not very relevant (any more)
as an outer temperature sensor cannot be connected.
Relative humidity shown in percent.
GALE WARNING icon appears when a drop in air pressure of 3 hPa (millibars) or greater over a period of 3 hours or
less is detected. This alarm is always set. It cannot be switched off.
An audio alarm will sound (unless the buzzer is switched off).
The alarm will be present at the electronic alarm output connector (but only if the buzzer is switched on).
Air pressure in hPa (millibars). Or if you change settings InHg icon.
Sea level pressure: “Red” is shown. Actual pressure: “Red” is not shown.
ALR. icon is shown if a pressure alarm has been set.
“X” icon is shown if the buzzer is switched off. In this case all alarms are “sound-free” and will only be indicated by
text in the chart display (lower display).
MEM. icon is shown if a pressure value has been saved in memory.
MIN. icon is shown when using the HISTORY function, if a pressure is the minimum value during the period.
MAX. icon is shown when using the HISTORY function, if a pressure is the maximum value during the period.
BATTERY LOW icon is shown when the remaining energy in the batteries is low. Replace batteries within a few days
to prevent data loss, and prevent leaking batteries. This icon will switch on when batteries are low, even if USB or 12
Volt power supply is present.
Note: When you take out the old batteries you only have 10 seconds to insert the new ones, or the data will be lost. So
be well prepared.
*) The moon phase display doesn’t work from 1/1-2018 because the program apparently was made to run in a ten
year period from 2008 to 2017. However if you choose a month in this period with the same moon phase rhythm as
the present month’s moon phase rhythm you will achieve a correct moon phase display. The date will of course not be
correct.
March 2018 corresponds to August 2012, April 2018 corresponds to September 2012
May 2018 corresponds to October 2012, June 2018 corresponds to November 2012
July 2018 corresponds to December 2012, August 2018 corresponds to January 2013
September 2018 corresponds to February 2013, then it jumps
October 2018 will correspond to June 2013, November 2018 will correspond to July 2013
and so on...
Buzzer off icon Gale warning icon Battery low icon
Time/date

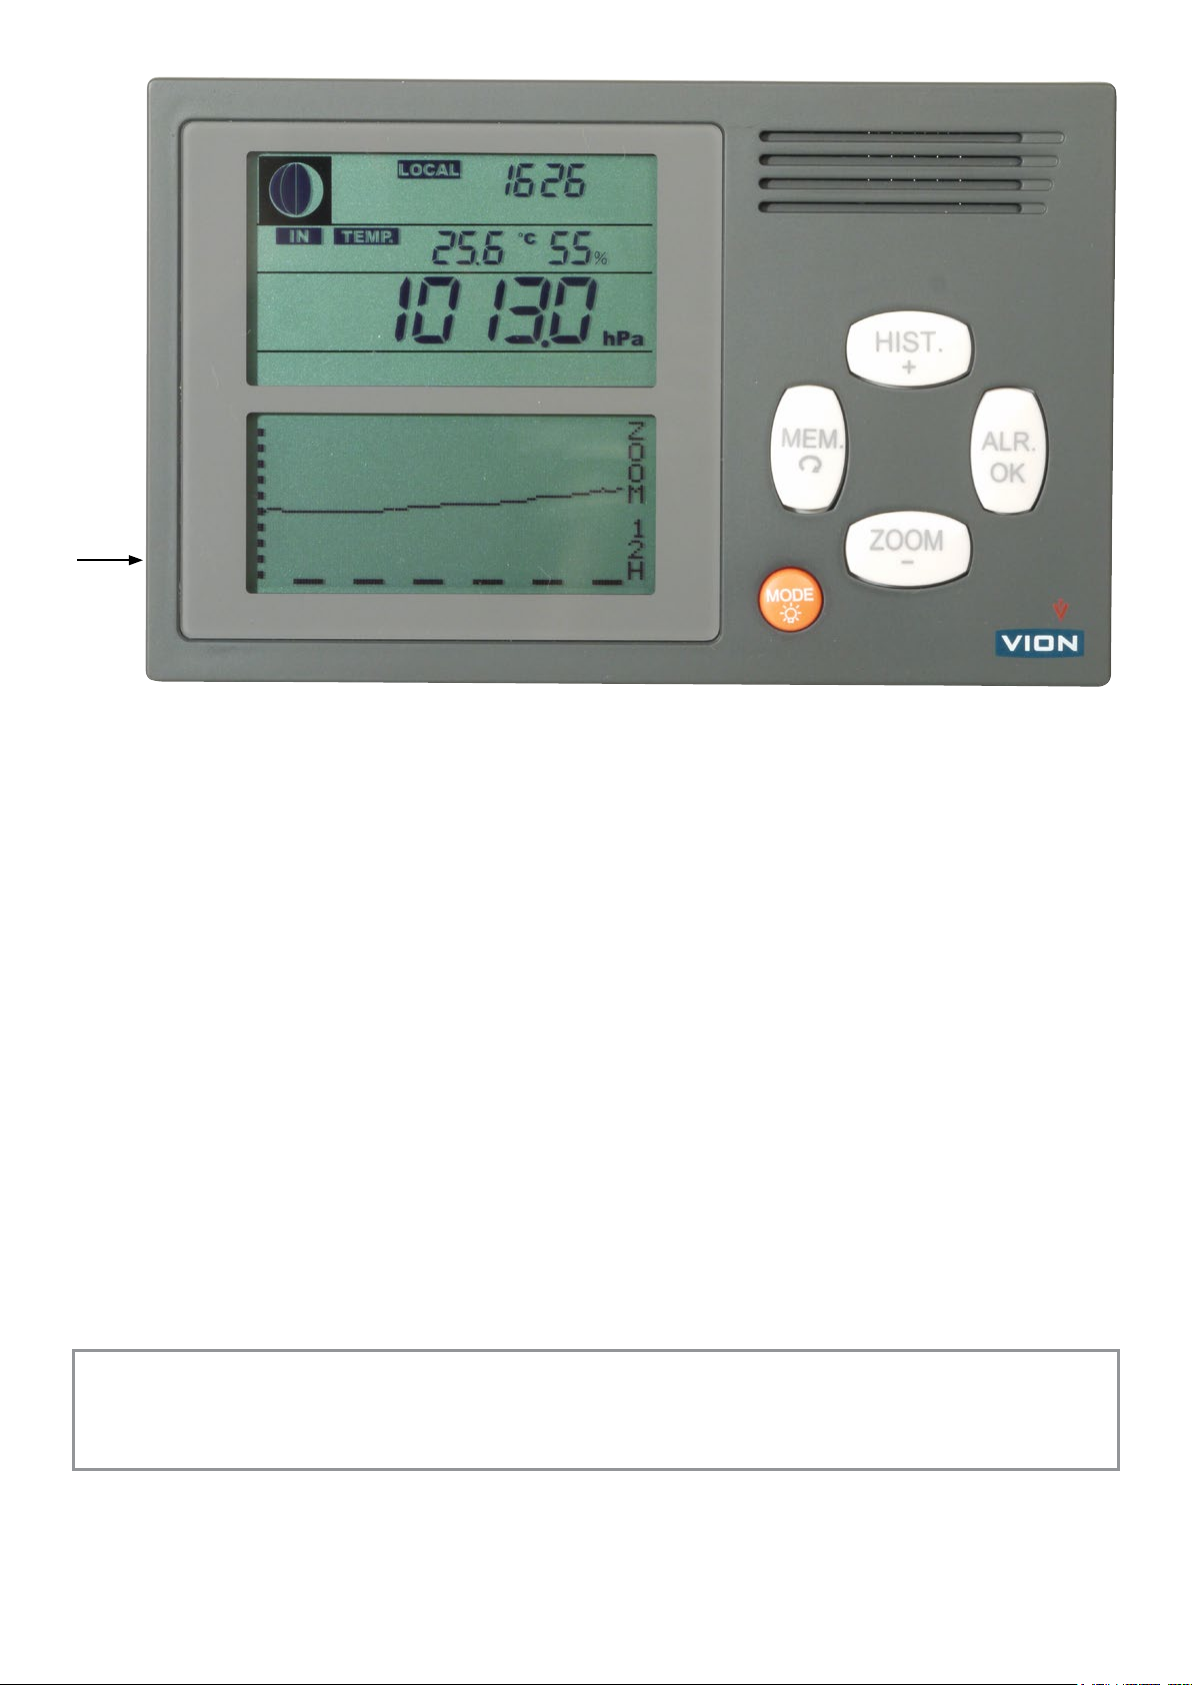
Chart display (lower screen)
A barograph showing the latest 2, 4, 6, 12, 24 or 48 hours of the air
pressure. Use the ZOOM/- and the the ZOOM/- and HIST./+ buttons to
adjust the chart scale (see below).
Navigation buttons overview
● Orange “MODE” button
Press it shortly and you can adjust the display back light level using
the buttons + and -.
Press it for a while and choose between following possibilities:
hour for adjusting time +1 hour, -1 hour or activate dual time
alarm set the time you want an alarm - doesn’t work when buzzer is
turned off (not so clever☺).
timer for racing
buzzer audible alarms won’t work when buzzer is turned of!
sensor forget this, no external sensor
temp forget this, no external sensor
set altitude, pressure settings etc… FAQ regarding the pressure readout - see below!
synchro forget this, no external sensor
● Combined “ALR.” (alarm) and “OK” (enter) button
You can set an alarm for sudden air pressure variations (presets between 0,5 and 10 hPa with 0,5 hPa steps), in-
creasing or decreasing within a given period between 1 hour and 6 hours with 1 hour steps - or for a target air pres-
sure value between 850 hPa and 1.100 hPa.
Audible alarm won’t work when buzzer is turned off, but the chart display will show: ALARM - Press a key to stop the
alarm! To stop the alarm you can press one of the 4 grey buttons (the orange MODE button doesn’t count here).
The alarm will be present at the electronic alarm output connector (but only if the buzzer is switched on).
● Combined “ZOOM“ and “-“ button
Press this button to changes the resolution of the chart display, use + and - to zoom in and out of the barograph. On
the horizontal time axis one dash or one space corresponds to 1 hour (except in the 48 hour zoom it’s 2 hours). On
the vertical air pressure axis one dash or one space corresponds to 1 hPa (1 millibar).
● Combined “HIST.” (history) and “+” button
When this button is pressed a cursor marks the time position on the pressure curve in the chart display and the corre-
sponding time and pressure is logged on the upper screen. Press + and - buttons to move the cursor backwards and
forward in time and read the corresponding air pressure.
● Combined “MEM.” (memory) and “return” (step backwards) button
By pressing the memory button and choosing OK you memorise the weather data at the time you press the button and
“MEM.” is indicated in the upper screen. Pres the memory button again and the OK button recalls the data from the
memory. Only one single set of data can be memorised and I don’t understand what it’s useful for? The HIST. (history)
button gives you access to all data from the last 48 hours! It’s stated in the original set of instructions that this feature
is particularly practical for watch changes. I don’t know?
Generally if no button is pressed within 20 seconds the display returns to the barograph display, except in the SET
menu.
Connector for alarm output
Alarms can be transferred to external equipment through the alarm output connector on the left hand side.
The alarm will only be present at the electronic alarm output connector if the buzzer is switched on!.
This output is an electronic switch (“open drain”). So if you want to connect directly to a siren or a lamp you have to
supply the power.
The maximum ratings are indicated on the A4000.2 to be 12-24 Volts and 0,5 Amps. However we recommend you
keep the current below 0,25 Amps. - Connector type: 3.5 mm mini jack mono or stereo. - Your external power supply’s
ground (-) shall be connected to the shield/outer part of the connector.

Technical specications
Absolute air pressure accuracy:
±1,5hPa @ 0-50°C, resolution 0,1 hPa within the working range. Working range is 900 to 1.100 hPa.
Temperature accuracy:
±0,5°C @ 25°C, resolution 0,1°C within the working range. Working range: 0 to 50ºC (32 to 122ºF).
Accuracy falls linearly from 25ºC to the range boundaries: From ±0,5ºC to ±1,25ºC.
Humidity accuracy:
±4,5%, resolution 1% within the operating range 0 to 100%.
Clock: Accuracy within ±30s per month.
FAQ
I am at sea level and my pressure readout is too low compared to the actual pressure. How do I adjust to cor-
rect readout?
First try using the MODE-SET-PRESSURE-ADJUSTMENT menu to make the necessary adjustment. Here a maxi-
mum of +/- 15 hPa can be introduced.
However in some units this adjustment is not enough. Here the trick is to introduce an “articial” Altitude. Go to the
menu MODE-SET-ALTITUDE. Now increase the altitude until the barometer pressure readout is correct.
This process is a “trial and error” process until you have reached the correct value. You can get very close to the cor-
rect value. The altitude-increment value is 5m and this corresponds to 0,625hPa.
So, as an example, if your barometer shows 950hPa - and the altitude is set to 0m - but should readout 1.010hPa
you can increase your altitude to approx. 480m. Press “OK” and check the pressure readout. At this point you are still
in the “SET” menu so just select “altitude” again and repeat your adjustment until you are satised with the pressure
readout. After pressing the “OK” nally press “MEM.” twice.
What is hecto-Pascal, hPa?
hPa is equal to millibar.
Normal pressure at sea level is 1.013,25 hPa = 1.013,25 millibar = 760 mm Hg = 29.92 In Hg
Pressure alarm in the mountains is less sensitive
I have noticed that when I set my pressure alarm to a 3 hPa change it requires almost a 4 hPa change before it acti-
vates.
The alarm is measured from actual changes in pressure and not the (calculated) pressure at sea level. As the pres-
sure in the mountains is lower than at sea level it requires a larger relative change to activate the alarm.
Therefore the alarm is less sensitive in the mountains.
Sometimes my unit freezes to a complete stop
This is a known error in the current version. The History menu seems to be most sensitive to this error.
The error is corrected by switching the unit off and then on again.
We are naturally working to nd the cause for this error.
Måløv 9/3-2018
Peter S. Jessen
www.delite.dk
Table of contents
Other Vion Weather Station manuals
Popular Weather Station manuals by other brands

Instant Transmission
Instant Transmission MA 10410 instruction manual

TFA
TFA 47.3004 instruction manual

La Crosse Technology
La Crosse Technology WS-9035U instruction manual

MicroStep-MIS
MicroStep-MIS MSB780 user guide

Conrad Electronic
Conrad Electronic WS55 operating instructions

ECOWITT
ECOWITT GW1001 Operation manual

Vestamatic
Vestamatic WISO Crystal Wind-/Sun Station Installation and operating instructions

Hyundai
Hyundai WS 2303 instruction manual

La Crosse Technology
La Crosse Technology 308-1425C manual

La Crosse Technology
La Crosse Technology WEATHER DIRECT WD-3103U owner's manual

MOB
MOB MO6562 user manual

La Crosse Technology
La Crosse Technology CA73453B Setup guide