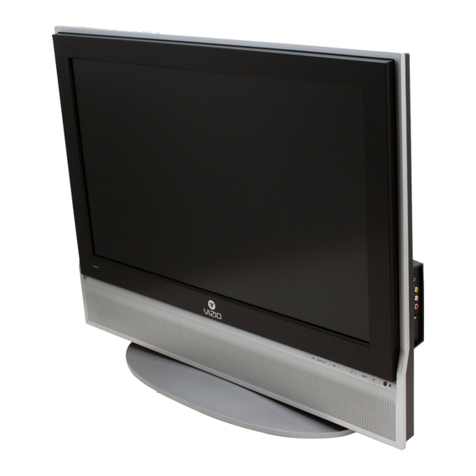
Vizio SV422XVT User manual

V1210
3V422)<VT
HDTV
User
Manna:
i\
so
"9;
<[,'
*7
I\
co
to
<5
Z
S
E
Dear
V1210
customer,
Congratulations
on
your
new
vzzao
SV422XVT
HDTV
purchase.
To
get
the
most
out
of
your
new
VIZIO
HDTV,
please
read
these
instructions
before
making
any
adjustments,
and
retain
them
for
fmum
reference.
We
hape
you
will
experience
many
years
of
enjoyment
from
your
new
WHO
VIA
Connected
High
Definifion
Television.
Fer
assistance,
piease
can
377—MW%Z30
(8’:'7~668-8462)
or
what:
us
at
www.VlZIO.<;om.
To
puxchase
or
Inquire
about
accessmies
and
irmafiatian
services
to;
your
V1210
HDTV,
psease
visit
our
website
at
www,\/¥ZIO.com
or
call
ioii
free
at
(8383
8494623.
You
wit;
register
yaur
VIZ}O
HDTV
whtzn
you
mm
on
your
HDTV
for
theirs!
time.
You
can
also
register
on
our
website
\wMI.VlZ§0.com.
it
is
imponam
to
register
your
HDTV
so
yuu
can
receive
future
product
upéates
and
support
information
than
wm
cominuaiiy
maximize
the
enioyment
of
your
HDTV.
For
peace
of
mind
and
to
protecz
your
investment
beyond
the
standam
warranty,
V1210
affetsyomsile
extended
warranty
service
piaas.
These
gfians
give
additionai
covetage
during
the
stsndaid
wattamy
peried.
Visit
our
websiie
M
can
as
to
purchase
a
53139.
Write
down
the
seriai
number
mated
9:!
me
back
oi
you:
HDTV
for
eaéy
reference
when
abtaiaing
wairanty,
support:
8eriaiA#:
‘
V
‘
Puichase
Date
‘
Vfzicisetagstered
itademafir
ofVf.':’i0,
Inc;
6113
v,
Inc.
Him!
Iago
and
‘High
Ezexinirien
Izmimedia
Interface‘
are
mgisfsmd
zrmamanrs
of
HUM
Licanséng
LLC.
Maarulscau
ml
suds;
Euensv
I:
am
Dairy
Laburatmiss.
Bothy
and
{he
donate-D
symbcsf
are
trademarks
of
Doiby
Laboratofiea
srs@
srs@.
imam»
as
and
mmu-me
are
Irademaflrs
u1'SR’S
Labs,
Inc.
Imsvnound
HE}
Md
Imvamme
Iactmofiagies
are
incorporated
umeriicense
from
SR$Labs,
me.
This
pzudwl
quaiifses
by
8i~3ER{;Y
STAR
in
the
‘tamosy
defauit (Home
Usa)‘
setting
and
this
is
an
satsingrih
which
power
sayings
win
be
achieved.
Changéng
he
factory
defaua
picture
setting
or
onabfing
other
iaaiusas
wit!
incteass
pavwer
consumpfton
that
couid
exceed
tfie
fiméts
necessaq
to
quafriy
for
Enemy
Stat
raking,
fig
WE
}'R.fi'sDEMARK3
SHOWN HEREIN
1185
WE
PROPERTY
OF
THEIR
RESPEGTME
OWNERS.
WAGES
USE!)
ARE
FOR
ELLUSTRATION
PURPGSES
OM
Y.
BRAVO.
V130
AND
THE
1:‘
£060
AND
WHERE
WSION
MEETS
VALCSE
AND
O?HER
WZK}
TRADEMARKS
ARE
YHE
2‘N?EL£ECTL#i!l.
?ROPERT)'
Of
W210
#536.
PRODUCT
SPECIf,3‘CA3'iOfiS
ARE
S£;'BJE€T
TO
CHANGE
WITHOUT
NOTICE
OF!
O8UG!3.T!ON.
4?)
2908
\£'Z!O
WC.
ALL
RKQHYS
RESERVES.
Version
9!18!2i309
1
.
V
www.VtZi0.com
533'
far
in
A
Witness
1»
O’8Li§V3H,
Q
/2;
1
9
V1268?
0713230

V5210
SWZZXVT
HDTV
User
Manual
.
trnpurlent
Safety
lrlelrurcilone
Your
HDTV
is
designed
and
manufactured
to
operate
within
defined
design
limits,
and
misuse
may
result
in
electric
shock
or
fire.
To
prevent
your
HDTV
frem
being
damaged,
the
following
instructions
should
be
observed
for
the
installatirm,
use,
and
maintenance
of
year
HDTV.
Read
the
following
safety
instructions
before
operating
your
HQTV.
Keep
these
instructions
in
a
sale
place
for
future
reference.
-
To
reduce
the
risk
at
eieclrlc
shock
or
<§Clm]30l‘t9l’ll.
damage,
switch
oil
the
power
before
connecting
other
components
to
yeur
HDTV.
c
Unplug
the
power
cord
belere
cleaning
yr:-ur
HDTV.
A
damp
cloth
is
sufficient
for
cleaning
your
HDTV.
Do
not
use
a
liquid
or
a
spray
cleaner
for
cleaning
your
HDTV.
Do
not
use
abrasive
cleaners.
T
-
Always
use
the
accessories
recommended
bythe
manufacturer
to
insure
compatibility.
o
lllaherx
moving
your
HDTV
from
an
area
of
low
temperature
to
an
area
all
high
temperature,
conrlerlsalicrn
may
loan
in
the
housing.
wait
before‘
lumirlg
on
your
HDTV
to
avoid
causing
fire,
electric
snack.
or
component
damage.
o
Use
enly
with
the
cart,
stand,
tripod.
bracket,
or
table
specified
by
manufacturer
or
sold
with
your
HDTV.
when
a
cart
is
used,
use
caution
when
movitg
the
carl!liDTV
combination
to
avoid
injury
fromlip-over.
09
not
place
your
HDTV
on
an
unstable
cart,
stand,
or
table.
ll
your
HDTV
tells,
it
can
lniure
a
person
and
cause
serleus
damage
ta
yuur
HDTV.
Use
only
a
cart
or
stand
recommended
by
‘the
rrramrfaclurer
er
sold
with
your
HDTV.
-
A
distance
of
at
least
it
feel
should
be
maintained
between
your
HDTV
and
any
heat
source,
such
as
a
radiator.
heater,
oven,
amplifier
etc.
Do
not
install
your
HDTV
clause
to
smoke,
Operating
your
HDTV
close
tr:
smoke
or
moisture
may
cause
tire
or
electric
shock.
T
.
Sluts
and
openings
la
the
back
and
barium
at
the
cabinei
are
provided
for
ventilation.
Tu
ensure
reliable
operation
of
your
HDTV
and
to
protect
it
from
overlrearling,
be
sure
these
epenings
are
not
blocked
or
covered.
Do
rial
place
your
HDTV
in
a
beokcase
or
cabinet
unless
proper
ventilation
is
provided;
o
'
Never
push
any
ubiecl
into
the
slots
and
openings
on
yeur
HDTl1cal2inel.
Do
net
place
any
objects
an
the lap
of
your
HDTV.
Doing
so
could
short
circuit
parts
causing
a
tire
or
electric
shack,
Never
spill
liquids
on
your
HDTV.
>
.
Your
HEW
should
be
operated
only
from
the
type
of
power
source
indicated
on
the
label.
tfyou
are
not
sure
of
the
type
at
power
supplied
to
ycur
home,
consult
your
dealer
all
local
puwer
eamparzy.
-
Do
not
apply
pressure
arrtrrow
objects
at
your
HDTV.
T
his
may
compromlse
the
lmegrily
of
the
display.
The
rrlanuia<:iurer's
warranty
dues
nut
cover
user
abuse
er
lmpreper
installations.
o
‘firepower
cord
must
be
replaced
when
using
different
voltage
than
the
yeltage
specified.
Fer
mare
lrrforrnation,
contact
your
dealer.
3
r
or
Your
HDTV
is
equipped
with
a
three-pranged
grounded
plug
{a
plug
with
a
third
grounding
pin}.
Tlris
plug
will
lil
enly
late
a
grounded
puwer
outlet.
This
is
a
safety
feature.
ll
your
cutie!
does
not
alzcernrrrodale
the
three-prongerl,
have
an
electrician
install
the
correct
outlet
or
use
an
adapter
to
ground
your
HDTV
safely.
Do
not
defeat
the
safety
purpuse
of
the
grounded
plug.
T
*
-
When
connected
to
a
power
outlet,
power
is
always
flowing
into
yaur
HDTV.
Te
trrtaily
disconrlecl
power.
unplug
are
power
cord.
o
The
lightning
flash
with
arruwhead
symbal
within
an
equilateral
triangle
is
intended
to
alert
the
user
to
the
presence
of
unisolated,
dangerous
voltage
within
the
inside
or
your
HDTV
that
may
be
of
T
sufficient
magnitude
to
constitute
arlslr
of
electric
shock
to
persons.
2
The
exclarrralirm
paint
within
an
equilateraltriangle
is
intended
to
alert
the
user
to
the
presence
of
imporlanl
operating
and
servicing
instruetlens
in
the
literature
accompanying
yeur
HDTV.
*
T
y
L
V
o
Do
not
overload
power
strips
and
extensian
cords.
Overloading
can
result
in
tire
or
electric
shock.
$7
V
M
2
mm
.VlZl0.com
V1268?
02313231

vezsrbn
9113:2009
V
3
V1230
SV422X\e‘T
HDTV
User
Mama?
The
war?
seeker
should
be
instafied
near
yeur
HDTV
and
easiiy
accessibée.
Only
power
of
the
marked
voitage
can
be
used
for
your
HOW.
My
ether
wattage
than
the
specified
mirage
may
cause
fire
or
eieetric
shock
r
30
not
ieurzh
the
pewer
card
during
lightning.
To
aveid
ereciric
shack,
avoid
handiing
the
power
card
during
electrical
storms.
’
Unpiug
your
HDTV
during
a
tighining
stoma
orwben
it
wiii
not
be
usect
for
rang
period
oftime.
This
win
protect
your
HDTV
tram
damage
due
to
power
surges.
Do
not
attempt
to
reeair
or
service
your
HDTV
yourseit.
Opening
or
removing
the
back
cave!
may
expose
you
to
high
vorteges.
eiectréc
snack,
and
other
hazards.
If
repairis
required,
centaci
your
clearer
and
refer
an
servicing
to
quaiifsed
service
personnel.
Keep
yeur
HDTV
away
from
moismre.
Do
not
excuse
your
HDTV
to
rain
or
moisture.
if
water
penetrates
into
your
HDTV,
urspiug
the
pawer
cord
and
contact
year
dearer.
Continuous
use
in
8133
case
may
resuil
in
fire
or
electric
shock.
Do
not
use
your
HDTV
if
any
abnermafity
occurs.
£1‘
any
smoke
or
odor
becomes
apparent,
ringing
the
power
cord
and contact
your
deaser
immediately.
{)0
net
try
to
repair
your
HDTV
yourseif.
Avoid
using
dropped
or
damaged
appfiances.
if
your
HDTV
is
dropped
and
the
housing
is
damaged,
the
intema!
cernponents
may
function
abnormaéiy.
Unplug
me
power
cord
immediaaeiy
and
canted
your
deaier
for
repair.
Continued
use
of
your
HDTV
may
cause
fire
or
eiecnic
shock.
00
am
insiatl
your
HDTV
in
an
area
with
heavy
dust
or
high
hunidity.
Operating
your
HDTV
in
erwimnmants
with
heavy
dust
er
high
humidity
may
cause
fire
or
eiectrrc
shock.
«
Fomxw
instructions
for
rnoxring
your
HOW.
Ensure
that
the
power
cent
and any
omer
cables
are
unplugged
before
moving
your
HDTV.
L
Men
Lmpiugging
your
HDTV.
hold
the
power
W39.
not
the
cord.
Putting
on
the
power
cord
may
damage
we
wires
inside
the
cord
and
cause
fire
or
electric
shock.
when
your
HDTV
wili
not
be
used
for
an
extended
period
at
sime,
unpsug
the
power
card,
To
reduce
risk
of
electric
shock,
do
net
touch
the
connector
with
wet
hands.
I
Insert
baiieries
in
accnrdance
with
ineiruciions.
Incorrect
poiaréties
may
cause
the
bafteries
in
ieak
whigh
can
damage
the
remote
control
car
injure
the
operaror.
31
any
ofthe
ioilawing
omurs,
contact
the
dearer:
a
‘The
power
cord
fairs
or
trays.
0
Liquid
sprays
or
any
object
drops
into
your
§-iDTV.
o
Your
HDTV
is
exposed
to
rain
or
other
moésture.
0
Your
HDFW
rs
dropped
or
damages:
in
any
way.
7
o
The
performance
of
your
HDTV
‘rzharrges
substamialiy.
www.‘flZ!O.cern
‘
V3268?
0713232

M
For
added
proteciion
of
the
TV
during
V3210
SV-422)(\fT
HDTV
User
Manna!
Te!evisér:~n
Antenna
Cennectien
Protective:
E.xtema.i
Televisicn
Antenna
Grounzfiing
If
an
outside
anxennaisatentte
dish
or
cable
system
is
to
be
connected
to
mé
TV.
make
sure
that
the
antenna
0:
came
system
is
elezrkricany
grounded
to
provéde
some
protection
against
vottage
surges
and
static
chatges.
Anicie
810
of
the
Nationai
Electfica!
Code,
ANSIINFPSA
70.
provides
infosmaiior:
wiih
regard
to
ptopex
grounding
of
the
mast
and
suppozting
structure,
giounding
of
the
lead-in
wire
10
an
antenna
discharge
unit,
size
of
the
gtoundéng
aonduciom
location
at
antenna
dischayge
units
connection
to
graunding
elaclmdes,
and
requiresrsents
of
the
grounding
electrode.
Lightning
Pmteciion
maouwmam:
a
lightning
storm
or
when
‘:2
is
left
unattended
or
unused
to:
iong
periods
of
time,
unpiug
the
TV
from
the
wail
onset
and
disconnect
the
antenna
or
cabie
system.
IEVKIID
Blfliflifwil
-umsumms
I
mwmmamms
vet
zwuarm,»
Power
Limes
Do
not
Iocaie
the
antenna
near
overhead
tight
or power
circuits.
or
,
where
it
coukiiall
into
such
power
‘MWW**°WNw=*N**Ww-=n~r~I
iines
or
circuns.
*
BENMHAUS
Remember,
the
screen
of
the
caaxial
cable
is
intended
to
be
connected
to
earth
inxhe
building
inszaitation.
Afivisory
9?
the
DTV
Trarzsitien
The
nationwide
switch
to
digitai
television
broadcasiiug
was
campieled
at:
June
32,
2099,
Your
VIZIO
HDTV
is
‘capable
of
receiving
Digiiai
Breadcasts,
and
no
Digital
Converter
Box
is
required.
Furadcfiiianaf
Informafien,
please
contact
the
patties
fisted
below,
as
appropriate:
FCC
(US
Federaicommunicatiens
Commission)
m’<Q:iA«mw.tcc.gov!
Phone:
1-888-CALL~FCC
(1-888425-5322}
TTY:
1-888-TELL-FCC
{1-868«835-5322)
Fax:
1-866418-D232
E-mail:
fccin§@fcc.ggv
NT!A
(National
Teiecommunications
and
Information
Administs'a!k>n)
.2
nfip_:llwww.ntia,d0c,govl
1—888—DT\/-2809
Listings
:15
US
Teievisim
Stafions:
ht¥Q::‘lvwm.h£gh—techgroduc!i<ms.comIusTVstaii>ons.h1m
4
www.VlZ}0.cnm
L
V1268?
6713233

V1210
SWZZXVT
HDTV
User
Manuat
Tame
<3?
Contents
irnponam
Safely
lnsxsucticns
.................................
..
Tesevision
Antenna
Connection
Pmtectéon
Advisory
of
the
DTV
Transition
.............
..
Finding
a
Location
fa:
Your
HDTV
.
W311
Mounting
your
Afiaching
{he
safety
C:'}AF'l'EiF:
3
BASIC
CONTROLS
ANG
CON!‘-§EC'fl0N$..
From
Pane!
Lefi-Side
Pane!
Commis
8.
Connections
Rear
Pane:
Connections
.......................
..
C:1APT$.R
2
W110
R£:WI3'i"rE
COf¢TE%OL.
lnstaiiing
the
Bafleries
Activating
Your
Biueinoth
Remote
.
Remote
Canirci
Buttons
Basic
W
Functions
AN
Functkms
.......
..
\!tA.Fx.mctions..
Making
ii
Your
Universe!
Remote..
Remote
Contra?
Range
................
..
W230
Remote
Controi
Precautions...‘
C:15’&PTE'§{
3
GETTWG
C:-lA?TE‘.F{
4
USING
YOUR
HDTV
FOR
TEE
F§RSTT3ME.,
Connecting
to
the
Internal
Seiecfmg
an
input
Source
. .
.
.
.
Setting
the
Tsme
Zane
&
Daylight
Savmg
Watching
a
TV
Program..............,.............
Vsewing
Digkaiw
Pmgram
information
NFC)
Button
................................
,.
GUIDE
Button
..........................
..
Expaonng
vzzio
Ememe1AI395
MA)
_
,
c.~w>T£P.
5
ccmwzcme
.
which
Veckeo
comection
Should
I
Use?
..................................................................................
.,,
Connecting
Your
Cable
or
Sa:e9ite
8ox....
Using
%+DMI
(Best)
..............................................
..
HEM
Connections
for
Cable
or
Satelfiie
Boxes
wit
Using
Component
Video
(Better)................................
Using
Sfifsdeo
(Bauer)
Using
Cemposite
\/K160
{Cam;>aiibie}....
Using
Coaxial
{Antenna}
(Compatible)
Connecting
Your
DVD
Mayer
..........
..
Using
HEM)
(Best)
HDW
Connecfians
for~£WD
Piayem
with
UV!
Using
CompunentVideo(Be1§er)
.................
..
Using
S-Video
(Better)
Using
Composite
(AV)
Video
(cnmpaiibie)
cementing
Coaxiai
(RF)
.................................................
..
V
Using
Your
Antenna
or
Digitai
Same
for
Standaxd
or
Digital
TV
Comeciing
Your
VCR
or
Video
Camera
.................................
..
Using
SA/JDEO
Using
AV
....................................................................................................................................
..
‘4e:sion9}1812009
M
L
5
V
wvvw.WZIO._cam
VX2687
0'i132¢34
L
V1.Zi0
SV-422XVf
HDTV
User
Manuai
Connecting
a
Hume
Theater
System
‘
Using
RCA
.............
..
Using
Opticai
(SPDIF)..
Bonnecking
a
Computer..,
RG8
{VGA}
Using
HUML...
.
Eshemei
Connection
i3r§APTE‘.R
6
USING
WA
Conneciing
to
the
Internet
Navigating
the
VIA
Dock
..........
..
Using
V3210
lniemet
Apps
MA)
30
31
31
33
32
32
‘$3
33
33
34
Navigaiing
Apps
....................
..
34
34
35
35
35
35
36
36
38
36
3?
37
Adding
Deieting
Apps.
Mating
Apps
..
I
Using
Pmfiies
.....
..
Creating
a
New
Pmfle
Switching
Frames
Edifing
your
Praffle
..
Removing
a
Pwfla.
Updating
your
T
V....
C.~mPTE;R
Ir’
i§DJU$J
1918
YOEJR
Him!
SETTWG8
..
Using
She
FEW
Settings
App.....,..
.....
..
input
Menu.
Wfide
Menu
.
‘
CC
Menu
Anaiog
Ciosed
Caption
.,
Bigfia!
Closed
Caption
........
.,39
Digitatcc
Style
. . . . . . . .
.
‘
,
. .
.
.
_
,
,
, ,
,,39
Sheep
Timermenu
..
,
TV
Setiingsmenu
Siza
&
Positzcm...
Cola:
Tempeiatuxe.
Pick
{Device
Type
Pick
Device
Bmnd
....
..
,
Confirm
Remote
Connecaon...
Equalizer
Settings
Reset
Audie
Mode.
Tuner
............
..
Tuner
Mode
.....
..
www.Vt2!O.com
V1268?
0713235

V5210
8V422XVT
HDTV
User
Maaua!
Auto
Channd
Search
Parfial
Cnannei
Seearch
Add
Anaiog
Shanna!
.
Skip
(Shanna:
.......
..
Analog
ms
.
Digital
MTS........
Name
Enput
Device
Se4t:p..
Input
SOUiGE......
Pick
Bevice
Type
.,
Pick
Device
Brand..,_.
Comm
Remote
Cormeciion
.
Parental
Controis
Rating
Enable...
C-hanne!
Locks
.
USArTV..
USA-Movie
CAN-English.
CAN-French
.A
.4,
Block
Unrated
Shows
,
Menu
Language
.48
"fime
&
Locai
Setiings
.48
Time
Zone
..........
..
.418
Daylight
Saving
..:18
Postal
Code......
..48
PP
.49
‘
PP
Mode
..
.49
P}?
Source
.49
Posiiion
.49
Size
......
..
»
49
Audio
,
.
.
. . .
,.
.....
.
.
A9
Network
Menu
....
..
.50
wired
Connection
.
.50
Mamsai
Setup
......
..
.50
Clxange
Saltiragb...
Test
Coanecfion
wreiess
Conneciiors.
;
3
wireless
Access
Poinis.
'
More
Access
Poims
.
Manna
Setup
.............
..
-
Enter
Access
Paint
Name
.
Biuefoeih
Menum,
.....
.;
.......
..
Pair
Devices
Heip
Menu
......
..
System
Info
Reset
AH
Sefiingsifiesets
Clear
Memory
{Factory
Defauitj
...................................
,.
C:iAPTER
8
I*13.%X¥NT£N11LNCEi
AND
TROU8LE3HOOT5NG
Cleaning
the
TV
and
Remote
Control
Troubieshooiing
Guide
. .
Wlvispiay
Troubleshoohng.
Audio
Troubieshoofing
.......
..
Biueiooth
Troubleshaeting
.............
..
W230
mtemet
Apps
Trwmeshommg......,.......................M.....
Remoée
Conimi
Troubleshooting
$$3§8$°&S
&
%$$k“{‘.’.‘3.’.‘.‘2k'3.‘"l.“£8"£»'8
Version
9!1812009
V
‘I
‘
www.\'iZlO.cem
VIZ687
0713236
Q

C:5APTf;iF3.
3
5SPEi3!FiCATi0:\1$
V1210
SVAQZXVT
HCFW
User
Manuai
’
imemei
Connection
Trm;b3eshoc:ting......
Teiephsne
&
Technicat
Support.
FCC
(31335
8
Radio
lmetiereace
Siatemem
Resoiution
thmugh
RG8
Input
.....
..
Preset
PC
Resoluiians
Using
a
Cabte
er
satemte
Box
Remote
UMSTED
V3210
SNTERNET
!kPPUC2A"f1C2I*l3
¥3iSCL:'«\lMER
$93350
!!>s$’FEPiNEZT
AP§’i.!CAT}O|'\1S
SOFTWARiS
§..iCE¥‘$5E
AGREEEMENT
..........................................
..
65
Opening
the
Package
Year
HOW
and
its
accompanying
accessories
are
carefuily
packed
in
a
cardboard
canon
than
has
been
designed
to
pmieci
iifmm
transpoctatkm
damage.
Once
you
have
opened
the
camm,
check
that
yuur
HDTV
is
in
good
condition
and
that
an
of
the
contents
are
included.
The
gmss
surfase
can
easify
be
scraicheii
or
broken,
so
hamfie
your
HDTV
genffy
am?
never
piece
your
HDTV
with
the
glass
facing
dswnwards
an
a
suzface
withmst
pmiective
padding.
IMPORTANT:
Save
the
cation
and
packing
mateiial
far
future
shipping.
Packagé
Cotztems
V
o
V3210
SVIIZZXVT
V1210
remote
cxmtroi
VUR10.
including
M!
keybaaid,
H72,
and
Bluetooth
—
AA
baftefies
tor
the
remote
centre!
{2}
Power
cord
Safety
Sirap
Cleaning
Cloth
This
user
manual
Quick
Setup
Guide
Oiivlit
Cazsiioat
Do
an!
appiy
pressure
ormrow
objects
atyout
i~lD”W.
This
may
éompromise
the
iifEégrity-
of
the
dispiay.
The
mamsfaciurefs
watramy
does
nut
sever
user
abuse
or
improper
instasiafieas.
8
*
www.V%Zi0.com
V1268?
071323?

Version
91822009
"
V
9
WZEG
SWZZXVT
HDTV
User
Manual
HUTV
Accesssorios
and
Services
Additional
certified
accessories
for
your
HDTV
are
sold
separateiy,
incrudingz
Walt
mounts
High
Definition
cables
,
Extra
or
replacement
remote
controis
‘Sound
Bars
Eluéray
DVD
Players
‘~OvG«C¢o
V1210
also
offers
instéltation
services
ann
extended
warranty
services
for
your
HDTV.
To
purchase
or
inquire
about
adoiiianai
accessones
and
services
for
you:
W210
HOW,
visit
our
website
at
www.V3Z!O.com
or
cat:
as
ten
free
at
87?~MWIfl0
(877-698-4946).
Findmg
a
Location
for
Your
HBTV
Here
are
some
things
you
shoukd
oonsider
when
oecidfng
on
a
proper
locanon
for
your
HDTV:
»
The
powerconsumptioo
of
your
HDTV
is
about
1':‘5.41W(AVG).
0
use
the
incioded
power
cord.
0
when
an
extension
cord
is
Required,
use
one
won
the
correct
gower
rating.
The
3-
prongeo
card
must
be
grounded
and
the
groondmg
feature
(3
prong)
must
noa
be
compromised.
V
«v
To
take
fun
advantage
of
yomr
TV,
you
wifi
need
an
tntemet
connection.
Set
up
the
Internet
connection
using
theninnial
sefup
App
or
the
Network
Menu
in
the
HDTV
Semngs
App.
Your
HDTV
has
802.3%
doaiéaand
wireiess
builoin
{which
is
also
compatibie
with
802.11!)
and
802.11g
wireless
networks),
so
you
can
connect
your
TV
to
the
intemet
thmugn
your
wirefess
home
network.
0:
you
can
connect
to
the
Internet
by
plugging
in
an
Eihemea
came
from
your
tmemei
connection
tome
Ethernet
port
on
your
HDTV.
A
wired
oonnecfion
may
provide
a
more
consisteni
connection
depending
on
{he
conditions
Sn
your
home
environment.
See
Network
Manx:
on
page
50
ior
deiai1edinforrnafion—on
setting
up
your
lntemei
conneciion.
-
instali
your
HDTV
on
a
flat
surface
to
avoid
tipping.
-
For
proper
veniiiation,
you
must
allow
space
between
me
back
of.)/nu:
HDTV
and
the
wen.
0
Avoid
insialling
your
HDTV
in
places
with
high
humidity,
dosi,
or
smoke:
so
you
do
not
shorien
the
sawice
life
of
the
eiectronic
components.
a
Insist!
your
HDTV
in
a
ievei.
tandscape
orientation,
with
the
V3230
1690
at
the
bottom
to
prevent
poor
ventilation
and
excessive
component
damage.
-
If
yoowant
to
mount
you:
HDTV
on
the
want
see
below
for
aodiiionai
information.
-
Roadihis
user
manna?
oarefofiy
before
insiaiiing
yon;
H91‘:/.
‘
V1210
offers
professkanaiy
Snsiaflafion
services
including
home
networking
Contact
VS/I210
fox
more
information
on
these
sexvices
at
877-MYWZIO
(87?~698~4946)
or
www.V!ZlO.coo3.
www.VlZK).com
V1263?
0713238

V1230
SV-i22XVT
HDTV
U53!
Manna}
Wail
¥r’is;>o:1t§rzg
your
HDTV
Your
HDTV
can
be
mounted
on
the
war?
for
viewing.
11
you
choose
to
mourn
your
HDTV
on
the
waii,
tollow
the
instrockiorrs
below.
1.
Write
down
the
serfs!
number
located
on
the
back
of
your
HDTV:
mmmmmmmmmm
__,___
2.
Remove
the
stand
base
and
neck:
2:.
Disconnect
ma
cables
from
your
HDTV.
11.
Piace
your
HDTV
face
down
on
a
soft,
flat
surface
to
prevent
damage
to
the
screen.
0.
Remove
the
eight
(8)
screws
herding
the
stand
neck.
and
then
remove
the
neck
L
and
base.
3.
Mount
your
HDTV
on
the
wait
:3.
Attach
your
HDTV
to
a
war!
mom!
{said
seoaraiety}
using
the
mounting
horas
in
the
back
panel
of
your
HDTV.
b.
Read
the
instructions‘,
that
came
wiih
your
specific
war!
rnount
to
property
hang
your
HDTV.
Wall
Mount
Specs:
c
Hare
Paliem:
400mm
x
200mm
;
Screw
Size:
M5
Pitch
1.0mm
Afiaching
rm».
safety
strap
when
your
HDTV
is
not
mounted
on
the
wall,
use
the
inciudeci
safety
strap
to
attach
your
HDTV
so
the
war]
to
reduce
the
chance
of
your
HDTV
being
partied
over.
The
Sarah:
Strap
should
be
used
with
common
sense
practice
such
as
ensuring
that
children
(or
adults)
do
not
climb
up,
grabbing
the
top
of
your
HDTV
and
putling
it
onto
themselves.
_
A A
~
»
1.
Attach
one
and
oftbe
strap
to
the
wafiz
-
rr
you
have
a
orywafi
finish
aitach
it
to
a
stud,
using
a
-
washer
underneath
the
screw
head.
»
#1
you
have
a
solid
wait
you
should
use
a
lag
ooinragain
using
a
washer
under
the
out.
2.
Attach
the
other
and
of
the
Safeiy
strap
:0
one
of
the
upper
walt
mounting
holes
on
.
me
back
of
your
HDTV,
using
a
washer
under
the
screw
head.
www.VlZ!0.com
VLZ687
0713239

WZK)
SWZZXW
HDTV
User
Manual
Qhapter
‘I
Basic.
tlontmir.
and
Cganxwectixsns
Fmrzi
Pane;
Commis“
Power
‘V5210’,
Light-—~W‘sen
you
$355!
connect
paws:
or
turn
your
HDTV
ofi,
wait
in:
the
W210
iogo
ta
stop
flashing
betcre
pressing
the
power
button
an
the
TV
or
the
remote
comm!
in
mm
your
HDTV
on.
Once
powered
on,
the
V3210
toga
turns
whiie.
Remote
comm!
Senser—»Wt3anV
in
SR
mode,
point
the
{emote
comm!
at
mis
sensor
in
the
iawer
right-
hand
corner
for
the
best
response
to
‘me
remote
signai.
Your
remote
comrot
normafly
ape-rates
wflh
Biuetoeth
which
aims
gas
it:
point
the
remote
comm!
anywhere
to
comm!
the
TV.
Yon
witl
pair
(Activate)
your
remme
during
the
initial
setup
procedure.
Left~$ide
Pane:
Ccntmis
8.
Connecaions
?ewer
{i’3}--Yarn
your
HDTV
on
by
pressing
the
bums
once.
Fress
the
button
again
is
your
HDTV
off.
WA
!
MENU
{®
)--Press
ta
iaunm
the
V3210
mtemei
Apps
{VIA}
Dock
on
the
ix>tiom'of
the
TV.
inciuding
me
HDTV
Settings
A99,
used
is
make
adgustrnems
ta
your
TV.
SH
A1
Ymuse
these
buitrms
so
step
up
ordown
thew
channels.
Men
in
a
menu,
these
battens
iunciizm
as
up
and
dawn
navigating.
‘
VOL
+
I
-
-—Use
these
buttons
to
increase
or
decceaséihe
speaiker
vomme.
when
in
a
menu,
these
buttons
funczion
as
$511
and
right
navigation.
!NPUT--Repeated
messing
of
this
button
slaps
through
the
input
sources
in
me
faflmving
sequence:
‘W,
AV
mamposite).
COMP
(Companeni),
HDMM,
Him:-2,
Ham-3,
HEM!
side,
and
R68
{VGA}.
Once
you
have
stepged
throng?»
the
entire
seqaeace,
you
wiil
mum
to
me
beginning.
when
in
a
menu,
this
button
funmians
as
the
OK
or
seieci
control.
USB
1, 2,
3-—These
pens
are
currently
far
service
ofly.
Register
your
HEW
to
seceive
future
prodxzct
upelates
including
upgrades
forthese
posts.
HIM!
SSDE-C::anect
anuiher
digiial
video
device
such
as
a
DVD
~;::£ayer
or
581-109
box
through
this
an
digiial
connector.
7
,
Vers$or:9!18J2E}£%9
H
L
www.VEiO.com
V1268?
{T913240

VLZJO
SWZZXVT
HDW
User
Manua¥
Rear
Panel
Cennecéions
_.....,W_.@._...m
1.
HEM!
1 8.
2-—-Connect
cligiiai
video
devices
such
as
{ND
pfayers
oi
semop
box
thmugh
these
at!
digkal
otmneciors.
There
is
an
additinnai
HDM3
pan
on
the
side
of
your
HDTV.
7
2.
RGB
PC-«Connect
the
video
and
audio
{mm
a
computer
here.
Connect
a
3/8"
mini
pug
stereo
cormecmr
item
the
computer
ice
the
TV
if
yin;
want
sauna
to
be
Xransmitled.
K
3.
S-ViDEOIAV-canne::t
cnmposita
nr
S~\/idea
video
devices,
such
as
a
VCR
or
game
ccnsoie.
Use
Ike
whiie
and
red
{mnednrs
to
canned
the
extemai
audit:
framing
same
source.
’
1%,
DW'!W—~Connec1
to
an
amemza
or
digital
cabie
source
for
digiial
TV.
Fix
digitat
TV
stations
in
year
area-visfiwwm-.an1ennaweb.mg.
Fox.
cabte
and
sateiiite
set-top
bnxes,
we
reoammend
that
you
use
a
HUM!
9:"
component
cabie
otmnecfism
for
hfigh
definition
image
quaiiiy.
V
5.
AUDIO
O{3T—-
\
V
a.
{OPHCAL}
when
digélat
‘W
is
“seieciad
for
viewing,
the
audio
asssxfiaied
5333'!
the
7
programming
wiii
be
availabie
an
the
SPD!F
Opfica!
cemecior
for
connection
in
a
*J¥Z!0V
Swami
Bar
{if
yam
home
theater
system.
b.
{ANALOG
UR}
Connect
the
audio
fmm
ycur
HDTV
ta
an
external
device,
such
as
a
V!Z!O
Sound
Bar
or
a
home
theater
system.
Nmampfified
speakers
cannci
be
connected
directly
here.
~
L
6.
ETHERNET--conned
an
Ethernet
came
to
access
the
Internet.
Set
up
the
Internet
connection
using
the
initiai
Setup
App
0!’
the
Network
Menu
in
the
HDTV
Settings
App.
Your
HDTV
also
has
802,11n
ctuaieband
wireiess,
so
yet.»
can
ccnnec:
ysur
TV
to
the
Internet
mmugh
you
wireiess
homehetvvntk.
See
Netwark
Menu
an page
so
for
detailed
informafion
ea
setting
up
yam
mietnei
connectien.
7.
HUM!
3»-—Gonned
another
digiia!
video
tievice
such
as
3
DVD
player
or
581-109‘
hex
through
this
at!
digilai
connector.
For
users
who
want
10
conned
to
a
{M
enabied
device,
use
[a
DV3~
HDM!
cable
and
connect
She
analog
audio
output
of
the
device
to
the
HR
AUDK)
here!
Your
V5210
Certified
Him:
and
HDM!~DVi
cabies
are
available
for
purchase
fmm
www.V1Z§O.com
G!’
by
calilng
877-MWIZIO
(877-698-4946).
7
L
~
8.
COMPONENT
{Y
Pbicb
Prlcr)
wconnect
component
video
devices
such
as
a
DVEJ
Playemr
cablgeisateltite
set-tap
box
here-
_‘
yr
»
m
www.V!Zl0.cam
V1268?
071324}

VIZIG
swzzxvr
HUTV
usermanuaa
I13’
hapter
2
VLZICJ
Remote
Ccsntmi
Yam
new
V1210
HDTV
comes
with
an
IR
1
Bluetoothenazsied
univemai
remme
that
lets
yet:
interact
wan
Internet
content
deiivered
to
your
HDTV.
Yon
can
also
use
ii
to
program
skher
AN
devices
cazmected
to
year
TV,
such
as
DVD
or
Biway
player,
cabiefsateflite
sat-top
hex,
DVR,
home
theater,
and
mare.
instailing
the
Batteries
1,
LRemove
the
battery
cover.
2.
Insert
two
AA
batteries
into
the
remote
central.
Make
sure
that
you
match
the
(+)
and
(-)
symbcls
are
{he
baiieries
wiih
She
(+)
and
H
symbols
insiazieme
battery
comparimem
3.
Replace
the
bsfiery
cuver.
Precautionary
‘figs
for
tnserting
the
Batteries:
i
Q
0
.V
Oniy
use
quality
AA
batteries.
De
no!
mix
new
and
aid
baitefies.
This
may
resuk
5n
masking
or
ieakage
that
may
cause
a
tire
91
lead
to
personai
ixfiury.
inserting
the
batteries
incortectty
may
also
resun
in
cracking
or
teakage
{hat
may
cause
a
tire
or
lead
to
persona!
injury.
{Dispose
of
batteries
according
to
ma!
hazardous
waste
regutations.
Keep
the
batteries
away
from
chiidren
and
pets.
;?«.cii%1ating
‘{ou1'13iuete¢th
Remote
You
will
activate
your
Bfueimth
remote
control
in
the
Setup
App.
Fcsliow
{he
instzuctions
on
the
screeh
in
oompieie
the
aciivaiian.
Yau
can
atso
acflvaie
your
remote
comm:
usfing
me
fiDTV
Settings
App.
See
Bluerooth
firierm
on
page
51
for
more
information
on
activating
your
remote
tsontmi.
Version
911
3:29:29
13
www.VEi0.com
7
VX2687
(378242

V3210
SWZEXVI
HDTV
User
Manual
Remote
Confirm!
Butioms
Basic
TV’
Functions
lNPUT-Press1o
cycle
xhrough
ihe
various
devices
comsecieo
to
your
TV
(canes!
Inputs).
You
can
name
your
inputs
when
you
set
them
up
during
the
HDTV§8£?i:3gs
App.
The
‘moms
cycte
in
the
following
sequence:
W,
AV
(Composite),
COMP
(Component),
HDMM,
HDM:-2,
HDM!-3,
HUM!
side,
and
R68
(VGA).
Once
you
have
stepped
through
‘
the
entire
sequence,
you
win
remm
to
the
beginning.
Device
Pgwg;
next
10
WPUT
button}-Pross
30
16!’?!
318
089108
oooneoied
to
me
active
input
3.2.
How,
COMP}
ON
and
OFF.
The
device
most
613!
be
5:22
up
during
the
39:05)
App
or
using
Device
Setup
in
the
HDTV
Settings
App.
Power
(gtop
right
corner}~P:ess
to
turn
the
W
on
from
the
standby
mode.
Press
it
again
to
return
to
standby
mode.
LIST-4-Press
to
dismay
a
list
of
availabie
chaoneis.
If
a
DVR
has
been
pm-grarmned
to
work
with
ihis
remote,
this
button
wit}
dismay
the
is:
of
recorded
pxogrorm.
9NFO~Press
to
display
program
iofonruatim.
if
a
device
has
been
programmed
to
work
with
this
remote,
this
button
wiil
act
as
ihe
INFO“
button
to:
that
crevice.
L
EXlT—~Press
to
exit
from
open
menus.
MENU—Press
to
launch
the
W250
Mamet
Apps
{VIA}
Dock
on
bottom
of
the
TV,
inciuding
the
HDTV
Seiiings
App.
used
to
make
aoiustments
to
your
TV.
This
bastion
also
opens
the
menu
for
the
crevice.
connected
to
the
active
input
(Le.
HDMI,
COMP).
A
Press
to
navigate
open
menus,
adjust
othorw
settings
such
‘R’
as
brightness
and
contrast.
ottum
menu
opiions
or;
off.
OK»-Press
to
seieot
an
option
in
the
menu.
8ACK—~Press
in
go
back
so
the
previous
page
in
open
menus.
GUIDE-Press
is
dismay
detailed
information
when
viewing
a
digital
‘TV
‘
pmgram.
YELLOW-—?ress
to
perform
the
same
function
asjhe
‘A’
button
on
your
cabie/satellite
box.
.
»
BLUE»-Press
to
pedosm
{ha
same
function
as
ihe
"B"
bufion
on
your
cableisatollite
box
_
»
RED~—«Press
to
pexform
the
same
foncxion
as
me
"C’
buiion
on
your
cabieisotefifle
box.“
SR1‘-Z£N~—Press
to
pevfoxm
‘me
same
function
as
the
“B?
button
on
your
oabtelssteiiirlo
box
VOL
Li?»-«Hess
to
turn
me
vomme
up
or
down.
VlA—-Pross
¥o
much
the
W230
Intenree‘
Apps
{W3}
Book
on
me
boitom
of
the
TV,
indoding
the
HDTV
Seiiings
APR
used
to
make
adjusiments
to
your
TV.
This
button
also
opens
the
menu
for
me
device
connected
to
she
active
input
(is.
HUM},
COMP).
MUTE--Press
to
tom
the
sound
on
and
off.
LAST-«Press
to
recait
the
previousiy
xoewed
chanoei
Also,
press
repeatediy
to
go
back
to
the
previous
menu
screen
or
out
£0
your
pmgram
when
you
press
it
repeatediy.
GB
in!
'!'---Press
to
change
we
Chamois
up
or
down.
Number
Button
Pad~——Press
to
seiect
a
channei
or
enter
a
password.
M
14
www.%}1Z§O.c<>m
VX2687
¥)?13§43L

V1230
SV422XV'¥’
HDTV
Use:
Manuai
P1P»-Press
to
activate
the
pidtsre-in~piciure
feature.
The
screen
wiil
dispiay
the
saxbscreen
in
the
corner
over
the
main
screen.
Press
it
again
to
dismay
the
PD?
(Picwre
Ousside
Picture}
option.
-{fiASH}——«Press
to
insert
a
flash
between
the
main
and
sub-channeis.
For
exampie.
digitai
chance!
28»
2 would
be
selected
by
the
button
sequence
2, 8,
DASH,
2,
.
AN
Functions
use
these
buttons
on
your
remote
ccntrotto
comm:
your
pie-ptogrammed
DVR.
DVD
Plays:
0!
Cableisatellite
Box.
Fast
Reverse
{«l)-—Press
to
reverse
playback.
Pause
{fi)--Press
ta
pause
playback.
Play
{
>)—-Press
10
start
piayback.
7
Fast
Farward
(>>)~—Pres.s
to
skip
is
th
naxi
chapler.
«
{S7}-—Press
to
begin
recarding.
7
step
{I}———Press
to
stop
piaybacidrecaming.
2
ii
?
;
x
WA
Functicns
V
L
Use
these
bufions
on
war
remme
cantroi
to
comm!
the
V1210
imemei
Apps
(WA)
functions
on
your
‘
HDTV.
See
Using
WA
on
page
33
for
more
infomation
about
’:he—V!A
functkms
on
year
HDTV.
Press
tr:
switch
between
_
:3'rfie:'en:
video
e-steer:
sizes
‘
P9551?
a!1r’\¥3P
05'
»~.:h+m
me
-Eids;-bar
is
Caper].
'
Wm
343
WA
3'33“
Press
to
nmve
or
aeiete
’
I
an
Aw
imam
the
W1
Dock.
Or,
creatcr
a
r—:~:s
’
5»
9.;
-Zit§£§8f31‘li¥i8“L2=.5:‘
,,
.
.
.
.
,.
g
F
Um
Deck
3
Pi'C.’3.:
3::
vzew
aemngo
‘
‘Far
the
active
App
R95;
is
tau-*;c:h
£328
‘M
Dick.
The
»'>.pps.
in
the
sggjfiififi
kwmarfi
3%..’
to
.
'
<iccxietya~:;waifm’:
mavms.
EV
shows,
izsien
1:2
mm:
lghws
aha
charamm
if
Imstgan-3
s’am:h
mme=..
va
ms
Apps.
You
must
\>
mivaie
your
:'8t‘2‘:ctc-
wuimt
duaing
the
iuitiat
Setup
App
iisai
plays
when
ym;
firsi
tum
can
you:
‘W
3::
mi’.-:1
‘Q
use
the
Sims
:9
keylsaard.
Version
91139909
V
~
15
‘
www.viZ%0.com
VIZ687
0713244

VIZIO
SV422XVf
HDTV
Use:
Manoat
Making
it
"(our
Univetsoi
Rernoto
The
Setup
App
ma!
was
when
you
5131
{um
on
your
TV
wit!
heip
you
sea
up
your
various
devices
that
are
connecied
to
your
HDTV,
so
1113?
you
can
use
your
V5210
temoie
contra!
fa:
an
of
your
devkzes.
You
can
a!so
sei
up
your
devices
by
acoesssng
the
HDTV
Seziings
App.
See
Beoioe
Seiop
on
page
45
for
more
informaiion
on
setting
up
your
remote.
7
Remote
Contra!
Range
when
in
if?
mode
{factory
defauit}:
V V
‘
Point
the
remo1e—contto!direct1y
at
this
sensor
for
the
best
0
when
in
Blueionth
mode:
0
response
to
the
remote
signat.
‘
V
o
Do
not
piaco
any
ohstades
betweesé
tho
remote
control
and
the
remote
comroi
sensor.
The
effective
range
of
the
remote
control
is
approximately
30
feet
(10
meiers)
from
she
front
of
the
remote
oonlrol
season
so‘
to
the
ieft
and
right,
20°
up
and
down.
Your
remote
control
aiso
has
Biuetooth-and
when
paired
with
your
HDTV,
allows
you
to
point
the
remote
control
anywhere
to
control
me
TV,
The
effective
range
of
the
remote
comm!
is
approximateiy
30
fee:
(19
meters}
from
the
from
of
the
mmote
comm!
sensor.
viz:-:2
Remote
Contra:
Precautionso
9
O
The
lemme
control
shouid
be
kept
dry
and
away
from
heat
sources.
Avoid
humidity.
ii
the
TV
responds
srraticaiiy
to
the
remote
comm
or
does
not
respond
at
art,
check
me
batieries.
I!
the
batteries
are
low
or
exhausted.
replace
them
with
fresh
battefies.
When
not
using
the
remote
COMFU!
fox
:3
long
period
of
fime,
remove
the
batteries.
Do
not
take
the
balieries
apart,
heat
them,
or
thsow
them
into
a
fare.
Do
not
subieot
the
remote
coniroi
to
undue
physicai
stress,
sum
as
sinking
or
dropping
31.
Do
not
auempl
to
dean
iheremoie
oooiroi
vfith
oxioiazile,
SOWBR3.’
Npe
it
with
3
cieaen,
damp
cioih.
‘
www.WzI0.com
V1268?
03733245
,

V1230
SV422XVT
HDTV
User
Manna!
Chapier
3
Setting
fitaried
Your
V!A—enabled
HDTV
has
a
bum-in
Setup
App
that
ptays
when
you
turn
an
yuur
TV
for
the
fist
time.
Fofiow
the
omscreen
directions
to
easfly
setup
your
new
HEW.
1.
Insert
baiteries
into
the
remote
controf.
2.
Conner}
the
power
eord
to
the
power
cord
cannecior
on
your
HDTV.
énd
than
slug
the
power
con:
inte
an
AC
wan
socket
V
3.
Gather
the
devices
your
want
to
cmmeci
to
your
HDTV.
Dom
canned
them
yet.
We
wisi
heip
you
dz:
the:
in
the
Setup
App».
7
4.
Tum
on
your
TV.
The
Sefap
App
wiii
aulsamaiécafiy
play
and
guide
your
‘mm
the
inisiai
setup
of
your
HDTV.
Use
the
arrow
and
OK
buttons
to
navigate
through
the
Setup
App.
During
the
setup
pmcess
you
wiii:
.
Aaivate
your
new
remote
comro!
for
Bkzetcatn
.
Cénnec:
to
the
interns:
‘
.
Add
yum
T81
channels
(uniessyuu
have
a
cabielsaieifiie
set-top
box)
a’
Connect
your
dexéoes
and
set
up
your
remote
to
ocmmithem
Vetsion
9!?
8129!)?
‘
1‘?
wsw:.V1Zi0.com
\/I268’?
9713246

VlZlO
8V422X’\O'
HOW
User
Manuat
Chapter
:5.
Uglng
your
l~lD"t"l?
for
the
first
time
Comtectlng
tn
the
tmernet
Set
up
the
Internet
connection
using
the
inttlal
Setup
App
or
the
Network
Menu
in
the
HDTV
Settings
App.
Year
HDTV
has
802.3%}
dual~bancl
wtreless,
so
you
can
connect
yam
TV
to
the
lrslernet
through
your
wireless
home
rzetwork.
Or
you
can
atso
connect
to
the
Internet
by
plugging
in
an
Ethernet
cable
tram
your
Internet
connection
into
the
Ethernet
port
or:
your
HDTV.
A
wired
cormeclirm
may
provide
a
more
ccnsistent
connection
depending
on
the
conditions
in
your
home
erwimrsmem.
See
Nettvoris
Menu
on
page
5!}
for
delaited
information
on
setting
up
year
lnlemet
connection,
’ ’
$ele<:ttng
an
lnput
Source
Select
the
input
source
for
your
HDTV
by
pressing
INPUT
on
the
remote
centre!
or
state
01
the
TV.
Presslng
this
button
will
cycle
you
through
the
fallowing
options:
N,
All
{Composite},
COMP
(Comgonenl)_
HDMI-‘S,
HDMl~
2,
HDMl-3,
HDMI
Side,
and
R68
{VGA}.
»
V
Turn
on
your
device
and
you
will
see
a
picture
an
your
HDTV.
ll
there
is
no
picture,
make
sure
you
have
selecleclime
correct
input
on
your
HDTV.
Nate:
lf
the
selected
device
‘is
RF
mmected.
your
HDTV
needs
ta
lye
in
W
‘
mode
and
on
either
channet3
or
channel
4
rnalchingthe
channel
which
has
been
selected
an
the
back
of
the
VCR,
Game
Box,
External
TV
Tuner
ca‘
Sateltite
Receiver.
Please
refer
to
Owner
:3:
Users
Manual
of
such
equipment
for
details,
*
~
A
Setting
the
Time’:
Zone
&
Daylig.3httSavings
L
1‘
Pressthe
WA
batten.
‘
“
’
2.
Press
4
or
>
on
the
remste
comrotto
select
the
HDTV
Settings
App,
and
then
press
OK.
The
Main
Menu
wifltze‘
dlsptayed.
V
t
‘
L
3.
Press
4,
>,
A,
(Jr
V
0:;
the
‘female
coafrol
to
highlight
HDTV
Settings,
and
then
press
OK
to
select
it,
The
input
-
Scarce
sul>~menu
Witt
be
highlighted.
’
4.
Press
A
or
'1
on
the
remote
control
its
‘highlight
??me
8
Local
Settitzgs,
and
then
press
>-
is
select
it.
The
‘time
*
Zone
sub-menu
witl
be
highlighted.
7
Press
4
or
>
to
select
yrzur
time
zone.
5.
Press
7
to
scroll
dowga
to
Daylight
V
;,mm,,9u§,¢,u,.¢,,,
Savings,
andthen
press
4
or
>
19
set
V
L
to
On
or
Off.
—
6:
Press
£Xl'l"
to
return
to
your
pmgram.
Fé«:‘v:ra:’v.
%r
L
ta
www.*J$zi0.com
VLZ687
0713247

V3230
S\%'422XV!'
i*iDTV
User
Mama!
Watching
3
W
Prsgram
Before
you
stan
waiaching
‘W,
piease
make
sure
that
any
oaiaie,
sateflite
ca:
off—air
antenna
canneciions
are
secure.
Also.
verify
ma:
the
POW‘)!
cord
is
plugged
imo
a
correcisy
grounded
eieciricaal
auflet
of
surge
protector.
1.
Turn
on
the
‘N.
The
VLZ30
toga
an
the
from
win
change
from
orange
19
white.
2.
sexes:
ihe
input
to
which
you!
device
is
connécied
ma:
provide
W
progtamming
(i.e.
w,
HDMI.
comp).
.
Nate:
You
shcuid
be
abse
to
see
a
picture.
~
if
you
do
not,
make
sure
that
351
of
your
HDTV
connections
are
secure
and
you
have
selected
the
curred
video
input
source.
Each
piess
of
iNPUT
will
cyde
thxough
the
availabie
inputs.
Press
iNPUT
until
me
input
associated
with
the
device
you
want
to
View
is
snowa.
3.
Mess
using
the
TV
input,
press
the
CH
L
or
7
bufisans
io
changefbe
channei.
The
channel
buttons
will
mt
work
if
yen
are
watching
a
program
using
the
HBML
Component,
or
Av
(Swfideo
or
Composite}
inputs.
7
4.
Press
HST
er
GK.
tofview
the
available
chamzais.
Press
A
or
V
is
scroti
thmugh
me
155:
and
press
OK
to
select
a
channel.
Uiewixag
Digitas
TV
Prcaggmm
tnfermatiosx
{NFC
Button
when
the
wanna
is
chaaged
or
man
you
pnass
{N50,
an
inf£;n*:1¥3i:ion[Vheadar
is
shéwn
over
the
pimufe
for
a
tew
seconds.
Each
press
of
the
SN?!)
batten
will
display
more
information
about
the
pmgram:
WC§w5A{}-9123
'
;{cr».:’:éiv'
"
EABLEV
,
:<i;;<2.s.§)3"~«.f
z;;s.3z_E
7w<i:am4Q:2:aaA:é~1
.
‘L
H
"
x;o:.a~r's1"
2'2ap:~m~
Version
911
3:29:39
L
:9
www.ViZl0.com
VX2687
0713248

V1230
SV422XV¥
HOW
User
Manuafl
GUIDE
Button
when
you
press
(311395
on
the
xemate
contra},
the
guide
is
shswn
an
mescrean
dispiaying
information
provided
by
the
bmadcasier
abmzi
me
surreal
and
upcoming
pregiams,
-
Press
4
or
>
to
go
to
the:
previous
0r
next
channei
in
me
guide.
-
Press
A
0:
7
to
sew}!
thmugh
the
list
and
View
iafosmazian
atom
qpconing
pmgrams.
.
The
guide
wiii
ciase
autamaiically
or
yen
can
mess
EXJT
ta
dose
ii
manuafiy.
www.ViZ!0.com
V1368?
0713249
Other manuals for SV422XVT
4
Table of contents
Other Vizio HDTV manuals

Vizio
Vizio M321i-A2 User manual

Vizio
Vizio D43-C1 User manual

Vizio
Vizio E43-D2 User manual

Vizio
Vizio M492i-B2 User manual

Vizio
Vizio D43-C1 User manual

Vizio
Vizio VO37L User manual

Vizio
Vizio P42 User manual

Vizio
Vizio E280i-A1 User manual

Vizio
Vizio VX240M - 24" LCD TV User manual

Vizio
Vizio VOJ370F1A - 37" LCD TV User manual

Vizio
Vizio M370VT User manual

Vizio
Vizio VU37L - 37" LCD TV User manual

Vizio
Vizio E390V User manual

Vizio
Vizio VX32L User manual

Vizio
Vizio E470-A0 User manual

Vizio
Vizio VOJ370F User manual

Vizio
Vizio VF550XVT User manual

Vizio
Vizio M650VSE User manual

Vizio
Vizio E551VA User manual

Vizio
Vizio XVT472SV User manual