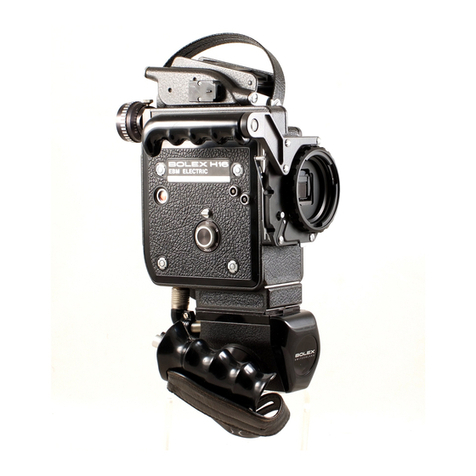
VOIGTLANDER BESSAMATIC User manual

BESSAMATIC
INSTRUCTIONS
FOR USE
Single Lens
Reflex Camera
24x36 mm

t
BESSAMATIC
24 x 36.35 mm
www.orphancameras.com

I
2
3
Focussing scale in feet
Aperture scole
Control ring
with shutter speeds sco le
Colch
for setting self-timer - V
Flqsh socket
for plug from floshgun
Spring-looded comero lotches
for closing ihe comero
7 Focussing ring
for rongef inding (distonces indicoted
in feet on the lens mount)
I Depth of field indicqtor
9 Releqse
I0 Film type indicqtor
I I Automolic operlure knob
for pre-selected shutter speed ond
outomotic operture odiustment
12 Film speed disc
in DIN ond ASA, with locking cotch
I3 Film rewind knob
l4 Filter fqctor
compensotion numbers
Reversing lever
for film rewind
Milled knob
for f ilm counter (exterior odiustment)
Ropid Film Wind
for tensioning the shutter
ond moving on the film
tg Lens locking cotch
l9 Tripod bush
I5
l6
17
Fis. ll

Loading
and
unloading
the camera You con use ony type of film you like in the
BESSAMATIC comero. The usuo I cossettes with
perf orqted 35 mm block-ond-white or colour f ilm
give 37 or 20 exposures on colour reversol f ilm
for colour tronsporencies, or on colour negotive
film for colour prints on poper.
Although the cossettes ore light-tight, it is not o
good ideo to hondle them in full sunlight. Alwoys
loqd or unlood the comero in the shode or if
there is none, use your own shodow.
The film type indicotor (.|0) is o constont reminder
of the type of film octuolly in the comero. lf is
very eosily set by turning the centrol disc, using
the two lugs: White __ block-ond-white film;
blue- colour film for doylight, ond yellow-
colour film for ortificiol light.
www.orphancameras.com

Setting the film speed
Moke ii q rule olwoys to set the film speed before
looding the comero os the outomotic exposure
ccnirol depends entirely on this setting. You will
find the film speed morked in ASA or DIN on
the film corton or in the leoflet occomponying
the film.
To set the film speed, first pull out rewind knob (,l3)
os for os it will go (see p. 6); then press the
locking cotch of film speed disc (12) to the right
or left until the oppropriote ASA or DIN number
is opposite the red index mork. The dot before
l2 ASA indicotes l0 ASA, the dot ofter 25 indicotes
32 ASA.
s
f-
3
,
f-
1"5
o

To open the camera
Simply press the
lqtches (6) together,
opens up.
two spring-looded
ond the comero bock I3
22
23
24
25
26
27
Film Wind Knob
Eyepiece of viewfinder
Chqmber for f ilm cqssetle
Film lrock
Film Counler Window
Sprocket wheel
Toke-up spool with hook
for ottoching the film
leoder
)
I
,, t
'1il
t,l
v,
www.orphancameras.com

Inserting the film cassette
Pull out film rewind knob (.l3) os for os
possible (see Fig. 3).
Anchor the beginning of the film to the hook
of the toke-up spool (27). Drow the cossette
ocross the film trock, insert into the cossette
chqmber, ond push bock the f ilm rewind
knob (13) os for os it will go. See Fig.4.
Now turn the toke-up spool until the f u ll
width of the f ilm is lying to ut over the
sp rocket wh ee l, (26) o n d two of its teeth
engoge two film perforotions (see Fig.5).
Finolly close the comero-bock; press firmly
into ploce until you heor the two lotches
click into the locked position.
A Fis. lV V Fis. V

Adjusting the film counter
Turn milled knob (.|6) until either C (for
36 exposure films) or O (for 20 exposure
films) oppeors under the white mork in the
film counter window (25).
Preparing for picture taking
Operote the releose button (9) ond the ropid
film wind (17) olternotely until the number
"36" or "20" oppeors in the film counter
window (25).
Rapid Film Wind
This should olwoys be turned os for os it will
go on ly then wi | | it retu rn to its in itio I
position. This oction tensions the shutter ond
ofter eoch exposu re, the f ilm counter will
show the number of exposures still ovoiloble.
The numbers therefore decreose from 36 (or
20) to 0.
I
When the film hos been correcily looded, the
rewind knob should turn ogoinst the direction
of the orrow when the ropid f ilm wind is
operoted. Owing to different tensions of films
in their cossettei, the knob will first turn ofter
between 3 to 6 exposures.
www.orphancameras.com

Sometimes, when trying to moke more thon
36 or 20 exposures on one roll of film, the
ropid film wind lever connot be swung round
completely ond is locked. ln this cose, do nol
opply force this would only result in
teoring ihe perforotions or cousing the end
of the film to slip out of the cossette.
Proceed os follows: Set reversing lever to "R"
(which moy be rother difficult), turn the ropid
film wind os for os it will go ond let it slide
bock to its originol position. You con now
rewind the f ilms os described obove.
Unloading the camera
Set the reversing lever (.l5) to the "R" position ond
pu ll out rewind knob (.|3) but on ly to the f irst stop
(see illustrotion). Then turn the rewind knob in the
direction of the engroved orrow until the mork I
(36-exposure cossette) or the mork O (20-exposure
cossette) is opposite the white index line in the
f ilm cou nter window once qgo in. Now you co n
open the comero-bock, pull out the rewind knob
os for os possible, ond remove the film cossette
from.the comero.
Changing partly exposed films
Rewind the portly exposed film os described obove.
Remember to moke o note of ihe number of the lost
exposed f rome, ond to re-set the f ilm speed ond f ilm
type if necessory.
When relooding the originol film, first of oll ploce the
block lens cop over the front lens mount. Then insert the
film in the usuol woy qnd olternotely work the ropid
winder ond press the releose until the number of the frome
you originolly noted oppeors in the film counter window.
Advonce the film once more, ond you con corry on
shooting.

The technique
of picture taklng
The outomotic exposure device simpli-
fies working with the BESSAMATIC
comero ond mokes its operotion very
simple indeed. To this we con odd
the odvontoges of o perfect reflex
system. A single glonce in the lorge
viewf inder mode so rodiontlY
brilliont by its Fresnel lens - shows
you:
o the subiect upright, right woy round
ond free from porollox, with the
exoct film of view covered bY the
film frome;
O you con then odiust the outomotic
exposure device ofler hoving Pre-
selected the shutter speed;
+ O you con occurotely focus wiih oll
interchongeoble lenses by one or
the other of the lwo rongefinding
' devices;
O you con keep o continuol check on
the setting of the shutter sPeed-
operture combinotion while in
operotion, ond without toking the
comero owoy from the eye.
l0 I
t
.l
L--' ...-., , ,--*.,ei"i-' ..-*r-.. ,:-- ;-..r- ...-. ....-... ..,:..'-.* .. ..-. -r.,r'
www.orphancameras.com

@ Pre-setting the shutter speed
Turn the ouiomolic exposure knob (11) to the left
or righi until the required shutter speed clicks into
position opposite the A mork. The shutter speed
should be chosen occording to subject movement
ond prevoiling light conditions.
This turning moiion is eosy when only the operture
scole (2) is moved; ihe knob is more difficult to octuote
when one of the end volues of the operture scole is olso
opposiie ihe I mork, becouse then the clicked-in shutter
speed scole (3) must olso be moved olong.
I
2n45.6811 162? , (l AR",ru.",
i sttru"r speeds
syNcHP@
The block numbers on the shutter speed scole lilSOO-flOO second) ore the speeds ot whicn
you con normolly toke piciures without o tripod. The yellow numbers (1/30-1 second)
indicote thot the comero must be firmly supported on o tripod, tree irunk, etc. to ovoid
comero movemenl during exposure.
At "8" the shutler remoins open os long os the releose buiton is pressed. Here too, o
tripod is necessory, os well os o coble releose which con be screwed into the coble
releose socket (9). ll

@ Automatic aperture control
Sight the subiect in the viewfinder ond
-turn the outomotic operture knob (11)
until the circulor mork in the viewfinder
is exoctly over the pointer of the ex- |
posure meter (see illustrotion). (-l
The correct exposure is now ouiomotic- t
olly odiusted ond you con reod off the I
shutter speed-operture combinotion not
only ot scoles (2) ond (3) bui olso in the
top of the viewfinder in the toking
position.
Generol nole:
Alwoys odlust the oulomolic operlure
confrol wirh the comero in o horizonlol
posilion, even if you intend lo loke on
upright piclure. In so doing, you will
obtoin the mosl exocl result with the
exposure meler.
lf the depth of field is not sufficienl for o porticulor shot
(see p. 17) or if it is necessory to give o still shorter
speed thon lhe one odiusted, becouse of fost sublect
molion, you quite simply oct os follows:
Turn conlrol ring (3) by its iwo finger grips until the
shuiter speed ond operture vo lues shown opposite the
1\ mork ore the ones you require. This oction will not
chonge the position of the olreody correctly odjusted
exposure meter pointer in the viewfinder in ony woy. But
do try to keep the operiure limit volues of the lens you
ore using in mind ihe whole iime ond do not try to
rotote the conirol ring beyond those limits!
.;
I
I
t2
www.orphancameras.com

I
@ Focussing
The holved centrol circle is the split-imoge ronge-
finder. When turning the focussing ring (7), the
verticol subiect lines will be disploced to the left
or right (with the comero held horizonto lly) (see
exomple 1 ).
or horizontol lines upwords or downwords (with
the comero held upright). The lens is occurotely
focussed when the two ports of the imoge register
precisely ocross the split circle (see exomple ll).
The ground-gloss screen is ploced oround the split-
imoge rongefinder oreo ond is most useful for
subiects without stroight lines. In this cose the
focussing ring must be turned untill the subiect is
rendered shorply on the ground-gloss ring.
Alwoys press the releose button os smoothly os
possible never ierk it! The imoge in the view-
finder disoppeors of the instont of exposure ond
returns immediotely when the ropid wind lever is
ope ro ted.
i\
il
;
I
tf
I3

Interchangeable lenses
A full ronge of Voigtlcjnder high-
performonce lenses ore ovoiloble for
the Bessomotic from 35 mm. wide-
ongle to 350 mm. telephoto ond olso
the f 2.8 36-82 mm. Voigtlcinder Zoomor
lens. All lenses ore fitted in o quick
chonge boyonet mount ond ore
occurotely f ocussed with f he double
rongefinder system.
Insertion and Removal
When inserting o lens, moke sure thot the red dot
on the lens mount is opposite the red dot on the
sperfure control ring (see illustrotion). Then turn
the ring to the right until it clicks into position,
ond the lens will be f irmly mounted on the comero.
To remove the lens, press the lens locking cotch (.|8),
turn the lens to the left ond pull it out of the
shutter (see illustrotion).
The "pre-selection diaphragm"
ollows subiect viewing ond focussing of full
operture under oll circumstonces. Only 'when the
shutter is releosed is the diophrogm outomoticolly
stopped down to the volue pre-determined by the
outomotic operture control. You should try to
remember thot with the outomotic exposure control
oll interchongeoble lenses con only be odiusted to
their lorgest operture.
l4
I
I
www.orphancameras.com

I
I
v
I
I
i
Aperture and depth of field
Depth of field is thot port of the picture oreo, in front of ond behind the
point of focus, which will be rendered shorp. This is dependent on the op-
erture, which you hove set. At lorge opertures (e. g. f 2.8 or 4) the depth of
field is limited - ot smoller opertures (e.g.f I or l1) it is greoter.
Reading off the depth of field
o When using the Color-Lonthor f 2.8/50 mm., ond hoving olreody set the
distonce, hold the comero so thot the focussing scole (1) os well os the
double row of operture numbers on the lens ore visible. Depth of field
extends now from the distonce shown obove the operture number of the
left of mork A to the distonce obove the some operture to the right
of A.
o All other interchongeoble lenses with fixed focol length hove on outomotic
depth of field indicotion. This consists of two red morks (8) which ride
over the focussing scole ond outomoticolly show the depth of field, i. e.
the morks move to o smoller or greoter distonce from eoch other when you
iurn the outomotic operture knob (ll).
3 The Voigtlcinder Zoomor t2.8 3GB2 mm. lens is on exception. This is
supplied complete with o depth of field toble in the shope of o colculoting
disc.

Self-timer
Ploce the comero on ony firm support (preferobly o tripod) ond set the self-
timer lever to the "V" position. You then press the shutter releose in the
normol woy ond the exposure will follow opproximotely 8-10 seconds loler.
When set to this position the lever connoi be returned by hond - only by
releosing the shutter.
Flash pictures
The comero hos "X" synchronizotion. Connection between the comero ond
floshgun is mode by flosh coble inserted into flosh socket (5). Shortest shutter
speed with copless bulbs - xM llPt 1 or AG I - is l/30th second. With
electronic flosh speeds up to l/500th con be used. The lens operture required
for correct exposure con be obtoined from the so-colled guide number. This
is usuolly quoted on the flosh bulb corlon or in the leoflets issued with the
electronic flosh unit. To find the correct operlure, divide lhe oppropriote
guide number by the distonce in feet between the subiect ond the flosh;
therefore: -
1
I
i
iI
I
'lI
fl
I
I
, suide number
cr perru re
' drstonce
guide number 80
r6
d isio nce l0 f eet :f8.
www.orphancameras.com

rl
t
Close-ups
of smoll obiects ond creotures os well os the
copying of pictures ond documents con be mode
with'the Foco" supplementory lenses, ovqiloble
in different powers - f rom 1l+ to 61lz diopter. With
certoin lenses it is possible to use more thon one
Focor lens ond obtoin o power of 10 diopters,
representing o reproduction rotio of I : .l.85.
Simply screw the Focor lenses on the comero lens
mount. Focus in the usuol woy with the rqngefinder
or ground-gloss screen.
You shou ld o lwoys stop down to f 15.6 or f /8 to
ensure sufficient depth of field, in the cose of
copying documents we would even soy f/1 I or f|l6.
Exposure is procticolly unoffected by the Focor
lenses. lf filters ore to be used, screw the filter
in front of the Focor lens. When using more thon
one Focor lens, ploce the one with the highest
power (i.e. with the lorgest number of diopters)
immediotely in front of the comerq lens.
A detoiled Focussing Toble for oll
Focor lenses ond interchongeoble lenses,
including doto on scqles of repro-
duction, depth of field, etc. is ovoiloble
from your photogrophic deoler.
17

Voigtltinder filters
ore hord cooted ond do not impoir the lens performonce in ony woy. The
yellow, green ond oronge filters con, of course, only be used with block-
ond-white films; ultro-violet, sky-light ond polorizing filters ore suitoble
for colour film os well.
Yellow filter Gl.5x Slight filtering effect for outdoor shots such os sports ond
oction subiects ...
Yellow filter G3x Universol filter for londscopes ond oiher outdoor subiects;
indispensoble for snow pictures
Green Filter Gr4 x Lightens green tones in rondscopes. Recommended for
oriificiol light portroiture ond for copying of coloured
originols
Orange Filter Or 5 x Strongly cuts blue light for dromotic effects. Reduces
otmospheric hoze in distont views ,
Ultrs-violet filter UV Cuts out ultro-violet rodiotion in high mountoins or neor
lhe seo. Eliminotes unpleosont blue costs in colour shots.
Requires no exposure increose
Filter foctor
1.*2
3
u
5
Skylisht filter SF
Polorizing filter Pol
l8
A combinotion of the UV Filter ond q weok conversion
filter; it completely eliminotes the ultroviolet port of the
spectrum
Reduces or cuts out disturbing reflections from shiny sur- see speciol
foces (spectocles, polished oreos, woter) other ihon metol instructions
www.orphancameras.com

Compensating tor a filter
With oll but the UV filters the exposure requires
some correction. You con corry out this odiust-
ment simply by bringing ihe coloured morks of the
lower side of the outomotic operture knob (ll)
opposite the odioining f ilter foctors ,l.5 x to 5 x;
turn the outomqtic operture knob until the coloured
mork opposite the block dot points io the
oppropriote f ilter foctor compensotion number ('14).
This will evidently upsei the coincidence position
of the exposure meter pointer in the viewfinder.
I
.J
$
i'q-l
e:
1';$
!li.ri
:li
I9
Table of contents
Other VOIGTLANDER Film Camera manuals

