You can only switch it over to
the options as shown in the
disk menu
Use the disk menu for
switchover
No subtitle in this DVD
You can only switch it over to
the options as shown in the
disk menu
Use the disk menu for
switchover
No subtitled
If the disc is not recorded
DVD SETUP MENU choice
language, is unable to
switch to select
language
The current DVD has no
audio or subtitle language
in theDVD SETUPMENU
The current DVD has no a
multi-viewing angle
if the disc is not recorded with more
perspective shooting scenes, can
not switch to other viewing in a NO
Multi-viewing disc
You try to switch it over to
another viewing angle out
there are no multi-viewing
Watch with more
perspective recording
scene switching angle
Unable to view angle switch
The disc has a copy
protection signal(some of the
disc may have this feature)
You fail to connected the
manual brake wires or fail to
turn on the manual brake
Connect the brake wire and
when turn on the manual brake
When the ignition switch is
urned to the ON position (or to
the ACC position) the player
automatically switches on
If there are no subtitles
recorded for the disk,then
it is unable to show subtitles.
Failed to play back according
to language in audio and
subtitle selected in the DVD
SETUP MENU unable to switch
over to another viewing angle
Picture is extremely unclear
distorted or dim in the
playback
Because the DVD and anti
copy analog copy protection
system, so if the player has a
copy protection signal disc,
then in some viewed on a
monitor, the picture may
appear horizontal strip or
other, it does not mean that the
issue of fault.
No image: PIC OFF is shown
This is a normal function
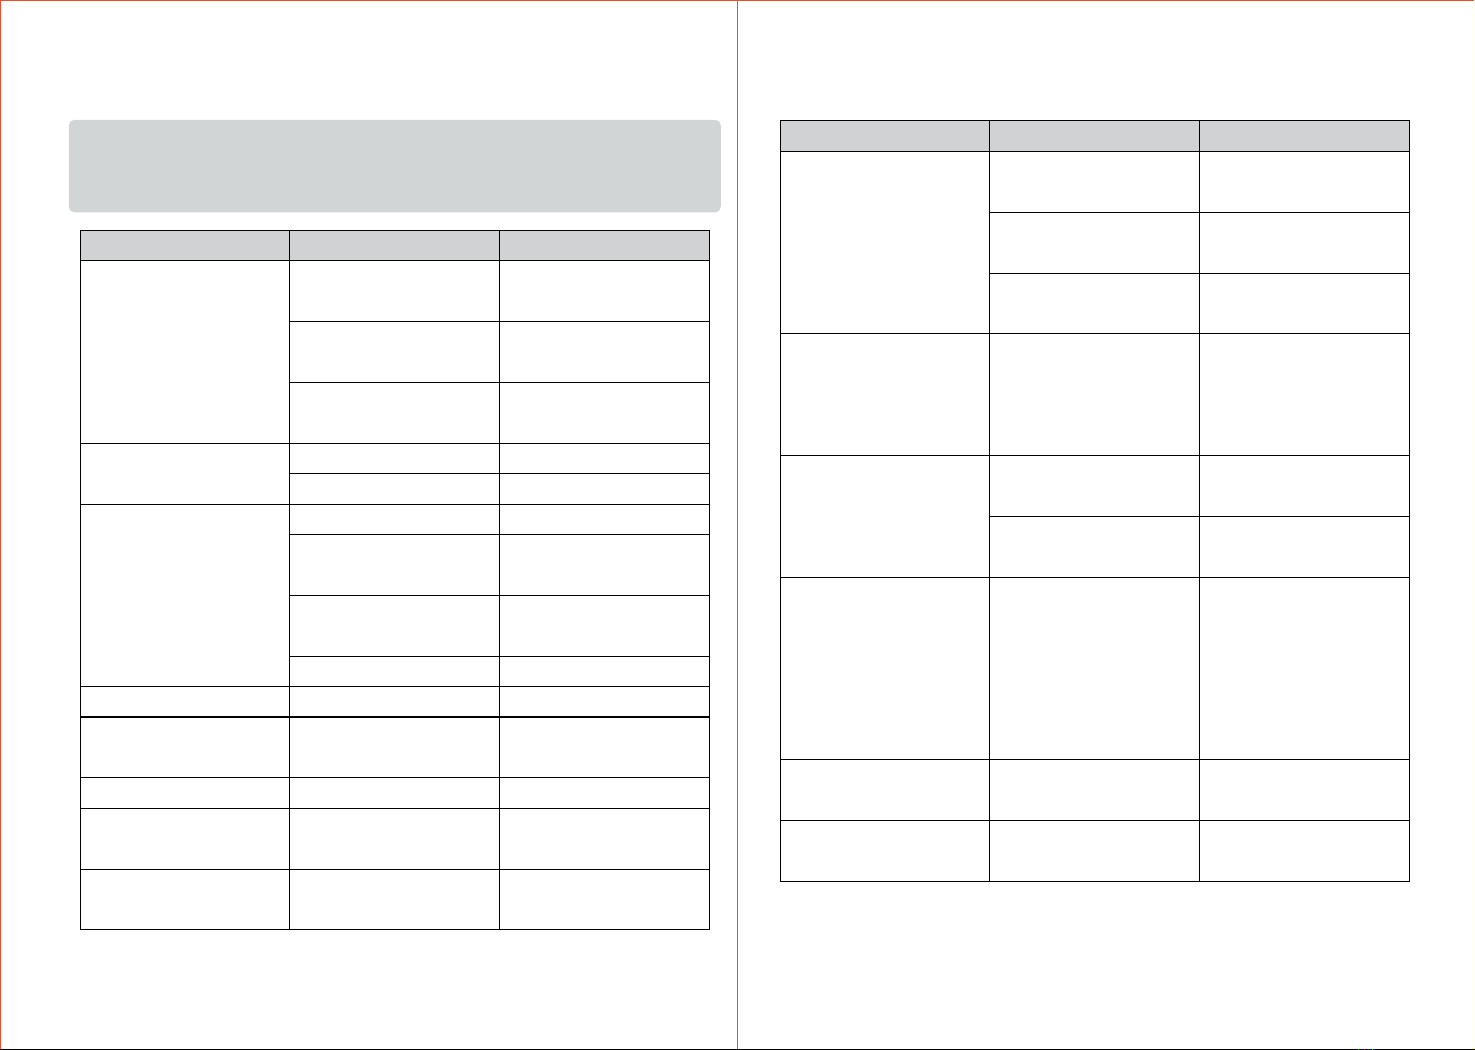
Phenomenon Cause Solutions
Troubleshooting
Note: Please check “troubleshooting list” carefully before sending the broken device back to repair,
also take appropriate measures to check or adjust simply.
If the problem is out of list or still could not solve the problem,please feel freely to contact our
professional after-sale team!
Phenomenon Cause Solutions
Clean the disk
The format of the disk is not
compatible Check the disk format
The disk video system is not
compatible
Change new disk is compatible
with the video system
No sound The cable is not properly
connected Re-connect the cable properly
The machine is running in still,
slow motion or frame by frame
playback
There is no sound output in still,
slow motion or frame by frame
playback
Cannot increase the volume
Particular Speaker cannot
output sound Audio setup is not corrected Set the proper audio
configuration
Disk poor quality or damage Replace the good quality disk
The DVD cannot display if appear
the parent lockup message
Turn on the parent lockup
function
Close the parent lockup function
or change the setting level
No power supply
Wrong connection between
wires and connector
Make sure all connections
correct again
Broken fuse Find out the reason of the Broken
fuse; and then replace it with the
identical fuse
The build-in microprocessor
is unable to work normally
due to the noise and other
factors
Failure of remote control rven if
you press the right Remote
control button on the unit still
does not normal operation.
Low Battery Replace with new batteries
Certain functionsare forbidden
under specific modes Enter the proper mode
Unable play the disk
Disk is dirty
Unable to ChangeLanguage
(subtitle included)
Current DVD has no extra
languages for selection
You can not switch to other
language in a None Multi-
Language disc
1615