VRinsight jetpit User manual

USER MANUAL
TM
Please read this manual before operating your units and
keep it for future reference.
Virtual Reality Insight
All stated here is subject to change without advanced notice for improvement.
Tel : +82-31-284-7090~91 Fax : +82-31-284-7092 E-mail : [email protected] Web site : www.vrinsight.com
VRinsight
1
VRinsight panel
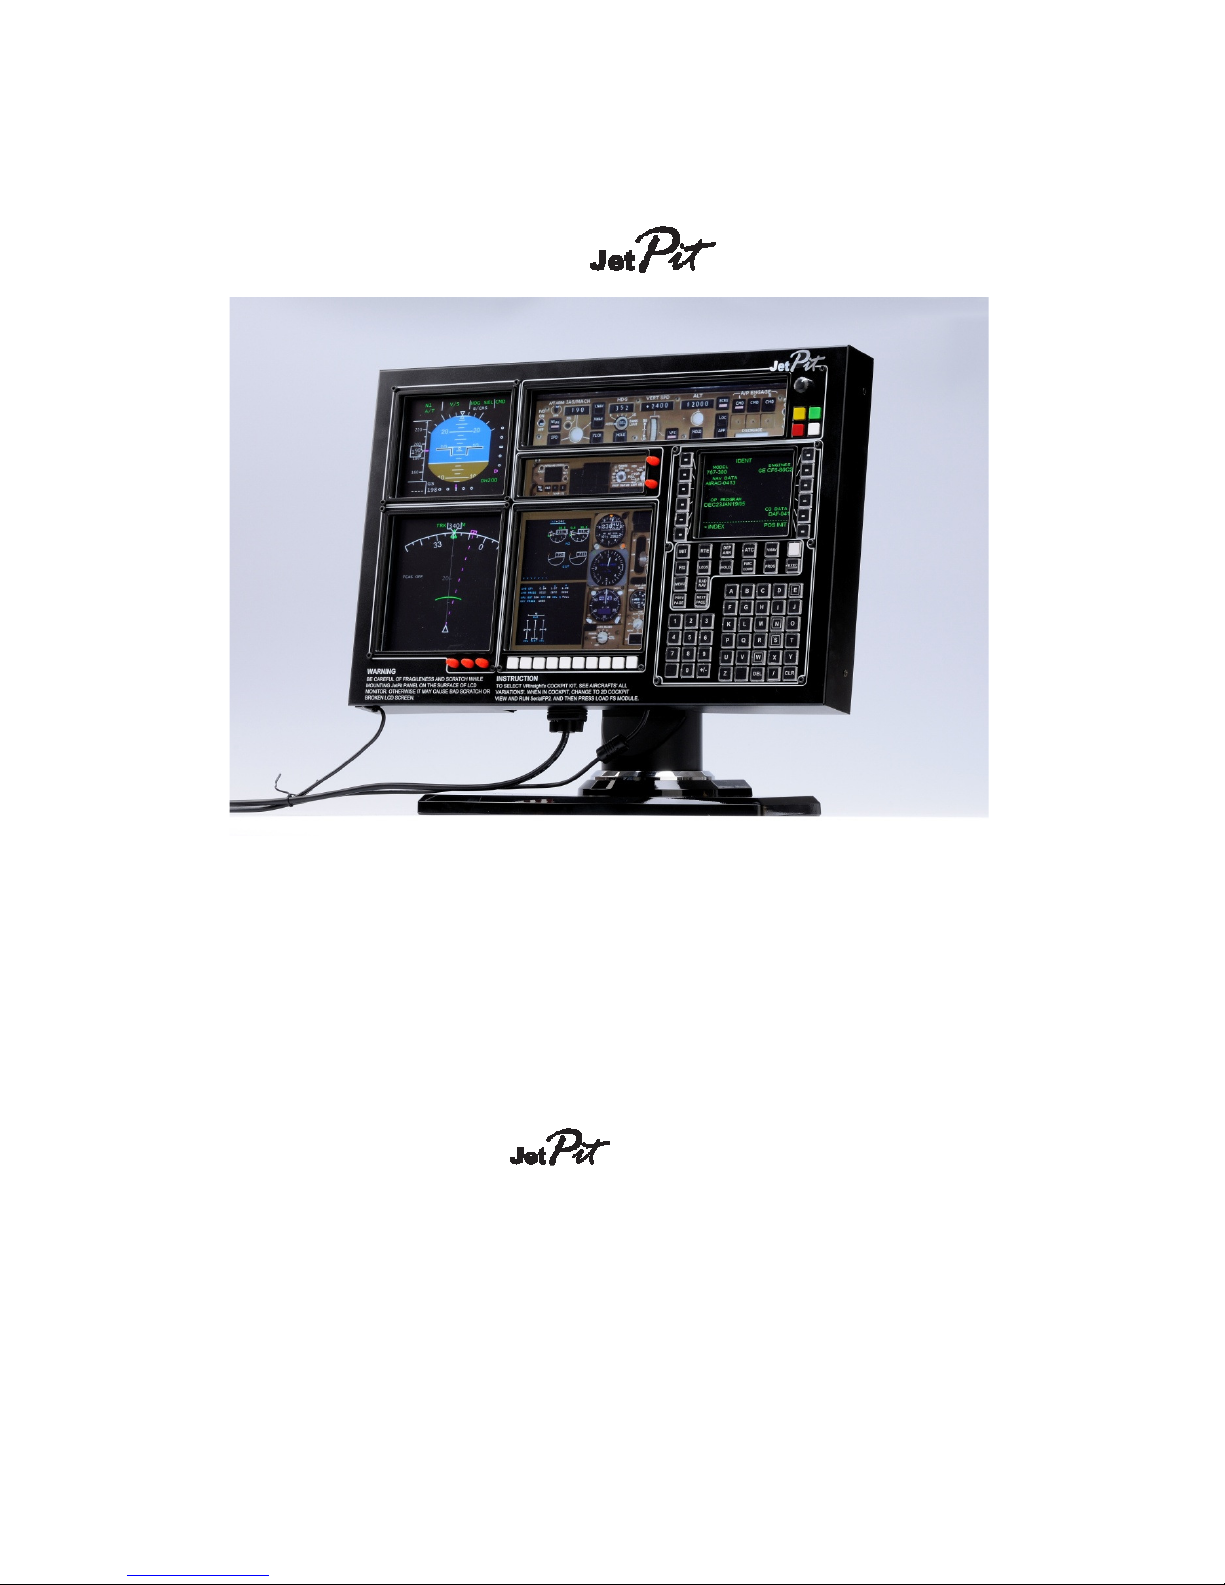
The JetPit panel of Rinsight is a control and screen system for jet type aircrafts. All
displays are synchronized with Microsoft’s Flight Simulator, supporting the default jet type
aircrafts of MSFS and most add-on jet type aircrafts. etPit panel displays the primary flight
information of PFD,ND, MCP, EFIS, EICAS and CDU with full functional rotation knob, push
buttons giving for users to be experienced the most enthusiastic flight. It is completely
interfaced with MSFS9 and MSFSX through add-on software “VRiSim” which enables JetPit
to perform full simulation with simple connecting PC through USB. Package including TFT
LCD Monitor.
•VRiSim supports all functions to panel.
•CDU function does not support with the default jet type aircrafts of MSFS.
•MCP panel is limited for displaying.
•If you want to use a USB hub, be sure that the USB hub is USB 2.0 compliant.
Otherwise it may cause a malfunction.
* LCD monitor is subject to change without advanced notice for improvement.
2
BEFORE USE : Thanks for purchasing VRi’s etPit.
Before operating your units, please read through this manual and keep it for future reference.
For any further question, visit www.wilcopub.com or contact us below:
Fax : +32-2-33107 51
E-mail (Support team) : info@wilcopub.com
NOTE : This manual could be redistributed unless you modify the contents.
This manual has been written out on a JetPit panel basis.
All software (& software versions) stated here is subject to change without advanced notice
for improvement.
If you want to download the latest driver version for panel & application
programs, visit www.vrinsight.com
picture (JetPit with MCP combo panel)
3

Features
•Real type displays for the most et type aircraft cockpit.
•Displays on the panel; (Re-configurable windows)
- PFD display
- ND display
- MCP display
- EFIS display
- EICAS display
- CDU display
•Controls on panel;
- CDU control
•User programmable buttons & Rotary knob;
- Five 4-ways buttons
- 14 push buttons
- 1 Rotary knob
•Full metal cases
One year warranty
Technical specifications
•USB interface type to computer
•External power requirement (for 20.1” TFT LCD monitor: Resolution[1680 * 1050]):
110V / 220V free voltage
Outlet for TFT LCD monitor is European standard.
•48.5cm (L) * 33cm (H) : Height is varied up to monitor maker.
9Kg (with TFT LCD monitor)
Operating software
VRiSim
Compatibility software
•Flight simulator 2004 / FSX by Microsoft
4

VRiSim Installation
With JetPit, an “Install DVD” is included. When you insert it in DVD driver of your
computer, “VRinsight HTML” document will be shown. Then click “VRiSim” (operating
software) and install it at a proper folder.
“VRiSim” is the main operating software of VRinsight used for all VRinsight flight panels.
VRiSim software supports all functions of JetPit and completely interfaced with MSFS9
and MSFSX enables full simulation with simple connection your computer through USB.
Be sure that when installing VRiSim, “Install USB-Serial Driver” must be checked.
After installation, you can find “SeiralFP2” in “All programs” of “Start menu”.
USB Connection
The connection between JetPit and your computer is made by using a USB cable that
plugs into one USB port on your computer. .If you want to use a USB hub, be sure that
the USB hub is USB 2.0 compliant. Otherwise it may cause a malfunction.
When you connect
JetPit
to your computer, your computer will detect it and will
When you connect
JetPit
to your computer, your computer will detect it and will
describe the process step by step.
Power Connection
Power supplying of JetPit is done by USB port and that of TFT LCD monitor is done by
110V / 220V free power cable.
Run “VRiSim”
When you confirm all setup processes done; “VRiSim” installation, “USB connection”
and “Power connection”, you are ready to operate JetPit.
Download & install “FSUIPC”
Refer to “Download & install FSUIPC” at “Download” part of www.vrinsight.com
FS 9 requires FSUIPC v3.80 or later. FSX requires FSUIPC v 4.26 or later
5
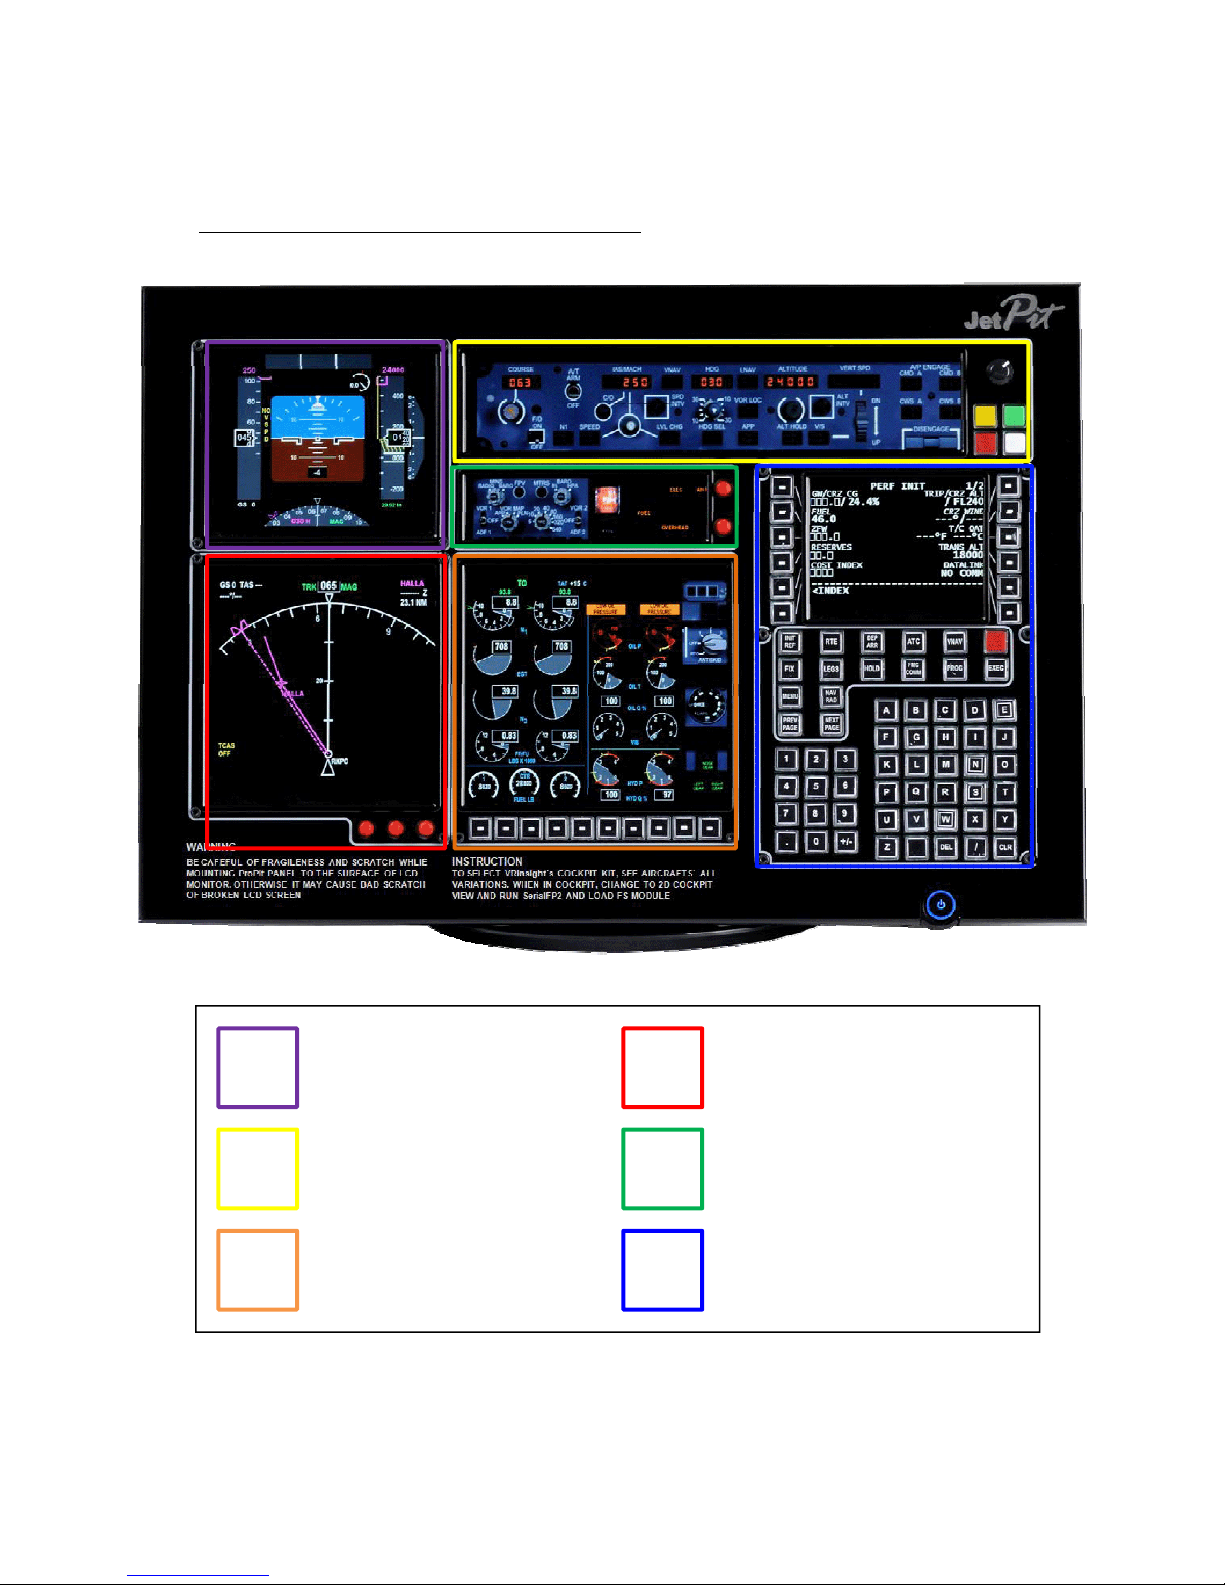
Controls & Displays for each part
6
PFD display
MCP display
ND display & controls
with three four-way
buttons
EFIS display & controls
with two four-way buttons
EICAS display & controls
with eight push buttons CDU display & controls
Displays and default Push, Rotary and Control buttons
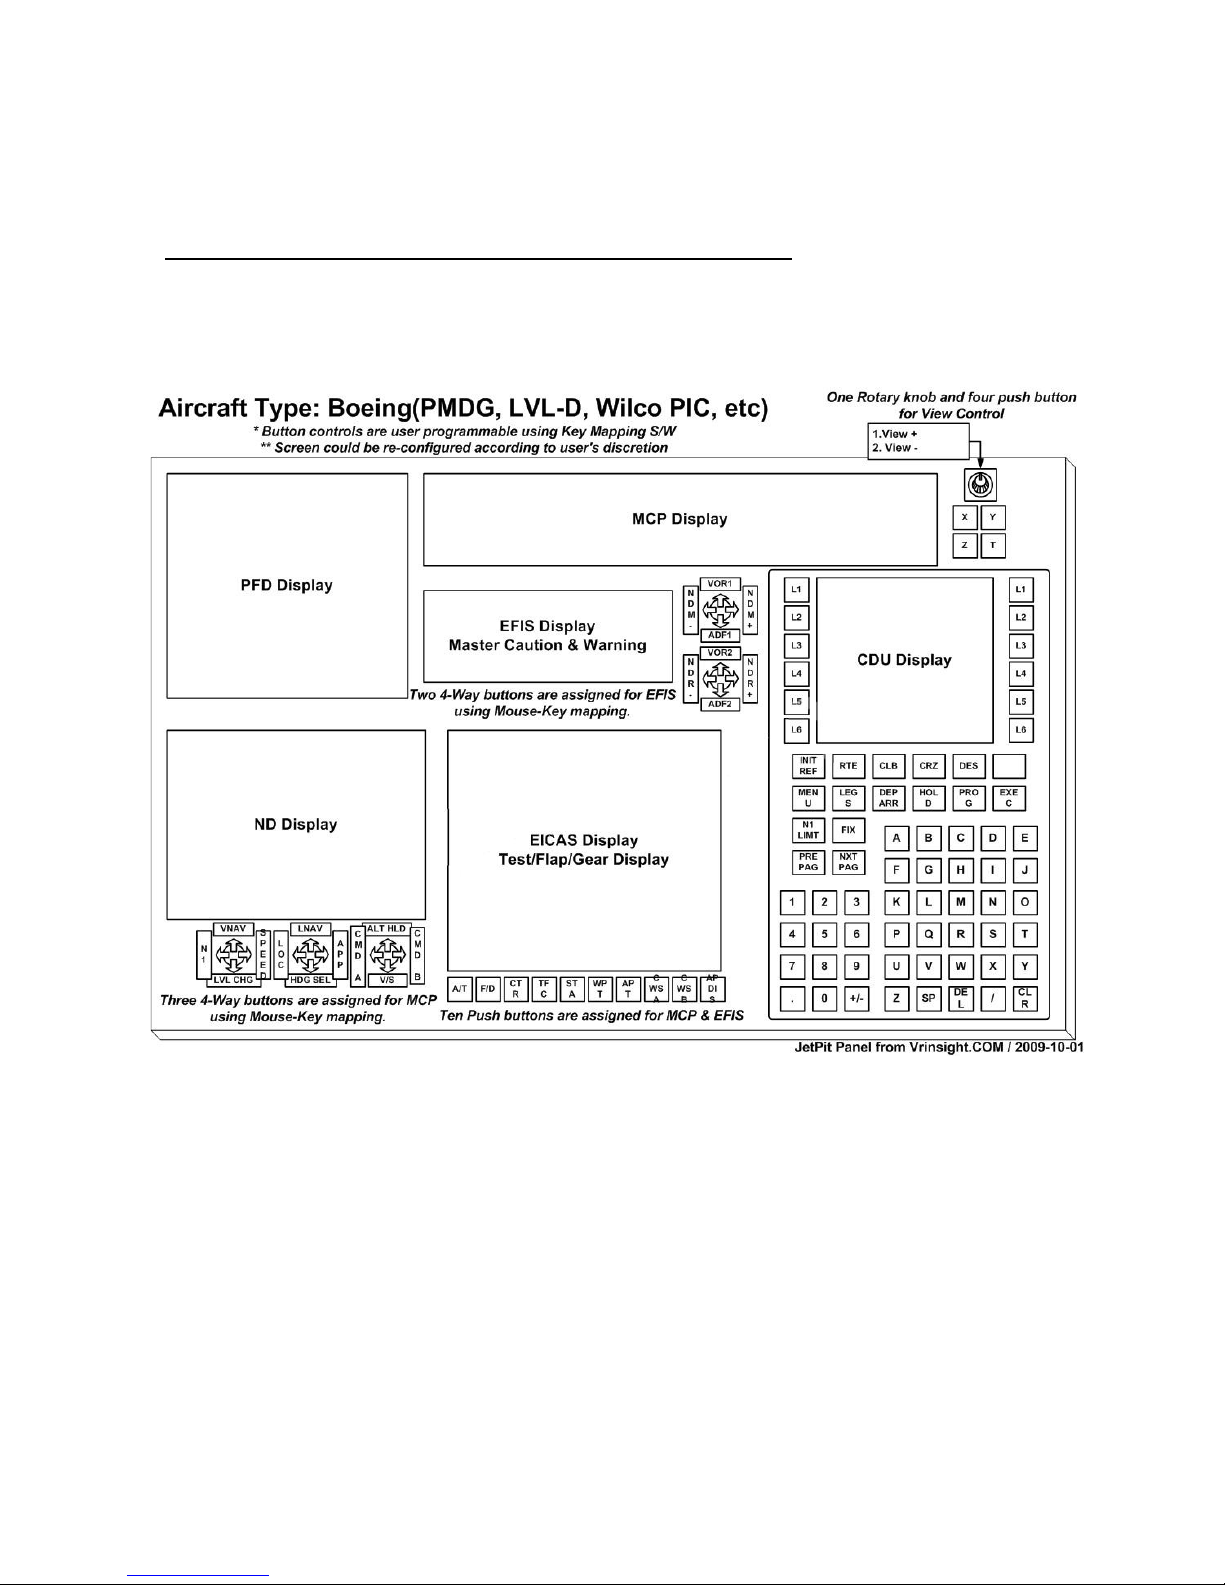
* All controllable buttons are reprogrammable for users’ propose using Key Mapping
software.
7

1. Check the current display properties in order that another sub monitor is
connected or not. (See “Settings”)
Monitor setting
8
2. Connect video cable of etPit to your computer.
3. Connect AC/DC adaptor to your etPit.
4. Check the display property in order that your etpit monitor is detected or not.

* If the etPit monitor (=Monitor 2) isn’t detected, check the connection of
video cable & AC/DC adaptor.
* If your OS is VISTA, please restart your computer.
5. When the etPit monitor is recognized, click monitor 2 (= etPit monitor).
6. Adjust the resolution for the etPit monitor.
(Recommended resolution is 1680 * 1050).
7. Check the position of the monitor 2.
8. Check “Extend my Windows desktop onto this monitor”.
9
* If the etPit monitor doesn’t illuminate, restart your computer.
9. Click “Apply” and click “OK”
10. If everything is done properly, the etPit will be power on.
* If the etPit doesn’t power on, restart your computer. And see if the indicator is red
light on. If it is, press “select” button.

11. Multiple display
11-A. N IDIA
11-A-1. Launch “NVIDIA Control Panel”.
11-A-2. Go to “Set up multiple displays and check “Configured independently
from each other (Dualview). Then the monitor of etPit will independently
display your “Desktop” view.
10
Table of contents


