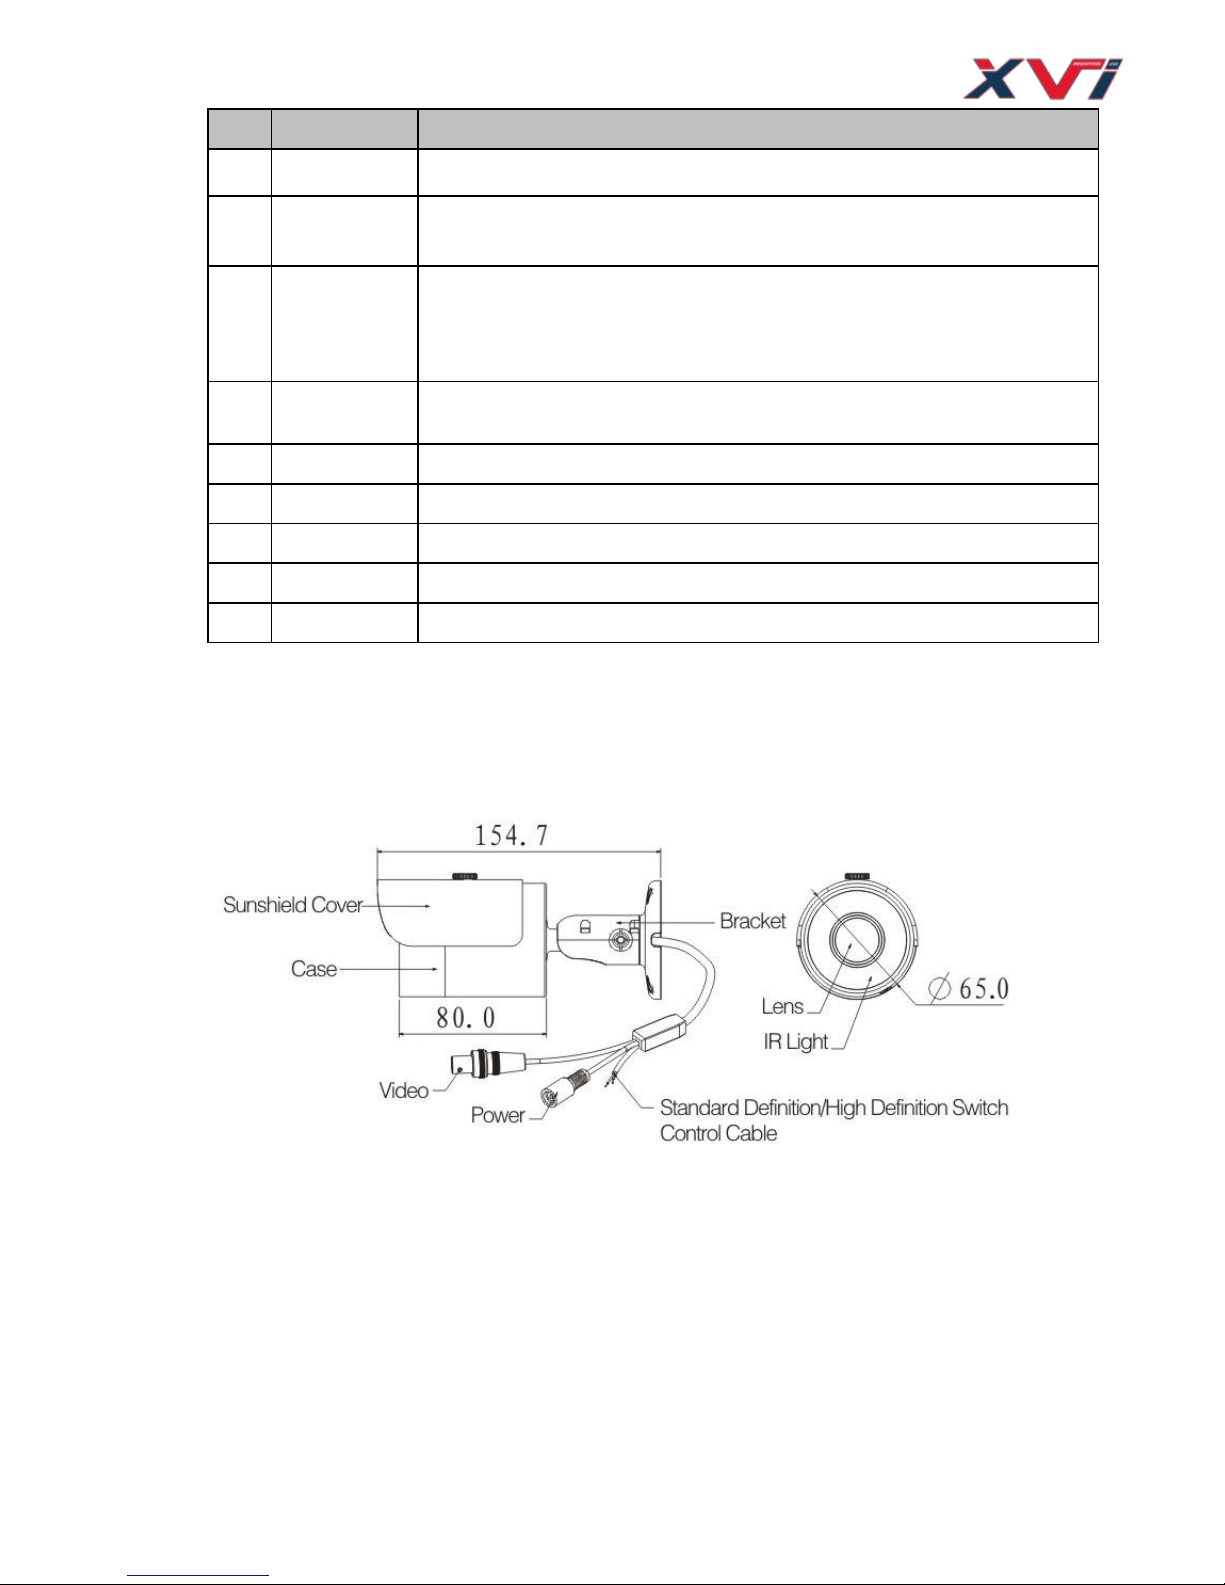
1General Introduction
1.1 Overview
This series megapixel HD camera conforms to the XVI standard. It supports video signal high-speed long
distance transmission without any delay. It can be controlled by the DVR conforming to the XVI.
1.2 Features
High-performance CMOS image sensor, megapixel definition.
HD video, coaxial cable to transmit the control signal.
Support 75-3 coaxial cable transmission without any loss. Transmission distance is over 300m.
Support HD and standard definition switch.
Support 1080P@25, 1080P@30, 720P@25, 720P@30, 720P@50, 720P@60.
High speed, long distance real-time transmission.
Support OSD (on-screen display), suitable for user self-defined setup.
Support privacy mask, image digital zoom.
Support DC12V power supplying.
Support 3D noise reduction (denoise), excellent performance in low illumination environment.
IP66 compliance.
Support ICR switch to realize surveillance both in the daytime and at night.
Support intelligent IR function.
1.3 Functions
XVI Specification
XVI(High Definition Composite Video Interface)is an over-coaxial –cable HD video transmission
standard. The technology renders two HD video formats by progressive scanning.
OSD
User-friendly on-screen display for you to select the different functions.
ICR
The IR cut removal is to filter the IR light in the daytime and then auto switch to the general fitter at night.
This function allows the camera to output the high sensitivity and clear video.
Smart IR technology
The sensor controls the IR light on/off via the combination work of the hardware and software, which
realizes the automatically IR light compensation according to the environment illumination.