11
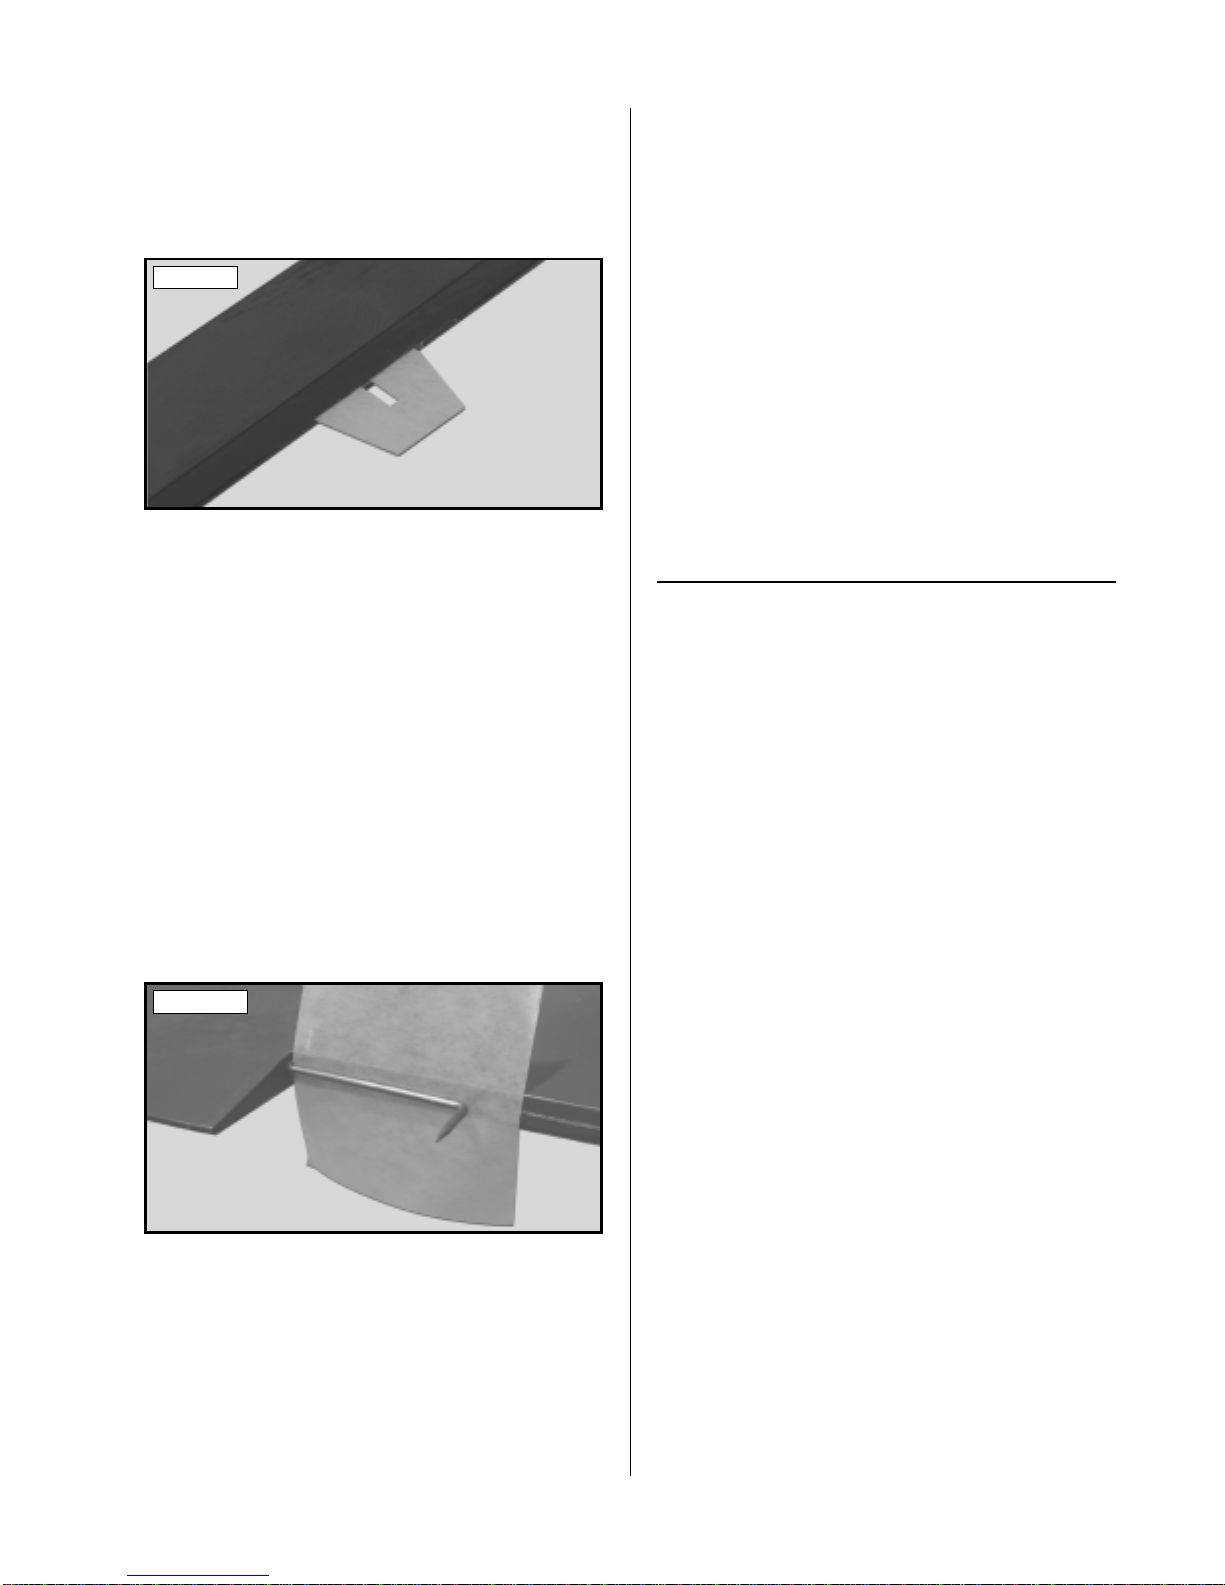
❑2) Test fit three C/A hinges into the hinge slots in
one aileron. Each hinge should be inserted far enough
intothe slotsso thatthe centerlinesof the hingesare flush
with the leading edge of the aileron. If the hinges cannot
beinserteddeeplyenough,use amodelingknifeandcare-
fully cut the hinge slots deeper. See photo # 9 below.
Photo # 9
☛Each of the hinges has a slot cut in the middle of it.
When installing the hinges, make sure that each of the
slots is perpendicular to the leading edge of the aileron.
These slots will allow the C/A to wick deeply into the
aileron giving the hinges more holding power.
❑3) With each of the hinges centered in the hinge
slots,apply 3-4drops of KwikBond ThinC/A to thejoint
where the hinges and the aileron meets. Allow a few sec-
onds between drops for the C/A to wick into the hinges,
thenturn theaileron overand repeatthis procedureon the
other side of each hinge. Allow the C/A to dry for about
10 minutes before proceeding.
❑4) Using a modeling knife, cut out a 1-3/4" x 2"
piece of waxed paper. Working with the same wing half
thattheaileroncamefrom,slide thewaxedpaperbetween
the aileron torque rod and the trailing edge of the wing.
See photo # 10 below.
Photo # 10
☛The waxed paper will prevent epoxy from getting
behind the torque rod and gluing it to the trailing edge
of the wing.
❑5) Mix a small quantity of Kwik Bond 5 Minute
Epoxy. Apply a thin layer of epoxy to the end of the aile-
ron torque rod and pack epoxy into the predrilled hole
and the precut groove in the leading edge of the aileron.
❑6) Slidetheaileronanditshingesintothehingeslots
inthetrailingedgeofthewing,makingsurethatthetorque
rod is firmly seated in the leading edge of the aileron.
Adjust the aileron so that the tip of the aileron is even
with the tip of the wing.
❑7) Whileholdingthe aileron tight against the wing,
rotate the aileron down about 45º. Apply 3-4 drops of
Kwik Bond Thin C/A to the exposed area of each hinge.
Turn the wing over and repeat for the other side of the
hinges. Allow the C/A and epoxy to fully cure. Once
cured,the aileron may be stiffand difficultto move. This
is normal. Gently pivot the aileron up and down about
five to ten times to free it up.
❑8) Repeatsteps # 2- #7 to hingethe second aileron
to the other half of the wing.
HINGING THE ELEVATOR
❑9) Locate the four precut hinge slots in the trailing
edge of the horizontal stabilizer and the leading edge of
the elevator.
☛Look carefully at the elevator and you will notice a
precut slot. This slot is in the bottom of the elevator, so
makesurethat youhingethe elevatorwith theslottoward
the bottom of the horizontal stabilizer.
❑10) Test fit the C/A hinges into the hinge slots in
the elevator. Each hinge should be inserted far enough
intothe slotsso thatthe centerlinesof the hingesare flush
withthe leadingedge ofthe elevator. If the hingescannot
be inserted deeply enough, use a modeling knife to care-
fully cut the hinge slots deeper.
☛Each of the hinges has a slot cut in the middle of it.
When installing the hinges, make sure that each of the
slots is perpendicular to the leading edge of the elevator.
Theseslotsallow theC/Ato wickdeeplyinto theelevator
giving the hinges more holding power.
❑11) With each of the hinges centered, apply 3-4
dropsofKwikBondThinC/Atothejointwherethehinges
andtheelevatormeet. Allowafewsecondsbetweendrops
for the C/A to wick into the hinges, then turn the elevator
over and repeat this procedure on the other side. Let the
C/A dry for about 10 minutes before proceeding.
❑12) Slide the elevator and its hinges into the precut
hinge slots in the trailing edge of the stabilizer. Adjust
the elevator so that the tips of the elevator are even with
the tips of the stabilizer.


