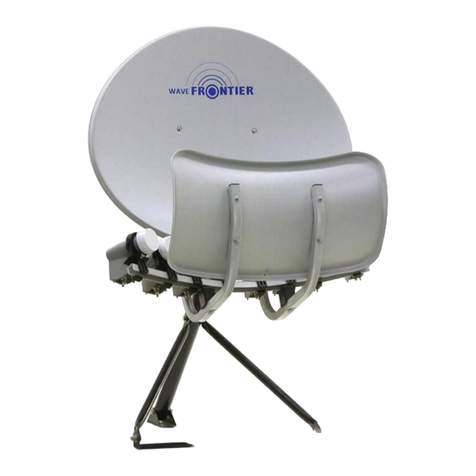
WaveFrontier Toroidal User manual

American Wavefrontier Corp
100 Pacifica Suite 260
Irvine, CA 92618 -1-
Thanks for choosing Toroidal. This file is developed to assist you in assembling and aligning
Toroidal Dish.
With Toroidal dish, you are aiming for more than 1 satellite and therefore this process will
require more time for assembling and aligning the dish. If you follow this process carefully, you
will cut down the installation time and achieve optimal signal strength for all satellites you are
aiming for.
TIP: Assemble and align Toroidal at ground level with
small TV and receiver right next to you. This will
save you a tremendous time. (If you have a sat
finder equipment, maybe not.) After the alignment,
you can put the assembled dish on your roof and
adjust azimuth only, take a minute and reducing the
risk and sweat!
You will find two pouches including bolts and nuts. One pouch is to assemble the dish and the
other is for the pole mount. (Pole mount assembly is not illustrated here. Use the diagram in
the box.)
•Print out (if you have not) the part list. Sort and group the bolts and nuts according to
the part list. This will save a lot of time and confusion.
•You will need Phillips Screw Driver and 10, 11, 12, 13 mm Wrenches for the assembly.
•Begin the process on flat surface.
•Make sure your location is not blocked from building or a huge tree. Remember you are
installing more than one satellite, thus you need a wider clear view of the sky.
Now let’s go ahead and start assembling.
Before You Begin
Assembling Toroidal

American Wavefrontier Corp
100 Pacifica Suite 260
Irvine, CA 92618 -2-
Start with Weaving tube. Do not tighten since you will need to
put this over the pole mount later on.
Parts: B11, B13 Tools:
Place Enduring tube across weaving tube and Back Mount
Elevation. Tighten with bolt and nut.
Parts: A6, A13, B9, B13 Tools:
Insert B10, B13. Make sure that nuts are outside of Back
Mount. This is where you make elevation adjustment later on.
For T90, use washer for extra holds. Washer also makes it
easier adjusting elevation control later on.
Parts: B10, B13, Washer Tools:
There are 3 connection points on Back Mount Tilt unit. Use B8
on the center with B13. Use Phillips driver to tighten. Then,
tighten B4 with B14 with hands. Nuts should be on the back
the unit so you can adjust skew angle later on.
Parts: B8, B13, B4, B14 Tools: Phillips
Attach LNBF Guide Seat onto Support Arms. Then, plug in
Support Arm Cap.
Parts: A3, A8, B4, A12 Tools: Phillips
Step 1: Assembling the Toroidal

American Wavefrontier Corp
100 Pacifica Suite 260
Irvine, CA 92618 -3-
Assemble Support Arms on both side using B3 & B13. Do not
use B2.
Parts: B3, B13 Tools: Phillips, Wrench
Attach Sub Reflector using B2 & B12. You will find a little hold
on the center of the side. This side with hole should be placed
down.
Parts: B2, B12 Tools: Phillips, Wrench
Attach LNBF Guide using B5. Pay attention the orientation of
LNBF Guide.
Parts: A4, B4 Tools: Phillips
Attach Main Reflector using B1, B12.
Parts: B1, B12 Tools: Phillips, Wrench

American Wavefrontier Corp
100 Pacifica Suite 260
Irvine, CA 92618 -4-
For illustration purpose, we will use the following setting for A city. The following table is
provided for major cities in the homepage of Wavefrontier (www.multilnbdish.com). If you have
not received one from Wavefrontier or cannot find one for your location on the website, contact
Make sure you indicate your zip code and satellites you are aiming for.
Model: T55
City: A City, CA
Country: USA
Azimuth Elevation Skew 91W 101W 110W 119W
156 45 95 L20.0 L10.0 R0.0 R10.0
Here we will illustrate LNBF Holder setting for 119W whose setting is R10.0
Look closely on the top of LNBF holder supporter. It has grid
showing L20, L10, R10, R20.
Parts: A9 Tools:
Insert LNBF Holder into the Supporter. Rotate/Align the
bottom of Holder so it can align to R10 Grid.
Parts: A10 Tools:
Tighten the aligned holder by using B6. Place another B6 with
your hand. Do not tight this one. This (2nd one) will be
tightened at the very end of this whole process.
Parts: B6 Tools: Phillips
Step 2: LNBF Mounting and Location

American Wavefrontier Corp
100 Pacifica Suite 260
Irvine, CA 92618 -5-
Place LNBF inside the holder and tighten another B6. You
may need to LNBF Adapter (A11) to secure LNBF depending
on the neck size of your LNBF.
Parts: B6, LNBF Tools: Phillips
Align the CENTER of LNBF Holder Unit at the R10 marking of
LNBF Guide.
Parts: Tools:
After inserting LNBF Holder Unit into guide, loosely tight screw
so that the unit can stay on the guide. You will tighten this
screw at the very end of this process. You will find that surface
of LNBF and Sub Reflectors are symmetrically aligned.
Parts: Tools: Phillips
Install other LNBF Units as you require using same method.
Parts: Tools:

American Wavefrontier Corp
100 Pacifica Suite 260
Irvine, CA 92618 -6-
We will use the same setting used before for illustration purpose.
First, makes sure that your pole mount is absolutely vertical.
Without vertical pole, all other setting angles are almost
meaningless.
Parts: Tools:
Without any skew adjustment, adjust elevation. You can use
an angle locator as shown or use elevation reading on the
bracket. (Align the edge of tube to the readings) If you are
using a washer on elevation unit, you may not able to see the
edge of the tube.
Parts: Tools: Wrench
Make skew adjustment. Tighten but remember you may need
to adjust this later on. So do not use excessive force.
Parts: Tools: Wrench
Now you are ready to aim for a satellite.
1. Select one LNBF in the center (or the LNBF nearest to the center, 101W for this case)
and hook it up to the receiver or sat finder equipment.
2. Adjust azimuth by moving antenna unit left and right to find the best signal. Then,
tighten Weaving Tube Unit to the pole.
3. Align elevation a little bit to get the MAXIMUM signal. Remember elevation is the most
critical factor here. Tighten elevation bracket.
4. Hook up to other LNBF and measure signal strength. If adjustment needed, move LNBF
holder right or left along the guide until you get the maximum.
5. If you not able to get a satisfactory signal, adjust skew angle a little bit, 1 degree up or
down. Then adjust LNBF holder to left or right to get an optimal signals.
6. If not satisfied with signals, repeat the steps.
7. Enjoy Toroidal !
Step 3: Aligning Toroidal
Table of contents
Other WaveFrontier Antenna manuals