•Your solar string light is not a toy. Keep it out of reach from small children.
•Your solar string light and solar panel are both weather-resistant.
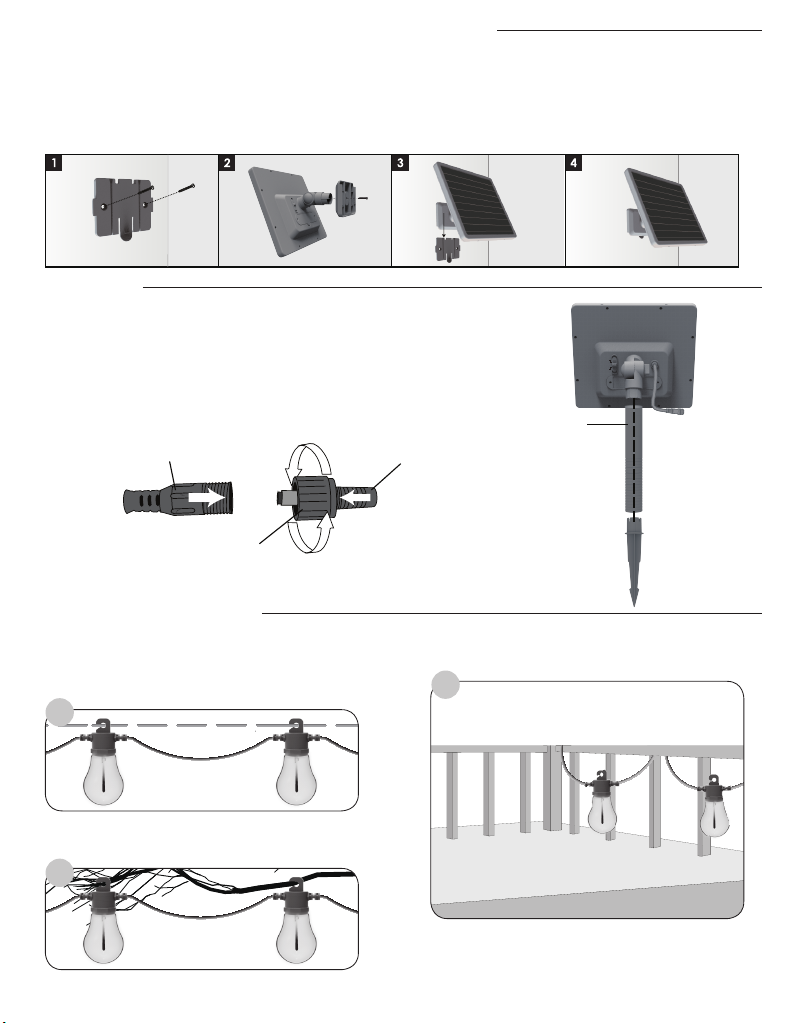
•The solar panel must be mounted outdoors to maximize sun exposure.
•Prior to installation, lay out all components and check against the parts list section on the page 1 of this manual.
•Do not hang clothes or any other objects on the solar string light.
•Do not cut or make any extension to the wire of solar string light.
• When replacing the battery, be sure to:
•Use a rechargeable battery only. Battery specication is Li-ion 3.7V 1800mAh, 1 pc is required.
• Observe the correct polarity (+ and -) when installing the replacement battery.
• Do not mix old and new battery and do not mix alkaline, standard (carbon-zinc) or rechargeable
(ni-cad, ni-mh, etc.) battery.
• Hyper Tough 18650 3.7V 1800 mAh replacement battery can be used with this light.
• IMPORTANT: Dispose of the Lithium ion battery in accordance with local, state and federal regulations.
• From time to time, ensure the plug between the solar panel and string light is securely connected.
• Please adjust the angle of the solar panel to optimize the exposure of the sun. Especially during the winter months.
• The solar panel should be cleaned with a damp cotton cloth on a regular basis. This will ensure optimal
performance and battery charging. Periodically, utilize the same technique to clean the bulbs.
• Never let any abrasive material come into contact with the solar panel and bulbs.
This product is covered under a two year limited warranty. Manufacture warrants to the original
purchaser that this product is free from defects in materials and workmanship for the period of two year from
date of purchase. The included battery is not covered under this warranty.
Proof of purchase including date, and explanation of complaint is required for warranty service.
• 2200K Filament LED Bulbs • Two Ways Installation: Ground Stake & Wall Mounted
• Built-in Hooks
• Automatic Illumination at Dusk
SAFETY INFORMATION
CAUTIONS: BATTERY INSTRUCTIONS
CARE & MAINTENANCE
WARRANTY
PRODUCT FEATURES
PRE-INSTALLATION
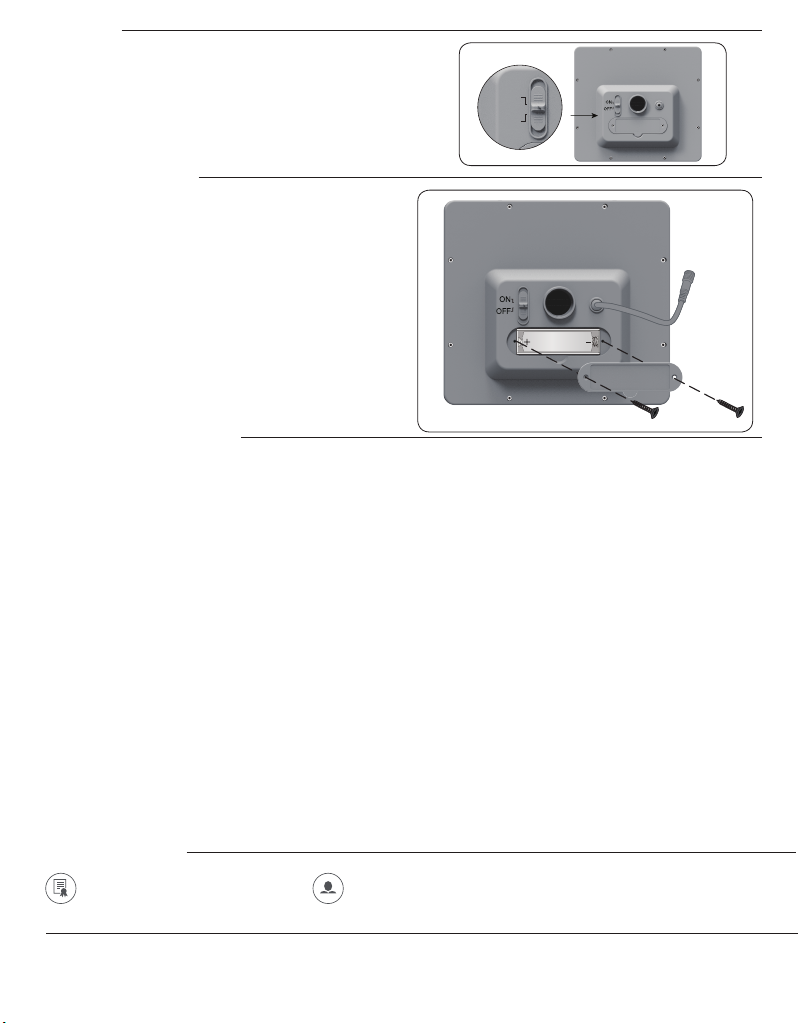
ON
OFF
Ensure your solar panel is placed
where exposes to optimized sunlight.
Be aware of objects such as trees or
property overhangs that may impede
the panel’s ability to generate a charge.
Prior to using your solar string light, the
solar panel needs sunlight for a period of
three days.
This initial charge should be done without
the string light connected or with the solar
panel in the OFF position.
After the third day, your included battery
will be fully charged.
Note: The solar panel should be mounted
in a place where the ON/OFF switch is
easily accessible.
2