manuals.online logo
Brands
  1. Home
  2. •
  3. Brands
  4. •
  5. Webb
  6. •
  7. Lawn Mower
  8. •
  9. Webb WERR16 Installation and maintenance instructions

Webb WERR16 Installation and maintenance instructions

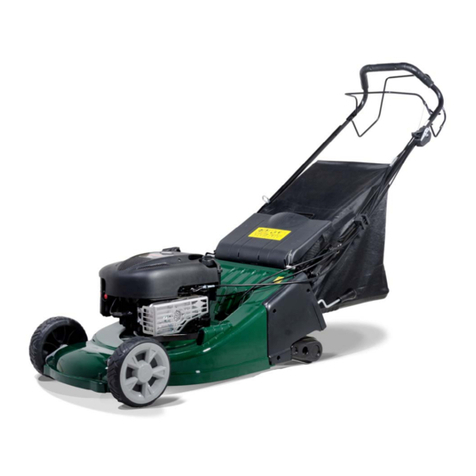
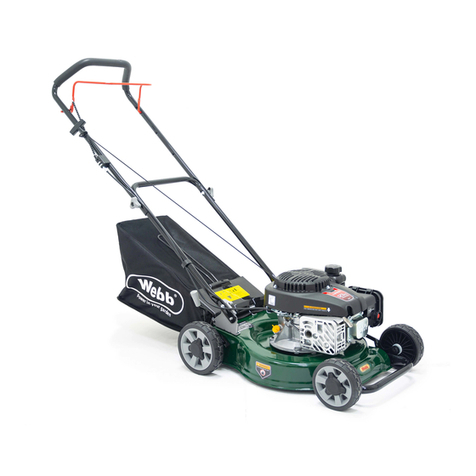
WERR16
OPERATOR’S MANUAL AND PARTS LIST
Self Propelled 16 Inch
Rear Roller Petrol Lawnmower
Spares & Support: 01793 333212 -
www.webblawnmowers.co.uk
Before use, please read & understand this manual, paying particular attention
to the safety instructions.
193839001 30/12/2014
Thank you for choosing our petrol lawnmower.
To ensure that you get the best results from your petrol lawnmower please read all of these safety and
operating instructions carefully before using this product.
CONTENTS
PAGE NUMBER
Product Specifications
2
Product Highlights
3
General Operation & Safety Rules
4
Assembly/Pre-Operation
6
Operation
8
Start/Stop Engine
10
Maintenance
11
Trouble Shooting
14
Parts Drawing & List
16
Warranty Terms & Conditions
20
EC Declaration of Conformity
22
Warranty Registration
26
PRODUCT SPECIFICATION
Model Number
WERR16
Product Number
193811001
Petrol Engine
Briggs & Stratton 500E Series
Engine Cubic Capacity(cc)
140cc
Engine Speed
2800rpm
Cutting Width
410mm
Adjustable Cutting Height
15-65mm
Grass Collection Capacity
60 Litres
Deck Material
Aluminum
Sound Pressure Level
82.5 dB(A)
Sound Power Level
93.0 dB(A)
Guaranteed Sound Power Level
96dB(A)
Vibration
5.87 m/s²
PRODUCT HIGHLIGHTS
IMPORTANT: Failure to observe the following safety instructions could result in serious injury.
WARNING: In order to prevent accidental starting when setting up, transporting, adjusting or making repairs,
always disconnect the spark plug lead.
CAUTION: Exhaust and other engine parts become extremely hot during operation and remain hot after
engine has stopped. To avoid severe burns on contact, stay away from these areas.
Drive Lever
Brake Lever
Grass
Collector
Triangle Knob
B&S 500E Series
Fuel Cap
Exhaust Muffler
Rear Roller
Starter Handle
Height Adjustment Lever
GENERAL OPERATION AND SAFETY RULES
Read the instructions carefully. Be familiar with the controls and the proper use of the equipment.
Do not put your hands or feet near or under rotating parts. Keep clear of the discharge opening at all
times.
Only allow responsible individuals, who are familiar with the instructions, to operate the machine.
Thoroughly inspect the area where equipment is to be used and remove all objects, which could be
thrown by the machine.
Never mow while people, especially children, or pets are nearby.
While mowing, always wear appropriate footwear and trousers. Do not operate the equipment when
barefoot or wearing open sandals.
Do not pull the mower backwards, unless absolutely necessary.
Never operate the lawnmower with defective guards, or without safety devices, for example deflectors
and/or grass catchers, in place.
Only use accessories approved by the manufacturer.
Stop the blade(s) when crossing gravel drives, paths, or roads.
Stop the engine and disconnect the spark plug:
- before clearing blockages or unclogging the chute.
- before checking, cleaning or working on the lawnmower.
- after striking a foreign object. Inspect the lawnmower for damage. All repairs should be undertaken by a
professional before future use.
- if lawnmower starts to vibrate abnormally (check immediately).
Shut the engine off and wait until it has come to a complete stop before removing the grass catcher.
Mow only in daylight or good artificial light.
Do not operate the machine while under the influence of alcohol or drugs.
Never operate machine in wet grass, this could cause the user to slip.
Keep a firm hold on the handle and walk; never run.
Disengage the self-propelled mechanism before starting the engine.
Always wear safety goggles or safety glasses with side shields when operating the mower.
Remove obstacles such as rocks, tree limbs, etc.
Watch for holes, ruts, or bumps. Tall grass can hide obstacles.
Do not trim near drop-offs, ditches or embankments. The operator could lose their footing or balance.
Do not mow excessively steep slopes.
Keep in mind that the operator or user is responsible for accidents or hazards involving the machine that
could occur to other people or their property.
Be alert and turn the machine off if children enter the area.
Wheeled rotary machines, should mow across the face of slopes, never up and down.
Never allow children or people unfamiliar with these instructions to use the lawnmower.
WARNING-Petrol is highly flammable.
- store fuel in containers specifically designed for this purpose;
- refuel outdoors only and do not smoke while refueling;
- add fuel before starting the engine. Never remove the cap of the fuel tank or add petrol while the
engine is running or when the engine is hot;
- if petrol is spilled, do not attempt to start the engine but move the machine away from the area of
spillage and avoid creating any source of ignition until the petrol vapours have dissipated;
- replace fuel tanks and container caps securely.
Before using, always visually inspect to ensure that the blade, blade bolts and cutter assembly are not
worn or damaged. Replace worn or damaged blades and bolts in sets to preserve balance.
Never tamper with safety devices. Regularly check that they are operating properly.
Keep the machine free of grass, leaves, or other debris build-up. Clean oil or fuel spillage. Allow the
machine to cool before storing.
Exercise extreme caution when changing direction on slopes.
Never attempt to make wheel height adjustments while the engine is running.
Grass catcher components are subject to wear, damage, and deterioration, which could expose moving
parts or allow objects to be thrown. Frequently check components and replace with the manufacturer’s
recommended parts, when necessary.
The mower blades are extremely sharp. Wrap the blade, wear gloves, and use extra caution when
servicing them.
Do not change the engine governor setting or over-rev the engine.
Stop the engine if the lawnmower has to be tilted for transportation when crossing surfaces other than
grass, and when transporting the lawnmower to and from the area to be mowed.
Disengage the drive clutch before starting the engine.
Start the engine carefully according to the instructions, with your feet well away from the blade.
Do not tilt the lawnmower when starting the engine or cutting.
Do not start the engine when standing in front of the discharge chute.
Never pick up or carry a lawnmower while the engine is running.
.
Read
Operators
Manual
DANGER!
Rotating Blades.
Keep hands & feet away
from openings while
machine running.
WARNING!
Keep hands & feet away
from cutting deck while
machine running.
Keep
bystanders
away.
Before attempting to
work on the machine
cutting equipment,
remove the spark plug
from the engine
WARNING!
Never mow up or
down slopes.
Remove objects which
could be thrown by the
rotating blade.
WARNING!
Keep other persons at a
safe distance when
using this lawnmower
ASSEMBLY/PRE-OPERATION
Read this instruction manual in its entirety before you assemble or operate your new lawnmower.
Your new lawnmower has been assembled and tested at the factory.
Roll the lawnmower out of the carton and check the carton thoroughly for additional loose parts.
IMPORTANT:
The lawnmower is shipped WITHOUT OIL OR PETROL in the engine. Failure to fill the engine with the
correct fluids & to the correct levels will invalidate your warranty.
OPERATION CABLES
To avoid damage during the transport process, the drive and brake cables for your machine may not be fitted
to their appropriate handle bar.
The front cable is the brake cable, which is to be fitted to the front lever on your machine; this is the Operator
Presence Control Lever (OPC). The cable at the rear is your drive cable, which is to be fitted to the rear
lever, which is your Drive Lever.
ASSEMBLE HANDLE
Fit the Lower Handle to the frame of the lawnmower.
Insert 1x Square Neck Bolt M8x20 (No.19) in the lower hole of the handle and frame from the inside.
Once through, add the M8 Lock Nut (No.20), tighten until they are secure.
Repeat for the other side.
Enter Hex Bolt M8x25 (No.21) into the second lower handle fixing and frame hole from the inside.
Once through, add Flat Washer 8.4x16x1.6 (No.17) & Small Grey Triangle Knob (No.15) with Lock Nut
M8/8.8 (No.14) and tighten to ensure they are secure.
Repeat for the other side.
Fit the Middle/Top Handle to the Lower Handle.
Place the Middle/Top Handle to the outside of the Lower Handle and line the holes up.
Insert Square Next Bolt M8x50 (No.118) from the outside, through the holes.
Once through, add Flat Washer 8.4x16x1.6 (No.17) & Large Grey Triangle Knob (No.16) with Hex Nut
M8/8.8 (No.14) and tighten to ensure they are secure.
Repeat for the other side.
INSTALL ATTACHMENTS
The mower has three different operating modes.
1. Collecting:
Fit the grassbox by lifting the rear flap on the mower and hook the front of the box to the shaft on the
mower.
Lower the flap to lock the grassbox in position.
When the box is full, the grass will be visible through the viewing window in the top of the box.
Stop the engine before emptying the grassbox.
2. Rear Discharge:
With the grassbox removed and the rear flap in the down position, the mower will cut and discharge the
grass from the rear of the machine.
3. Mulching:
Fit the mulch plug to the rear discharge opening of the mower and close the rear flap.
Remove the side discharge cover and close side cover.
The mower will now recycle the chopped grass into the lawn surface.
To mulch efficiently only cut one third of the length of the grass.
OPERATION
DRIVE CONTROL (Model: WERR16)
The drive is controlled by holding the Operator Presence Control bar up to the push handle and pulling
the Drive Control lever back towards the handle.
Forward motion will stop when the Operator Presence Control bar is released. To stop forward motion
without stopping the engine release the Drive Control lever until the drive control disengages and hold the
Operator Presence Control bar up against handle to continue mowing without the drive.
Operator Presence Control (OPC) Bar - must be held down to the handle to start the engine. Release the
handle to stop the engine.
Drive Control (Self-Propelled) Lever - used to engage self- propelled motion of the lawn mower.
LAWNMOWER ENGINE SPEED
The engine speed was set at the factory for optimum performance. Speed is not adjustable.
ADJUST CUTTING HEIGHT
Lower the cutting deck for a low cut and raise the deck for a high cut; adjust cutting height to suit your
requirements. Medium position is best for most lawns. If you have extremely high grass, it is recommended
you cut in stages, gradually reducing the grass height.
PUSH HANDLE
OPERATOR
PRESENCE CONTROL
LEVER (OPC)
DRIVE CONTROL LEVER
(SELF-PROPELLED)
THROTTLE
BEFORE STARTING ENGINE ADD OIL & PETROL
Check the engine manufacturers Instruction Manual, to ensure you do not invalidate the engine warranty,
before undertaking any actions.
YOUR LAWNMOWER IS SHIPPED WITHOUT OIL OR PETROL IN THE ENGINE.
Before each subsequent use, the oil level must be checked and if necessary topped up with SAE30 engine
oil. It is recommended that oil is poured into the engine, using a funnel.
OIL FILLER CAP/DIPSTICK
CAUTION: DO NOT overfill the engine with oil (from empty, (470ml of oil will fill the oil to the Upper Limit on
the dipstick, or it will smoke heavily from the exhaust on startup.
1. Be sure that the lawnmower is on level ground.
2. Remove the oil dipstick from the oil fill spout.
3. Insert and tighten the dipstick.
IMPORTANT:
Check the oil level before each use. Add oil if needed. Fill to the full line on the dipstick.
Change the oil after every 25 hours of operation or each season. You may need to change the oil more
often under dusty, dirty conditions. See “TO CHANGE ENGINE OIL” in the Maintenance section of this
manual.
ADD PETROL
Fill the fuel tank to the bottom of the tank filler neck. Do not overfill. Use fresh, clean, regular unleaded
petrol. Do not mix oil with petrol. Purchase fuel in quantities that can be used within 30 days to ensure
fuel freshness. Old or stale fuel can cause damage to the engine carburetor, which would not be
covered under the warranty.
CAUTION: Wipe off any spilled oil or fuel. Do not store, spill or use petrol near an open flame.
CAUTION: To avoid engine problems, the fuel system should be emptied before being stored for 30 days or
more. To empty the fuel tank, start the engine and let it run until the fuel lines and carburetor are empty. Use
fresh fuel for your next use of the machine. See Storage Instructions for additional information.
Never use engine or carburetor cleaner products in the fuel tank, permanent damage may occur.
Fuel Cap
Lower
Limit
Upper
Limit
START ENGINE
To start the engine, first make sure that the spark plug is positioned securely and the engine has been
filled with sufficient oil and petrol.
NOTE: Due to protective coatings within the engine, a small amount of smoke may be present during the
initial use of the machine and should be considered normal.
When the engine is cold, you will need to push the RED engine primer button on the air filter 2-3 times.
When the engine is warm, it should not be necessary to prime the engine.
Hold the Operator Presence Control lever up to the Push Handle.
Pull the engine starter pull chord/handle quickly. DO NOT ALLOW IT TO SNAP BACK TO THE ENGINE.
STOP ENGINE
To stop engine, release the Operator Presence Control bar.
CAUTION: The cutting blade will continue to rotate for a few seconds after the engine has stopped.
Disconnect the spark plug cap if the lawnmower is to be left unattended.
MOWING TIPS
Under certain conditions, such as very tall grass, it may be necessary to raise the height of the cut to
reduce the pushing effort and to keep from overloading the engine and leaving clumps of grass
clippings. It may also be necessary to reduce ground speed and/or run the lawnmower over the area a
second time.
For extremely heavy cutting, reduce the width of cut by overlapping the previously cut area and mow
slowly.
Pores in cloth grass catchers can become filled with dirt and dust during use and catchers will collect
less grass. To prevent this, regularly hose the catcher off with water and let it dry before using.
Keep the top of the engine around the starter clean and clear of grass clippings and chaff. This will
assist engine air flow and extend engine life.
MAINTENANCE
IMPORTANT - Regular, careful maintenance is essential for keeping the safety level and original
performance of the machine unchanged over time.
1) Keep all nuts, bolts and screws tight to be sure the equipment is in safe working condition. Regular
maintenance is essential for safety and performance.
2) Never store the equipment with fuel in the tank inside a building where vapour may reach a flame, spark
or source of extreme heat.
3) Allow the engine to cool before storing in an enclosed space.
4) To reduce the fire hazard, keep the engine, exhaust silencer, battery compartment and fuel storage area
free of grass, leaves, or excessive grease. Remove grass cuttings from containers before storage.
5) Do not use equipment with worn or damaged parts. Parts should be replaced not repaired. Only use
genuine spare parts. Parts that are not of the same quality can damage the equipment and create safety
hazards.
6) If the fuel tank has to be drained, this should be done outdoors and when the engine is cool.
7) Wear strong work gloves when removing and reassembling the blade.
8) Check the blade’s balance after sharpening.
9) Check the self-closing guard and grass-catcher frequently for wear and deterioration.
10) Whenever the machine is to be handled, transported or tilted you must:
- Wear strong working gloves.
- Grasp the machine at the points that offer a safe grip, clear of the blade and taking account of the weight of
the machine and its distribution.
CLEANING
Carefully clean the machine after each cut to ensure an easy start-up next time you use the machine. Be
sure to remove grass debris and mud accumulated inside the chassis before it dries.
If you need to tilt the mower while cleaning always tip it backwards towards the handles, do not tip it on
its side as this will cause oil to enter the carburettor or exhaust.
The paintwork on the inside of the chassis may peel off over time due to the abrasive action of the cut
grass; when this occurs you must touch up the paintwork using a rustproof paint as soon as possible to
prevent the formation of rust that would lead to corrosion of the metal.
Remove the transmission casing by removing the screws and clean around the transmission and drive
belts with a brush or compressed air once or twice a year.
Once every season, the drive wheels should be cleaned internally. Remove both wheels. Clean the gear
wheel and the wheel gear rim of grass and dirt using a brush or compressed air.
CHANGING BLADES
Empty the oil tank before removing the blade.
To replace the blade, undo the blade securing bolt. This will be very tight and it is recommended that you
wear protective gloves, due to the blade being very sharp.
Reinstall as illustrated. Tighten the screw properly. Tightening torque 45 Nm.
When replacing the blade, the blade screw should also be replaced.
CHANGING OIL
Let engine run out of petrol
Wait until engine has stopped & cooled slightly.
Disconnect spark plug wire and keep away from spark plug.
When engine is still warm, remove oil drain plug.
Drain oil into a suitable container.
Clean the oil drain plug before refitting back.
Return machine to wheels and level ground.
Remove dipstick and add new recommended oil, slowly to upper limit on dipstick (500ml)
DO NOT OVERFILL
Refit tipstick and oil cap to engine
WARNING: Prevent skin contact with used
engine oil. Wash your skin with soap & water
after oil change.
CAUTION: Used oil is a hazardous waste
product. All discarded oil, should be disposed
of at your local recycling centre, using a sealed
container. DO NOT DISCARD IN
HOUSEHOLD WASTE
Blade Bolt
Blade
Blade Washer
Blade Adaptor
Oil Drain Plug
SPARK PLUG
Once the engine has cooled, remove the spark plug and clean with a wire brush. Using a feeler gauge, set
the gap to (0.7-0.8mm) or (0.028-0.031”). Refit the spark plug taking care not to over tighten.
AIR FILTER
Unclip the air filter cover and remove the sponge filter element. To avoid objects falling into the air intake,
replace the air filter cover.
DRAINING THE FUEL TANK AND CARBURETOR
Place an approved petrol container below the carburetor, and use a funnel to avoid spilling fuel.
Remove the drain bolt and then move the fuel valve lever to the ON position.
After all the fuel has drained into the container, reinstall the drain bolt and washer. Tighten the drain bolt
securely.
Air Filter Cover
Air Filter
Drain Bolt
Float
Bowl
MAINTENANCE SCHEDULE
REGULAR SERVICE PERIOD(4)
Before
Each
Use
First
Month
or
5 Hrs
Every 3
Months
or
25 Hrs
Every 6
Months
or
50 Hrs
Every
Year
or
100
Hrs
Every
Two
Years
or 250
Hrs
ITEM
Perform at every indicated month or
operating hour interval, whichever
comes first.
Engine oil
Check
O
Replace
O
O
Air cleaner
Check
O
Replace
O
Spark plug
Check-
adjust
O
Replace
O
Flywheel brake pad (A
types)
Check
O
Fuel tank and filter
Clean
O
Fuel tube
Check
Every 2 years (Replace if necessary)
TROUBLE SHOOTING
ENGINE WILL NOT START
Possible Cause
Correction
Check fuel.
Out of fuel.
Refuel
Poor fuel; engine stored without
treating or draining petrol, or
refueled with poor fuel.
Drain the fuel tank and carburetor
Refuel with fresh petrol.
Remove and inspect spark
plug.
Spark plug faulty, fouled, or
improperly gapped.
Replace the spark plug
Spark plug wet with fuel
(flooded engine).
Dry and reinstall spark plug.
Take engine to an authorised
dealer, or refer to engine
manual.
Fuel filter clogged, carburetor
malfunction, ignition
malfunction, valves stuck, etc.
Replace or repair faulty
components as necessary.
ENGINE LACKS POWER
Possible Cause
Correction
Check air cleaner
Air cleaner elements clogged.
Clean or replace air cleaner
elements
Check fuel
Poor fuel; engine stored without
treating or draining petrol, or
refueled with poor fuel.
Drain the fuel tank and carburetor
Refuel with fresh petrol.
Take engine to an authorised
dealer, or refer to engine
manual.
Fuel filter clogged, carburetor
malfunction, ignition
malfunction, valves stuck, etc.
Replace or repair faulty
components as necessary.
SERVICING
We recommend that you take the machine to an authorised service dealer for annual servicing,
maintenance and inspection of safety equipment. For service and spare parts, please contact your
nearest approved service dealer, who can be found by visiting www.webblawnmowers.couk.
STORAGE
The same petrol must not remain in the tank for more than 30 days.
Thoroughly clean the mower and store it indoors in a dry place.
THE ENVIRONMENT
In order to protect the environment, we recommend that the following points should be given special
consideration:
Always use pure unleaded petrol.
Always use a funnel and/or petrol can with a level control to avoid spillage when refilling the fuel tank.
Do not fill the fuel tank completely.
Do not overfill with engine oil.
When changing the oil, ensure that all the used oil is collected. Avoid spillage. Take the used oil to a
recycling unit.
Do not dispose of used oil in a rubbish bin. Take it to a recycling unit.
Replace the silencer if faulty. Always use the Manufacturer’s original spare parts.
Always seek professional help when the carburetor requires adjustment.
Clean the air filter according to the instructions.
PARTS DIAGRAM
PARTS LIST - 1
Item No
Handy Part No.
Handy Description
Qty
1
WE119-1
Top Handle
1
2
WE119-2
Foam Pipe
1
3
WE119-3
Self-Propelled Lever
1
4
WE119-4
Brake Lever
1
5
WE119-5
Brake Lever Foam Pipe
1
6
WE119-6
Self-Propelled Lever Foam Pipe
1
7
WE119-7
Left Handle Cover Inner
1
8
WE119-8
Left Handle Cover Outer
1
9
WE113-9
Lock Nut M6/8.8
2
10
WE119-9
Right Handle Cover Outer
1
11
WE113-21
Cable Fastener
2
12
WE119-10
Adjustment Cover Plate
1
13
WE119-11
Right Handle Cover Inner
1
14
WE113-19
Hex Nut M8/8.8
4
15
WE113-74
Triangle Knob Small (Grey)
2
16
WE113-73
Triangle Knob Large (Grey)
2
17
WE113-17
Flat Washer 8.4x16x1.6
5
18
WE119-12
Lower Handle
1
19
QG112-5
Square Neck Bolt M8x20/8.8
2
20
WE113-52
Lock Nut M8
5
21
WE119-13
Hex Bolt M8x25/8.8
3
22
WE119-14
Rear Discharge Cover
1
23
WE119-15
Grass Collector Bag (Unbranded)
1
24
WE119-16
Grass Collector Top
1
25
WE119-17
Grass Collector Frame
1
26
WE119-18
Grass Collector Breather
1
27
WE119-19
Rear Discharge Cover Spring
1
28
WE113-63
Rear Discharge Cover Shaft
1
29
WE113-65
Lock Washer
2
30
WE119-20
Left Lower Handle Bracket
1
31
WE119-21
Right Lower Handle Bracket
1
32
WE119-22
Hex Flange Bolt M8x20
4
33
WE119-23
Deck
1
34
WE119-24
Height Adjustment Board
1
35
WE119-25
Hex Flange Bolt M5x12
2
36
WE117-14
Height Adjuster Handle
1
37
WE119-26
Rear Axle Assembly
1
38
WE119-27
Rear Roller
2
39
WE119-28
Rear Roller Shaft
1
PARTS LIST - 2
Item No
Handy Part No.
Handy Description
Qty
40
WE119-29
Pin 5.3x16
2
41
WE119-30
Long Key
1
42
WE119-31
Pin
1
43
WE119-32
Roller Sleeve
2
44
WE114-8
Bearing 6001RS
5
45
WE119-33
Chain Big Gear
1
46
WE119-34
Chain
1
47
WE119-35
Chain Small Gear
1
48
WE119-36
Chain Cover
1
49
WE119-37
Right Rear Bracket
1
50
WE113-37
Hex Screws M6x10
4
51
WE119-38
Hex Screws M6x10
4
52
WE119-39
Self Propelled Bush
2
53
WE119-40
Rear Drive Axle Bush
1
54
WE119-41
Gearbox Assembly
1
55
WE114-11
Washer 12
3
56
WE119-42
Self-Propelled Spring
1
57
WE119-43
B&S 500E Engine
1
58
WE114-21
Bolt 8/3-16*1ST
3
59
WE119-44
Blade Adaptor
1
60
WE119-45
Blade 400mm
1
61
WE119-46
Blade Washer
1
62
WE113-71
Hex Flange Bolt 50mm
1
63
WE119-47
Pulley
1
64
WE119-48
Second Pulley I
1
65
WE119-49
Second Pulley II
1
66
WE119-50
Second Pulley Spring
1
67
WE119-51
Bearing 6901RS
1
68
WE119-52
Fixation
1
69
WE119-53
V Belt (Engine) 490Li
1
70
WE119-54
V Belt (Self-Propelled) 400Li
1
71
WE119-55
Discharge Chute
1
72
WE119-56
Deck Deflector
1
73
WE119-57
Mulch Plug
1
74
WE119-58
Front Axle
1
75
WE119-59
Wheel
2
76
WE119-60
Wheel Trim (Grey)
2
77
WE113-12
Lock Nut M8
7
78
WE119-61
Front Protector
1
PARTS LIST –3
Item No
Handy Part No.
Handy Description
Qty
79
WE119-62
Height Adjustment Rod
1
80
WE119-63
Height Adjustment Spring
1
81
WE119-64
Hex Bolt M6x20
23
82
WE119-65
Rear Roller Rubber Cover
1
83
WE119-66
Hex Lock Nut M5
7
84
WE119-67
Hex Flange Bolt M5x10
3
85
WE113-28
Cable Stopper
1
86
WE119-68
Hex Flange Bolt M6x35
1
87
QG112-14
Hex Flange Bolt M6x16
1
88
WE119-69
Washer
2
89
WE119-70
Height Adjuster Rubber Cover
1
90
WE119-71
Hex Screw ST4.2x14
2
91
WE119-72
Flat Washer 6.4x22x3
2
92
QG112-10
Hex Screw ST6.3x18
4
93
WE119-73
Deck Blade Rubber Cover
2
94
WE119-74
Washer 12.2x24x1.5
2
95
WE119-75
Rear Roller Rubber Cover Board
1
96
WE115-10
Flat Washer 13x39.3x1
1
97
WE119-76
Self-Propelled Lever Left Fixed Block
1
98
WE119-77
Stop Lever Left Fixed Block
1
99
WE119-78
Self-Propelled Lever Right Fixed Block
1
100
WE119-79
Stop Lever Right Fixed Block
1
101
WE119-80
Fixed Block
4
102
WE119-81
Left Cable fixed Block
1
103
WE119-82
Right Cable Fixed Block
1
104
WE119-83
Middle Handle
2
105
WE119-84
Cross Head Screw ST4.8x25
6
106
WE119-85
Hex Flange Bolt M5x30/8.8
4
107
WE113-23
Square Neck Bolt M8x30/8.8
3
108
WE119-86
Cross Head Screw M4x16
4
109
WE119-87
Lock Nut M4
4
110
WE119-88
Hex Bolt M8x20
1
111
WE119-89
Flat Washer 10.5x20x2
1
112
WE119-90
Flexible Washer 10x1
1
113
WE119-91
Bush 10.3x8x8.7
1
114
WE119-92
Throttle Handle
1
115
WE119-93
Brake Cable
1
116
WE119-94
Self-Propelled Cable
1
117
WE119-95
Throttle Cable
1
118
WE113-72
Bolt M8x50/8.8
2

Other Webb Lawn Mower manuals

Webb WEER33 Installation and operation manual

Webb

Webb WEER33 Installation and operation manual

Webb WER18SPES Installation and maintenance instructions

Webb

Webb WER18SPES Installation and maintenance instructions

Webb WEER36 User manual

Webb

Webb WEER36 User manual

Webb C12E User manual

Webb

Webb C12E User manual

Webb WER16LIHP Installation and operation manual

Webb

Webb WER16LIHP Installation and operation manual

Webb WER21HW Installation and maintenance instructions

Webb

Webb WER21HW Installation and maintenance instructions

Webb H12R User manual

Webb

Webb H12R User manual

Webb WER40HPSFX User manual

Webb

Webb WER40HPSFX User manual

Webb WERR17LIP Installation and operation manual

Webb

Webb WERR17LIP Installation and operation manual

Webb WER46SP User manual

Webb

Webb WER46SP User manual

Webb WER19ALSP User manual

Webb

Webb WER19ALSP User manual

Webb WEH18 User manual

Webb

Webb WEH18 User manual

Webb WERR19SP Installation and operation manual

Webb

Webb WERR19SP Installation and operation manual

Webb WER21HW User manual

Webb

Webb WER21HW User manual

Webb WER21HW Installation and operation manual

Webb

Webb WER21HW Installation and operation manual

Webb Werr17 Installation and maintenance instructions

Webb

Webb Werr17 Installation and maintenance instructions

Webb WER41HP Installation and operation manual

Webb

Webb WER41HP Installation and operation manual

Webb WERR17P Installation and operation manual

Webb

Webb WERR17P Installation and operation manual

Webb WER18HW4 User manual

Webb

Webb WER18HW4 User manual

Webb WER18HP Installation and maintenance instructions

Webb

Webb WER18HP Installation and maintenance instructions

Webb WERR17P User manual

Webb

Webb WERR17P User manual

Webb WEH12R Installation and operation manual

Webb

Webb WEH12R Installation and operation manual

Webb 12530 User manual

Webb

Webb 12530 User manual

Webb WERR19 Installation and maintenance instructions

Webb

Webb WERR19 Installation and maintenance instructions

Popular Lawn Mower manuals by other brands

Murray MP450 Operator's manual

Murray

Murray MP450 Operator's manual

White Outdoor Series 900 Operator's manual

White Outdoor

White Outdoor Series 900 Operator's manual

Simplicity LTH Series Service manual

Simplicity

Simplicity LTH Series Service manual

Ozito LMP-301 operating instructions

Ozito

Ozito LMP-301 operating instructions

Toro Proline 30187 Operator's manual

Toro

Toro Proline 30187 Operator's manual

HUSTLER X-ONE 930503 parts manual

HUSTLER

HUSTLER X-ONE 930503 parts manual

Stihl RM 248 T instruction manual

Stihl

Stihl RM 248 T instruction manual

Craftsman 917.255744 Operator's manual

Craftsman

Craftsman 917.255744 Operator's manual

Stiga MP1 554 Series Operator's manual

Stiga

Stiga MP1 554 Series Operator's manual

Jonsered LGT54 Operator's manual

Jonsered

Jonsered LGT54 Operator's manual

Craftsman 917.270533 owner's manual

Craftsman

Craftsman 917.270533 owner's manual

Husqvarna 2348 LS Operator's manual

Husqvarna

Husqvarna 2348 LS Operator's manual

Craftsman 33748 Operator's manual

Craftsman

Craftsman 33748 Operator's manual

Craftsman 917.275764 owner's manual

Craftsman

Craftsman 917.275764 owner's manual

Snapper EZT18542150ZBVE (2690612) parts manual

Snapper

Snapper EZT18542150ZBVE (2690612) parts manual

Toro TimeCutter MX 4275T Operator's manual

Toro

Toro TimeCutter MX 4275T Operator's manual

Ariens Pro Zoom 54 manual

Ariens

Ariens Pro Zoom 54 manual

Husqvarna AUTOMOWER 310 Operator's manual

Husqvarna

Husqvarna AUTOMOWER 310 Operator's manual

manuals.online logo
manuals.online logoBrands
  • About & Mission
  • Contact us
  • Privacy Policy
  • Terms and Conditions

Copyright 2025 Manuals.Online. All Rights Reserved.