4West Mountain Radio Operating Manual
Status Screen
The LCD status screen operates in two modes:
• scrolling status mode (See Figure 1)
• individual status mode (See Figure 2)
Press the NEXT button while in scrolling status mode to go to the individual status mode.
Press the EXIT button while in individual status mode to return the unit to scrolling status mode. Press either
button at any time to temporarily enable the backlight on the LCD.
The LCD status screen and the NEXT and EXIT buttons generally are used to view unit information and
settings. In order to congure the unit, the user must use a web browser over the network.
Scrolling Status Mode: The LCD will display status of all the connected nodes.
Supply: 13.80 V
Node 1: 0.15 A
Figure 1 – Scrolling status screen
The top line displays the current voltage of the power supply. The bottom line displays the status of one node
at a time for a few seconds before scrolling to the next node. If the node is enabled, it will display the load (in
Amps) drawn from that node. If the node is disabled, it will display OFF in that position.
Individual Status Mode: The LCD status screen will continue to display a screen until the NEXT or EXIT
button is pressed. If NEXT is pressed it will display the next status screen. If EXIT is pressed, it will return to
the scrolling status mode. The following is an example of an individual screen.
Node 1 Descriptive String
Node 1: 0.15 A
Figure 2 – Individual status screen
The top line shows a descriptive name for this node, which can be congured using a web browser over the
network. The bottom line displays the load or whether the node is OFF.
Network Status Screen: While still in Individual Status Mode, press NEXT past each node status to view the
network status information.
Network Status:
192.168.100.220
Figure 3 – Network status screen
In this screen, the second line gives the current network status, and has the following possible values:
• Not Connected – No network connection is found. If using Ethernet, verify that a good ethernet cable
has been connected from a hub/PC to the RIGrunner. If using Wi, verify that all of the WIFI SSID and
security settings are valid for the WIFI router.
• DHCP Not Bound – A network connection has been found, but no IP information has been sent by
a DHCP server. More information about this is detailed in the Networking section of the RIGrunner
manual.
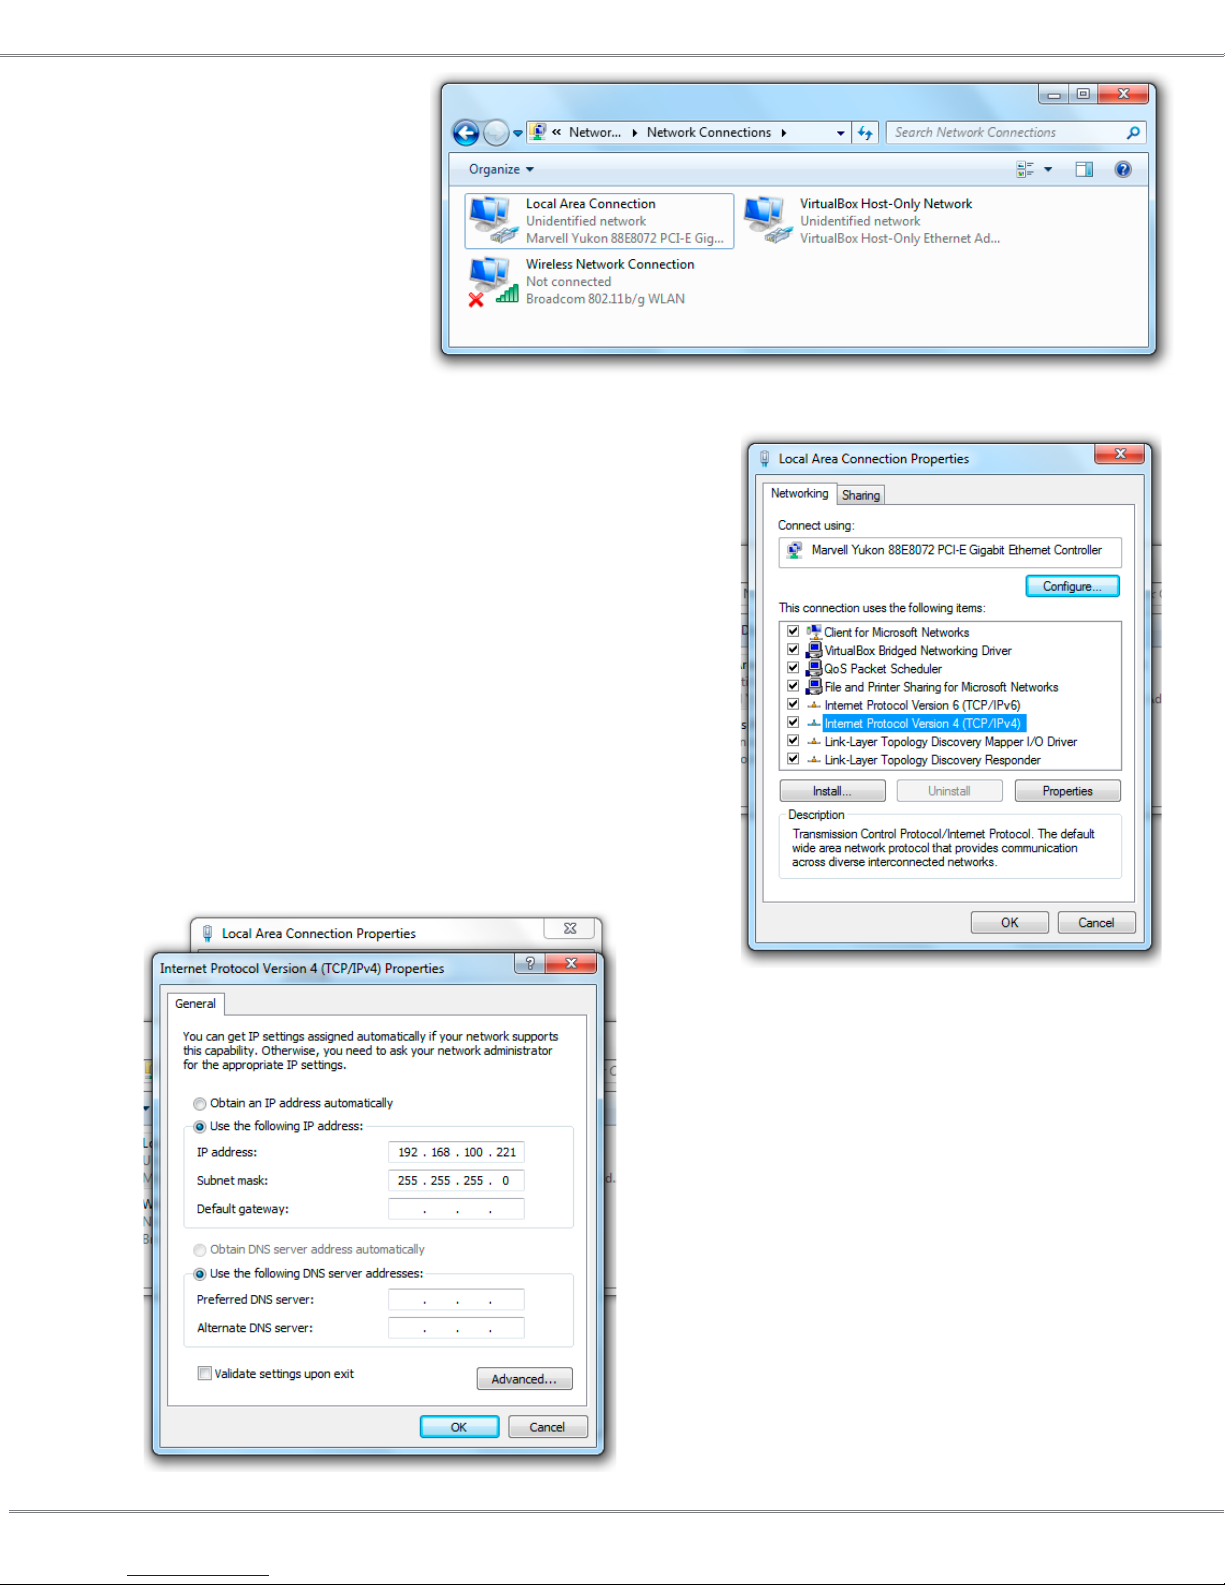
• IP Address – An IP address is a set of 4 numbers, with each number seperated by a ‘.’. This number
represents the address on the network, and is the address that can be open with a web browser. More
information about this is detailed in the Networking section of the RIGrunner manual.