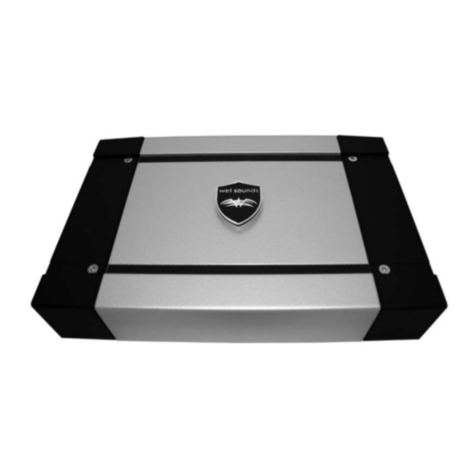
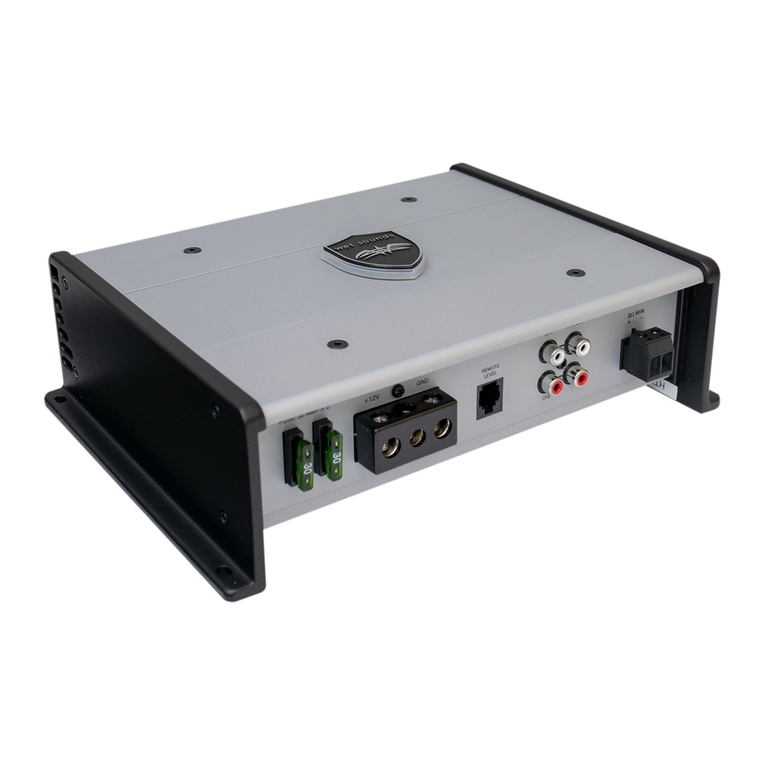
Wet Sounds HTX-1 User manual

HTX-1, HTX-2, HTX-4, HTX-6
OWNER'S MANUAL
HIGH PERFORMANCE MARINE AUDIO
wetsounds.com
HTX SERIES

1
CONGRATULATIONS!
Thank you for purchasing the Wet Sounds Hydro-TechTM;+7;VHULHVDPSOL¿HU
:HW 6RXQGV UHSUHVHQWV WKH XOWLPDWH LQ +LJK 3HUIRUPDQFH 0DULQH $XGLR :HW
6RXQGV+7;6HULHV0DULQH$PSOL¿HUVDUHGHVLJQHGWREHDFRPSOHWHVROXWLRQIRU
HYHU\W\SHRIH[WUHPHPDULQHDSSOLFDWLRQ+7;DPSOL¿HUVXVHVXSHULRUSHUIRUPDQFH
FLUFXLWU\ E\ XWLOL]LQJ &ODVV ' 3RZHU 6XSSOLHV 7KHVH DPSOL¿HUV KDYH H[WUHPH
SRZHURXWSXWSDFNHGLQVLGHDVPDOOFKDVVLVWKHUPDORYHUORDGSURWHFWLRQÀH[LEOH
FURVVRYHUVH[WHQGHGLQSXWV+7;DPSOL¿HUVDUHDZHOOEDODQFHGPDWFKIRUDOORI
WKH:HW6RXQGVSURGXFWV
WARNING
:HEXLOGDOO:HW6RXQGVSURGXFWVWRSOD\DWKLJKYROXPHVIRUH[WHQGHGSHULRGVRI
WLPH<RXUHDUVKRZHYHUDUHQRWGHVLJQHGIRUKLJKYROXPHOLVWHQLQJ7KLVSURGXFW
FDQ HDVLO\ JHQHUDWH KLJK YROXPHV WKDW FDQ SHUPDQHQWO\ GDPDJH \RXU KHDULQJ
:HXUJH\RXWROLPLW\RXUH[SRVXUHWRYHU\KLJKYROXPHVRXQG<RXPD\DOVR¿QG
\RXUVWDWHKDVODZVJRYHUQLQJWKHYROXPHRIDQDXGLRV\VWHPPlease be aware
of all local and state laws in your area. A Properly tuned and operated audio
system will deliver years of enjoyment when used properly.
WARNING
3OHDVHFKHFNWKHLQVWDOODWLRQORFDWLRQEHIRUH\RXEHJLQ'RQRWFXWDQ\RIWKHERDWV
VWUXFWXUH 3D\ FORVH DWWHQWLRQ WR ZKDW LWHPV DUH EHKLQG WKH SDQHOV DQG FDUSHW
2IWHQWKHPDQXIDFWXUHUZLOOKLGHZLUHVPHFKDQLFDORURWKHUHOHFWURQLFGHYLFHVLQ
WKHH[DFWORFDWLRQV\RXZLVKWRLQVWDOOLQ
Wet Sounds HTX Series Owner’s Manual
WET SOUNDS HTX SERIES SUBWOOFER AMPLIFIERS

2
Wet Sounds HTX Series Owner’s Manual
INSTALLATION INSTRUCTIONS
:HW6RXQGV0DULQH$PSOL¿HUVDUHGHVLJQHGIRUHDV\LQVWDOODWLRQLQ\RXUERDW7R
HQVXUHSURSHULQVWDOODWLRQRI\RXUQHZSXUFKDVHSOHDVHIROORZDOOWKHVXJJHVWLRQV
OLVWHG EHORZ If you do not have experience with marine electrical and
PHFKDQLFDO V\VWHPV FRQWDFW D SURIHVVLRQDO LQVWDOOHU 3D\LQJ D TXDOL¿HG
installer is almost always cheaper than paying a dealership to repair your
boat.
LOCATING THE AMPLIFIER
7KH DPSOL¿HU PXVW EH VHFXUHO\ PRXQWHG WR D VROLG VXUIDFH 3OHDVH VHOHFW D
GU\ ORFDWLRQ WR PRXQW \RXU DPSOL¿HU $OO :HW 6RXQGV SURGXFWV DUH GHVLJQHG WR
RSHUDWH LQ KXPLG HQYLURQPHQWV KRZHYHU GLUHFW FRQWDFW ZLWK ZDWHU FDQ GDPDJH
WKHHOHFWURQLFV'RQRWPRXQWWKHDPSOL¿HUWRDQ\DUHDWKDWPD\KDYHH[FHVVLYH
YLEUDWLRQ OLNH D VXEZRRIHU HQFORVXUH 3RVLWLRQ WKH DPSOL¿HU LQ DQ DUHD WKDW
UHFHLYHVVXI¿FLHQWDLUÀRZIRUSURSHUKHDWGLVVLSDWLRQ
SUPPLYING ENOUGH POWER
<RXU DPSOL¿HU GRHV 127 PDNH SRZHU LW FRQYHUWV SRZHU RU FXUUHQW IURP \RXU
ERDWVHOHFWULFDOV\VWHPDQGFRQYHUWVLWLQWRKLJKSRZHUPXVLFDOHQHUJ\,IWKHDPS
FDQ¶WJHWDOOWKHSRZHULWQHHGVLWZLOOQRWSURGXFHLWVIXOORXWSXW<RXU:HW6RXQGV
DPSOL¿HUZLOOSURGXFHIXOORXWSXWORQJHUWKDQRWKHUDPSOL¿HVRQWKHPDUNHWWRGD\
6KRXOG\RXUYROWDJHRUFXUUHQWGURSWRRORZWKHDPSOL¿HUZLOOGURSEHORZWKHUDWHG
RXWSXW0DNHVXUH\RXUERDWVFKDUJLQJV\VWHPLVLQJRRGZRUNLQJRUGHU$Q\KLJK
SHUIRUPDQFH DXGLR DPSOL¿HU ZLOO LQFUHDVH WKH GHPDQG RQ \RXU DOWHUQDWRU DQG
EDWWHU\,I\RXDUHXQVXUHKDYH\RXFKDUJLQJV\VWHPFKHFNHGV\VWHPWHVWLQJE\D
SURIHVVLRQDOWHFKQLFLDQ

RUNNING THE WIRING CABLES
**Always keep the signal cable and the power cables separated to prevent the
possibility
of
inducing noise into the system**
Carefully run the power and the signal cables through the boat. Always keep all
the wire tight and tied down to prevent the power wire from shorting and reduce
the risk
of
fire. A 4 AWG
or
larger wire should be used for power and ground
connections. We recommend a fuse to be installed on the power wire within 18
inches
of
the battery for safety.
AMPLIFIER CONNECTIONS
**Make sure that the +12 volt cable is
NOT
connected
to
the battery while making
any
of
the connections until allthe connections and the fuse are installed**
PowerConnections
The HTX Series is designed for 4 AWG Power wire (+12 V) and Ground wire
(GND).
You
will need to prepare thewire by remove 5/8" on the protective shielding
on the powerand ground wire. Then take a Phillips head screwdriver and back out
the screws on the terminal block. Insert the +12 volt wire into the +12Vside
of
the
terminal block and then tighten the screw back into the terminal block.
You
will
do
the same
for
the Ground wire. See below
TURN
ON
+12V
e GND
Power
12V
(
+)
Ground
(-)
Wet
Sounds
HTX
Series
Owner's
Manual

REMOTE CONNECTION
This amplifier is designed to accept a 12AWG -16AWG wire input on the terminal
block for speaker outputs 1 and 2. (Diagram A). The Remote Turn-on is how the
amplifier knows when to turn on and off. This is typically connected to the remote
output wire on an aftermarket radio. When connecting this amplifier
to
a factory
radio, you will need to find a +12 volt accessory wire that switches on and offwith
the key.
T
URN
ON
+12V
e
GNO
AMPLIFIER SIGNAL INPUTS
Connect the RCAoutputs from the source unit into the inputs
of
the amplifier. The
HTX
Series has 1 pair
of
inputs for each pair
of
channels (6 channel shown below,
other models will vary).
CH1
CH2
INPUT
CH3
CH4
CH5
CH6
There are 2 different input selection switches.
The first is to designate 2
or
4
channel input.
You
can select 2 channel inputwhen only using 1 set
of
RCAinputs
to allow all 4 channels to have output (CH 1,2,3, & 4
).
The next is to turn on
or
off
the inputs for channels 5 & 6.(See below) Ch 5 & 6 can be carried over from
inputs 1 & 2 when in 2CH mode,
or
a separate set
of
RCA cables can be used
in
6CH mode.
**note
if
you only usethe amplifier
in
2 channel input mode you will not have fading
capabilities between front and rear outputs.**
2CH 4CH 2CH
6CH
CH3-4
CHS-6
INPUT MODE
Wet
Sounds
HTX
Series
Owner's
Manual

SPEAKER TERMINAL INPUTS
The HTX Series utilizes removable speakerterminal blocks for easier installations
and stronger power connections. The terminal blocks are designed to accept 12
AWG- 16AWG speaker wire. When preparing the wire you will need to strip 5/8"
of
the cables protective shielding. Then take a small Phillips or flat head screwdriver
and back out the screw on the terminal block. Insert the speaker wire into the
terminal block and then tighten the screw back into the terminal block. (DO NOT
OVERTIGHTEN) (See below)
20MIN
+
CH1
- + CH2 -
POWER INDICATOR
The amplifier is equipped with a dual illumination LED
on
the top
of
the amplifier
that the Wet Sounds logo badge is mounted on. This amplifier is equipped with an
advanced diagnostic system controlled by a microprocessor.
In
the event that the
unit goes into protection for any reason itwill flash a diagnostic code. The different
sequences indicate the "Code" for faster trouble shooting. When the amplifier first
turns on the LED will flash blue. Once the amplifier is ready for use the LED light
will change to solid blue. Ifthe amplifier is
in
protection mode (over voltage, under
voltage, DC offset, thermal heating
or
speaker short) the LED light will flash a red
diagnostic sequence. See
troubleshooting
section
for
further
detail.
Wet Sounds HTXSeries
Owner's
Manual

6
1. Channel 3-4 Input Switch ± $GMXVWLQJ WKLV VZLWFK WR FKDQQHO LQSXW DQG
FRQQHFWLQJRQO\WKH&+LQSXWVDOORZVWKHDPSOL¿HUWRKDYHFKDQQHORXWSXW
2. Channel 5-6 Input Switch±$GMXVWLQJWKLVVZLWFKWXUQVRQRIIWKH5&$LQSXWVIRU
FKDQQHOV
3. Gain Control 1-2 -7KLVLVWKHLQSXWVHQVLWLYLW\JDLQFRQWUROIRUFKDQQHOV
4. Variable Crossover 1-2±%XLOWLQGEFURVVRYHUZLWKIUHTXHQFLHVEHWZHHQ+]
±+]
5. Crossover Switch 1-27KH+3)DWWHQXDWHVORZIUHTXHQFLHVDQGLVXVHGZLWK
PLGUDQJHVSHDNHUVDQGWZHHWHUV/3)DWWHQXDWHVKLJKIUHTXHQFLHVDQGLVXVHGIRU
VXEZRRIHUV7KLVFRQWUROVFKDQQHOV
6. Gain Control 3-4±7KLVLVWKHLQSXWVHQVLWLYLW\JDLQFRQWUROIRUFKDQQHOV
7. Variable Crossover 3-4±%XLOWLQGEFURVVRYHUZLWKIUHTXHQFLHVEHWZHHQ+]
±+]
8. Crossover Switch 3-47KH+3)DWWHQXDWHVORZIUHTXHQFLHVDQGLVXVHGZLWK
PLGUDQJHVSHDNHUVDQGWZHHWHUV/3)DWWHQXDWHVKLJKIUHTXHQFLHVDQGLVXVHGIRU
VXEZRRIHUV7KLVFRQWUROVFKDQQHOV
9. Gain Control 5-6±7KLVLVWKHLQSXWVHQVLWLYLW\JDLQFRQWUROIRUFKDQQHOV
10. Variable Crossover 5-6 ± %XLOW LQ GE FURVVRYHU ZLWK IUHTXHQFLHV EHWZHHQ
+]±+]
11. Crossover Switch 5-67KH+3)DWWHQXDWHVORZIUHTXHQFLHVDQGLVXVHGZLWK
PLGUDQJHVSHDNHUVDQGWZHHWHUV/3)DWWHQXDWHVKLJKIUHTXHQFLHVDQGLVXVHGIRU
VXEZRRIHUV7KLVFRQWUROVFKDQQHOV
12. Power LED Indicator and Logo
AMP DIAGRAM WITH LEGEND
Wet Sounds HTX Series Owner’s Manual
1 2 3 4 5 6 7 8 9 10 11 12

1
2
3
4
5 6 7 8
7
1. Fuses ±7KHIXVHVSURWHFWWKHDPSOL¿HUDJDLQVWLQWHUQDOHOHFWULFDOGDPDJHDQG
DUH PHDQW WR SURWHFW WKH DPSOL¿HU RQO\$OO RWKHU SRZHU FRQQHFWLRQV VKRXOG EH
fused at the source
2. (+) 12 Volt Power ± &RQQHFW WKLV WHUPLQDO WKURXJK D )86( RU &,5&8,7
%5($.(5WRWKHSRVLWLYHWHUPLQDORIWKHYHKLFOHEDWWHU\RUWKHSRVLWLYHWHUPLQDORI
DQLVRODWHGDXGLRV\VWHPEDWWHU\
3. Remote Turn On ± 7KLV WHUPLQDO WXUQV RQ WKH DPSOL¿HU ZKHQ YROW LV
DSSOLHG WR LW &RQQHFW LW WR WKH 5HPRWH 7XUQ RQ OHDG RI WKH KHDG XQLW RU VLJQDO
VRXUFH
4. Ground ±&RQQHFWWKLVWHUPLQDOGLUHFWO\WRWKHEDWWHU\XVLQJWKHVKRUWHVWZLUH
QHFHVVDU\WRPDNHWKLVFRQQHFWLRQ$OZD\VXVHZLUHRIWKHVDPHJDXJHRUODUJHU
WKDQWKHYROWSRZHUZLUH
5. RCA Inputs 5&$,QSXW-DFNV²$FFHSWVOLQHOHYHORXWSXWVIURPVRXUFHXQLWVRU
VLJQDOSURFHVVRUVDWYROWDJHVEHWZHHQP9DQGYROWV
6. Speaker Terminal Output Block 1-2±7KLVLVWKHVSHDNHUFRQQHFWLQJEORFNIRU
FKDQQHOV
7. Speaker Terminal Output Block 3-4±7KLVLVWKHVSHDNHUFRQQHFWLQJEORFNIRU
FKDQQHOV
8. Speaker Terminal Output Block 5-6±7KLVLVWKHVSHDNHUFRQQHFWLQJEORFNIRU
FKDQQHOV
AMP DIAGRAM WITH LEGEND
Wet Sounds HTX Series Owner’s Manual

8
%HFDXVHRIWKHZLGHUDQJHRIKHDGXQLWUDGLRRXWSXWFRQ¿JXUDWLRQVDOO:HW6RXQGV
DPSOL¿HUVKDYHDQDGMXVWDEOHLQSXWVHQVLWLYLW\RU³*$,1´7KHJDLQLV127DYROXPH
RUDSRZHUOLPLWLQJFRQWUROVLPLODUWRDWKURWWOH,WPDNHVWKHDPSOL¿HUPRUHVHQVLWLYH
WRLQSXW IURPWKHVWHUHR:KHQWKHJDLQLVWXUQHGXSWKHDPSOL¿HUZLOOUHDFKIXOO
RXWSXWDWORZHUYROXPHOHYHOVRQWKHKHDGXQLWUDGLR$OVRZKHQWKHJDLQLVVHWWRR
KLJKWKHDPSOL¿HUEHFRPHVPXFKPRUHVHQVLWLYHWRQRLVHIURP\RXUERDWVHOHFWULFDO
V\VWHP
Adjusting the Gain
<RXZLOOQHHGDVPDOOÀDWKHDGVFUHZGULYHUDQGVHOHFWWKHVW\OHJHQUHRIPXVLF
\RXSULPDULO\HQMR\OLVWHQLQJWR
Here are 3 easy steps to follow.
1. 7XUQWKHJDLQDOOWKHZD\FRXQWHUFORFNZLVHWRWKH³PLQ´SRLQWRQWKHDPS
2. ,QFUHDVHWKHKHDGXQLWUDGLRYROXPHWRôRIWKHPD[LPXPYROXPHRXWSXWZKLOH
SD\LQJ\RXUIDYRULWHVW\OHJHQUHRIPXVLF
3. *HQWO\WXUQWKHJDLQFORFNZLVHWRLQFUHDVHWKHDPSOL¿HUVRXWSXWXQWLOWKH
GHVLUHGOHYHORIRXWSXWLVDFKLHYHG
**You will repeat these steps for both the front and rear channels
independently**
You should not hear any distortion in your speakers at this level,
if you do, slowly turn down the gain until distortion is no longer
present. If you need further assistance please contact Wet
Sounds Technical Services Department.
Crossover Controls
7KLVDPSOL¿HULVGHVLJQHGWRSOD\IUHTXHQFLHVEHWZHHQ+]DQG+]7KH
DPSOL¿HULVHTXLSSHGGLIIHUHQWRSWLRQDOVHWWLQJV+LJK3DVV+,RU/RZ3DVV
/26HHEHORZ
“High-Pass”
GHVLJQHGWRSOD\RQO\WKHIUHTXHQFLHVDERYHZKHUHWKHFURVVRYHULVVHWDW
“Low Pass”
GHVLJQHGWRSOD\RQO\WKHIUHTXHQFLHVEHORZZKHUHWKHFURVVRYHULVVHWDW
Input Selection
SETTING UP THE AMPLIFIER
Wet Sounds HTX Series Owner’s Manual
9
TROUBLESHOOTING
1. &KHFN\RXUIXVHDQGUHSODFHLIQHFHVVDU\
2. &RQ¿UP\RXU*URXQGZLUHKDVDJRRGFRQQHFWLRQ
3. 0DNHVXUH\RXUUHPRWHZLUHDQGSRZHUZLUHKDV9ROWV
4. 0DNHVXUH\RXUEDWWHU\KDVYROWV
5. &RQ¿UPWKDWWKHDPSOL¿HU/('FRORULVEOXH,IWKHOLJKWÀDVKLQJLVUHGWKDQWKH
DPSOL¿HULVLQSURWHFWLRQPRGH,IWKHOLJKWLVUHGFKHFNWKHIROORZLQJLWHPVEHORZ
A. 6HHZKDWVHTXHQFHLVÀDVKLQJE\UHIHUHQFLQJWKHFKDUWEHORZ
B. &RQ¿UPWKDWDWKHVSHDNHULVQRWEORZQ
C. &RQ¿UPWKDWWKHUHDUHQRORRVHZLUHVWKDWFRXOGEHJURXQGLQJRXWWKH
DPSOL¿HU
D. &KHFNWKDWWKHDPSOL¿HUKDVVXI¿FLHQWDLUFLUFXODWLRQZKHUHLWLV
ORFDWHG,QVXI¿FLHQWDLUÀRZDQGRYHUGULYLQJWKHDXGLRV\VWHPFRXOG
UHVXOWLQWKHDPSOL¿HUJRLQJLQWRSURWHFWLRQWRSUHVHUYHWKHDPSOL¿HU
,I\RXDUHH[SHULHQFLQJSUREOHPVZLWK\RXUDPSOL¿HUDIWHU
installation follow these procedures to try and remedy the
problem.
Wet Sounds HTX Series Owner’s Manual
For HTX 4, 6 ampliers, a short will only shut down the channels which are in fault. The other channels will
contiunue to play. After a fault connection is cleared, the error code will continue to ash, while the logo is
still illuminated blue. Please contact Tech Support for additional assistance, questions, etc.
Wet Sounds HTX Fault Codes
Circuit Board

BRIDGED AUDIO RCA CONFIGURATION
When connecting two speakers
in
bridged mode on channels 1-4 on the HTX-
4 or HTX-6, the left and right RCA's must be split to retain stereo separation.
This means you will have left audio out
of
the left speaker and right audio out
of
the right speaker.
You
must also switch to 4CH on the input mode section
of
the control panel on top
of
the amplifier (See the switch image below for an
example). Ifyou choose not to configure using this method and just use 2CH
mode, then both speakers will play in mono and not stereo.
FUSE
25AMP
X 2
RCA
Left
RCA
HTX-6
Control
Panel
2CH I4CH I
CH3-4
1-· -1
2CH
6CH
CHS-6
INPUT MODE
HTX-4
Connection
Panel
Left
RCA
Y-Splitter
Left RCA Y-S
pli
tt
er
+
4!18RIDGEO -
Two dual male RCAY-Splitters are
required
for
this
configuration.
Please
contact
Wet
Sounds
Technical
Support
at 877.938.7757
if
you
need
any
assistance
or
how
to
bridge
your
HTX Series Amplifier.
Wet
Sounds
HTX
Series
Owner
's
Manual

11
Wet Sounds HTX Series Owner’s Manual
SAMPLE SYSTEM SETUPS
HTX-2
HTX-4

12
Wet Sounds HTX Series Owner’s Manual

HTX-6
HTX-6

HTX-1 63(&6
330W X 1 @ <1.0% THD
650W X 1 @ <1.0% THD
0.2V-6.0V
Wet Sounds HTX Series Owner’s Manual
13
´
´
´
´
´
´
´

HTX-2 63(&6
150W X 2 @ <1.0% THD
300W X 2 @ <1.0% THD
0.2V-6.0V
STEREO
STEREO
600W X 1 @ <1.0% THD
MONO 4
20Hz-20KHz
600W X 1 @ <1.0% THD
50Hz-250Hz
50Hz-250Hz
60dB 90dB
Wet Sounds HTX Series Owner’s Manual
14
´
´
´
´
´
´
´

4x100
4x150
2x300
HTX-4
Wet Sounds HTX Series Owner’s Manual
15
HTX-4 63(&6
´
´
´
´
´
´
´

13.23”
12.83”
12.05”
7.126”
6.25”
2.79”
3.00”
6x100
6x150
3x300
Wet Sounds HTX Series Owner’s Manual
16 HTX-6 63(&6
´
´
´
´
´
´
´

LIMITED WARRANTY
Length and limits of Warranty
:HW6RXQGVZDUUDQWVWKLVSURGXFWWREHIUHHRIGHIHFWVLQPDWHULDORUZRUNPDQVKLS
IRU\HDUIURPWKHGDWHRISXUFKDVH:HW6RXQGVZDUUDQW\DSSOLHVH[FOXVLYHO\
WR WKH RULJLQDO SXUFKDVHU QRW WUDQVIHUDEOH DQG WKH DPSOL¿HU PXVW EH SXUFKDVHG
IURP DQ$XWKRUL]HG :HW 6RXQGV 5HWDLOHU ZLWKLQ WKH 8QLWHG 6WDWHV$OO SURGXFWV
SXUFKDVHGRXWVLGHRIWKH8QLWHG6WDWHVDUHFRYHUHGE\WKH$XWKRUL]HG'LVWULEXWRU
RU2(0VXSSOLHU$Q\DQGDOOZDUUDQWLHVQRWWRH[FOXGHPHUFKDQWDELOLW\RU¿WQHVV
DUHOLPLWHGLQWKHGXUDWLRQWR\HDU7KLVZDUUDQW\JLYHV\RXVSHFL¿FOHJDOULJKWV
DQGWKRVHULJKWVPD\YDU\IURPVWDWHWRVWDWH
Items not covered
6HULDOQXPEHUVWKDWDUHGHIDFHGDOWHUHGRUUHPRYHG
$Q\SURGXFWSXUFKDVHGRXWVLGHWKH8QLWHG6WDWHV
$Q\FRVWUHODWHGWRUHPRYDOLQVWDOODWLRQVKLSSLQJRIWKHSURGXFW
'DPDJHFDXVHGE\DEXVHRUDFFLGHQWWKHIWZDWHUVKLSSLQJRUQHJOHFW
6HUYLFHSHUIRUPHGE\DQ\RQHRWKHUWKDQ:HW6RXQGVRUD$XWKRUL]HG:HW6RXQGV
6HUYLFH&HQWHU
6XEVHTXHQWGDPDJHWRDQ\RWKHUFRPSRQHQWV
0LVUHSUHVHQWDWLRQVE\WKHVHOOHU
)DLOXUHWRIROORZLQVWDOODWLRQLQVWUXFWLRQV
&RVPHWLFGDPDJH
Obtaining Service
6KRXOG VHUYLFH EH QHFHVVDU\ :HW 6RXQGV DW LWV GLVFUHWLRQ UHSODFH RU UHSDLU
WKHGHIHFWLYHHTXLSPHQWZLWKQHZRUUHIXUELVKHGSURGXFW7RUHFHLYHVHUYLFHWKH
RULJLQDOLQYRLFHRISXUFKDVHZLWKWKHFXVWRPHUQDPHSURGXFWSXUFKDVHGUHWDLOHU
QDPH DQG DGGUHVV ZLWK GDWH RI SXUFKDVH PXVW EH SURYLGHG WR REWDLQ ZDUUDQW\
VHUYLFH&RQWDFW:HW6RXQGVGLUHFWO\DWFRQWDFWFXVWRPHUVHUYLFH
WRREWDLQ5$5HWXUQ$XWKRUL]DWLRQ<RXDUHUHVSRQVLEOHIRUWKHVKLSSLQJRIWKH
SURGXFWWR:HW6RXQGV
Wet Sounds HT-X Series Owner’s Manual
17

w e t s 0 u
WET
SOUNDS INC.
www.wetsounds.
com
877-938-7757
n d
10621 S Sam Houston PKWY W • Suite 100
Houston, Texas 77071
USA
USA
s
Wet
Sounds
HT-X Series
Owner's
Manual
This manual suits for next models
3
Table of contents
Other Wet Sounds Amplifier manuals

Wet Sounds
Wet Sounds HT-4 User manual

Wet Sounds
Wet Sounds HT-2 User manual

Wet Sounds
Wet Sounds SINISTER SDX 2500 User manual

Wet Sounds
Wet Sounds SD2 User manual

Wet Sounds
Wet Sounds STX MICRO-1 User manual

Wet Sounds
Wet Sounds HT-2 User manual

Wet Sounds
Wet Sounds HT-1 User manual

Wet Sounds
Wet Sounds HT-4 User manual

Wet Sounds
Wet Sounds VENUE Series User manual

Wet Sounds
Wet Sounds SYN-DX Series User manual