Wharfedale Pro Crystal-4.1 User manual
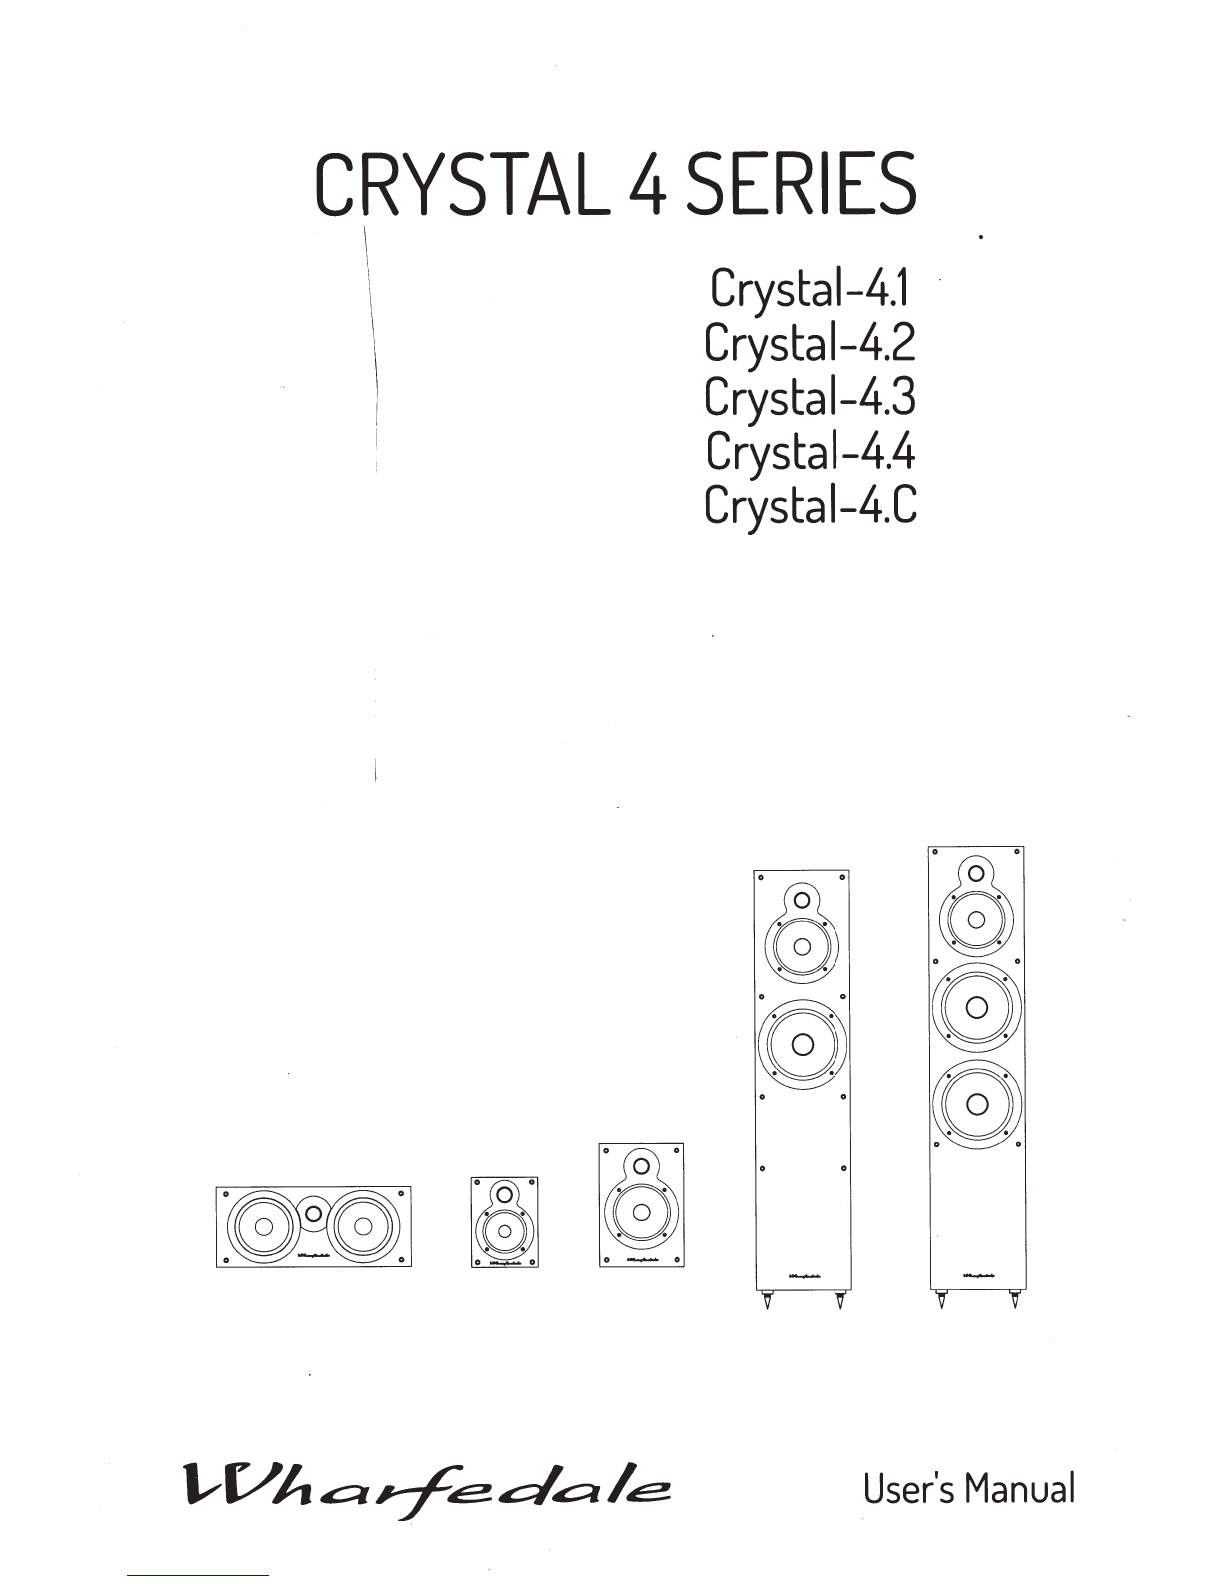
CRYSTAL
4
SERIES
0
0
~~~
0-
0
o
-o
Crystal-4.1
·
Crystal-4.2
Crystal-4.3
Crystal-4.4
Crystai-4.C
0
0 0
0
0
0 0
0
0 0
~
0 0
0 0
'V' 'V'
User's
Manual
USER
INSTRUCTIONS:
Crystal4
Series
IMPORTANT
SAFETY
INFORMATION
A
BEFORE
INSTALLING
THIS
PRODUCT
READ
ALL
THESE
INSTRUCTIONS!
This
symbol
indicates that there are important operating and maiJ,tenance
instructions
in
the literature accompanying this unit. !
Read these instructions. Keep these instructions. Heed allwarnings. Follow allinstr/uctions.
Before making any connections, switch allthe units
in
yoursystem offat the mains)
I
Set thevolume control at minimum when you switch on your system or change
so~rces
and turn the level
up
gradually.
DO
NOT use your amplifierat
full
volume.
Ensure that allloudspeakers
in
the system are correctlywired.
DO
NOT subjectyour loudspeakers to excessive cold, heat. humidity
or
sunlight.
Loudspeakers should not be placed directlyfacing other hi-fi units, or share the
sar.:ne
shelf
or
cabinet.
DO
NOT place heavy objects on top
of
loudspeakers.
Some manufacturers forbid the placing
of
objects on top
of
theirTV sets. CheckyourTV handbook before
installing the speaker directlyon yourTV set. Consult yourTV dealer
if
you are
in
any doubt.
DO
NOT connect speakerterminals to the mains supply.
DO
NOT dismantle the loudspeaker.There
a~e
no userserviceable parts inside it ar:'d you
will
void thewarranty.
Refer allservicing to qualified service personnel. Servicing
is
required when the apjJaratus has been damaged
in
anyway, the apparatus has been exposed to rain
or
moisture, does not operate normally, or has been dropped.
Caution: Changes or modifications not expressly approved bythe manufacturer could void the user's authority to
operate this device.
Unpacking
After taking
out
the
top
packing piece, lift the loudspeakers from the carton.
Do
NOT lift a loudspeaker
out
using
the protective bad. After unpacking remove allthe protective bags from the loudspeakers and store
or
dispose
of
them safely.
The Crystal-4.3 and Crystal-4.4 are heavy. If
you are unsure
of
yourability to unpack and manoeuvre them safely,
get
someone to helpyou.
Check allitems after unpacking. Ifany item
is
missing
or
damaged, immediatelycontactyourWharfedale dealer.
Retain the packaging. Ifyou dispose
of
the packing, followallrecycling regulations
in
your
area.

USER
INSTRUCTIONS:
Crystal4
Series
Preparing
The
Crystal-4.3
and
Crystal-4.4
Loudspeakers
Attaching
The
Spikes
Place a
soft
cloth on the
floOI'
to
protect
the
speaker.
Invert
the
loudspeakerand place it on the cloth.
Thread a locking nut
two-thir~s
of
theway
up
the
spike. Thread each spikeasseh1bly intoa spike mount.
Tighten finger
tight
so that spike
is
secure
but
not
locked in place.
Levelling
The
Loudspeaker
Invert
the
loudspeakerand place int carefully on
the
floor.
If
the
floor is not perfectly levelyou
will
find that
onespike is
off
the
ground. Starting with this spike,
unscrew
it
so
that
it
touches
the
floor. Move
the
other
spikes in and
out
so until
the
speakeris levelfront and
back and sideways.
Now
tighten
the
huts
to
lock the
spikes firmly in position.
Spike
Seats:
A set
of
spike seats is provided for
sensitive floors. Place a seat undereach spike before
you
level
the
speakers.
Caution:
Spikes
Are
Sharp
Make sure
that
there are
no
wires or hidden obstacles
that
could
be
damaged
by
the
spikes in
the
immediate operationalarea
of
the
speakers.
NEVER
drag a loudspeakeron its spikes. Always liftit.
If
the
item is heavy
get
assistance.
2
USER
INSTRUCTIONS:
Crystal4
Series
Positioning
Stereo
Loudspeakers
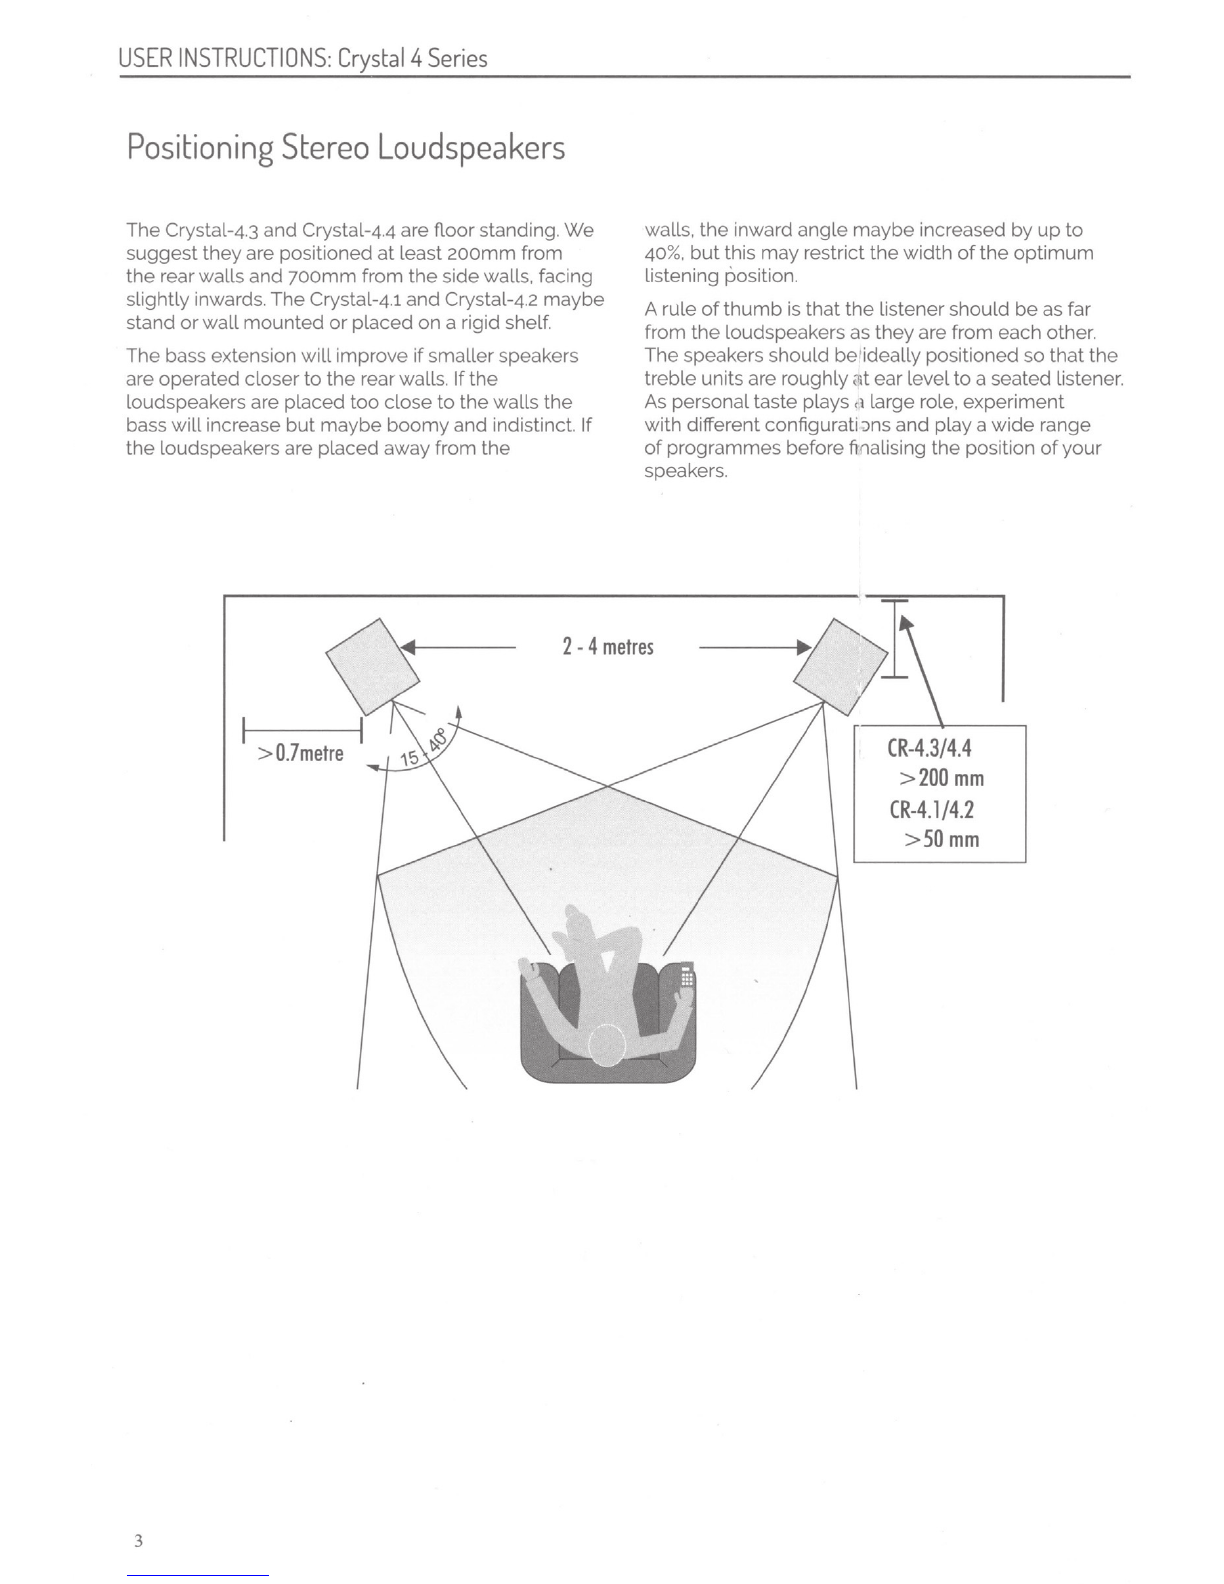
The Crystal-4.3
and
Crystal-4.4 are floor standing. We
suggest
they
are positioned
at
least
zoomm
from
the rear walls and
700mm
from
the
sidewalls, facing
slightly inwards. The Crystal-4.1 and Crystal-4.2 maybe
stand
or
wall
mounted
or
placed on a rigid shelf.
The bass extension
will
improve
if
smallerspeakers
are operated closer
to
the
rearwalls.
If
the
loudspeakers are placedtoo close
to
the
walls the
bass
will
increase
but
maybe
boomy
and indistinct.
If
the
loudspeakers are placed awayfrom the
walls. the inward
angle
maybe increased
by
up
to
40%.
but
this
may
restrict
the
width
of
the optimum
listeni
ng
position.
A rule
of
thumb
is
that
the
listenershould
be
as far
from
the
loudspeakers
as
theyare from each other.
The speakers should
be
·ideally positioned so that the
trebleunitsare roughlyillt earlevel
to
a seated listener.
As
personaltaste plays c
tlarge
role, experiment
with differentconfigurati:ms and play a
wide
range
of
programmes before
fi11alising
the position
of
your
speakers.
2- 4
metres
I I
>0.7metre
3
>200
mm
CR-4.1/4.2
>50mm

USER
INSTRUCTIONS:
Crystal4
Series
Positioning
Home
Cinema
Loudspeakers
I
>2
00mm
I.
•
>2
00mm
•
•
-·
I
I
I
II
··
-'
I
2-4
metres---.-+
I >
150
mm
iij@li
5.1
SYSTEM
2-4
metre~---.-+
I>
150
mm
MiJIIOI
7.1
SYSTEM
II
WALL
MOUNTING
POSITIONS
400mm
5.1
Positioning
Place the front speakers
as
shown. Front loudspeakers
should
be
placed awayfrom thewalls for best results.
Angling
the
speakers inward slightlywillimprove
stereo images
but
too
extremean angle
will
impair
the
moviesound.
All
the speakerswith
the
exception
of
the Crystal-4.
C
must
be
placed at least 450mm from a
CRT
TV. Flat
panelsare unaffected.
The Crystal-4.C centre speakercan
be
placed above
or
below
the
TV
screen.
Subwooferroom positioning
is
not
critical
but
we
recommend
that
it
is
placed in front
of
the listening
seat. Never operate
the
subwooferwithin 450mm
of
a
conventional
TV
screen.
The surround speakers should
be
placed above and
behind
the
listening seat. Theymay be mounted on
the sidewalls
or
on
the rearwalls
but
always behind
a listener.Do
not
operate
them
within 450mm
of
a
conventional
CRT
TV.
If
the
distance between
the
sidewalls
is
too
great,you
could
use a second pair
of
stand mounted orfloor
standing loudspeakers, as the surround loudspeakers
placed
as
shown in
the
drawing opposite.
7.1
Positioning
If
you are using a
7.1
system. the back loudspeakers
must
be
at least1metre behind the listening seat.
Wall
Monting
Positions
If
you arewallmounting the centre and effects
loudspeakers
we
recommend thatthey
be
mounted
as shown.
The Crystal-
4.1
has integralspeakermounts.
To
wall
mount
the
Crystal-4.C
we
recommend thatyou
consultyourdealer
to
advise you on a suitable
wall
bracket.
Wall
mounting
the
centre loudspeaker
below
the
screen
is
not
recommended unless the screen
is
mounted significantlyabove eyelevel. Consultyour
TV user guidefor preferred placementoptions
4

USER
INSTRUCTIONS:
Crystal4
Series
Doby
Labs
Recommended
7.1
Placement
Left
Front
I
Centre
~~
~
~
RightFront
left
Surround
•
(Single
bock
channe
l
for
?J
~ound)
150°
Left
Bock
I I
I I
Wall
Mounting
The
Crystal-4.1
Loudspeakers
The
crossover terminalpanel
of
the
Crystal-4.1
loudspeakeris providedwith an integralkeyhole slot
for
wall
mounting.
Wall
mounting should
be
carried
out
by
licensed sound contractors
or
technicians
with appropriate qualifications and experience.
All
installations and wiring should
comply
with the
standards laid
down
by
the
competent
authority
in the countryand place
of
installation. Beforeyou
a
ttempt
wall
or
ceiling mounting, ensure
the
surface
is stable and strong enough to supportthe
weight
of
the speakerand mounting hardware.
You
will
need 1No.8 screwand matching
wall
plug
to
attach each loudspeaker
to
the
wall. These are
the responsibility
of
the installer
who
should
supply
suitable fixings forthis purpose.
Drillone
6mm
hole in the
wall
ata suitable height
off
the floor. Fix a suitable No8 round head screwfirmly
into each holeusing appropriate
wall
plugs.Leave
a
stub
of
7mm
protruding from
the
wall. Align the
keyhole slotin
the
crossover
panel
over
the
screw
head
and
carefully lower
the
unitonto
the
screw.
Remove
the
loudspeaKers from
the
wall
readyfor
connection. Afterconnection theycan
be
re-installed
on
the
wall.
5
b
0
Right
Surround
90°
•
Back
CR-4.1
(Detail)
Connecting
Your
Loudspeakers
CR-4.1
b c
+
Amplifier-
Speaker
Connections:
USER
INSTRUCTIONS:
Crystal4
Series
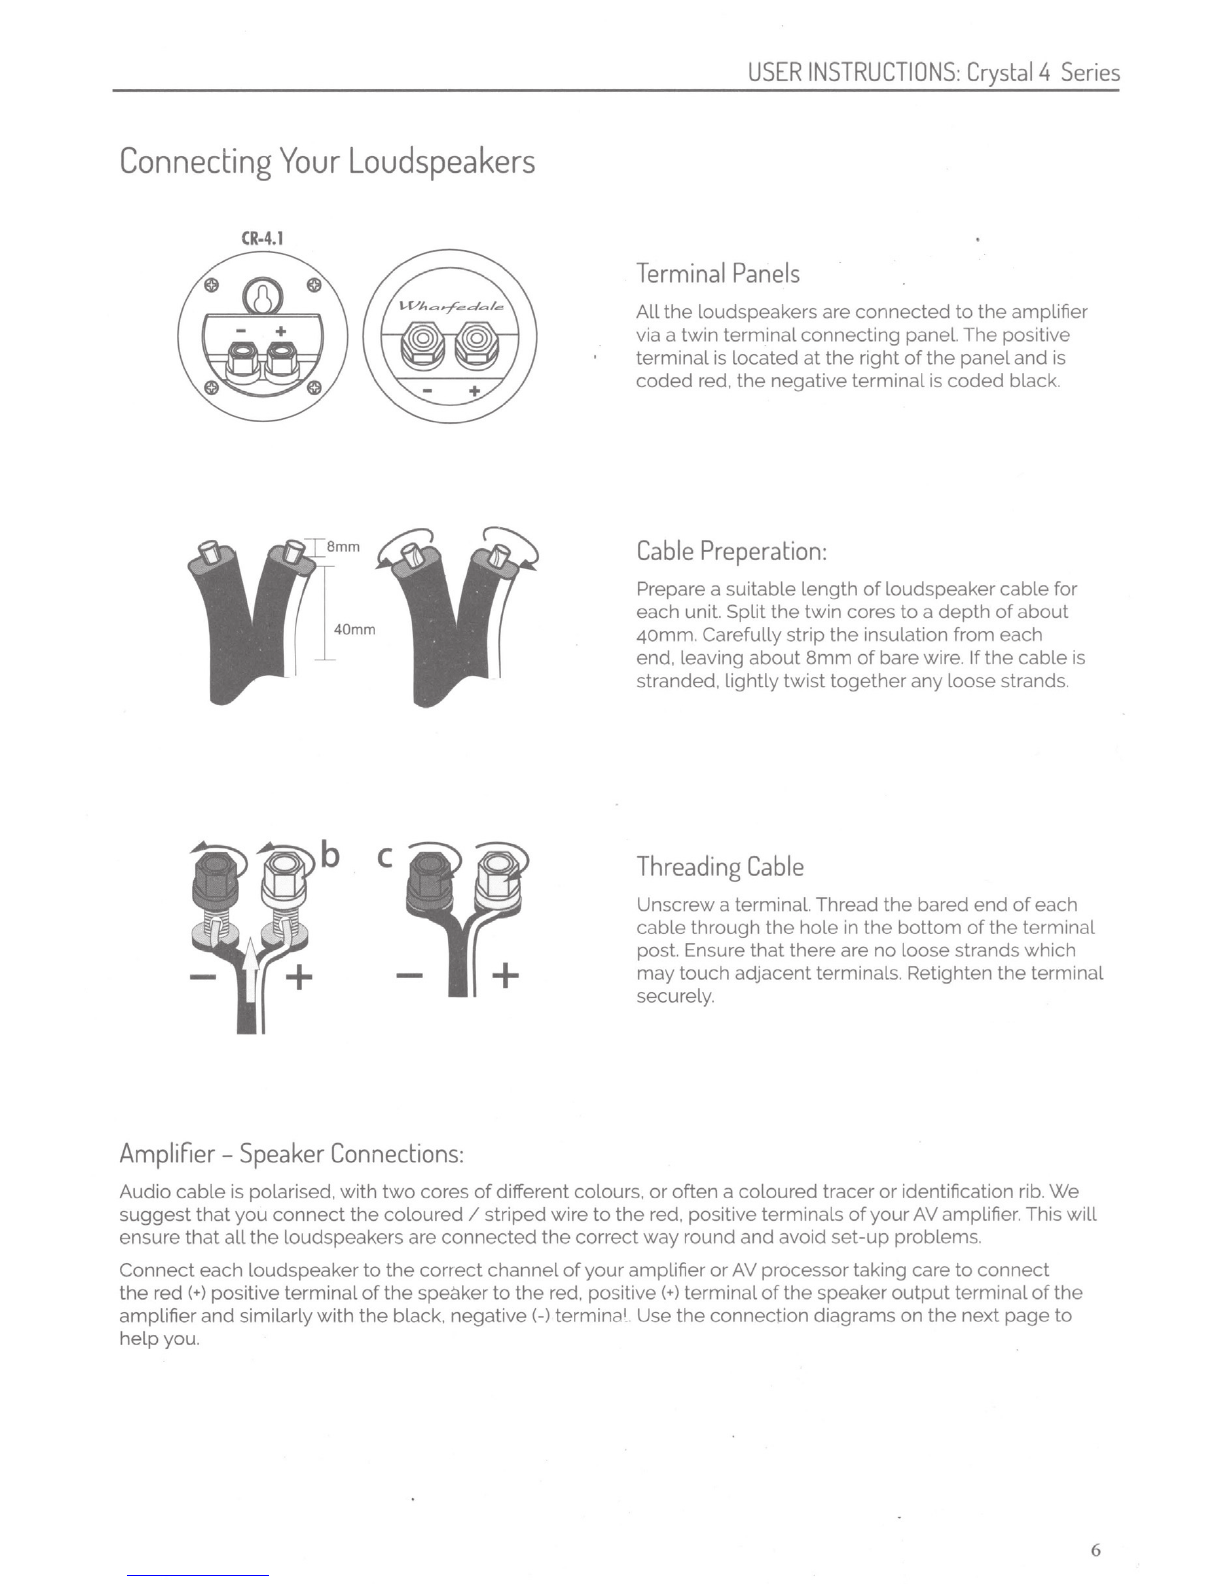
Terminal
Panels
All
the
loudspeakersare connected
to
the amplifier
via a twin terminalconnecting panel.
The
positive
terminalis located
at
the right
of
the paneland is
coded
red. the negative terminalis
coded
black.
Cable
Preperation:
Prepare a suitable length
of
loudspeakercable for
each unit. Split the twin cores
to
a
depth
of
about
40mm. Carefully strip
the
insulation from each
end, leaving
about
8mm
of
barewire.
If
the
cable
is
stranded, lightlytwist
together
anyloose strands.
Threading
Cable
Unscrewa terminal. Thread
the
bared
end
of
each
cable
through the hole in
the
bottom
of
the terminal
post. Ensure
that
there are
no
loose strands which
may
touch adjacent terminals. Retighten
the
terminal
securely.
Audio
cable
is polarised.
with
two
cores
of
differentcolours.
or
often a coloured tracer
or
identification rib.
We
suggest that you
connect
the coloured I striped wire
to
the
red. positive terminals
of
yourAV amplifier.This
will
ensure
that
all
the
loudspeakers are connected
the
correct
way round and avoid
set-up
problems.
Connect each loudspeaker
to
the correct channel
of
your
amplifier
or
AV processortaking care to
connect
the
red (
+)
positive terminal
of
the
speaker
to
the red. positive (
+)
terminal
of
the speaker
output
terminal
of
the
amplifierand similarly
with
the black. negative
(-)
termina1 Use
the
connection diagrams on the next
page
to
help
you.
6

USER
INSTRUCTIONS:
Crystal4
Series
Connecting
Your
Loudspeakers
Stereo
Connection
5
Channel
Connection
.----:f.
..[)
STERfO
AMPUFIER
L.
.R
ROOM
PLACEMENT
[LJJ
Iii;·~
=j
------
~
~--
--~--~
L.
~
.R
~L
n A n
SR
111
7
Channel
Connection
7
I"
I
L.U-1
I "
ROOM
PLACEMENT
• • •
ROOM
PLACEMENT
~
[L_JJ M
• •

USER
INSTRUCTIONS:
Crystal4
Series
Setting
Up
A
Stereo
System
· Ensure that the Listening seat
is
centralto the loudspeakers.
Play some music with which you are familiar. Adjust
the
speakers for the
optimum
performance.
You
will
find that
a
few
degrees more
or
less 'toe
in'
can effect the sound dramatically.
The sound should
be
well
balanced with a firm
bass.
Ifthe sound lacks definition orthe bass
is
indistinct. the
Setting
Up
An
AV
System
A
Please read the relevant sections
of
your
AV
amplifier manualand familiarise yourselfwith thevarious
..
issues. Ifyou are unsure. consultyour dealer for help.
MostdigitalAV processors require you
to
specify
the
size
of
speakers
in
alloperationalchannels. These are
usually 'Large'
or
'Small'. Set allthe bookshelfspeakers to 'Small'. This
will
directallthe bass
in
the system to the
subwooferfor clean,
deep
and louderbass. The floorstanding loudspeakers should be set to 'Large'. It
is
normal
for a centre and effects speakers to be set to 'Small'. Set the 'Subwoofer' option n the processor to
'On'.
Ifthere
is
no subwoofer
in
the system set allthe speakers to 'Large' and set the subwooferto
'Off'.
When the Loudspeaker settings are finalised,
put
the
AV
amplifier into its Test'
mode
(see your processor
instruction) and adjust the
Levels
untilallchannels are equally
Loud.
Troubleshooting
IF
YOUR
LOUDSPEAKERS
ARE
NOT
WORKING
SATISFACTORILY,
PLEASE
WORK
THROUGH
THE
TABLE
BELOW
BEFORE
CONTACTING
YOUR
DEALER
FOR
ASSISTANCE.
BEFORE
INVESTIGATING
A
PROBLEM.
SWITCH
OFF
THE
SYSTEM
AT
THE
MAINS
Symptom
Possible
Cause
...
No Sound System
not
switched on: Speaker cables shorting terminals out: wrong source selected
Sound lacks bass
content
Front loudspeakers
out
of
phase. Check
all
system connections and rectify.
Bass reproduction
is
indistinct Subwoofer
not
switched
onl
Subwoofer phase incorrected: Subwoofercrossover controltoo
low
Excessive bass distortion at
low
volumes Subwoofer levelset
too
high:
LFE
levelset too high: Subwoofer incorrectlywired
Excessive
or
distorted bass at high levels System levelset
too
high: Bass controlset
too
high
Distortion I rattling
at
high levels System level
too
high: Objects
too
close
or
on
top
of
speakers
Indistinct Sound: Poor localisation
of
effects. One
or
more loudspeakers
is
out
of
phase. Check
all
system connections and rectify.
Poor localisation
of
dialogue. (Read
the
manualfor correct connection procedure)
8

USER
INSTRUCTIONS:
Crystal4
Series
Further Information
Care
and
Maintenance
Ifyou playthe speakers with the grilles offexercise
great care.
NEVER
touch drive units which are easily
damaged. The Loudspeaker cabineys can be cleaned
with a
damp
cloth orwith a spray furniture polish and
a soft cloth. Apply the spray sparingly to
the
cloth and
then polish the cabinet. Never apply spray directlyto
the cabinet.
Guarantee
&
Service
In
the unlikely event thatyour unit develops a fault
you should return it to theWharfedale dealer using
the original packing to ensure safe shipping.
The terms
of
yourguarantee mayvary
in
different
countries
but
in
allcases
the
guarantee excludes.
Alldamage caused through accident. misuse. wear
andtear. neglect. incorrect installation. adjustment
or
repair by unauthorised personnel
is
not covered by
yourwarranty.
Wharfedale
will
not be
Liable
for any consequential
damage,
Loss
or injury, arising from or inconjunction
with this equipment.
9
Authorised
Service
Centres
UK
lAG
UK
LTD.
lAG
House 13/14 Glebe
Road.
Huntingdon.
Cambridgeshire.
PE2g
7DL.
England
Tel:
+44
(0)1480
447700
ASIA
lAG
Group
LTD.
Sanecore Industrial
Park,
Jiuwei, Xixiang, Shenzhen
China
Tel:
+86
755
27483535
Additionally, Wharfedale retailers and
global
distributors
will
be able to assist you on finding
authorised service centres worldwide.
To
find your
Wharfedale distributorvisit www.wharfedale.co.uk
Wharfedale has a policy
of
continuous product
development and reserves the right to change
specification without notice.
The name 'Wharfedale'
is
a registered trademark
of
Wharfedale International Ltd. Wharfedale
is
a
member
of
the InternationalAudio Group

USER
INSTRUCTIONS:
Crysta14
Series
Specifications
Modle
Crystal-4.1
Crystal-4.2
Crystal-4.3
Crystal-4.4
Generaldescription BookshelfSpeaker BookshelfSpeaker Floorstanding Speaker FloorstC:nding Speaker
Enclosure
type
Bass Reftex Bass Reftex Bass Reftex Bass Reftex
Transducer
complement
2-way 2-way 3-way 3-way
Bass driver
100mm
Woven Kevlar Cone 125mmWoven Kevlar Cone 165mm Polypropylene Cone 165mmPolypropylene Cone
x2
Midrange driver 125mmWoven Kevlar Cone 125mmWoven Kevlar Cone
Treble driver 25mm Soft Dome 25mm Soft Dome 25mm Soft
Dome
25mm Soft Dome
AVshield
No No
No
No
Sensitivity (2.83V@ 1m)
86dB
88dB
88dB
godB
Recommended amplifier
power
20-60W
20-100W 25-120W 25-150W
PeakSPL 95dB
96dB
o6dB
lO?dB
Nominal
impedance
80
Compatible
80
Compatible
80
Compatible
80
Compatible
Minimum
impedance
4.30 4.40 3.70
.0
Frequencyresponse
(+I
-3d
B)
75HZ- 20kHz
6oHz-
2okHz
50Hz-
20kHz
40Hz-
20kHz
Bass extension (-6dB) 70Hz 55Hz 45HZ
35HZ
Crossover frequency 3.4kHz 2.6kHz
500Hz&2kHz
460Hz & 2.7kHz
Cabinet
Volume
(in litres) 2.3L 6.gL 7.5L&21L 7.5L&23L
Dimensions (mm)
Height(on plinth) 194mm 265mm (goo•22lmm (950+22)mm
Width
141mm 18omm 205mm 205mm
Depth (with grille&terminall (147•1olmm (212•10)mm (245+10)mm
(245+10)mm
Carton size 382 x
225
x
28omm
475
x 300 x
385mm
1020 X 360 X 315mm 1070 X 360 X 315mm
Net
weight
2kg each 4.2kg each 14.5kg each 15kg each
Gross
weight
4.8kglctn
g.6kglctn
16.2kglctn
17kglctn
Finish Black I
Walnut
I Wh,ite Black I
Walnut
I
White
Black I
Walnut
I
White
Black I Walnut I
White
Modle
Crystai-4.C
Generaldescription Centre Speaker
Enclosure
type
Bass Reftex
Transducer
complement
2-way
Bass driver 125mmWoven Kevlar Cone
x2
Midrangedriver
Treble driver 25mm Soft Dome
AVshield
Yes
Sensitivity(2.83V@ 1ml 8gdB
Recommended amplifier
power
25-100W
PeakSPL 95dB
Nominal
impedance
80
Compatible
Minimum impedance
Frequency response (+l-3dB)
70HZ-20kHz
Bass extension (-6dB) 65Hz
Crossoverfrequency 2.4kHz
cabinet
Volume (in litres) 8.2L
Dimensions (mm)
Height(on plinth) 172mm
Width
415mm
Depth (with grille&terminall (192•1olmm
carton
size 495 x 280 x
26omm
Net
weight
6.8kg each
Gross
weight
8kglctn
Finish BlackI
Walnut
I
White
10

lAG
House.
13/14
Glebe Road, Huntingdon. Cambridgeshire. PE29 7DL, UK
Tel:
•44(0h480
452561
Fax
:
•44(0h480
413403 www.wharfedale.co.uk
lAG
reserves
the
right
to
alter
the
design andspecifications
without
notice.
All
rights reserved © lAG Group Ltd.
Wharfedale
is a
member
of
the
International
Audio
Group. CODE:
WH14-MNLoo6a

Manuel
d'utlllsateur
Gebrauchsanleitung
lstruzioni
per
I'Uso
nstrucciones
de
\
es
para
o
Utilizatlor
II
2
3
CAUTIONS!
ATTENTIONS!
WARNUNGS!
AVVERTENZE!
WAARSCHUWINGS!
PRECAUCIONES!
ATEN(AO!
~t~!
UNPACKING
DE8ALLAGE
AUSPACKEN
_
DISIM8ALLAGGIO
UITPAKKEN
DESEM8ALAGEM
DESEM8ALAJE
3f!f1~~fhpr~
TERMINAL
PANELS
PLAQUETTES
DE
CONNEXION
ANSCHLUB80RD
VASCHETTA
COLLEGAMENTI
KLEMMEN80RD
PANELES
DE
TERMINALES
PAINEL
DOS
TERMINAlS
tl
~
Jtifff
TID
ti
STANDARD
LOUDSPEAKER
CONNECTIONS
RACCORDEMENT
NORMALE
STANDARD
LAUTSPRECHERANSCHLUSSE
COLLEGAMENTO
CONVENZI
ON
ALE
TRADITIONELE
AANSLUITINGEN
CONEXION
NORMAL
LIGA(OES
DE
COLUNAS
CONVENCIONAIS
1h
Fr
~
~
~
:~J
~!:i!tl
81-WIRING
&
81-AMPING
81-CA8LAGE
ET
81-AMPLIFICATION
81CONEXION
Y
81AMPLIFICACION
.
81-AMPLIFICACAO
E
81-CA8LAGEM
XX~~*OXX15Jl:::k~
PHASE
FASE
if§lli:
.
HOME
CINEMA
(3}
5
.
1/6.1/7
.
11f],m)~
~~
SOUND
LEVEL
NIVEAU
SONORE
SCHALLPEGEL
LIVELLO
ACUSTICO
.
GELUIDSNIVEAU
NIVEL
DE
SONIDO
NiVEL
SONORO
Frif~f
WARRANTY
GARANTIE
GARANTIE8ESTIMMUNGEN
GARANTIA
GARANTIEVOORWAARDEN
GARANZIA
GARANTiA
mt:m151H~
' 5
<.
--~~
~
..:·.
:i;·.
ll
i;
~_::_,·ifif

Instruction
Manual
Manuel
d"utilisateur
Gebrauchsanleitung
lstruzioni
per
I"Uso
Gebruiksaanwijzing
lnstrucciones
de
uso
lnstru.;oes
para
o
Utilizador
m?~um-

UNPACKING
1
DEBALLAGE
AUSPACKEN
DISIMBALLAGGIO
UITPAKKEN
DESEMBALAGEM
DESEMBALAJE
7fM1~1¥JthF"ft
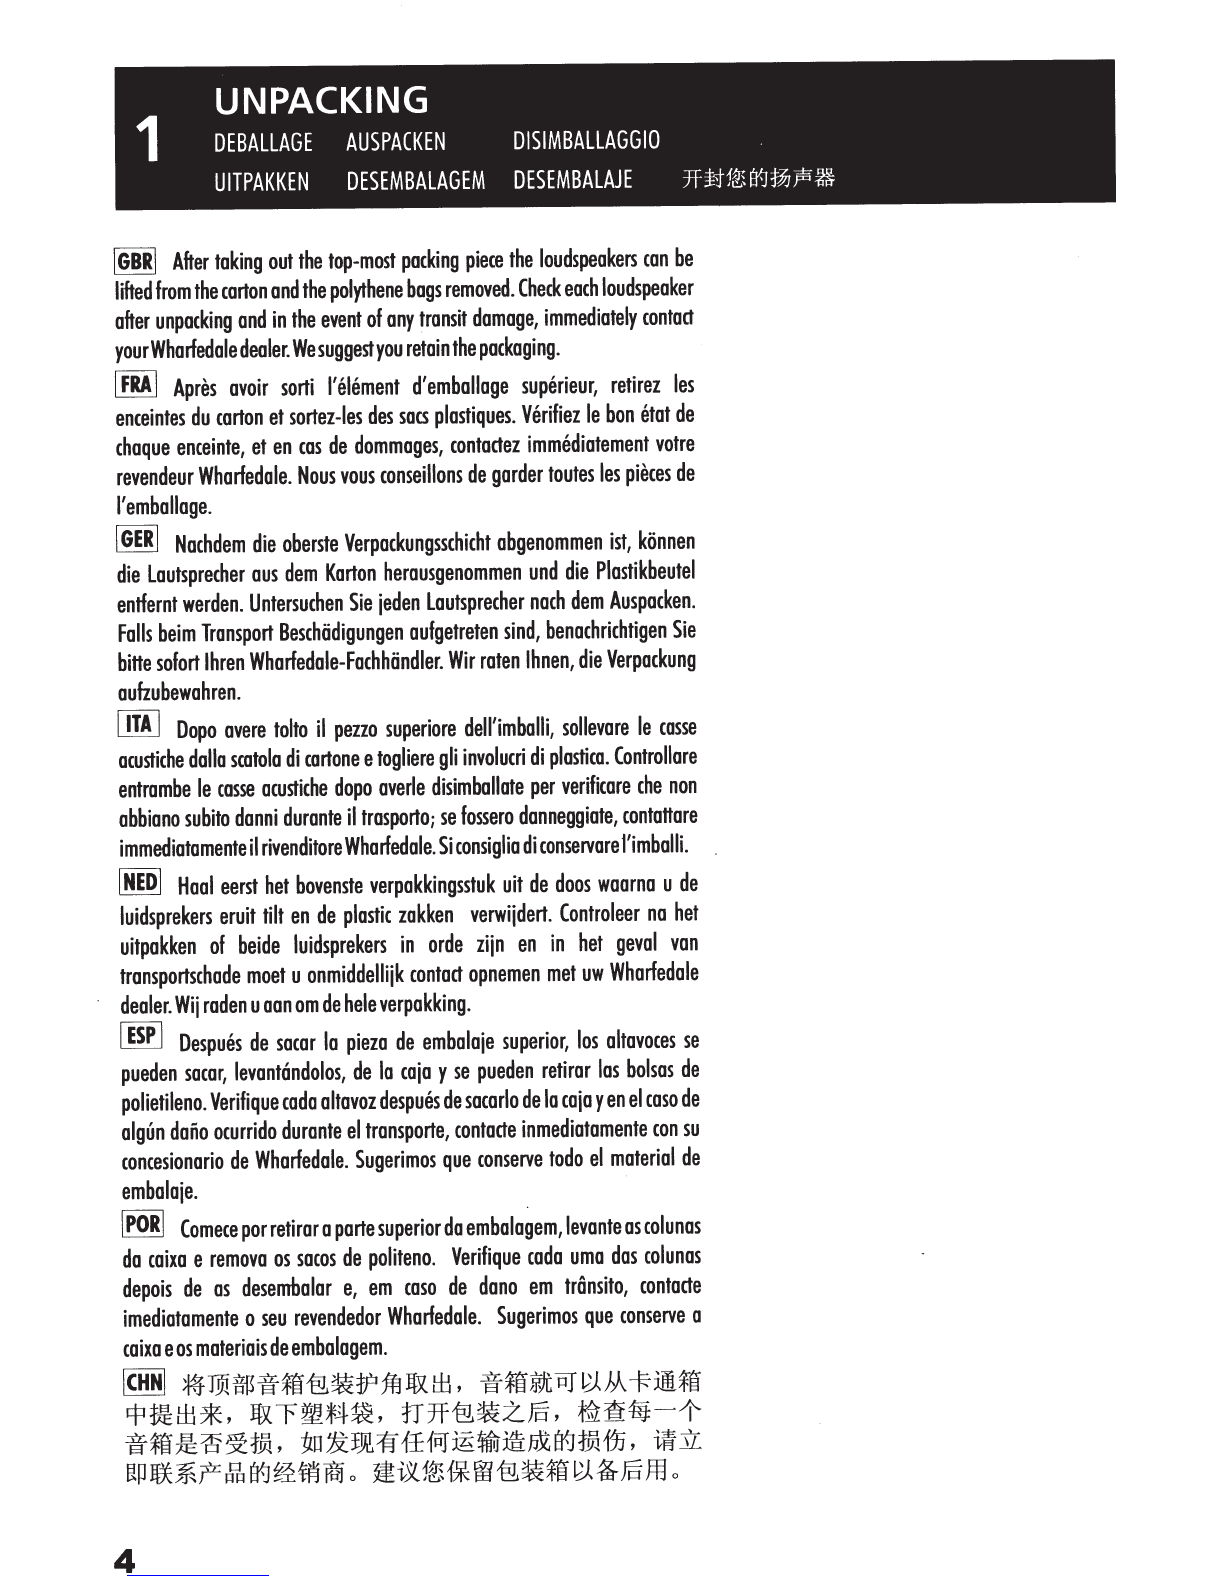
IGBRI
After
taking
out
the
top-most
pocking
piece
the
loudspeakers
con
be
lifted
from
the
carton
and
the
polythene
bogs
removed.
Check
each
loudspeaker
after
unpacking
and
in
the
event
of
any
transit
damage,
immediately
contact
your
Whorfedole
dealer.
We
suggest
you
retain
the
packaging.
I
FRA
I
Apres
ovoir
sorti
I'
element
d'
emboli
age
superieur,
retirez
les
enceintes
du
carton
et
sortez-les
des
sacs
plostiques.
Verifiez
le
bon
etot
de
choque
enceinte,
et
en
cos
de
dommoges,
contodez
immediotement
votre
revendeur
Whorfedole.
Nous
vous
conseillons
de
gorder
toutes
les
pieces
de
I'
embolloge.
I
GER
I
Nochdem
die
oberste
Verpockungsschicht
obgenommen
ist,
konnen
die
loutsprecher
ous
dem
Korton
herousgenommen
und
die
Plostikbeutel
entfernt
werden.
Untersuchen
Sie
ieden
loutsprecher
noch
dem
Auspocken.
Falls
beim
Transport
Beschodigungen
oufgetreten
sind,
benochrichtigen
Sie
bitte
sofort
lhren
Whorfedole-Fochhondler.
Wir
roten
Ihnen,
die
Verpockung
aufzubewohren.
I
ITA
I
Dopo
overe
tolto
il
pezzo
superiore
dell'imbolli,
sollevore
le
cosse
ocustiche
dollo
scotolo
di
cortone
e
togliere
gli
involucri
di
plostico.
Controllore
entrombe
le
cosse
ocustiche
dopo
overle
disimbollote
per
verificore
che
non
abbiono
subito
donni
durante
il
trosporto;
se
fossero
donneggiote,
contottore
immediotomente
il
rivenditore
Whorfedole.
Si
consiglio
di
conservore
1'imbolli.
I
NED
I
Hool
eerst
het
bovenste
verpokkingsstuk
uit
de
doos
woo
rna
u
de
luidsprekers
eruit
tilt
en
de
plastic
zokken
verwiidert.
Controleer
no
het
uitpokken
of
beide
luidsprekers
in
orde
ziin
en
in
het
gevol
von
tronsportschode
moet
u
onmiddelliik
contact
opnemen
met
uw
Whorfedole
dealer.
Wii
rod
en
ua
on
om
de
hele
verpokking.
I
ESP
I
Despues
de
socor
Ia
piezo
de
emboloie
superior,
los
oltovoces
se
pueden
socor,
levontandolos,
de
Ia
coia
y
se
pueden
retiror
los
bolsas
de
polietileno.
Verifique
coda
oltovoz
despues
de
socorlo
de
Ia
coio
yen
el
coso
de
olgun
dono
ocurrido
durante
el
tronsporte,
contode
inmediotomente
con
su
concesionorio
de
Whorfedole.
Sugerimos
que
conserve
todo
el
material
de
emboloie.
I
PORI
Comece
por
retiror
a
porte
superior
do
embologem,
levonte
as
colunos
do
coixo
e
removo
os
socos
de
politeno.
Verifique
coda
umo
dos
colunos
depois
de
as
desembolor
e,
em
coso
de
dono
em
tronsito,
contode
imediotomente
o
seu
revendedor
Whorfedole.
Sugerimos
que
conserve
a
coixo
e
os
materia
is
de
embologem.
ICHNI
~TWfmift§{tL~tftjfj~tfj'
ir*imtPJPJJA
-Fiitff
~~tfJ*,
~~m~~,
ffH'P1~~~,
~~~-~
iftff~~~~,
~~~~ffw~-~~~~m,
~~
ep~*f=£~~~~1{ij
0
~i5l1~1*=M'P1~f§PJ~J§ffl
o
4

TERMINAL
PANELS
2
PLAQUETTES
DE
CONNEXION
ANSCHLUBBORD
KLEMMENBORD
VASCHETTA
COLLEGAMENTI
PANELES
DE
TERMINALES
PAINEL
DOS
TERMINAlS
ff(~!JW-=fOOfK
[ffi]J
Your
loudspeakers
use
two
or
four
terminals.
··
IEJ
Les
haut-parleurs
utilisent
deux
ou
quatre
barnes.
mlJ
lhre
Lautsprecher
besitzen
zwei
oder
vier
AnschluBklemmen
.
lil]
I
diffusori
usano
due
o
quattro
morsetti.
mE
Uw
luidsprekers
gebruiken
twee
of
vier
aansluitklemmen.
ll3l
Los
altavoces
utilizan
dos
o
cuatro
terminales
IEJ
As
suas
colunas
utilizam
dais
ou
quatro
terminnais
mm
1~
tt-J
1m
JE"
~
1f
~
1'
:eJG
1m
1'ff(
~
!1W
-=f
0
5

6
rGBRl
loudspeaker
cable
is
polarity
coded
along_one
edge
.
'spntthe
cable
to
a
depth
of
about
25mm
and
stnp
8mm
of
insulation
from
each
wire.
If
the
cable
is
stranded
,
twist
the
strands
together.
I
FRA
I
La
polo
rite
des
cobles
des
haut
-
parleurs
est
indiquee
sur
le
cote
du
coble.
Fendez
le
coble
sur
une
longueur
d'
environ
25
mm
et
denudez
chaque
fil
sur
8mm.
Si
le
coble
est
a
orne
divisee
,
torsadez
les
extremites
ensemble.
I
GER
I
Auf
einer
Kante
des
lautsprecherkabels
ist
die
Polarittit
angegeben.
Das
Kabel
etwa
25
mm
tief
aufschlitzen
und
8
mm
lsolierung
von
jedem
Draht
entfernen
.
Bei
litzen-
Kabel
die
Enden
verdr.Uen
.
I
ITA
I
II
cavo
degli
altoparlanti
e
normal
mente
provvisto
di
un
cod
ice
colorato
lungo
un
bordo
.
Separare
il
cavo
per
circa
25
mm
e
spell
are
un
tratto
di
8
mm
di
isolamento
do
ogni
filo.
Se
il
cavo
e
del
tipo
multifilo
attorcigliare
le
estremita.
I
NED
I
longs
een
rand
van
de
luidsprekerkabel
is
een
polariteitscode
aangebracht.
Kabel
tot
een
diepte
van
ongeveer
25mm
splitsen
en
8mm
isolatie
van
elke
droad
verwijderen.
Bij
litzekabels
de
uiteinden
in
elkaor
draaien
.
I
ESP
I
El
cable
del
altavoz
tiene
marcada
Ia
poloridad
en
uno
de
los
bordes
.
Corte
el
cable
a
una
profundidad
de
25mm
y
retire
unos
8mm
del
recubrimiento
aislante
de
coda
alambre
.
Si
el
cable
es
trenzado,
enrosque
los
extremos
junto
I
POR
I
0
cabo
das
colunas
possui
urn
c6digo
de
polaridade
ao
Iongo
de
urn
a
extremidade.
Divida
o
cabo
ate
urn
a
profundidade
de
cerca
de
25
mm
e
descarne
8
mm
de
isolamento
de
coda
fio.
Se
o
cabo
for
entran~ando,
entrance
as
extremidades
conjuntamente.
I
CHN
I 1athF"
~~~~
B"JJ!I~t5Flf~~~
8":1
~~
tL
*4
~~~51
3f
:*:
~"J
25~
*
,
Jt~
J
~-ff~"Js~*l¥1~~~m.
Btl::\
~~
-
~051~JhF"~~~~£5t3fB"J,
~Em
8":1
~
f4lij
rr
~.
I
GBR
I
Unscrew
each
terminal.
Thread
the
bore
end
of
the
cable
through
the
cross-hole
ensuring
there
ore
no
loose
strands.
Tighten
securely.
I
FRA
I
Devissez
chaque
borne.
Passez
l'extremite
denudee
du
coble
a
travers
le
trou
transversal
en
veillant
a
ne
pas
laisser
de
brins
I
fiches
.
Serrez
a
fond
.
I
GER
I
Jede
Anschlu6klemme
aufschrauben
.
Das
freigelegte
Kabelende
durch
die
Querbohrung
fiihren
und
darauf
achten,
daB
keine
losen
litzen
iibrigbleiben
.
Donn
die
Schrauben
fest
anziehen
.
I
ITA
I
Svitare
ogni
morsetto.
lnserire
l'estremita
nuda
del
cavo
ottraverso
il
foro
passante
accertandosi
che
non
fuoriescano
dei
fili
ed
avvitare
saldamente
.
I
NED
I
Elke
klem
losschroeven
.
Blanke
einde
door
het
gaatje
in
de
klem
steken
en
zorgen
doter
geen
losse
draadjes
zijn.
Stevig
aandraaien.
I
ESP
I
Desenrosque
coda
terminal.
Haga
pasar
el
extrema
vivo
del
cable
por
el
orificio
asegurandose
de
que
no
queda
ningun
hilo
suelto
.
Apriete
para
asegurar.
I
POR
I
Desaperte
coda
terminal.
Enfie
a
extremidade
descarnada
atraves
do
orificio
transversal,
certificando-se
de
que
nfio
existem
fios
soltos.
Aperte
bern
.
l
cHN
I
1iJEr~-i'fillij.:Y:.
~~~~~B*~iffi~
M~XR.
:#~*~~&1f~Mo~
rr~~-i'fillij.Y
.
This manual suits for next models
4
Table of contents
Other Wharfedale Pro Stereo System manuals

Wharfedale Pro
Wharfedale Pro WLA-28X User manual

Wharfedale Pro
Wharfedale Pro MS-100 HCP and User manual

Wharfedale Pro
Wharfedale Pro DIAMOND 12 Series User manual

Wharfedale Pro
Wharfedale Pro Kinetic 215A Guide

Wharfedale Pro
Wharfedale Pro Titan 8 Passive Guide

Wharfedale Pro
Wharfedale Pro SVP-X12PM Guide

Wharfedale Pro
Wharfedale Pro Kinetic 12A User manual
 Quick start quide")


