Wild Goose Kamado User manual

USER GUIDE

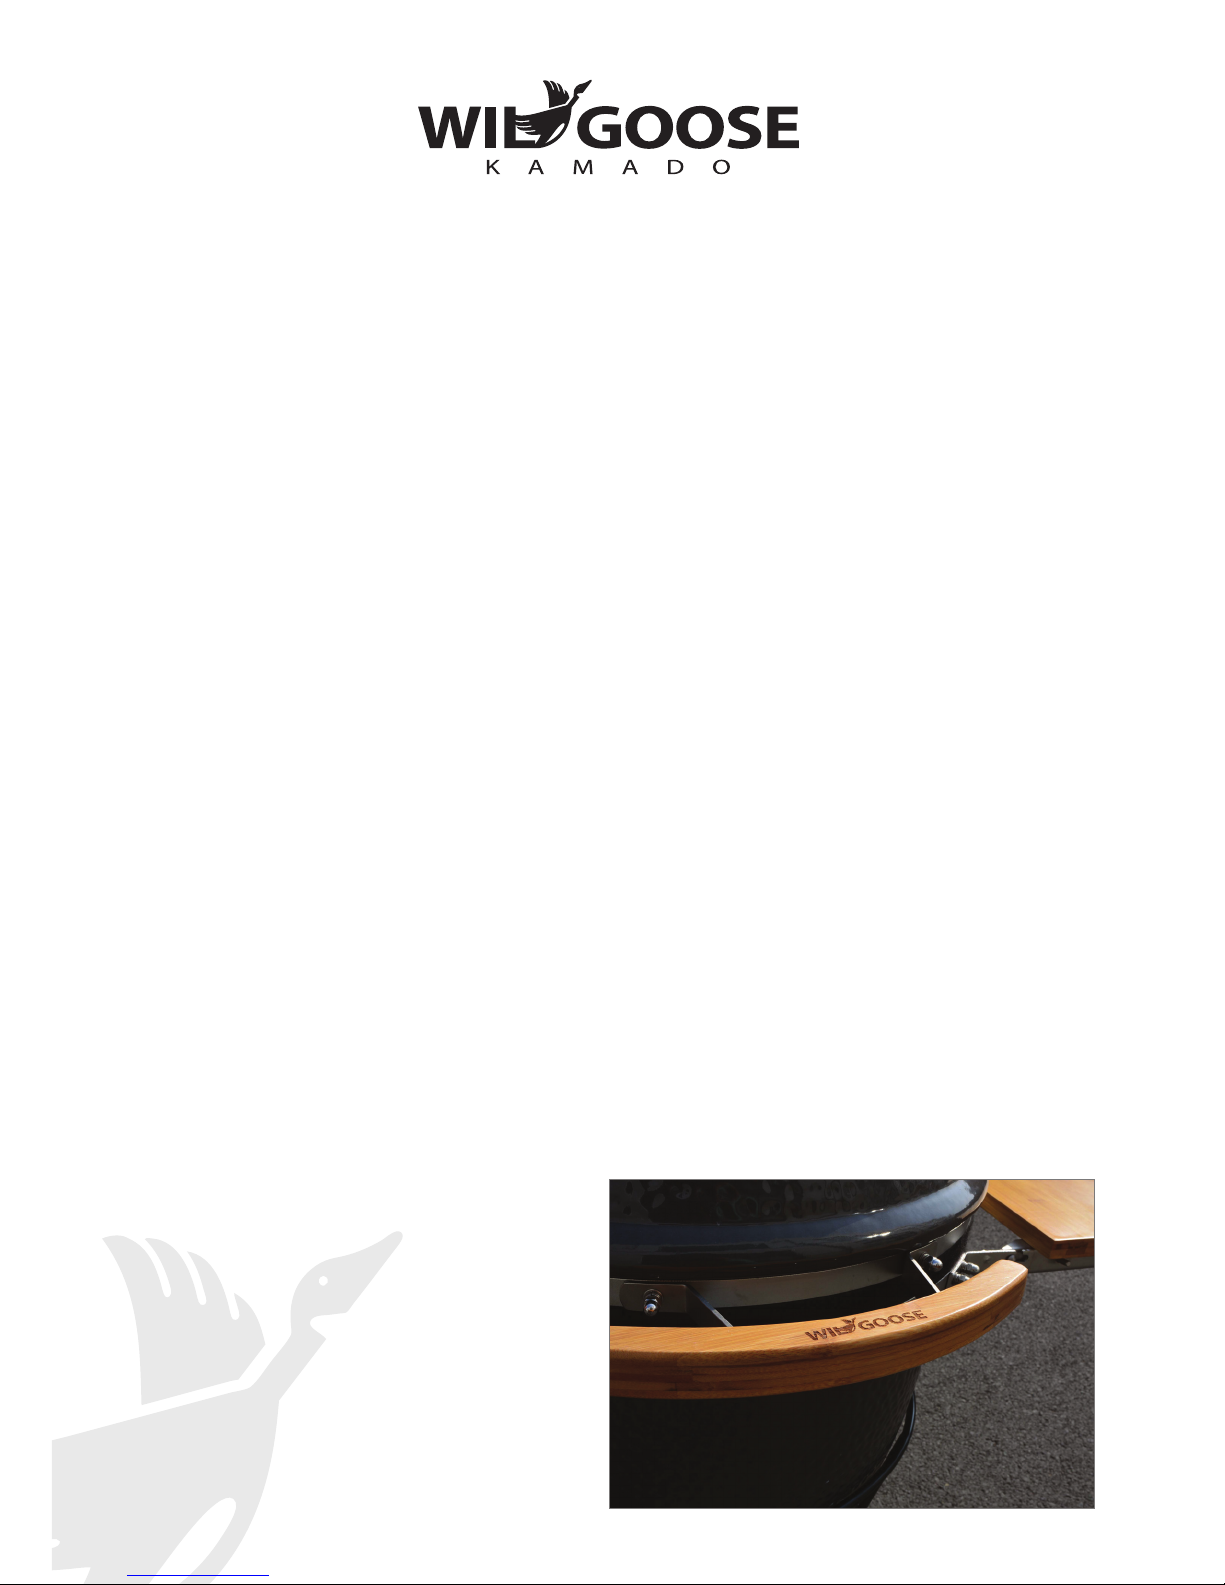
Included in your Wild Goose Kamado
1. Trolley cart (with cart model only)
2. Ceramic fire bowl
3. Wooden side shelves and hooks (with cart model only)
4. Grill holder shelf (with cart model only)
5. Bottom vent
6. Cast Iron top vent
2
1
2
3 4
5
6
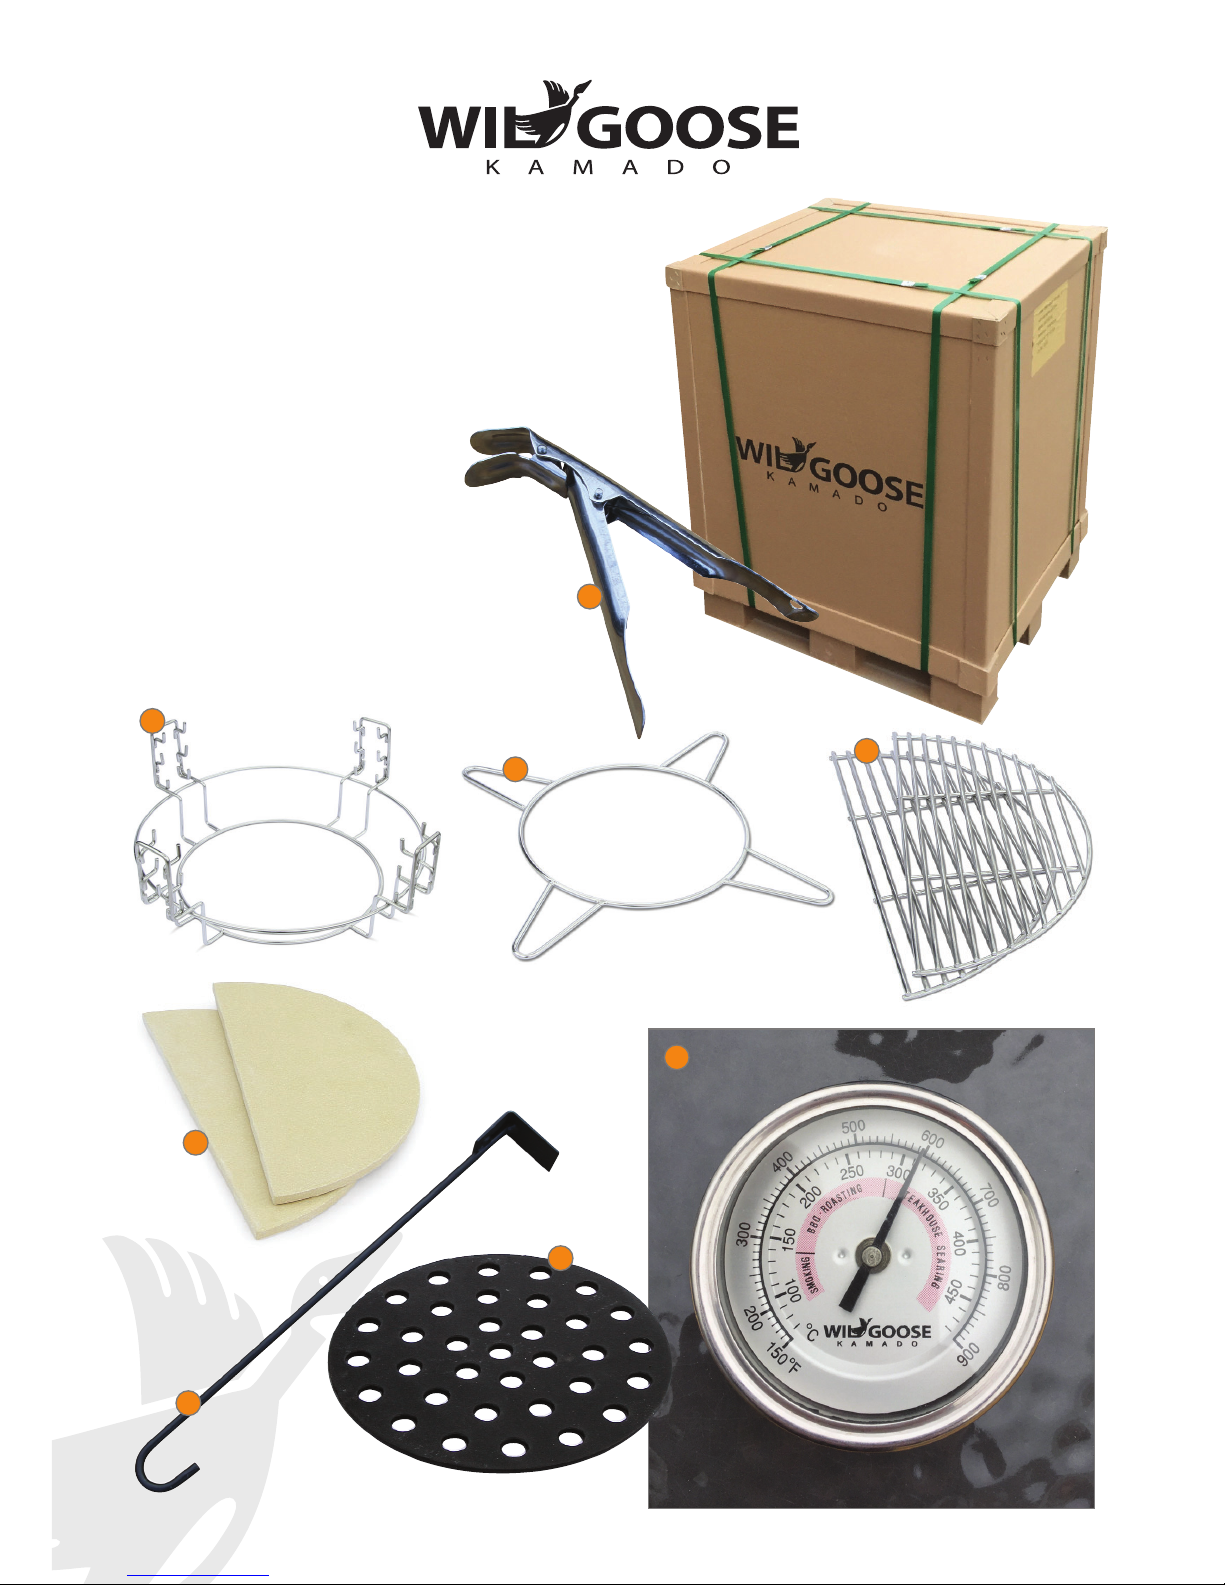
Included in your Wild Goose Kamado
1. Grill lifting grabber
2. Grill Rack
3. Heat defelector shelf
4. 2 x Half moon stainless steel grills
5. 2 x Half moon ceramic heat deflectors
6. Ash removal tool
7. Cast iron charcoal grate
8. Thermometer
3
2
3
8
1
6
7
5
4

A totally new concept in outdoor cooking
If you think that you have bought a barbeque, think again! Cooking on a kamado grill is whole new way of cooking
that is probably different to anything you’ve ever done before.It’s not complicated, just different to run-of-the-mill
barbequing and you should read this guide book carefully all the way through before you assemble and then cook
on your Wild goose Kamado.
You can use your Wild Go o s e K a mado in the following different ways:
• Low and Slow. Slow Cook and smoke joints like shoulder of Pork and Beef brisket for a delicious flavor and a
delicate texture.
• Normal Roast.For items like a whole chicken or sausages.
• Fast Blast.For more aggressive grilling – for example when you want to cook a steak.
• Warp Factor.You can get your Wild goose Kamado to 350 or more Celcius and cook an amazing Pizza in
under two minutes.
In this guide we will tell you how to do all this, and more, and how to generally use and look after your Wild
Goose Kamado.
4
Assembling your Wild Goose Kamado (With Cart Version)
No doubt you are keen to get started in assembling your Kamado,but please read through this whole section first
so that you know the overall procedure.
1. Remove the metal cart from the box and assemble the two parts together using the screws provided.
2. Place the cart on a firm level surface and apply the brakes by pressing the tabs down on the two locking casters.
3. Empty the Wild Goose Kamado (WGK) of all accessories including the ceramic fire bowl.
4. When lifting the WGK, it is important that you do not use the shelf tabs (which look like ideal handles for this –
but are NOT) or the hinge. Instead,the whole unit should be lifted from below for safety.You can open the
bottom vent and use this hole as a handle. THIS IS A TWO MAN JOB.
5. The bottom vent, and therefore the front of the WGK should be orientated in between the two brake wheels
when you lift the whole unit into the cart.
6. Lift the lid and return the ceramic fire bowl to the WGK.You should orientate this so that the gap at the bottom
lines up with the main bottom vent.The best way to lift the ceramic fire bowl is to put your arm down the
middle of the bowl and place your hand in the air vent recess for grip.
7. Place the cast iron charcoal grate in the bottom of the ceramic fire bowl.
8. Place the stainless steel rack on top of the ceramic fire ring, and add the two half moon grills.
9. Close the lid and place the cast iron top vent on top of the WGK, so that the logo faces forward.
10. Attach the side shelves as shown in fig 5.These can be folded down when not in use.
Assembly of a free standing Wild Goose Kamado and placing into a wooden or steel trolley
1. Open the WGK lid and remove all the contents including the Ceramic fire bowl from within.The best way to
lift the ceramic fire bowl is to put your arm down the middle of the bowl and place your hand in the air vent
recess for grip.
2. You can place the WGK into a special Wooden or steel trolley stand table or you can place it onto any firm level
surface. Either way you need to place the base of the WGK onto the three ceramic feet. Arrange the feet as a
triangle on the surface ready for the WGK to sit on.
3. Gently lift the WGK into position to rest on the
ceramic feet. If you are using a wooden or steel
table, take extra care not to catch the bottom vent
on the wood or steel as you lower the WGK
through the hole.
THIS IS A TWO MAN JOB
4. Follow steps 6-9 in the previous page instructions.
5
Before you light your Wild Goose Kamado, let’s talk about Charcoal...
• Charcoal type and quality are very important.
• Never use lighter fluids or self lighting charcoal.
• You load probably far more charcoal than you may expect.
• You can put the WGK out at the end, and save the charcoal.
• The leftover Charcoal can be re-used.
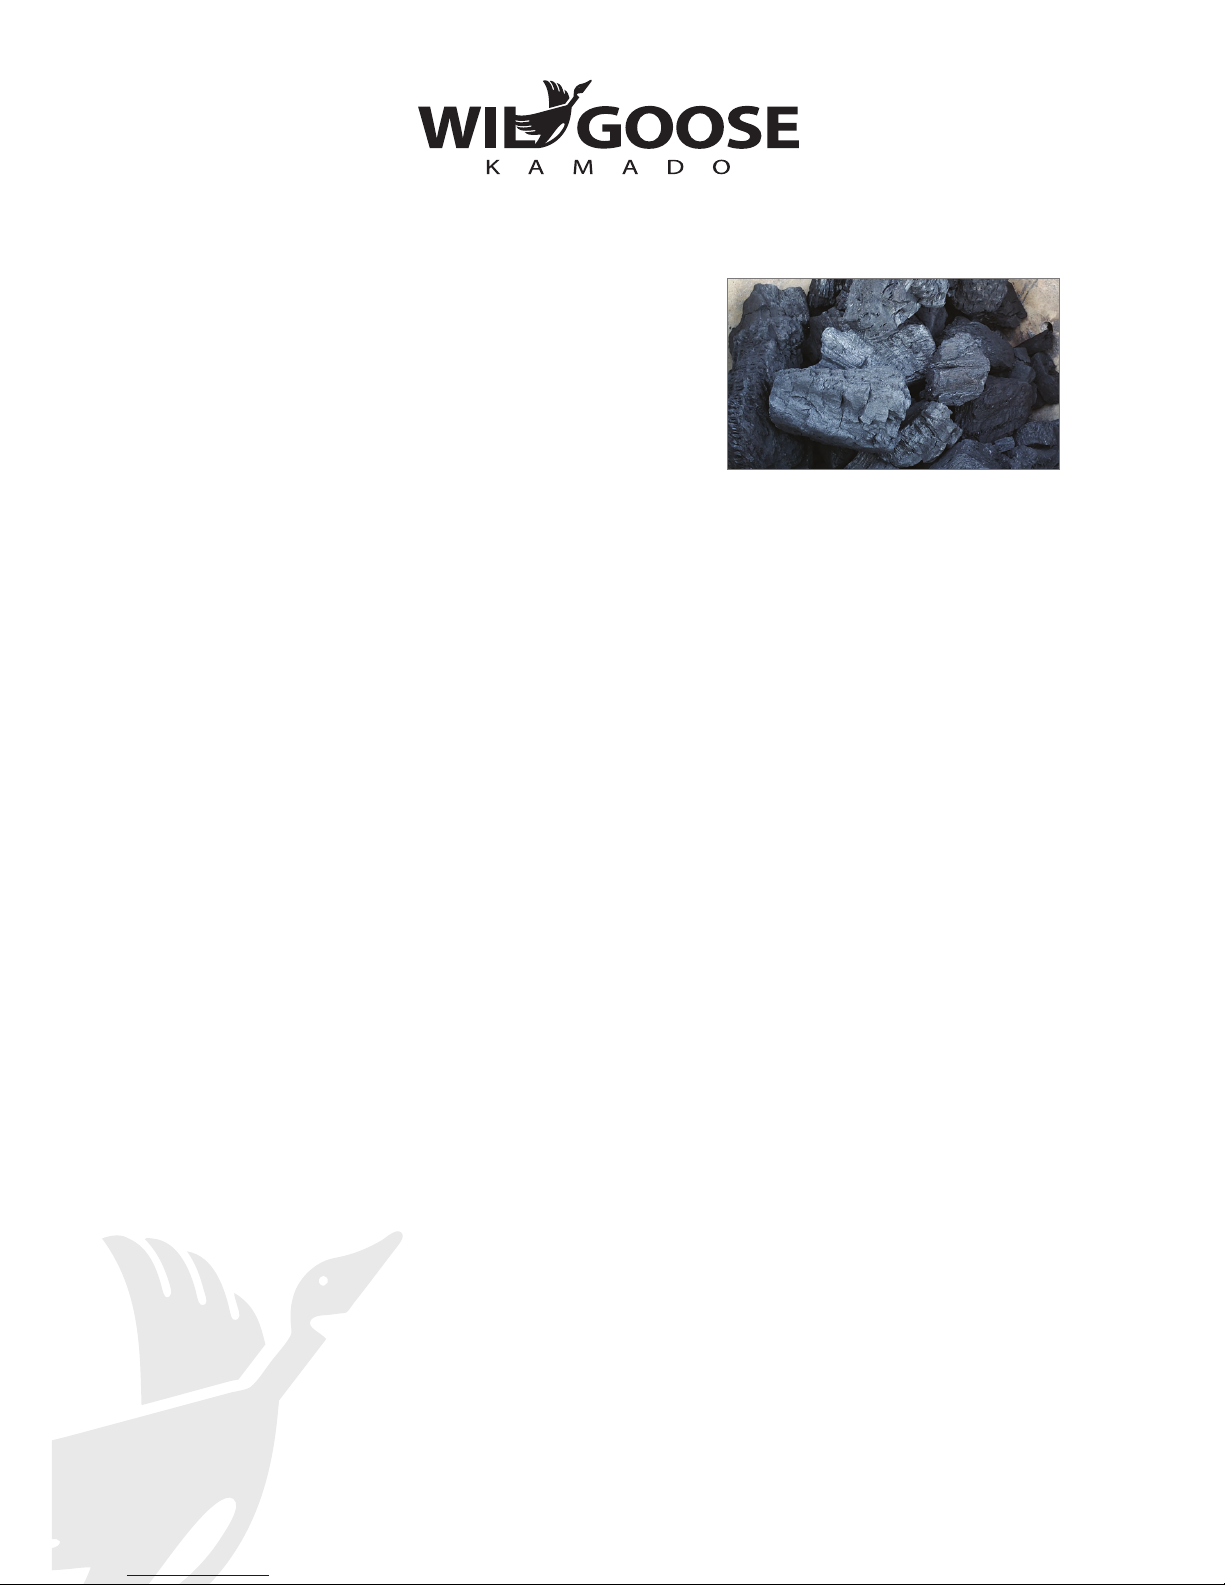
Why Charcoal type is so important
To cook in your Wild Goose kamado you should ONLY be using restaurant grade lumpwood charcoal. This is
generally available from places like Booker or Makro or readily available mail order on the internet.It tends to come
in bigger plain bags with no printing on it and it is usually in bigger lumps.
If you buy lumpwood charcoal from a garage, supermarket or DIY store it will usually be useless, in too small pieces
and you will struggle to get your WGK up to temperature.
Briquettes,anykindofprocessedcharcoalandselflightingcharcoalaresimplyforbidden!
They are full of nasty Chemicals and will transfer those nasty smells into the porous ceramic of your WGK and this
will taint your food.If you have half a bag of this left in your shed, we suggest that you chuck it away now to avoid
using it in a charcoal emergency in the future!
Remember that cooking on a Kamado style grill is slower than normal barbecuing and the meat gets immersed in the
charcoal flavour.Therefore you should consider the quality of your charcoal to be as important as the quality of your meat.
Why you should never use lighter fluid
For the same reason that you shouldn’t use self lighting fluid – that the chemical smell gets absorbed into the
porous ceramic and will impart a nasty flavour to the cooking.You can use a normal firelighter if you must, or follow
our method below.
How much Charcoal should we put in?
Many first time users make the mistake of putting too little charcoal in because you do need more than a normal
BBQ in a Kamado, however, this is not extravagant because remember that your WGK is completely controllable by
the air vents and you can close these up at the end of cooking and the charcoal will actually go out. You can then
re-use this charcoal next time so none is wasted (use up to three times).
Understanding the air vents
As you already know, the air vents are the key to the control when cooking on your Wild Goose Kamado.So it is important
that the air can get to your charcoal from below.To this end,you should always place big lumps of charcoal one by one
by hand over the cast charcoal grid to allow a good flow of air through. Never just pour your charcoal in,thesmallpieces
and dust can clog up your air flow- resulting in poor performance.You want all the dust and small pieces left in your
charcoal bag when you have finished it rather than blocking your vents up in the WGK. Clean the ash out from underneath
the charcoal grid on a regular basis and always before an extreme cook such as very low and slow or very hot for pizzas.
6

Lighting your Wild Goose Kamado
• Open the bottom vent fully
• If you are re-lighting charcoal that has been burned before,stir it
around in the bowl to let the ash fall through the grid, if necessary
clean out the ash to allow good air flow. If necessary,mix a little fresh
charcoal in with the old.
• Place some large lumps of charcoal over the bottom grid and buildup a nice mound of charcoal.
• Take a 2 sheet long piece of kitchen roll,fold it over in to a 1”wide taper,give it’s half twist in the middle to keep it together.
• Place on the charcoal,cover the kitchen roll with some cooking oil and then place a few pieces of charcoal over the taper.
• Light the taper and leave the lid open for about 10 minutes. Once the flames have gone and you see some areas
of white ash, you can close the lid and adjust the top and bottom vents according to how you want to cook (see
later info in this guide).
Setting up your Wild Goose Kamado for different types of cooking
Your WGK is an extremely flexible and you can set the cook up for a surprisingly varied array of different
cooking methods – for example:
• Low and slow cook – about 100-150 ºC for up to 8 hours slow smoke.
• Roasting and general barbecuing between 150-200 ºC
• Fast blast for searing steaks 200- 250 ºC or baking bread
• Warp factor for cooking pizzas 300+ ºC
These are just the main examples, but they are certainly not the limit, there are a myriad of different
combinations of both temperature and grilling positions. Experimenting with new combinations is a part of the
fun of getting to know your Wild Goose Kamado.There are no end of videos on the internet showing different
techniques that you can try out.
General information about cooking with your WGK
The main thing to note about cooking on your Wild Goose Kamado is
that you always cook with the lid closed. This enables you to control
the temperature at all times by adjusting the top and bottom vents.
Using the vents to control temperature
Always light your WGK with the bottom vent fully open. Once lit (after
about 10 mins) you can close the bottom vent down to about 1.5 - 2”
open and close the lid.You will do most of your temperature control using the top vent at various stage of
openness.You can open the petal wheel vent and you can also slide the vent across more.
7

1} Low & Slow Cook
Examples: slow cook a shoulder or belly
of pork, a Turkey or perhaps a brisket
of beef.
This method of cooking is popular in
the southern USA where cooking for
8-10 hours is the BBQ norm! You can
add a lot of flavour just by this long
slow cook, however when you use a rub
first and or a baste during the cook you
can infuse even more delicious flavours.
Smoking
By adding wood chips or better still, wooden chunks of special woods on top of
the charcoal you can also smoke the food whilst you are cooking.There are
numerous wood chunks or chips on the market, each wood adds different subtle
flavours such as apple wood, whisky barrel oak etc.
TIP: soak your wood chunks or chips in water first for longer smoking
performance.
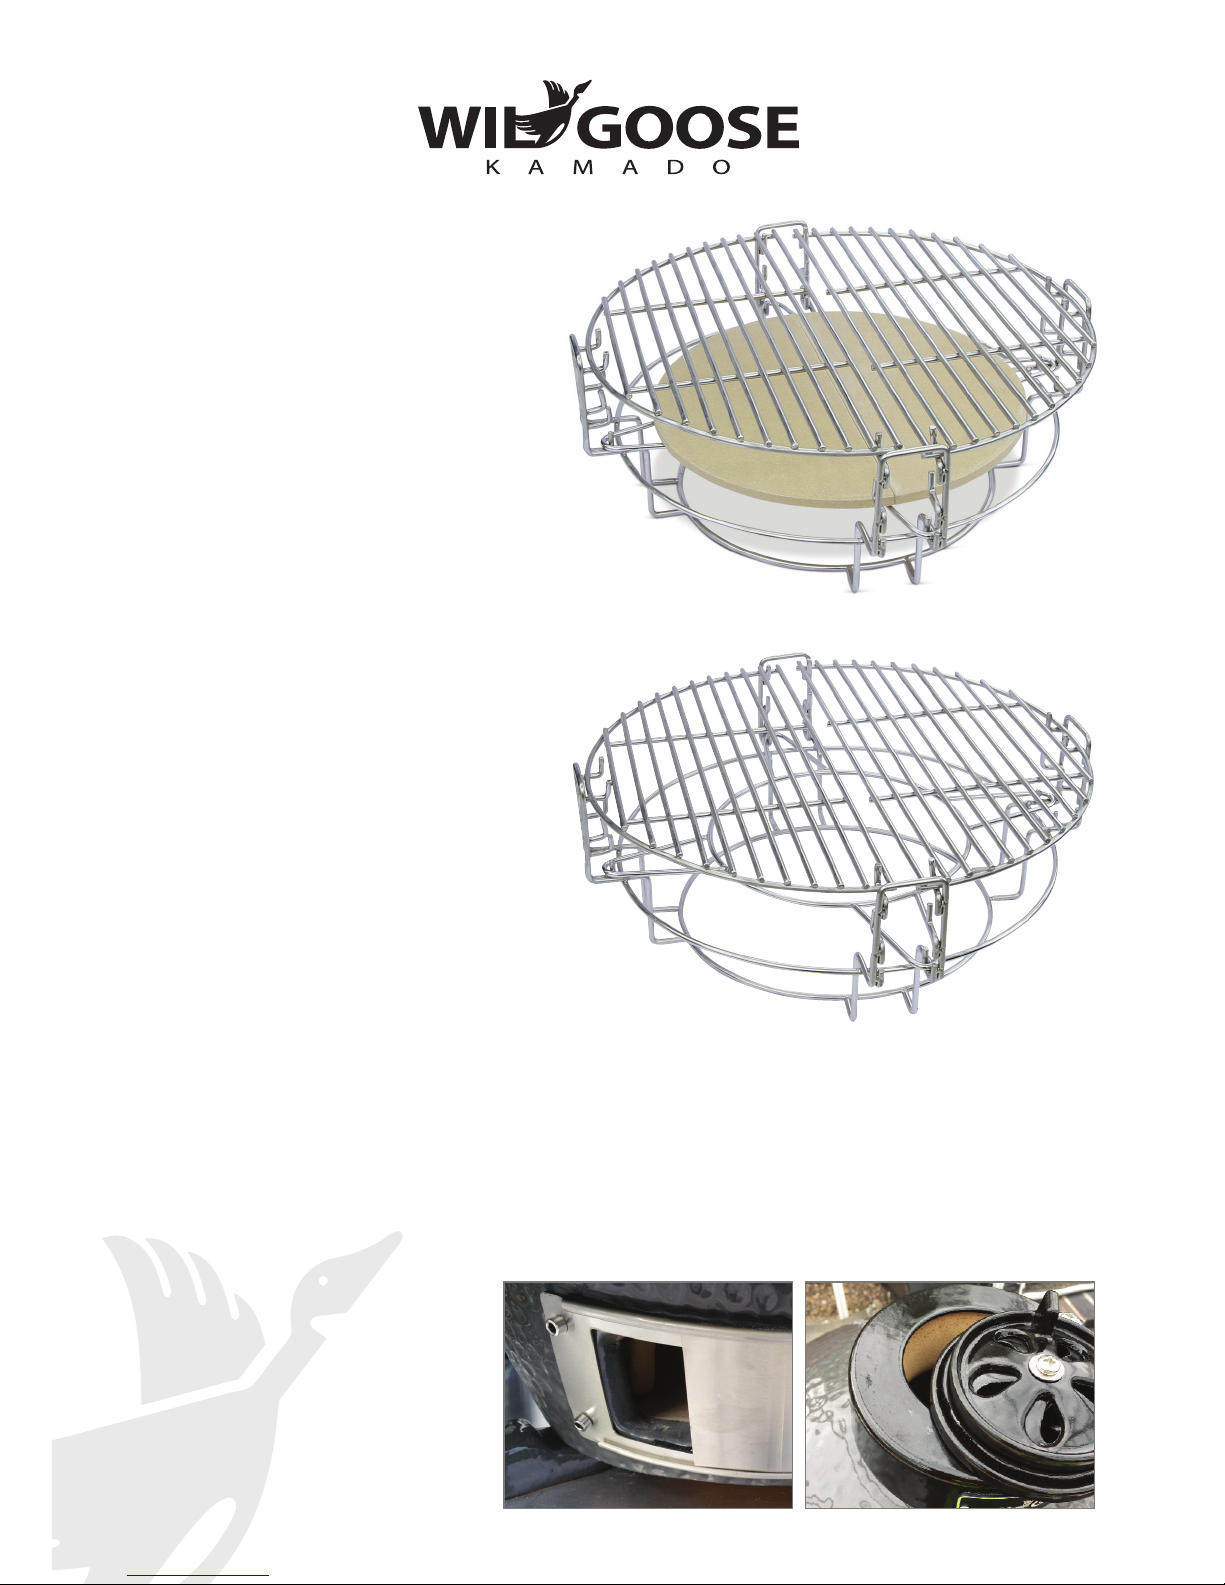
How to set up your wild goose rack
For a long slow cook, you would normally use the heat deflector.
Add the heat deflector wire shelf and position the heat deflector on to this as
shown in fig 3.You can place a disposable foil tray on to this to collect the drips if
you wish.Then place the half moon cooking grills on the top position on the rack.
How to set up your vents and charcoal
For a low slow cook such as this we recommend that you clean the ash out, and use 100% fresh charcoal rather than
pre-used leftovers.
Once lit, position the bottom vent about 2”open and the petal wheel fully open and slide it across about half an
inch. Allow the temperature to come up slowly over the course of about 45 minutes.
Keep an eye on the temperature and adjust the top vent to fine tune the temperature. A quarter inch adjustment
will make about 10-15 degrees difference
but you will need to allow 10 minutes for
a change to take effect.
TIP: the temperature will rise fast and fall
slowly, once you have the right
temperature the WGK should stay
reasonably stable.
Once up to temperature,The petal
wheel is half open for a slow smoke
fig.3
8
2} Normal Roasting & Grilling
Probably the most common way that you will use
your Wild Goose Kamado, at between 150-200 ºC.
Examples: Cook a whole chicken, joint of meat,
sausages, burgers
How to set up your wild goose rack.
Option 1: Roasting
For cooking a joint of meat, you would normally
use the heat deflector.The heat deflector enables
you to cook using the indirect heat method and
therefore stops your joint from burning.
Add the heat deflector wire shelf and position the
heat deflector on to this as shown in fig 4.You can
place a disposable foil tray on to this to collect the
drips if you wish.Then place the half moon
cooking grills on the top position on the rack.
Allow extra time for the WGK to warm up when
using the heat deflector.
Option 2: Grilling
For cooking burgers, sausage, kebabs, fish etc.
Set the half moon grill to the highest level (with
no heat detector).
How to set up your vents and charcoal
Once lit, position the bottom vent about 2”open
and the petal wheel fully and slide it across about 1-1.5”.Allowthetemperaturetocomeup.
Keep an eye on the temperature and adjust the top vent to fine tune the temperature. A quarter inch adjustment
will make about 10-15 degrees difference but you will need to allow 5-10 minutes for a change to take effect.
TIP: the temperature will rise fast and fall slowly, once you have the right temperature the WGK should stay
reasonably stable.TIP: Don’t worry about getting the WGK to any kind of exact temperature, in fact, the lower the
better within the range really – cook nice
and slowly and always with the lid down,
this imparts more flavour and your meat
will be moist, cooked all the way through
and free from nasty burnt flavours. Plus, if
you get sidetracked talking to guests
whilst cooking; your food won’t ruin.
fig.4
Roasting
Grilling
9

3} Fast Blast
For fast hot cooking 200-250 ºC
Examples: Bake bread,sear steak
How to set up your wild goose rack
Option 1: Baking
For baking bread, you would normally use the heat
deflector.The heat deflector enables you to cook using
the indirect heat method and therefore stops your bread
from burning on the bottom.
Add the heat deflector wire shelf and position the heat
deflector on to this as shown in fig 4 (page 9).Then place
the half moon cooking grills on the top position on the
rack. Allow extra time for the WGK to warm up when
using the heat deflector.
Option 2: Grilling
For cooking steak, lamb chops etc
Set the half moon grill to the highest level
How to set up your vents and charcoal
Once lit,position the bottom vent about 2”open and the
petal wheel fully and slide it fully across. Allow the
temperature to come up.
Keep an eye on the temperature and be ready to adjust the top vent to fine tune the temperature.You will probably
want the petal vent open and the top vent slid half open.
TIP: the temperature will rise fast and fall slowly, once you have the right temperature the WGK should stay
reasonably stable.
TIP: Always cook with the lid closed for flavour and control.
You can have a cooler zone on one half whilst cooking by
using the half moon heat deflector
Use different heights for differing cooking fierceness
10

4} Warp Factor
For very fast, very hot cooking 300-350 ºC
Examples: Pizza, self cleaning
How to set up your wild goose rack - Pizza
Light a good hour before needed. Clean out all the ash and use
100% new charcoal, taking car to hand place large lumps with
plenty of room for air circulation between particularly on top of
the charcoal grid. Use more charcoal than for normal grilling.
Set the heat deflector rack on the highest possible position.
Place the half moon heat deflectors on
the rack.
Despite the fact that the heat deflector looks like a pizza stone,
you can’t cook directly on it. If you do, the pizza base will burn.
Place the (optional) Pizza stone directly on top of the heat
deflector.
Allow extra time for the WGK to warm up when using the heat
deflector.
Once your stone is hot enough you should be able to cook a pizza
in just a couple of minutes.
TIP: scatter some semolina on the pizza stone just before cooking so
that the pizza doesn’t stick during cooking.
How to set up your vents and charcoal
Before lighting, clean out all ash. Use only 100% new charcoal and
put alot in. Once lit, position the bottom vent about 2”open and the
petal wheel fully
and slide it fully
across. Allow the temperature to come up.
Keep an eye on the temperature and be ready to adjust the top
vent to fine tune the temperature.
You will probably want the petal vent open and the top vent slid
half open.
TIP: the temperature will rise fast and fall slowly, once you have
the right temperature the WGK should stay reasonably stable.
For Pizza, first use the heat deflector shelf
Then add the two half moon heat deflectors, then
place the pizza stone on top
Allow some time for the ceramic to warm up
11

Care & Maintenance
Clean out the Ashes
Remove the charcoal grid and sweep out all the ashes to allow good air flow on a regular basis.
Once a year or so remove the whole ceramic fire bowl ( put your arm down the middle and lift by the vent hole)
sweep out all the ash and return the fire bowl.
Check the tension on the steel bands
Use a spanner to check that the bands are nice and tight and lined up in the right place.
Check the bands as soon as you assemble the WGK the first time and annually thereafter.
When your Wild Goose Kamado goes Mouldy
After a period of no use, a layer of mould may from on the grids.The best way (and easiest) is to simply light your
WGK according to the warp factor procedure.The hot temperature will clean the Kamado.Use a wire brush on the
half moon cooking grids to remove any last debris.
Replace the seals
Usually every couple of years you will need to replace the seals top and bottom. If you cook on ‘warp factor’ a lot,
you may need to replace the seals more regularly. It’s important to keep a good seal so that you maintain your good
air control using the top and bottom vents.
Keep it covered
Keep your WGK covered when not in use to
protect it from the elements.
Don't bash the Ceramic
it's tough and heavy but like any pottery it can
smash if you hit it hard enough.Take particular
care with the lid as if it slams down it can cause
damage that is not covered under guarantee.
Never leave the lid up for long periods and
regularly check that the steel bands are securely
holding it (check tension at least once a year)
Burn only charcoal
Please don't be tempted to use your WGK as a
heater or burn anything other than lumpwood
charcoal.Logs,coal etc may cause damage to
the firebowl.
12

Care & Maintenance
Crazing
It is perfectly normal for the ceramic glaze to craze early on.These appear like
cracks but in fact it is crazing caused by different expansion rates between the
clay and the glaze.
Crazing does not affect the performance or lifespan of your Wild Goose Kamado,
however it can become more visually apparent when the glaze is dusty.
Trouble shooting
If you are struggling to get your Kamado up to temperature within about 20 minutes try the following checklist:
1. Have you cleaned out the ash thoroughly? (occasionally, you can even remove the firebowl to clean out).
2. Are you using dry, restaurant grade lumpwood charcoal in decent sized pieces and have you stacked it by hand
with nice gaps between chunks for airflow?
3. Have you put enough charcoal in? You do need to use probably more than you think - but this is not a waste because
when you close the vents after cooking, it will go out and you can re-use the charcoal next time (3 times max).
4. Once lit, if you have both vents open fully after following the above advice you should get a good heat
reasonably quickly.
Guarantee
Your Wild Goose Kamado comes with a 12 month guarantee.
Safety advice:
Weight: Wild goose Kamado is heavy, Please take care closing the lid and when lifting into the cart. Be careful when
pushing around, if the wheels stick on rough ground you could push it over with too enthusiastic a push.
Children: Keep little hands away from the hinge,the lid when closing and the bottom vent (hot). If a child lifts the
lid, they may not have the strength to hold it up and may let it slam - which could also cause damage.
Backdraft: Any fire that is starved of oxygen can potentially flare up when it receives a sudden influx of oxygen,
known as a backdraft.To ensure that this does not occur,we recommend that whilst lifting the lid, you pause for a
second or two with the lid an inch or so open to allow the air in gradually, rather than yanking it up in one movement.
Fire: Occasionally, sparks may spit out of the bottom vent so take care that flammable items are not nearby when
the WGK is lit. Similarly, hot ash could spill out of the bottom vent.Take care on wooden decking,and don't leave
your WGK unsupervised when lit.
After use: Close the top and bottom vents and allow to go out.Do not cover, or put away inside until completely
cooled - the next day most likely.
External use only
13

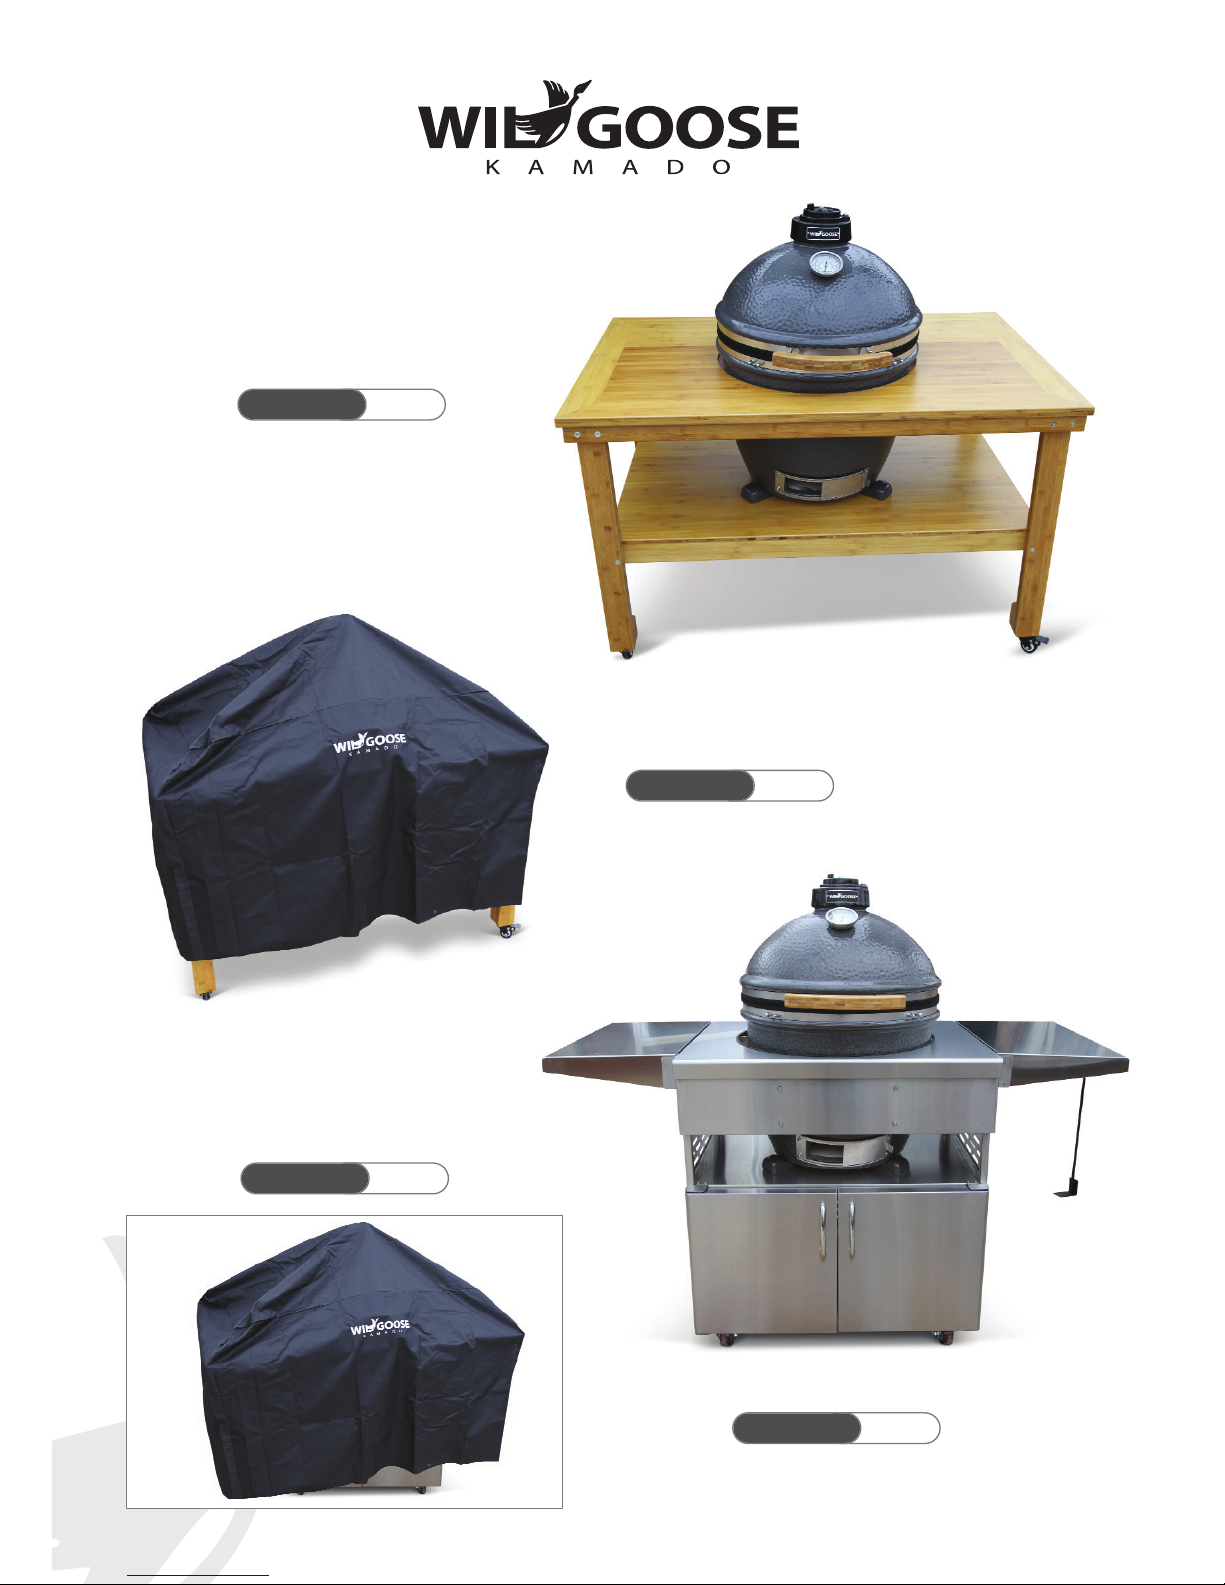
Models & Accessories available
14
Wild Goose Kamado 18 (with cart)
Wild Goose Kamado (stand alone)
Cover for with cart model Pizza Stone
!"#$%&'()*+,-(
!"#!%&'()*+,-(
!"#.%&'()*+,-(!"#/%&'()*+,-(
Models & Accessories available
15
Steel cupboard table for stand alone Kamado
Cover for steel table model
Wooden table for stand alone Kamado
!"#0%&'()*+,-(
!"/1%&'()*+,-(
!"#2%&'()*+,-(
Cover for wooden table model
!"#"%&'()*+,-(

WILD GOOSE KAMADO
UK Distributor:The Greenhouse People Ltd, Blythe Park, Cresswell, Stoke-on-Trent, ST11 9RD.
Helpline 01782 388811 email: info@greenhousepeople.co.uk
www.greenhousepeople.co.uk
Table of contents
Popular Grill manuals by other brands


Proficook
Proficook Gasgrill PC-GG 1258 instruction manual

Weber
Weber PLATINUM 2200 NG operating guide

Redmond
Redmond RBQ-0251-E user manual

Lincat
Lincat Lynx 400 GG1R Installation, operating and servicing instructions

Nexgrill
Nexgrill 720-0441-LP Assembly & operating instructions

Kenyon
Kenyon G2 owner's manual


