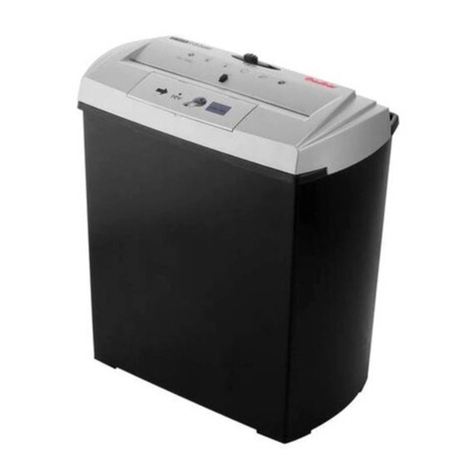
Yard Works YF8010 User manual

Garden Shredder
Déchiqueteuse de jardin
model number / nºde modèle 060-1744-0 | contact us / communiquez avec nous au: 1.866.523.5218
IMPORTANT:
Read and understand all safety rules and operating
instructions before using this product.
Instruction
Manual
IMPORTANT:
Lisez et comprenez toutes les règles de sécurité et les
instructions de fonctionnement avant d'utiliser ce produit.
Guide
d’utilisation

model number 060-1744-0 | contact us: 1.866.523.5218 model number 060-1744-0 | contact us: 1.866.523.5218
2 3
SPECIFICATIONS 2
KNOW YOUR GARDEN SHREDDER 3
SYMBOLS 4
ELECTRICAL INFORMATION 7
GENERAL SAFETY RULES 8
ASSEMBLY 11
OPERATION 13
MAINTENANCE 17
TROUBLESHOOTING 19
DISPOSAL 20
WARRANTY 21
Table of Contents
Know Your Garden Shredder
Type Corded
Voltage 120 V~ 60 Hz
Amp 15 A
No-load Speed 3700 RPM
Cutting Capacity 1 1/2" (39 mm)
Discharge Collection box
Weight 30 lb (13.7 kg)
Specifications
KNOW YOUR GARDEN SHREDDER
Always take care when removing the packaging to prevent damage to
you or to the garden shredder.
• Remove all parts from the box and carefully remove all packaging.
Take care not to lose any instructions which may be affixed to the
parts. These provide important information which will be required
while assembling the garden shredder.
• Keep all packaging until the garden shredder is fully assembled
and has been operated successfully.
!
1
2
3
4
5
6
7
8
9
14
10
12
13
15
16
17
18
11
7. Locking knob
8. Overload protector
9. Power cable
10. Plunger
11. Wheel covers
12. Wheels
13. Axle tube
14. On/Off switch
15. Socket wrench
16. Wheel bushing
17. Self-locking nut
18. Washer
1. Feed hopper
2. Body cover
3. Locking button
4. Collection box
5. Left bracket
6. Right bracket

model number 060-1744-0 | contact us: 1.866.523.5218 model number 060-1744-0 | contact us: 1.866.523.5218
4 5
Symbols
Symbols
Some of the following symbols may be used on this product. Please study
them and learn their meaning. Proper interpretation of these symbols will
allow you to operate the product effectively and safely.
Symbol Description/Explanation
V Volts-Voltage
A Amperes-Current
Hz Hertz-Frequency (cycles per second)
W Watts-Power
~ Alternating current-Type of current
/min Per Minute-Revolutions, strokes,
surface speed, orbits, etc., per minute.
Class II Construction-Double-insulated construction
Safety Alert-Precautions that involve your safety
Hand Alert-Warning! Never place hands into ejection
chute as serious injury will occur.
The rotating part will continuously run for several
seconds after you turn off the machine.
READ THE OPERATOR'S MANUAL(S) – Read,
understand and follow all instructions in the user
manual(s) before attempting to assemble and
operate.
CAUTION! Beware of stones and other foreign objects
that could be thrown from the product.
Keep bystanders and children a safe distance (at
least 11 yd/10 m) away from the work area.
DANGER! Cutting/ dismemberment hazard - Keep
hands away from the rotating blade.
Do not open or remove safety shields while motor is
running.
WARNING! Turn the machine OFF and disconnect
it from the power supply before inspecting, cleaning,
changing accessories or conducting any other
maintenance task.

model number 060-1744-0 | contact us: 1.866.523.5218 model number 060-1744-0 | contact us: 1.866.523.5218
6 7
Electrical Information
GUIDELINES FOR USING EXTENSION CORDS
USE THE PROPER EXTENSION CORD.
Make sure your extension cord is in good condition. When using on extension
cord, be sure to use one heavy enough to carry the current your product will
draw. An undersized cord will cause overheating. The table below shows the
correct size to use depending on cord length and nameplate ampere rating.
If in doubt, use the next heavier gauge. The smaller the gauge number, the
heavier the cord.
Minimum Gauge for Extension Cords (AWG)
(When using 120 V only)
Ampere Rating Total Length of Cord in feet (meter)
More Than Not More Than
0 6
6 10
10 12
12 16
25' (7.6 m) 50' (15 m) 100' (30.4 m) 150' (45.7 m)
18 16 16 14
18 16 14 12
16 14 16 12
14 12 Not Recommended
Make sure your extension cord is properly wired and in good condition.
Always replace a damaged extension cord or have it repaired by a qualified
person before use. Keep extension cords away from sharp objects, excessive
heat and damp or wet areas.
Use a separate electrical circuit for your tools. This circuit should use a wire
of at least 12 gauge and should be protected with a 15 A time-delayed fuse.
Before connecting the motor to the power line, make sure the switch is in the
OFF position and the electric current is identical to that stamped on the motor
nameplate. Running at a lower voltage will damage the motor.
!WARNING! Always make sure that your outlet is property grounded.
If you are uncertain, have it checked by a certified electrician.
This garden shredder is for outdoor use only. Do not expose to rain
or use in damp locations.
Although this shredder is double-insulated, the extension cord and
receptacle must still be grounded while in use to protect the operator
from electric shock.
Always wear safety goggles or safety glasses with
side shields, and as necessary a full faceshield as
well as full ear protection when operating this product.
Do not stand on the machine.
Symbols

model number 060-1744-0 | contact us: 1.866.523.5218 model number 060-1744-0 | contact us: 1.866.523.5218
8 9
General Safety Rules
FOR ALL DOUBLE-INSULATED
APPLIANCES
1. Replacement Parts: when servicing use only identical replacement parts.
2. Polarized Appliance Connections: to reduce the risk of electric shock, this
appliance has a polarized plug (one blade is wider than the other) and
will require the use of a polarized extension cord. The appliance plug will
fit into a polarized extension cord only one way. If the plug does not fit
fully into the extension cord, reverse the plug. If the plug still does not fit,
obtain the correct polarized extension cord. A polarized extension cord
will require the use of a polarized wall outlet. This plug will fit into the
polarized wall outlet only one way. If the plug does not fit fully into the
wall outlet, reverse the plug. If the plug still does not fit, contact a qualified
electrician to install the proper wall outlet. Do not change the equipment
plug, extension cord receptacle, or extension cord plug in any way.
FOR ALL APPLIANCES
1. Do not use appliances in damp or wet locations as this can be dangerous.
2. Do not use in the rain.
3. Keep children away. All visitors should be kept at a safe distance from the
work area.
4. Dress properly. Do not wear loose clothing or jewellery, which can get
caught in moving parts. Use of rubber gloves and heavy footwear is
recommended when working outdoors. Wear protective hair covering to
contain long hair.
5. Use safety glasses. Always use face or dust mask if operation is dusty.
6. Use the right appliance. Do not use appliance for any job except that for
which it is intended.
7. Ground Fault Circuit Interrupter (GFCI) protection should be provided
on the circuit(s) or outlet(s) to be used for the gardening appliance.
Receptacles with built-in GFCI protection may be used for this measure of
safety.
8. Warning—to reduce the risk of electric shock, use only with an extension
cord intended for outdoor use, such as an extension cord of cord type
SW-A, SOW-A, STW-A, STOW-A, SJW-A, SJOW-A, SJTW-A or
SJTOW-A.
9. Extension Cord
Make sure your extension cord is in good condition and is heavy enough
to carry the current your product will draw. An undersized extension cord
will cause a drop in line voltage resulting in loss of power and overheating.
To reduce the risk of disconnection of appliance cord from the extension
cord during use:
i) make a knot as shown in below.
ii) Use one of the plug-receptacle retaining straps or connectors
described in this manual.
10. Avoid unintentional starting. Do not carry plugged-in appliance with finger
on switch. Be sure switch is off when plugging in.
11. Do not abuse cord. Never carry appliance by cord or yank it to disconnect
from receptacle. Keep cord away from heat, oil, and sharp edges.
12. Do not force appliance. It will do the job better and with less likelihood of
a risk of injury at the rate for which it was designed.
13. Do not overreach. Keep proper footing and balance at all times.
14. Stay alert. Watch what you are doing. Use common sense. Do not
operate appliance when you are tired.
15. Disconnect the appliance from the power supply when not in use, before
servicing, when changing accessories such as blades, and the like.
16. Keep guards in place and in working order.
17. Keep blades sharp.
18. Keep hands and feet away from cutting area.
Shredder cord
Extension cord
(A) Tie cord as shown (B) Connect plug and receptacle

model number 060-1744-0 | contact us: 1.866.523.5218 model number 060-1744-0 | contact us: 1.866.523.5218
10 11
FITTING THE TRANSPORTATION WHEELS
Before using the garden shredder, some assembly is required.
1. Turn the machine upside down on a flat surface and rotate the two
brackets from the outside of the machine to the upright position (Fig. 1).
2. Attach the axle tube between the left and right brackets. Slide the axle
through the assembly hole in left bracket then through out the other
assembly hole in the right bracket.
3. Position the washers and wheel bushings on each end of the axle tube.
Then assemble the wheels onto each end of the axle end. Use the self-
locking nuts on each end of the axle and tighten both the self-locking nuts
using the wrench supplied (Fig. 2).
4. Attach the wheel cover and make sure everything is assembled in the
correct position.
Fig. 1
Assembly
!WARNING! You may need assistance to lift the machine out of the
box and assemble it.
NOTE: before using the garden shredder, read the instruction
book carefully.
!
Fig. 2
NOTE: The wheels must be fitted the correct way round to allow
the nuts to tighten on each end of the axle.
!
wheel cover
nut
wheel
washer
wheel bushing
axle tube
left bracket
assembly holes
WARNING!
1. Do not allow garden waste to accumulate before shredding as it will begin
to compost, become too damp and clog the cutting assembly. Dry material
will help most material to clear the ejection chute. Save some dry sticks
until last to help clean the blade area.
2. Frequently monitor the build-up of shredded material.
3. Do not allow shredded material to build up and fill the inside of the
shredder's discharge chute.
4. When the collection box is full, press the On/Off switch to turn the garden
shredder off before emptying.
General Safety Rules
!WARNING! Do not put your hands up inside the shredder's
discharge chute to clear away shredded material while the shredder
is switched on or connected to the power supply.

model number 060-1744-0 | contact us: 1.866.523.5218 model number 060-1744-0 | contact us: 1.866.523.5218
12 13
FITTING THE COLLECTION BOX
1. Lift the locking button then attach the collection box into the frame as
shown in Fig. 3.
2. Make sure the locking button and locking knob (Fig. 4) are locked
before using the machine.
Assembly
Fig. 3
!WARNING! Before assembly, make sure that the machine is
switched off and unplugged.
!WARNING! Take care when tilting the unit onto its wheels as
the unit has an uneven weight distribution when tilted and during
wheeled transportation.
NOTE: Before assembling the collection box, make sure the
machine is in the upright position and two brackets are placed on
the ground.
!
locking button
!WARNING! To ensure the stability of the shredder, make sure that
the cap-headed bolts and washers are securely tightened.
Fig. 4
locking knob
For best results when shredding, follow the guidelines shown in the table
below.
MATERIAL SHREDDING METHOD
Operation
Feed into the feeding chute at a rate which the shredder
will accept without overloading. Use the plunger to push
the material into the chute if required.
Twigs and pruning up to
1/4" (6 mm) diameter.
Branches and pruning
up to 1 1/2" (39 mm) in
diameter.
Bedding plants, weeds
and shrubby growth.
Clip off all side growth with pruning shears before
feeding into the feeding chute with the plunger.
Knock soil and stones off the roots to avoid damage to
the blades. Avoid weeds that may have seeded. The
seeds may not decompose and may germinate later.
With any material having a high, moisture content, it is
advisable to feed in some drier sticks at regular intervals
to help push the material through the cutting assembly
and prevent it from clogging.
Freshly cut foliage,
hedge pruning, and
kitchen waste (e.g.,
cabbage leaves,
vegetable peelings,
etc.)
Fig. 5
On position
Fig. 6
Off position

model number 060-1744-0 | contact us: 1.866.523.5218 model number 060-1744-0 | contact us: 1.866.523.5218
14 15
Operation
START/ STOP THE SHREDDER
1. Connect to the electric power supply.
2. To switch on the shredder, press the power On/Off switch to the ON
position (Fig. 5).
3. To switch off, simply press the On/Off switch to the OFF position (Fig. 6).
NOTE: Ensure power On/Off switch is in the OFF position before
plugging in the shredder.
!
!WARNING! Do not put your hands into the feeding chute.
The shredder must be used in the upright position only. Do not
operate the shredder if it is lying on its side.
When feeding long woody branches/stems into the shredder, be
careful of whip and vibrations as they get caught by the cutter.
The cutting device has a tendency to pull branches/stems into
the machine. Do not try to impede entry of the material being cut
once feeding has started.
CLEARING OBSTRUCTIONS
If the shredder becomes jammed, power to the motor will automatically
cut off. If the shredder jams and can not be restarted, the following actions
should be taken.
1. Switch the shredder OFF.
2. Disconnect shredder from electric power supply before attempting to
unblock any jams.
3. Unscrew locking knob, located on underside of cover.
4. Lift body cover up so you can clearly see the cutting section.
5. Remove any twigs, branches or other material that may be clogging
the blades, feeding chute or discharge chute.
6. Close body cover, make sure it is correctly located and securely
retighten the locking knob.
OPERATION OF OVERLOAD PROTECTOR
If the machine is overloaded, the overload protector incorporated in the
motor will cut off the power to the shredder.
Fig. 7
locking knob
body cover
feeding chute
Operation
NOTE: If body cover is not correctly fitted, and locking knob is
not securely tightened, the shredder can not be operated.
!
Fig. 8
overload protector
1. Leave the shredder for a few minutes, then press the overload
protector to reset the machine (Fig. 8).
2. Press the main switch to the ON position to restart the shredder.
3. If after above steps the shredder still can not be started, the motor
protector needs to be disconnected from the power circuit. Unplug the
power cable from the socket, wait for a few minutes, then plug it in and
follow above steps to restart the shredder.
USE PLUNGER
Use the plunger provided to help push the branches/stems down into the
feeding chute.
!WARNING! The garden shredder has a tendency to pull branches/
stems into the machine. Do not try to impede entry of the material
being cut once feeding has started.

model number 060-1744-0 | contact us: 1.866.523.5218 model number 060-1744-0 | contact us: 1.866.523.5218
16 17
NOTE: After prolonged use, the garden shredder may lose
performance. If the blades become worn or damaged, they can
be reversed to provide a new cutting edge.
!
Fig. 9
NOTE: 1. Do not allow garden waste to accumulate before
shredding as it will begin to compost and become too damp and
clog the cutting assembly. Dry material will help most material to
clear the ejection chute. Save some dry sticks until last to help
clean the blade area.
2. Frequently monitor the build-up of shredded material.
3. Do not allow shredded material to build up and fill the inside of
the shredder's discharge chute.
4. When the collection box is full, make sure to press the On/Off
switch to turn the garden shredder off, and release the locking
button before emptying collection box.
!
Operation
Maintenance
BLADE MAINTENANCE
Fig. 10 Fig. 11
The shredder has two blades that are attached to a rotating support.
When one side of a blade becomes dull, it can be turned over in order to
use the other side. Dull blades can be replaced or properly sharpened.
1. Switch shredder off by pressing the power On/Off switch to the Off
position.
2. Disconnect the shredder from the electric power supply.
3. Turn the locking knob counter-clockwise until the body cover can be
opened. Lift up the body cover to expose the two blades (Fig. 7).
4. Wearing protective gloves, use a screwdriver (not supplied) to hold the
blade plate, then use the hexagonal end of the socket wrench supplied
to loosen and remove the first hexagon socket head screw (Fig. 10).
5. Turn the blade plate 180°, use the hexagonal wrench to loosen and
remove the other hexagon socket head screw (Fig. 11).
6. Lift out the old blade. Either reinsert the blade with the sharp edge in
position as the cutting surface or insert a replacement blade.
7. Follow the same procedure for the opposite cutting blade.
8. Replace and tighten the two screws in order to secure the new blade
to the support.
9. Close cover, making sure it is correctly placed, and securely retighten
locking knob.

model number 060-1744-0 | contact us: 1.866.523.5218 model number 060-1744-0 | contact us: 1.866.523.5218
18 19
GENERAL MAINTENANCE
1. For maximum performance and longevity, keep the shredder clean
and in good working condition.
2. Inspect the switch and the power cord for damage before each use.
3. Check for damaged, missing, or worn parts. Check for loose screws,
moving parts that are jammed, or any other condition that may affect
the operation.
4. If abnormal vibration or noise occurs, turn the garden shredder OFF
immediately and have the problem corrected before further use.
5. If damaged or performing abnormally, do not use the shredder until it
has been properly repaired, or replaced.
NOTE: If body cover is not correctly fitted, and locking knob is
not securely tightened, the shredder can not be operated.
!
Maintenance
CLEANING
1. Wipe the outside of the shredder with a soft, dry cloth.
2. Remove the hopper from the housing body before washing the inside
of the hopper.
3. Do not hose the shredder down or wash it with water.
!WARNING! To avoid injury, electric shock, or damage to the
shredder, do not allow any liquid to get inside the shredder.
!WARNING! To avoid damage or electric shock, do not use
strong solvents or detergents on the plastic housing or the plastic
components. Certain household cleaners may cause damage and
create a shock hazard.
TROUBLESHOOTING
If your device is not operating properly, follow the instructions below. If this
does not solve the problem, please contact your local repair agent.
Problem Possible cause Solution
Motor not running. 1. No mains voltage.
2. Cable faulty?
3. Was the motor
protection triggered?
4. Was the safety switch
triggered?
1. Check cable, plug, socket
and fuse.
2. Contact your local repair
agent.
3. Remove all chipped pieces
and press reset button.
4. Check the hopper-motor
housing connection.
Material to be
chipped is not
pulled in.
1. Material blockage?
2. Are the blades
blocked?
3. Are the blades worn?
1. Remove all chipped pieces
from the blades.
2. Remove all chipped pieces
and press reset button.
3. Replace the blades if
necessary.
Troubleshooting
!WARNING! Before making any repairs or adjustments, make sure to
turn the switch Off and unplug.

model number 060-1744-0 | contact us: 1.866.523.5218 model number 060-1744-0 | contact us: 1.866.523.5218
20 21
RECYCLING AND DISPOSAL
1. Recycle unwanted materials instead of disposing of them as waste.
All tools, hoses and packaging should be sorted, taken to the local
recycling centre, and disposed of in an environmentally safe way.
2. Recycle rather than dispose of unwanted material in landfill whenever
possible. The machine is delivered in rigid packaging to avoid damage
during transportation, but the packaging, roller, and the machine itself
are manufactured from recyclable materials and should be disposed of
accordingly.
3. Do not throw your clippings into a rubbish bin where it will be disposed
of in landfill. You can dispose of clippings on your compost heap,
alternating them with other garden material. Alternatively, many
communities provide a public collection point where you can dispose
of your garden waste in an environmentally friendly manner.
4. Recycle packaging where facilities exist.
Disposal
Warranty
2-YEAR LIMITED WARRANTY
For TWO YEARS from the date of
purchase within Canada, YARDWORKS
CANADA will, at its option, repair or
replace for the original purchaser, free
of charge, any part or parts found to be
defective in materials or workmanship.
THIS WARRANTY DOES NOT COVER:
1. Any part that has become inoperative
due to misuse, commercial use,
abuse, neglect, accident, improper
maintenance, or alteration;
2. The unit, if it has not been operated
and/or maintained in accordance with
the owner’s manual;
3. Normal wear, except as noted below;
4. Routine maintenance items such as
sealing cap, sealing ring; or
5. Normal deterioration of the exterior
finish due to use or exposure.
HOW TO OBTAIN SERVICE:
Warranty service is available by calling
the toll-free helpline at 1.866.523.5218.
The factory will not accept the return
of a complete unit unless prior written
permission has been extended by
YARDWORKS CANADA.
TRANSPORTATION CHARGES:
Transportation charges for the
movement of any power equipment unit
or attachment are the responsibility
of the purchaser. The purchaser must
pay transportation charges for any part
submitted for replacement under this
warranty unless such return is requested
in writing by YARDWORKS CANADA.
OTHER WARRANTIES:
All other warranties, express or implied,
including any implied warranty of
merchantability is limited in its duration
to that set forth in this express limited
warranty. The provisions as set forth
in this warranty provide the sole and
exclusive remedy of YARDWORKS
CANADA obligations arising from the
sale of its products.
YARDWORKS CANADA will not be liable for incidental or
consequential loss or damage.
Made in China
Imported by Yardworks Canada Toronto, Canada M4S 2B8

nºde modèle 060-1744-0 | communiquez avec nous au: 1.866.523.5218 nºde modèle 060-1744-0 | communiquez avec nous au: 1.866.523.5218
22 23
FICHE TECHNIQUE 22
FAMILIARISEZ-VOUS AVEC VOTRE
DÉCHIQUETEUSE DE JARDIN 23
SYMBOLES 24
RENSEIGNEMENTS RELATIFS À
L’ÉLECTRICITÉ 27
RÈGLES DE SÉCURITÉ GÉNÉRALE 29
ASSEMBLAGE 32
UTILISATION 34
ENTRETIEN 40
DÉPANNAGE 43
RECYCLAGE ET ÉLIMINATION 44
GARANTIE 45
Table des matières
Type Avec cordon électrique
Tension 120 V~60 Hz
Ampère 15 A
Vitesse à vide 3 700 tr/min
Capacité de coupe 1 1/2 po (39 mm)
Décharge Boîte de collecte
Poids 30 lb (13.7 kg)
Fiche technique
Familiarisez-vous avec votre
déchiqueteuse de jardin
FAMILIARISEZ-VOUS AVEC VOTRE DÉCHIQUETEUSE
DE JARDIN
Faites attention lors du retrait de l’emballage pour éviter de vous blesser
ou d’endommager la déchiqueteuse de jardin.
• Retirez toutes les pièces de la boîte et retirez soigneusement les
matériaux d’emballage. Veillez à ne pas perdre les consignes qui peuvent
être apposées sur les pièces. Celles-ci fournissent des avis importants qui
seront nécessaires lors de l’assemblage de la déchiqueteuse de jardin.
• Conservez tous les matériaux d’emballage jusqu’à ce que la
déchiqueteuse de jardin soit complètement assemblée et assurez-vous
qu’elle fonctionne correctement.
!
1
2
3
4
5
6
7
8
9
14
10
12
13
15
16
17
18
11
7. Bouton de blocage
8. Bouton de réinitialisation
9. Cordon d’alimentation
10. Poussoir
11. Enjoliveurs de roue
12. Roues
13. Tube d’essieu
14. Bouton Marche/Arrêt
15. Clé à douille
16. Bague de roue
17. Écrou autobloquant
18. Rondelle
1. Trémie d’alimentation
2. Couvercle du corps
3. Bouton de blocage
4. Boîte de collecte
5. Support gauche
6. Support droit

nºde modèle 060-1744-0 | communiquez avec nous au: 1.866.523.5218 nºde modèle 060-1744-0 | communiquez avec nous au: 1.866.523.5218
24 25
Symboles
Symboles
Il se peut que certains des symboles suivants soient utilisés sur ce produit.
Veuillez les étudier et en apprendre la signification. La bonne interprétation
de ces symboles vous permettra de faire fonctionner le produit efficacement
et de façon sécuritaire.
Symbole Description/Signification
V Volt-Tension
A Ampère-Courant
Hz Hertz-Fréquence (cycles par seconde)
W Watt-Alimentation
~ Courant alternatif-Type de courant
/min Par minute-Tours, coups, vitesse périphérique,
orbites, etc., par minutes.
Construction de classe II-Construction à double
isolation
Alerte à la sécurité-Précautions touchant à votre
sécurité
Alerte concernant vos mains-Avertissement! Ne
placez jamais vos mains dans la goulotte d’éjection
sous peine de blessures graves.
La pièce rotative fonctionnera en continu pendant
plusieurs secondes après l’arrêt de l’appareil.
LISEZ LE GUIDE D’UTILISATION– Veuillez
lire, comprendre et suivre toutes les instructions
contenues dans le guide d’utilisation avant de tenter
d’assembler et d’utiliser cet appareil.
ATTENTION! Faites attention aux pierres et autres
objets étrangers qui pourraient être projetés de
l’appareil.
Gardez les personnes présentes et les enfants à une
distance de sécurité (au moins 32 pi/10 m) de la zone
de travail.
DANGER! Risque de coupure/ mutilation – Gardez les
mains à l'écart de la palette rotative.
N’ouvrez pas les écrans
protecteurs et ne les retirez pas lorsque le moteur est
en marche.
AVERTISSEMENT! Éteignez l’appareil et
débranchezle du secteur avant d’inspecter, de
nettoyer, de changer des accessoires
ou d’effectuer toute autre tâche d’entretien.

nºde modèle 060-1744-0 | communiquez avec nous au: 1.866.523.5218 nºde modèle 060-1744-0 | communiquez avec nous au: 1.866.523.5218
26 27
Renseignements relatifs à l’électricité
LIGNES DIRECTRICES RELATIVES À L’UTILISATION DES
RALLONGES
UTILISEZ UNE RALLONGE APPROPRIÉE.
Assurez-vous que la rallonge est en bon état. Veillez à utiliser une rallonge
de calibre assez élevé pour transporter le courant nécessaire à l’appareil
utilisé. Une rallonge trop faible provoquera une surchauffe. Le tableau ci-
dessous indique le calibre adéquat recommandé en fonction de la longueur
du cordon et de son intensité nominale.
Dans le doute, utilisez le calibre de fil supérieur. Plus le calibre est petit, plus
le cordon est épais.
Calibre minimum pour les rallonges
(calibrage américain normalisé des fils)
(seulement lors de l’utilisation de 120 V)
Intensité nominale Longueur totale du cordon en pieds (mètres)
Plus de Pas plus de
0 6
6 10
10 12
12 16
25 pi (7,6 m) 50 pi (15 m) 100 pi (30,4 m) 150 pi (45,7 m)
18 16 16 14
18 16 14 12
16 14 16 12
14 12 Usage déconseillé
Veillez à ce que votre rallonge soit adéquatement câblée et en bon état.
Remplacez toujours une rallonge endommagée ou faites-la remplacer par
une personne qualifiée avant de l’utiliser. Tenez vos rallonges à l’écart
des objets pointus ou tranchants, de la chaleur excessive et des endroits
humides ou mouillés.
Branchez cet appareil à un circuit électrique indépendant. Ce circuit devrait
comprendre un fil de calibre 12 au minimum et devrait être protégé par
un fusible temporisé de 15 A. Avant de raccorder le moteur à la ligne
d’alimentation, assurez-vous que l’interrupteur est sur la position OFF (arrêt)
et que le classement du courant électrique est identique au courant figurant
Toujours portez des lunettes de sécurité ou des
lunettes de sécurité avec des écrans latéraux
et, si nécessaire, un écran facial complet ainsi qu'une
des protection auditive complète lors de l'utilisation
de ce produit.
Ne vous tenez pas sur la machine.
Symboles

nºde modèle 060-1744-0 | communiquez avec nous au: 1.866.523.5218 nºde modèle 060-1744-0 | communiquez avec nous au: 1.866.523.5218
28 29
sur la plaque signalétique du moteur. Si la tension du courant est trop faible,
vous risquez d’endommager le moteur.
!AVERTISSEMENT! Assurez-vous toujours que votre prise est bien
mise à la terre.
Si vous n’êtes pas certain, faites-la vérifier par un électricien qualifié.
Cette déchiqueteuse de jardin est destinée pour une utilisation
à l’extérieur seulement. N’exposez pas l’appareil à la pluie ou à
l’humidité.
Bien qu’il s’agisse d’une déchiqueteuse à double isolation, la
rallonge et la prise doivent toujours être mises à la terre lors de
l’utilisation afin de protéger l’utilisateur contre les décharges
électriques.
Renseignements relatifs à l’électricité
Règles de sécurité générale
POUR TOUS LES APPAREILS À DOUBLE
ISOLATION
1. Pièces de rechange : utilisez exclusivement des pièces identiques à
celles d’origine pour les réparations.
2. Branchement des appareils avec fiche polarisée : afin de réduire les
risques de choc électrique, cet appareil est muni d’une fiche polarisée
(une broche est plus large que l’autre) et devra être utilisé avec une
rallonge polarisée. La fiche de l’appareil s’insère d’une seule façon
dans la rallonge polarisée. Si la fiche ne s’insère pas complètement
dans la rallonge, inversez la fiche. Si la fiche ne s’insère toujours
pas complètement, obtenez une bonne rallonge polarisée. Pour une
rallonge polarisée, il faudra une prise polarisée. Il n’y a qu’une façon
d’insérer cette fiche dans une rallonge polarisée. Si la fiche ne s’insère
pas complètement dans la prise murale, inversez la fiche. Si elle n’y
entre toujours pas, demandez à un électricien qualifié d’installer la prise
adéquate. Ne changez d’aucune façon la fiche de l’appareil, la prise ou la
fiche de la rallonge.
AVIS CONCERNANT TOUS LES APPAREILS
1. N’utilisez pas d’appareils dans des endroits humides ou mouillés car cela
peut être dangereux.
2. Ne l’utilisez pas par temps pluvieux
3. Tenez les enfants à l’écart du produit. Tous les visiteurs doivent se tenir à
une distance sécuritaire de la zone de travail.
4. Portez des vêtements appropriés. Ne portez pas de vêtements amples
ou des bijoux, car ils peuvent se faire happer dans les pièces mobiles.
L’utilisation de gants de caoutchouc et de chaussures de protection
robustes est recommandée pour les travaux extérieurs. Portez un couvre-
chef pour contenir les cheveux longs.
5. Portez des lunettes de sécurité. Portez toujours un protecteur facial et un
masque antipoussières si l’opération produit de la poussière.
6. Utilisez le bon appareil. N’utilisez pas l’appareil aux fins autres que celles
prévues.

nºde modèle 060-1744-0 | communiquez avec nous au: 1.866.523.5218 nºde modèle 060-1744-0 | communiquez avec nous au: 1.866.523.5218
30 31
Règles de sécurité générale
7. La protection de disjoncteur de fuite de terre (DFT) devrait être fournie
sur le(s) circuit(s) ou la(les) prise(s) dont vous vous servez pour l’appareil
de jardinage. Des prises ayant une protection DFT intégrée peuvent être
utilisées par mesure de sécurité.
8. Avertissement – Afin de réduire le risque de choc électrique, utilisez
l’appareil uniquement avec une rallonge destinée à une utilisation à
l’extérieur, comme une rallonge de type de cordon SW-A, SOW-A,
STW-A, STOW-A, SJW-A, SJOW-A, SJTW-A. ou SJTOW-A.
9. Rallonge
Assurez-vous que votre rallonge est en bon état et suffisamment lourde
pour répondre aux appels de courant de l’appareil. Une rallonge de
calibre trop faible provoquera une chute de tension, causant ainsi une
perte de puissance et la surchauffe de l’appareil. Pour réduire le risque de
débranchement du cordon de l’appareil de la rallonge pendant l’utilisation
de l’appareil :
i) faites un nœud comme indiqué ci-dessous.
ii) utilisez l’une des sangles de retenue de la fiche ou des connecteurs
décrits dans ce guide.
10. Évitez un démarrage accidentel. Ne transportez pas l’appareil branché
avec le doigt sur le bouton Marche/Arrêt. Veillez à ce que le bouton
Marche/Arrêt soit en position d’arrêt avant de brancher l’outil.
11. N’utilisez pas le cordon de façon abusive. Ne transportez pas l’appareil
par son cordon ou ne tirez pas sur le cordon pour le débrancher de la
prise. Tenez les rallonges loin des sources de chaleur, de l’huile et des
bords tranchants.
Règles de sécurité générale
12. Ne forcez pas l’appareil. Vous aurez de meilleurs résultats et éviterez de
vous blesser si vous respectez la vitesse pour laquelle l’appareil a été
conçu.
13. Ne travaillez pas en extension. Gardez toujours un appui solide et un bon
équilibre.
14. Restez vigilant. Faites attention à ce que vous faites. Faites appel au bon
sens. N’utilisez pas l’appareil lorsque vous êtes fatigué.
15. Débranchez l’appareil de l’alimentation électrique lorsqu’il n’est pas
utilisé, avant l’entretien et lors du changement d’accessoires tels que les
lames.
16. Les dispositifs protecteurs doivent être bien en place et en bon état.
17. Gardez les lames bien affûtées.
18. Gardez les mains et les pieds à l’écart de la zone de coupe.
Cordon rallonge
(A) Bouclez les cordons comme indiqué (B) Branchez la fiche à la prise
Cordon de la déchiqueteuse
AVERTISSEMENT!
1. Ne laissez pas les déchets de jardin s’accumuler avant d’effectuer le
déchiquetage car ils auront déjà commencé à se décomposer, seront
trop humides et donc obstrueront l’ensemble de coupe. La plupart des
matériaux secs se dégageront facilement de la goulotte d’éjection. Mettez
de côté les branches sèches jusqu’à la fin du déchiquetage pour faciliter
le nettoyage de l’ensemble de lame.
2. Surveillez fréquemment l’accumulation de matériel déchiqueté.
3. Ne laissez pas de matériaux déchiquetés s’accumuler et remplir l’intérieur
de la goulotte d’éjection de la déchiqueteuse.
4. Lorsque la boîte de collecte est pleine, appuyez sur le bouton Marche/
Arrêt pour éteindre la déchiqueteuse de jardin avant de la vider.
!AVERTISSEMENT! Ne placez pas vos mains dans la goulotte
d’éjection de la déchiqueteuse pour nettoyer les débris lorsque
celle-ci est en marche ou sous tension.

nºde modèle 060-1744-0 | communiquez avec nous au: 1.866.523.5218 nºde modèle 060-1744-0 | communiquez avec nous au: 1.866.523.5218
32 33
Assembly
MONTAGE DES ROUES DE TRANSPORT
1. Placez l’appareil à l’envers sur une surface plane et faites pivoter les deux
supports de l’extérieur de l’appareil en position verticale (fig. 1).
2. Fixez le tube d’essieu entre les supports gauche et droit. Faites glisser
l’essieu dans le trou d’assemblage du support gauche, puis dans l’autre
trou d’assemblage du support droit.
3. Positionnez les rondelles et les bagues de roue à chaque extrémité du
tube d’essieu. Assemblez ensuite les roues à chaque extrémité de l’essieu.
Utilisez les écrous autobloquants à chaque extrémité de l’essieu et serrez
les deux écrous autobloquants à l’aide de la clé fournie (fig. 2).
4. Fixez l’enjoliveur de roue et assurez-vous que tout est assemblé dans la
bonne position.
Fig. 1
Assembly
!AVERTISSEMENT! Vous aurez peut-être besoin d’aide pour sortir
l’appareil de la boîte et l’assembler.
REMARQUE : Avant d’utiliser la déchiqueteuse de jardin,
lisez attentivement le guide d’utilisation. Avant d’utiliser la
déchiqueteuse de jardin, un assemblage partiel est requis.
!
Fig. 2
REMARQUE : Les roues doivent être montées dans le bon sens
pour permettre le serrage des écrous à chaque extrémité de
l’essieu.
!
enjoliveur de roue
écrou
roue
rondelle
bague de roue
tube d'essieu
support de gauche
trous d'assemblage
!AVERTISSEMENT! Avant d’effectuer l’assemblage, assurez-vous
que l’appareil est éteint et débranché.
!AVERTISSEMENT! Faites attention lorsque vous inclinez l’appareil
sur ses roues car il présente une répartition inégale du poids
lorsqu’il est incliné et lors du transport sur roues.
Fig. 3
bouton de blocage
Fig. 4
molette de
verrouillage

nºde modèle 060-1744-0 | communiquez avec nous au: 1.866.523.5218 nºde modèle 060-1744-0 | communiquez avec nous au: 1.866.523.5218
34 35
MONTAGE DE LA BOÎTE DE COLLECTE
1. Levez le bouton de blocage, puis fixez la boîte de collecte dans le
cadre comme illustré à la fig. 3.
2. Assurez-vous que le bouton de blocage et la molette de verrouillage
(fig. 4) sont en position de verrouillage avant d’utiliser l’appareil.
Utilisation
REMARQUE : Avant d’assembler la boîte de collecte, assurez-
vous que l’appareil se trouve en position verticale et que deux
supports sont placés sur le sol.
!
!AVERTISSEMENT! Pour assurer la stabilité de la déchiqueteuse,
assurez-vous que les boulons à tête cylindrique et les rondelles
sont bien serrés.
Pour obtenir les meilleurs résultats lors du déchiquetage, suivez les
consignes d’utilisation indiquées dans le tableau ci-dessous.
MATÉRIAU MÉTHODE DE DÉCHIQUETAGE
Utilisation
Introduisez les débris dans la trémie d’alimentation à
une vitesse que la déchiqueteuse peut accepter sans la
surcharger. Utilisez le poussoir pour pousser le matériau
dans la goulotte si nécessaire.
Coupe des branches
de 1/4 po (6 mm) de
diamètre.
Coupe des branches
de moins de 1 1/2 po
(39 mm) de
de diamètre.
Les plantes à massif,
les mauvaises herbes
et les arbustes.
Coupez toute croissance latérale à l’aide de cisailles
avant de les insérer dans la trémie d’alimentation avec
le poussoir.
Frappez les racines pour enlever le sol et les pierres
afin d’éviter d’endommager les lames. Évitez les
mauvaises herbes qui ont des graines. Les graines
peuvent ne pas se décomposer et peuvent germer plus
tard.
Pour tous les matériaux ayant une teneur en humidité
élevée, il est conseillé d’introduire des branches plus
sèches à intervalles réguliers pour aider à pousser le
matériau à travers le dispositif de coupe et l’empêcher
de se boucher.
Feuillage fraîchement
coupé, coupes de
haie et déchets de
cuisine (p. ex., feuilles
de chou, pelures de
légumes, etc.)
Fig. 5
position de marche
Fig. 6
position d’arrêt

nºde modèle 060-1744-0 | communiquez avec nous au: 1.866.523.5218 nºde modèle 060-1744-0 | communiquez avec nous au: 1.866.523.5218
36 37
MARCHE/ARRÊT DE LA DÉCHIQUETEUSE
1. Branchez l’appareil à la source d’alimentation électrique.
2. Pour démarrer la déchiqueteuse, appuyez sur le bouton Marche/Arrêt
pour le mettre en position de marche (fig. 5).
3. Pour arrêter la déchiqueteuse, appuyez sur le bouton Marche/Arrêt pour
le mettre en position d’arrêt (fig. 6).
REMARQUE : Assurez-vous que le bouton Marche/Arrêt est en
position d’arrêt avant de brancher la déchiqueteuse.
!
!AVERTISSEMENT! Ne mettez pas vos mains dans la trémie
d’alimentation.
La déchiqueteuse doit être utilisée en position verticale
seulement. N’utilisez pas la déchiqueteuse si elle est couchée
sur son côté.
Lorsque vous introduisez de longues branches/tiges ligneuses
dans la déchiqueteuse, faites attention aux coups de fouet et aux
vibrations car elles sont happées par le dispositif de coupe.
Le dispositif de coupe a tendance à tirer les branches/tiges dans
la déchiqueteuse. N’essayez pas de gêner l’entrée du matériau
coupé une fois que le déchiquetage commence.
DÉGAGEMENT DES OBSTRUCTIONS
Si la déchiqueteuse est bouchée, le moteur sera automatiquement
mis hors tension. Si la déchiqueteuse se bloque et ne peut pas être
redémarrée, les actions suivantes doivent être entreprises.
1. Éteignez la déchiqueteuse.
2. Débranchez la déchiqueteuse de l’alimentation électrique avant de
tenter de débloquer un bourrage.
3. Dévissez la molette de verrouillage située sous le couvercle.
Utilisation
Utilisation
4. Levez le couvercle du corps pour voir clairement la section de coupe.
5. Enlevez toutes les tiges, branches ou tout autre matériau susceptible
d’obstruer les lames, la trémie d’alimentation ou la goulotte d’éjection.
6. Fermez le couvercle du corps, assurez-vous qu’il est correctement placé
et resserrez bien la molette de verrouillage.
couvercle du corps
trémie d’alimentation
molette de verrouillage
REMARQUE : Si le couvercle du corps n’est pas correctement
installé et que la molette de verrouillage n’est pas bien serrée, la
déchiqueteuse ne peut pas être utilisée.
!
Fig. 8
bouton de
réinitialisation
BOUTON DE RÉINITIALISATION DU DISPOSITIF DE PROTECTION
CONTRE LES SURCHAGES
1. Laissez la déchiqueteuse pendant quelques minutes, puis appuyez sur le
bouton de réinitialisation du dispositif de protection contre les surcharges
pour réinitialiser l’appareil (fig. 8).
2. Appuyez sur le bouton Marche/Arrêt principal afin de redémarrer la
déchiqueteuse.
Fig. 7

nºde modèle 060-1744-0 | communiquez avec nous au: 1.866.523.5218 nºde modèle 060-1744-0 | communiquez avec nous au: 1.866.523.5218
38 39
3. Si, après avoir effectué les étapes ci-dessus, la déchiqueteuse ne
démarre toujours pas, le protecteur de moteur doit être déconnecté du
circuit d’alimentation. Débranchez le cordon d’alimentation de la prise,
attendez quelques minutes, puis branchez-le et suivez les étapes ci-
dessus pour redémarrer la déchiqueteuse.
UTILISATION DU POUSSOIR
Utilisez le poussoir fourni pour aider à pousser les branches/tiges vers le
bas de la trémie d’alimentation.
!AVERTISSEMENT! La déchiqueteuse de jardin a tendance à tirer
les branches/tiges dans l’appareil. N’essayez pas de gêner l’entrée
du matériau coupé une fois que le déchiquetage commence.
Utilisation
Utilisation
Fig. 9
REMARQUE : Après une utilisation prolongée, la déchiqueteuse
de jardin peut connaître une baisse de performance. Si les lames
sont usées ou endommagées, elles peuvent être réinstallées en
les retournant pour offrir un nouveau bord tranchant.
!
REMARQUE :
1. Ne laissez pas les déchets de jardin s’accumuler avant
d’effectuer le déchiquetage car ils auront déjà commencé
à se décomposer, seront trop humides et donc obstrueront
l’ensemble de coupe. La plupart des matériaux secs se
dégageront facilement de la goulotte d’éjection. Mettez de
côté les branches sèches jusqu’à la fin du déchiquetage pour
faciliter le nettoyage de l’ensemble de lame.
2. Surveillez fréquemment l’accumulation de matériel
déchiqueté.
3. Ne laissez pas de matériaux déchiquetés s’accumuler
et remplir l’intérieur de la goulotte d’éjection de la
déchiqueteuse.
4. Lorsque la boîte de collecte est pleine, assurez-vous
d’appuyer sur le bouton Marche/Arrêt pour éteindre la
déchiqueteuse de jardin et désactivez le bouton de blocage
pour dégager la boîte de collecte aux fins de vidage.
!
This manual suits for next models
1
Table of contents
Languages: