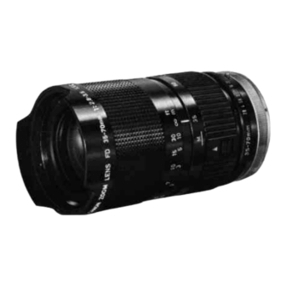
Yashica AF Lenses User manual

YASHICA
AFUENSES
24mm
F2.8
28mmT2.8
BOilim
F1.8
MACROfGOmm
F2.8
Instruction
Manual
Bedienungsanleitung
Mode
d'emploi
Manual
de
instrucciones

D
W
20
35
2216
8 4 I 4 8
16
22
*The
lens
and
cameramodelsused
for
thè
illustrations
in
thismanual
are
thè
Yashica
AF
Lens
50mm
F1.8
and
Yashica
230-AF.
If
youuse
otherYashica
AF
lenses
on
thiscamera,
orif
you
use
thislens
on
other
Yashica
AF
cameras,
youcan
also
operateyourlens
in
thè
same
procedures
as
described
init.
However,
pleasenotethatthere
are
someinstructions
relating
to
particular
models
only.
*Inden
AbbidungendieserBedienungsanleitungwerden
das
YashicaAF-Objektiv
f/1,8/50
mmunddie
KameraYashica
230-AF
gezeigt.
I
m
allgemeinengelten
diein
dieserBedienungsanleitungbeschriebenenVerfahrenauch
bei
Verwendung
anderer
AF-Objektive
an
dieserKamerabzw.
bei
VerwendungdiesesObjektivs
mit
eineranderenYashica
AF-Kamera
Bitte
beachten
Sie
jedoch,
dal}
sicheinige
der
Anweisungen
nurauf
bestimmteModellebeziehen.
*Les
modèlesd'objectif
etde
boftierutiliséspour
les
illustrationsdans
ce
manuel
soni
l'objetifYashica
AF50mm
F1,8
etle
Yashica230-AF.
Si
vousutilisezd'autresobjectifsYashica
AFsurcet
appareil
ousi
vousutilisez
cet
objectif
sur
d'autresboitiersYashica
AF,
vouspouvezégalement
utiliser
votreobjectifselon
les
mémes
procedures
que
celles
décritesdans
ce
manuel.Faitestoutefoisattention
au
fait
que
certaines
des
instructions
ne
soni
relativesqu'à
des
modèlesparticuliers..
*
Los
modelos
de
objetivos
y
càmarasenpleados
en
las
ilustraciones
de
estemanualcorresponden
al
objetivo
AFde50
mm,
F1.8,
y a la
Yashica230-AF.
Si
empleaotrosobjetivos
AF
Yashica
con
està
càmara,
o si
utilizaesteobjetivo
con
otrascàmaras
AF
Yashica,podràusartambién
su
objetivo
de
acuerdo
con
los
procedimientosdescritos
a
continuación.
Sin
embargo,
tenga
en
cuenta
que
algunas
delas
instrucciones
se
refieren
a
ciertosmodelosparticularessolamente.

Name
of
parts
Atout
thè
depth
of
field
scale
O
Distanceindex
©
Focusing
ring
©
Lenshood
O
Distancescale
0
Depth
of
fieldscale
©
Infraredcompensation
mark
O
Aperture
value
coupling
Pin
©
Auto-focuscoupling
©
LensmountingIndex
©
Cameraauto-focussignalcontact
Lens
mounting/removal
1
Remove
thè
rearlens
capand
thè
camera's
body
cap.
2
Align
thè
lensmountingindexmarkwith
thr
lens
index
on
thè
camerabody,
and
insert
thè
lens
to
thè
body;rotate
thè
lensclockwise
until
a
distinct
"click"
is
heard.(Fig.
®).
•To
remove
thè
lens,press
thè
lensrelease
button
on
thè
camerabody,rotate
thè
lenscounterclockwise
and
remove.
Built-in
lenshood
(AF
Lens
28mm
F2.8
andAF
Lens
50mm
F1.8
only):
The
hood
is
built
inlo
thè
front
endof
thè
lens.
Touse
thè
lenshood,rotate
thè
focusing
ring
to
infinity;
thè
endof
thè
hood
can
then
bc
pulled
out
toward
thè
front.
(Fig.
(B1)
Focusing
Auto-focusing:
Set
thè
camera'sswitch
to
thè
auto
focusmode.When
thè
shutter
releasebutton
is
piessed
lightly,
focusing
will
be
performed
automatically.
•
Whenperformingauto-focusing,
donot
touch
thè
focusingringsince
it
willrotateautomatically.
Manual-focusing:
Set
thè
camera
to
thè
manualfocus
mode.
While
lookingthrough
thè
viewfinder,rotate
thè
lens'
focusingring
to
adjust
thè
focus
as
desired
Focusing
can
also
be
performed
by
setting
thè
distance
index
on
thè
lens
to
thè
figure
on
thè
distancescale
corresponding
to
thè
distance
to
thè
subject.(Fig.
;C').
Aperture
setting
The
AF
(auto-focus)lensdoes
not
nave
an
aperturering.
To
set
thè
lensaperture,consult
thè
camera's
Instructionbooklet
and
follow
thè
instructionsgiven
there.
When
thè
lens
is
focused
ona
givensubject,
not
only
willthatsubject
bein
clear
focus,
buta
certaindistance
m
front
and
back
of
thè
subjectwillalso
bein
clear
focus;
thatrange
of
clearfocus
is
called
thè
"depth
of
field.".
The
depth
of
fieldscaleindicates
thè
approximaterange
within
whichclearfocuswill
be
produced
at
various
aperture
(f-stop)
settings.Noticethatthisrangechanges
depending
on
thè
distance
from
thè
subject
and
thè
aperturesettingchosen.
For
informationregarding
useof
thè
depth
of
fieldscale
in
photography,
consult
thè
Instructionbookletfurnishedwithyourcamera.(Fig.
@
).
About
thè
infrared
compensation
mark
Whenusinginfrared
black
and
whitefilm,
thè
point
of
focus
changesslightlyfromthat
produced
with
normal
films.
Asa
result,compensation
of
focus
is
required.
First,performfocusingnormallywithoutusing
any
filters
on
thè
lens,
and
note
thè
distance
indicated
on
thè
focusing
ring.
Then,attach
any
desired
filters
and
turn
thè
focusingringslightly
so
that
thè
aforementioned
focusing
ringnumber(distance)
is
alignedwith
thè
infrared
compensationmark(redline).(Fig.
©).
•
When
using
infrared
color
films,
consult
thè
instructions
providedwith
thè
film.
•
Infraredphotography
should
be
performedusing
manualfocusing.
Notes
regarding
use
•
Whendust
or
diri
adheres
to
thè
surface
of
thè
lens,
use
a
blower
or
soft
lensbrush
to
remove
thè
dirt;
to
removefingerprints,wipegentlywith
a
commercially
available
lens
paper.
Donot
exert
unreasonable
pressure
when
wiping!
•To
clean
dirtfrom
thè
lensbody,wipegentlywith
a
soft
cloth.
Never
use
benzine,
thinner,
or
othersolvents!
•
When
a
lens
is
removedfrom
thè
camerabody,
be
sure
to
replace
thè
front
and
rear
lens
caps,
and
store
in
a
well-ventilated
piaceawayfromhumidity
and
dust.
•Donot
touch
thè
Auto-focussignalcontact.Touching
thè
contacts
may
deposit
oil
or
dirt,
resulting
in
poor
electrical
contact.

GA
Type
Lens
Hoods
(Optional)
TheGA
TypeLensHoodsdevelopedspecially
forAF
Lenses
have
thè
followìngfeatures.
•
Mounting
and
dismounting
thè
hood
is
verysimple.
It
canbe
mounted
by
simply
pushing
thè
end
with
a
larger
diameterinto
thè
lens
and
dismounted
by
pulling
thè
small
knob
atitsend
toward
thè
front.
•
Because
ithasa
taperedconstructiontoward
thè
front
end,
thè
flash
light
isnot
cut
offbyits
frontedgewhen
takingflashpictureswith
a
CS-110AF/111AF.
•
Becausethislenshoodcovers
thè
lens'
focusing
ring,
you
will
nevertouch
thè
focusingringinadvertentlywhile
thè
auto-focusing
System
is
operating.Therefore
youcan
concentrate
your
attention
on
your
picture-taking
by
holding
thè
lensfirmlywithyourfingers.Remove
thè
hood
to
shoot
on
manualfocusing.
•
Because
thè
hood
is
fixed
atits
installata
position,
its
effect
may
be
reducedwithsomelenseswhen
thè
lens'
front
endis
fully
extended.
•The
lens
caps
that
canbe
used
on
these
GA
type
hoods
areas
follows:
62
mm
Lens
Cap
K-64
(clip-on
type)
For
GA-11
Note:
If
youputone
filler
on
thè
AF
Lens
24
mm
F2.8,
thè
lenshood
maynotbe
mounted
and
dismountedsmoothly
if
thè
lens'
front
endis
fully
extended.Before
putting
a
lens
capon
thè
hood,
be
sure
toset
thè
focusingring
at
<x.
Bezeichnung
der
Te/fé
O
Entfe
ningsindexlinie
O
Scharioinstellring
©
Gegenlichtblende
O
Entfemungsskala
©
Schàrlcntiefenskala
©
Infrarot-Kompensationsmarke
O
Blendenwert-Kupplungsstift
©
Autofokus-Kupplung
©
Objektivbefestigungs-lndexmarke
©
Autofokus-Signalkontakt
der
Kamera
Ansetzen/Entfernen
des
Objektivs
I
Den
hinteren
Objektivschutzdeckel
undden
Kameragehàusedeckel
entfernen..
2
Die
Objektivbefestigungs-lndexmarke
aufden
Objektivindex
am
Kameragehause
ausrichten,
und
das
Objektiv
andas
Gehause
ansetzen;
das
Objektiv
im
Uhrzeigersinn
drehen,
bises
deutlich
hòrbareinrastet.
(Abb.
(A).
•Zum
Entfernen
des
Objektivs
den
Objektiv-
entriegelungsknopf
am
Kameragehause
drucken,
das
Objektiv
entgegen
dem
Uhrzeigersinn
drehen
und
dieses
abnehmen.
EingebauteGegenlichtblende
(nur
fiir
AF-Objektiv
1/2,8.12?'mm
und
AF-Objektiv
f/1,8/50
mm):
Die
"ii><|i'n
làitblende
istindas
vordereEnde
des
Objektivs
uni
i"h;itt.
Zur
Verwendung
der
Gegenlichtblende
den
Scharleistellring
auf
unendlichdrehen;
das
Ende
der
Gegi
ilichtblende
kanndannnachvornherausgezogen
werdcn.
(Abb.
B:)
Scharfeinstellung
Aut
i.itisene
Scharfeinstellung:
Den
Schalter
der
Kameu
aufdie
Betriebsart
tur
automatische
Scharloinstellung
einstellen.Wenn
der
Auslóserleicht
gedrur.kt
wird,erfolgt
die
Scharfeinstellung
automatisch.
•Beider
automatischenScharfeinstellung
den
Scharloinstellring
nichtberùhren,
weil
er
sich
automatischdreht.
Mantelle
Scharfeinstellung:
Die
Kamera
aufdie
Betriebsart
fùr
manuelle
Scharfeinstellungeinstellen.
Durch
den
Sucherblicken
und
dabei
den
Scharieinstellring
der
Kameradrehen,
umdie
Schartiiinstellung
wunschgemàB
vorzunehmen.
Die
Scharfeinstellungkannebenfallsvorgenommenwerden,
indem
mari
die
Entfernungsindexlinie
am
Objektiv
aufdie
Zahl
an
dar
Entfemungsskalaeinstellt,
diedem
Abstand
vom
Motiv
entspricht.(Abb.
©).

Blendeneinstellung
Das
AF-Objektiv
(AF=
Blendenaulomatik)weistkeinen
Blendenring
auf.
Umdie
Objektivòffnung
einzustellen,
auf
die
Bedienungsanleitung
der
KameraBezug
nehmen,
und
gemà'B
den
dori
angegebenenAnweisungen
vorgehen.
Einzelheiten
iiber
die
Schàrfentiefenskala
Wenn
das
Objektiv
aufein
bestimmtes
Motiv
scharf
eingestellt
ist,werdennicht
nur
jenesMotiv,
sonderò
auch
der
Bereich
in
einem
gewissenAbstand
vorund
hinter
dem
Motivscharfabgebildet;dieserBereich
der
scharfenAbbildungwird
"Scharfentiefe"
genannt.
Die
Schafentiefenskala
zeigt
den
ungefàhrenBereich
;m
in-
nerhalb
demdie
Motive
bei
verschiedenen
Blendeneinstellungenscharf
abgebildet
werden.Bitte
beachten,
daB
sich
dieserBereich
je
nach
dem
Abstand
vom
Motiv
undder
gewahlten
Blendeneinstellungandert.
Einzelheiten
uber
die
Verwendung
der
Schàrfentiefenskala
beim
Fotografierensind
inder
Bedienungsanleitungangegeben,
die
Ihrer
Kamera
beigefugtist.(Abb.
IDI).
Einzelheiten uber
die
Infrarot-Kompensationsmarke
Bei
Verwendung
von
Infrarot-SchwarzweiBfilm
weicht
der
Brennpunkt
geringfugig
von
demjenigennormaler
Filme
ab.
Daher
ist
eine
Brennpunktkompensation
erforlerlich.
Zuerst
die
Scharfeinstellung
aufdie
normaleWeiseohne
Verwendungirgendwelcher
Filler
aufdem
Objektiv
vornehmen,
unddieaufdem
Scharfeinstellhng
angezeigteEntfernung
zur
Kenntnìsnehmen.Dann
die
gewunschten
Filteranbringen,
undden
Scharfeinstfelinng
leicht
drehen,
sodaBdie
vorher
erwahnte
Scharfeinstellringzahl
(Entfernung)
aufdie
Infrarot-
Kompensationsmarke(roteLinie)ausgerichtetist.(Abb.
©).
«
Bei
Verwendung
von
Infrarot-Farbfilm
aufdie
Gebrauchsanweisung
Bezugnehmen,
diedem
Film
beigefugt
ist.
•
Infrarotaufnahmen
sollten
mit
Hilfe
der
manuellen
Scharfeinstellung
gemachtwerden.
Anmerkungen
zur
Verwendung
•
WennStauboderSchmutz
ander
Oberflache
des
Objektivsanhaftet,
einen
Blaspinsel
oder
einen
weichen
Pinsel
verwenden,
um
den
Schmutz
zu
enllernen;
zum
Entfernen
von
Fingerabdrucken
das
Objektiv
mit
einem
im
Handel
erhàltlichenObjektivpapier
vorsichtìgì
abwischen.
BeimAbwischenkeinen
zu
starkenlruck
auf
das
Objektiv
ausuben!
•Zum
Entfernen
von
Schmutz
vom
Objeklivkòrper
diesenvorsichtig
mit
einemweichen
Tuch
nbwischen.
Niemals
Benzin,
Verdunnungsmittel
oder
.'liniere
Lósungsmittel
verwenden!
•
Wenn
ein
Objektiv
vom
Kameragehause
entferntwird,
darauf
achten,
den
vorderen
und
hinteren
Objektivschutzdeckel
anzubrigen;
das
Objektiv
an
einem
gut
belufteten
Ort
aufbewahren,
der
frei
von
Feuchtigkeit
und
Staub
ist.
•Den
Autofokus-Signalkontaktnichtberùhren.Beim
Bertihren
der
Kontakte
kònnen
01
oderSchmutz
auf
diese
gelangen,
so
daB
ein
schlechter
elekthscher
Kontakt
die
Folge
ist.
GA-Gegenlichtblenden
(Sonderzubehòr)
Die
Gegenlichtblenden
vomTypGA
wurdenspeziell
tur
AF-Objektive
entwickelt
und
zeichnensichdurch
die
folgendenMerkmaleaus:
•
DieseGegenlichtblendenlassensichdenkbareinfach
anbringen
und
abnehmen.
Zum
Anbringen
drucken
Sie
einfach
das
Ende
mitdem
gròBeren
Durchmesser
indas
Objektiv,
zum
Entfernen
ziehen
Sieden
kleinenAnsatz
am
Ende
der
Gegenlichtblendenachvorn.
•Da
sich
die
Gegenlichtblendenachvorne
verjungt,
wird
das
Blitzlicht
bei
Aufnahmen
mitdem
Blitzgeràt
CS-110AF/111AF
nichtdurch
die
Vorderkante
der
Blende
blockiert.
•Dadie
Gegenlichtblende
uber
dem
Scharfeinstellring
angebrachtwird,bestehtkeineGefahreiner
versehentlichenVerstellung
des
Scharfeinstellrings
bei
Betrieb
der
Fokussierautomatik.
Sie
kònnen
sich
daher
vollstandig
aufdie
Aufnahmekonzentrieren,indem
Sie
das
Objektiv
test
zwischen
den
Fingernhalten.
Fùr
Aufnahmen
mit
manueller
Fokussierungentfernen
Sie
die
Gegenlichtblende.
«
Dadie
Gegenlichtblende
in
ihrerLage
fixiert
ist,
wird
ihre
Wirkung
bei
Verwendung
mit
bestimmtenObjektiven
u.U.
verringert,wenndiesevollstandigausgefahrensind.
•Die
folgendenObjektivschutzdeckelkònnen
ander
Vorderseite
dieserGegenlichtblendenangebracht
werden:
Objektivschutzdeckel
K-64,
62
mm
(aufsteckbar)
fur
GA-11
Hinweis:Wenn
ein
Filter
am
AF-Objektiv
f/2,8/24
mm
angebrachtist,kann
die
Gegenlichtblendeu.U.
nur
schwierig
angebracht
und
abgenommenwerden,wenn
das
Objektivvollstandigausgefahrenist.
In
einem
solchenFallstellen
Sieden
Scharfeinstellring
auf
Unendlich,bevor
Sieden
Objektivschutzdeckel
ander
Gegenlichtblende
anbringen.
Nomenclature
des
organes
O
Repère
des
distances
©
Bague
de
mise
au
pomt
©
Parasoleil
O
Echelle
des
distances
©
Echelle
des
profondeurs
de
champ
©
Repère
de
compensationinfrarouge
O
Goupille
de
couplage
de
valeur
d'ouverture
©
Accouplement
dela
mise
au
pointautomatique
©
Repère
de
montage
de
l'objectif
©
Contaci
de
signal
de
mise
au
pointautomatique
de
l'appareil
Fixation/retrait
de
l'objectif
I
Retirer
le
capuchond'objectif
artière
etle
capuchon
de
boìtier
de
l'appareilphoto.
2
Amener
le
repère
de
montaged'objectif
en
regard
du
repère
d'objectif
de
l'appareil
photo,
et
insérer
l'objectif
dans
le
boìtier;
taire
tournerl'objectifdans
le
sens
des
aiguilles
d'une
mentre
jusqu'à
ceque
l'on
entende
unnet
cliquetis.(Fig.
® ).
•
Pourretirerl'objectif,appuyer
surle
bouton
de
dégagementd'objectif
du
boTtier
de
l'appareilphoto,
tourner
l'objectifdans
le
senscontraire
des
aituilles
d'une
rnontre
etle
retirer,
Parasoleil
incorpora
(Objectif
AF28
mm
F2.8
et
Objectif
AF50mm
F1,8
seulement):
Le
parasoleil
est
incorpora
dansl'extrémitéavant
de
l'objectif.
Pour
utiliser
le
parasoleil,
taire
tourner
la
bague
de
mise
au
point
sur
l'infini;
on
pourra
alors
tirer
sur
l'extrémité
du
parasoleil
ver
l'avant.(Fig.
®
)
Mise
au
point
Mise
au
pointautomatique:Régler
le
sélecteur
de
l'appareilphoto
surle
mode
de
mise
au
point
automatique.Quand
on
appuielégèrement
surle
déclencheur,
la
mise
au
points'effecue
auto-
matiquement.
•
Quand
on
effectue
une
mise
au
point
automatique,
ne
pas
toucher
la
bague
de
mise
au
point
car
elle
se
mettrait
a
tournerautomatiquement.
Mise
au
pointmanuelle:
Mettre
l'appareilphotodans
le
mode
de
mise
au
point
manuelle.Tout
en
regardant
dans
le
viseur,tourner
la
bague
de
mise
au
point
de
l'objectif
de
fagon
a
régler
la
mise
au
point.
On
pourra
égalementeffectuer
la
mise
au
point
en
réglant
le
repère
des
distances
de
l'objectif
surle
chiffre
de
l'échelle
des
distancescorrespondant
a
la
distance
du
sujet.(Fig.
©).
Réglage
du
diaphragme
L'objectif
AF
(a
mise
au
pointautomatique)
ne
possedè
pasde
bague
de
diaphragme.Pourrégler
le
diaphragme
de
l'objectif,
consulter
le
mode
d'emploi
de
l'appareil
photo
et
suivre
les
instructions
quiy
sontdonnées.
A
propos
de
l'échelle
des
profondeurs
de
champ
Lorsque
l'objectif
estmisau
point
surun
sujetdonne,
la
mise
au
pointseranette
non
seulement
surle
sujet,
maiségalement
surune
certainedistancedevant
et
derrière
le
sujet;c'estcette
plage
de
netteté
dela
mise
au
point
que
l'onappelle
la
"profondeur
de
champ"
L'échelle
des
profondeurs
de
champindique
la
plage
approximative
sur
laquelle
la
mise
au
pointseranette
a
divers
réglages
du
diaphragme(ouverture
de
disphragme).
On
remarquera
que
cetteplagevarie
en
fonction
dela
distance
du
sujet
etdu
réglage
du
diaphragme.Pour
de
plus
amplesinformations
sur
l'utilisation
de
l'échelle
des
profondeurs
de
champ
lors
des
prises
de
vue,consulter
le
moded'emploi
de
l'appareilphoto.(Fig.
't))
).
A
propos
du
repère
de
compensation
infrarouge
Lorsqu'on
utilise
une
pelliculeinfrarougenoir
et
blanc,
le
niveau
dela
mise
au
pointdiffèrelégèrement
dece
qu'il
est
avec
une
pellicule
normale.
En
conséquence,
ilest
nécessaire
d'effectuer
une
compensation
de
mise
au
point.
Effectuertoutd'abord
la
mise
au
point
normalement.sansmonter
de
filtre
sur
l'objectif,
et
noter
la
distance
indiquée
surla
bague
de
mise
au
point.
Puìs,
monter
les
filtres
voulus.
et
tourner
lécè'r~~ri~~
;
-
oe
r'iSc.
--.'-.
point
de
facon
quete
nombre
de
la
bague
de
mise
au
pointrepéreprécédemment(distance)
Vienne
se
mettre
er
'egard
du
repère
de
compensation
infrarouge
(ligne
rouge).(Fig.
E ).
•
Lorsqu'onutilise
des
pellicule
infrarougescouleur.
consulter
le
mode
d'emploi
des
pellicules.
•Les
prises
aevue
infrarouges
doivent
ètre
effectuées
dans
le
mooe
de
mise
au
pointmanuelle.
Notes
relatives
a
l'utilisation
•
Lorsque
dela
poussière
oudela
saletécolle
a
la
surface
de
l'objectif,
retirer
la
saleté
a
l'aided'unepoire
scuffiante
ou
d'unebrossepour
Objectif
douce;pour
retirer
les
marques
de
doigts,essuyer
délicatement
avec
du
papierpour
Objectif
en
venie
dans
le
commerce.
Ne
pas
appuyertropfort
quand
on
essuie!
•
Pour
re!<rer
la
saleté
du
corps
de
l'objectif,essuyer
délicatementavec
un
chiffondoux.
Ne
jamaisutiliser
de
benzine,
diluants
ni
tousautressolvants!
•
Lorsqu'onretirel'objectif
du
boTtier
de
l'appareilphoto,
toujours
penser
a
remettre
les
capuchonsd'objectif
avant
et
arrière,
et
rangerl'objectifdans
un
endroitbien
aere
et
a
l'abri
de
l'humidité
etdela
poussière.
•Nepas
toucher
le
contaci
de
signal
de
mise
au
point
auotmatique
caron
risquerait
d'y
déposer
dela
graisse
ou
dela
saleté,
cequi
entratnerait
un
mauvais
contaci
éleclrique.
(Suite
pagesuivante)

Parasoleils
d'objectif
de
type
GA
(En
option)
Les
parasoleilsd'objectif
de
type
GA
spécialement
mis
au
point
pour
les
objectifs
AF
possèdent
les
caractéristiques
suivantes.
•La
mise
en
piace
etle
retrait
du
parasoleil
sont
très
simples.
Le
parasoleil
peutètre
monte
en
poussant
simplement
l'extrémité
du
plus
granddiamètre
sur
l'objectif
et
retiré
en
tirantversl'avant
le
petitbouton
qui
se
trouve
surson
extrémité.
•En
raison
desa
constructionconiqueversl'extrémité
avant,
la
lumière
de
l'éclair
du
flash
n'est
pas
coupée
parson
rebordavant
lors
dela
prise
de
photos
avec
flash
en
utilisant
un
flash
CS-110AF/111AF.
•
Gomme
ce
parasoleil
recouvre
la
bague
de
mise
au
point
de
l'objectif,vous
ne
risquez
pasde
touchei
accidentellement
la
bague
de
mise
au
pointpendant
le
fonctionnement
du
système
de
mise
au
point
automatique.
En
conséquence,vouspouvez
concentrar
votre
attention
surla
prise
de
vues
en
maintenan
fermement
l'objectifavec
les
doigts.Retirez
le
parasoleil
pour
prendre
des
photosdans
le
mode
de
mise
au
point
manuelle.
•
Gomme
le
parasoleil
est
fixé
a
sa
position
de
mise
en
piace,
son
effetpeutétreréduitaveccertainsobjectifs
lorsque
le
rebordavant
de
l'objectif
est
complètement
déployé.
•Les
capuchons
de
l'objectifpouvantétreutìlisés
sur
ces
parasoleils
de
type
GA
sont
les
suivants:
Capuchond'objectif
62
mm
K-64(type
a
fixer)
pour
GA-11
Note:
Si
vousplacez
un
filtre
sur
l'objectif
AF
24
mm
F2,8,
le
parasoleild'objectif
ne
peutétremonte
ou
retiré
régulièrement
sila
partieavant
de
l'objectif
est
complètementdéployée.Avant
de
piacer
un
capuchon
d'objectif
surle
parasoleil,
assurez-vous
de
bienpiacer
la
bague
de
mise
au
point
de
l'objectif
surla
position
oc.
Nomenclatura
O
indice
de
distancias
&
Anillo
de
enfoque
©
Parasol
del
objetivo
O
Escala
de
distancias
0
Escala
de
profundidad
de
campo
©
Marca
de
compensación
de
infrarrojos
O
Pasador
de
acoplamiento
del
valor
de
abertura
0
Acoplamiento
de
enfoqueautomàtico
©
indice
de
montaje
del
objetivo
C)
Contacto
dela
serial
de
enfoqueautomàtico
dela
càmara
Montaje/extracción
del
objetivo
1
Retire
la
tapatrasera
del
objetivo
y la
tapa
del
cuerpo
dela
càmara.
2
Alinee
la
marca
de
referencia
de
montaje
del
objetivo
conla
marca
de
referencia
del
cuerpo
dela
càmara
e
inserte
el
objetivo
enla
càmara.Gire
luego
el
objetivo
hacia
la
derecha
hasta
quese
oiga
un
sonido
de
chasquido.
(Fig.
(A)).
•
Para
retirar
el
objetivo,presionesobre
el
botón
de
liberación
del
objetivo
que
estàsituado
enel
cuerpo
de
la
càmara,gire
el
objetivohacia
la
izquierda
y
retirelo.
Parasol
del
objetivoincorporado(objetivo
AFde
28mm,
F2,8,
y
objetivo
AFde50mm,
F1,8
solamente):
El
parasol
del
objetivo
està
incorporado
en
el
extremo
delantero
del
objetivo.
Para
utilizar
el
parasol
del
objetivo,gire
el
anillo
de
enfoquehacia
la
posición
del
infinito;
el
extremo
del
parasolpadràsacarseluego
haciaadelante.(Fig.
IBI
)
Enfoque
Enfoque
automàtico:
Ponga
el
interruptor
dela
càmara
enla
posición
correspondiente
al
modo
de
enfoqueautomàtico.Cuando
se
presioneligeramente
el
disparador,
el
enfoque
se
Ilevarà
a
cabo
automàticamente.
•
Cuando
se
realice
el
enfoqueautomàtico,
no
toque
el
anillo
de
enfoqueporqueésteestaràgirando
automàticamente.
Enfoque
manual:
Ponga
la
càmara
enel
modo
de
enfoquemanual.
Mientras
mira
a
través
del
visor,
gire
el
anillo
de
enfoque
del
objetivoparaajustar
el
enfoque
deseado.
El
enfoquepuederealizarsetambiénajustando
el
indice
de
distancias
del
objetivo
enel
nùmero
dela
escala
de
distancias
que
corresponda
a la
distancia
a
quese
encuentra
el
objeto.(Fig.
© ).
Ajuste
de
abertura
El
objetivo
AF
(enfoqueautomàtico)
no
dispone
de
anillo
de
abertura.Paraajustar
la
abertura
del
objetivo,
consulte
el
manual
de
instrucciones
dela
càmara
y
siga
sus
instrucciones.

Acerca
de la
escala
de
profundidad
de
campo
Parasoles para
objetivos
tipo
GA
(Opcionales)
Cuando
el
objetivo
tenga
enfocado
cierto
objeto,
no
solamentedichoobjeto
eselque
queda
enfocado,
tambiénquedanenfocadostodos
los
objetos
que
estàn
a
ciertadistancia
por
delante
y por
detràs
deese
objeto.
Esa
distancia
enlaque
quedanenfocados
los
objetos
recibe
el
nombre
de
"profundidad
de
campo".
La
escala
dela
profundidad
de
campo
indica
aproximadamente
el
margen
deun
buenenfoque
con
diversas
aberturas
del
objetivo(indicadas
porla
letra
f y
un
nùmero).Tenga
en
cuenta
que
estemargen
de
enfoquedepende
dela
distancia
a laquese
encuentra
el
objeto
y dela
aberturaelegida.
Para
obtener
mas
informaciónsobre
como
utilizar
la
escala
de
profundidad
de
campo,consulte
el
manual
de
instruccionesprovisto
con
su
càmara.(Fig.
© ).
Acerca
de la
marca
de
compensación
de
infrarrojos
Cuandoutilice
una
pelicula
de
bianco
y
negro
para
fotografia
por
rayos
infrarrojos,
el
punto
de
enfoque
cambialigeramente
de
aquel
producìdo
con
peliculas
normales.
Por
està
razón,
se
hacenecesario
realizar
una
compensación
del
enfoque.Primero,enfoque
normalmente
sin
utilizar
filtro
alguno
enel
objetivo
y
anote
la
distanciaìndicada
enel
anillo
de
enfoque.
Luego,coloque
el
filtro
que
desee
y
gireligeramente
el
anillo
de
enfoquepara
queel
nùmerocorrespondiente
a
la
distanciaanotadaanteriormentequedealineado
con
la
marca
de
compensación
de
infrarrojos(linearoja).
(Fig.©).
•
Cuandoutilicepeliculas
de
color
parafotografia
por
rayos
infrarrojos,consulte
las
instruccionesprovistas
conla
pelicula.
•La
fotografia
por
rayos
infrarrojos
deberàrealizarse
utilizando
el
enfoquemanual.
Notas
sobre
la
utilización
•
Cuando
se
adhierasuciedad
y
polvo
enla
superficie
dela
lente,utilice
un
soplador
o
cepillosuavepara
lentesparapoderlimpiarla.
Para
eliminarhuellas
dactilares,
trote
ligeramente
conun
papel
de
limpieza
de
objetivos
de
venta
enel
comercioespecializado.
No
presione
excesivamente
al
limpiar.
•
Paralimpiar
la
suciedad
del
cuerpo
del
objetivo,
frótelo
cuidadosamente
conun
panosuave.Nunca
utilicebencina,diluyentes
de
pintura
o
cualquierotro
tipo
de
disolvente.
•
Cuandoretire
un
objetivo
dela
càmara,
nose
Divide
de
colocar
sus
tapasdelantera
y
trasera
y
guardarlo
en
un
lugar
ventiladoalejado
dela
humedad
y el
polvo.
•No
toque
el
contacio
dela
serial
de
enfoque
automàtico
yaquedelo
contrario
podria
depositarse
en
el
grasa
o
suciedad
que
reducirian
el
buen
contacio
eléctrico.
Los
parasoles
de
objetivos
tipo
GA
especialmente
disenados
paraobjetivos
AF
poseen
las
funciones
siguientes.
•La
instalación
y el
desmontaje
del
parasol
son
muy
sencillos.
El
parasol
puede
instalarsepresionandosimplemente
el
extremo
conun
diàmetro
mayor
dentro
del
objetivo,
y
desmontarsetirandohaciaadelante
dela
pequena
perilla
desu
extremo.
•
Como
el
parasoltiene
una
construccióncònicahacia
el
extremo
frontal,
la
iluminación
del
flash
nose
cortarà
mediante
su
borde
frontal
cuandofotografie
conla
CS-110AF/111AF.
•
Comoesteparasolcubre
el
anillo
de
enfoque
del
objetivo,
usted
no
podràenfocarnunca
por
descuido
el
anillo
de
enfoquecuando
este
funcionando
el
sistema
de
enfoque
automàtico.
Porlo
tanto,ustedpodrà
concentrarse
enla
composiciónfotogràficasujetando
firmemente
el
objetivo.Paraenfocarmanualmente,
desmonte
el
parasol.
•
Como
el
parasol
se
fija
ensu
posición
de
instalación,
su
efectopuedeversereducido
con
ciertosobjetivos
cuando
el
estremo
frontal
de
tales
objetivos
este
completamenteextendido.
•Las
tapas
que
podrànemplearse
con
estosparasoles
tipo
GAlon:
Tapa
p,nra
objetivos
de62
mm
K-64
(lipo
enganchable)
Para
la
GA-11
Nota:
Si
coloca
un
filtro
enel
objetivo
AFde24mm,
F2,8,
ne
podràinstalar
ni
desmontarfàcilmente
el
parasol
i:on
el
extremo
frontal
completamente
extendido
Antes
d"
colocar
la
tapa
enel
parasol
del
objetivo,
ajuste
t.'l
anillo
de
enfoque
a co.

Specifications/Technische
Daten/Fiche
technique/Especificaciones
AF24
mm
F2.8
AF
28mm
F2.8
AF50mm
F1.8
AF
MAGRO
60mm
F2.8
Focal
length
Brennweite
Longueur
focale
Distancia
focal
24
mm
28
mm
50
mm
60mm
Lens
composition
Aufbau
des
Objektivs
Composition
de
l'objectif
Composición
de
objetivos
9
elements
in8
groups
9
Semente
in8
Gruppen
9
elements
en8
groupes
9
elementos
en8
grupos
6
elements
in6
groups
6
Elemento
in6
Gruppen
6
éléments
en6
groupes
6
elementos
en6
grupos
6
elements
in4
groups
6
Elemente
in4
Gruppen
6
éléments
en4
groupes
6
elementos
en4
grupos
7
elements
in5
groups
7
Elemente
in5
Gruppen
7
éléments
en5
groupes
7
elementos
en5
grupos
Negative
size
Bildformat
Formai
de
négatif
Tamano
del
negativo
Angular
field
Bildwinkel
Angle
de
champ
Campo
angular
Mount
ObjektivanschluB
Monlure
Monlura
Aperture
Blende
Ouverture
Abertura
Minimum
aperture
Minimale
Blende
Ouverture
minimale
Abertura
minima
Minimum
focusing
disfance
Kleisler
Aufnahmeabsland
Distance
de
mise
au
point
minimale
Distancia
minima
de
enfoque
Maximum
magnification
Maximale
Vergròfìerung
Rapport
de
grossissement
maximal
Aumenlo
maximo
Filler
size
Filtergròlìe
Diamèlre
du
filfre
Tamano
del
filfro
Dimensions
Abmessungen
Dimensions
Dimensiones
Weighl
Gewichl
Poids
Peso
Accessories
Zubehòr
Accessoires
Accesorios
Hood
Gegenlichtblend
Para
setoli
Parasol
24x36
mm
24x36
mm
83°76°
AF
mount
AF-Fassung
^_
Monture
AF
Montura
AF
Autoaperture,
set
from
camerabody
Automatische
Blendenregelung
vom
Kameragehause
^_
Ouverture
automatique,réglée
sur
l'appareilphoto
Abertura
automàtica
aiustada
desde
la
carrara
F22
F22
\
0.25
m 0.3m
M1:6/
M1:7.6
^Bt
^^^H
24
x 36mm24x 36mm
46°40°
*.
1
F22
F32
(floating
System)
0
.f
„
o,,-
(schwebend
qelaaertesSystem)
""
(système
flottant)
(sistemadotante)
M1:6.6
M1:1
(screw
in)
(screw
in)
(screw
in)
(screw
in)
(Einschraubtyp)
.„
mrv,
(Einschraubtyp)
.n
„,„,
Einschraubtyp)
,-„
__
(Einschraubtyp)
(àvis)
49mm(àvis)
49mm(àvis)
58mm(àvis)
(tipo
roscado)(tiporoscado)
'
(tiporoscado)(tiporoscado)
c48.5(L)mm
66
(D)x40.5
(L)mm66(D)x 38(L)mm
67.5
(D)x
68.5
(L)mm
!
250
g 200g 200g 360g
Front
cap,rear
cap
Vorderer
und
hinterer
Schutzdeckel
«.
<_
«_
Capuchonavant,capuchonarrière
Tapasdelantera
y
trasera
(optional)
Built-in
slide
type
or
GA-1
1
(optional)
P
.
1
1
(Sonderzubehòr)EingebauterGleitypoder
GA-1
1
(Sonderzubehòr)
^
(en
option)Incorporè,
a
curseur
ou
GA-1
1
(en
option)
(opcionales)
Tipodeslizante
incorporado
o
GA-1
1
(opcionales)
Lenscase(optional)
Objektivtasche(Sonderzubehòr)
Étui
d'objectif
(en
option)
Caja
del
objetivo
(opcionales)
Yashica
70A
(hardcase)
or
Contax
No.1
(softcase)
Yashica
70A
(harterKocher)oderContax
Nr.1
(weicheTasche)
Yashica
70A
(étuidur)
ou
Contax
No.1
(étuisouple)
Yashica
70A
(cajadura)
o
Contax
N°1
(cajablanda)
Yashica
70A
(hardcase)
or
Contax
No.2
(soft
case)
Yashica
70A
(harterKocher)oderContax
Nr.2
(weicheTasche)
Yashica
70A
(étuidur)
ou
Contax
No.2
(étuisouple)
Yashica
70A
(cajadura)
o
Contax
N°2
(cajablanda)
SpecHications
and
design
are
subject
to
change
without
notice.
/ *
Anderungen
der
technischen
Daten
und
au/ìeren
Aufmachung
jedrzeit
vorbehalten.
Les
spécijications
etla
conception
soni
sujettes
a
modif/calion
sans
préaws.
/ *
Las
especificac/ones
y
e!
diseno
estàn
su/eros
a
cambios
sin
previo
aviso.
KYOCERA
CORPORATIONH880305
(5)
Pnnted
m
Japan
Table of contents
Popular Camera Lens manuals by other brands

Panasonic
Panasonic ET-D3QW300 operating instructions

Panasonic
Panasonic WV-LZA61/2S instructions

Sony
Sony SAL50M28 - 50mm f/2.8 Macro Lens Service manual

Nikon
Nikon AF Micro-Nikkor 60mm F/2.8 D instruction manual

Panasonic
Panasonic VW-CLT1 owner's manual

Kompernass
Kompernass SFO 180 A1 operating instructions