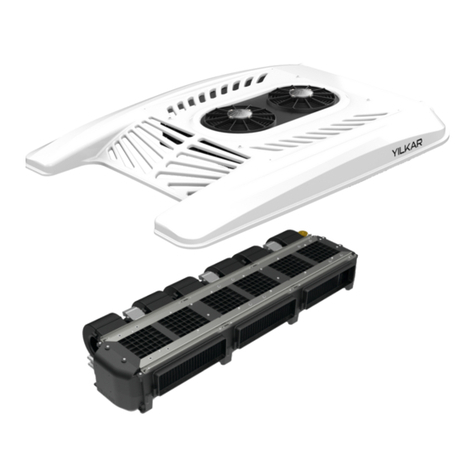
YILKAR YK 80S Maintenance manual

MONTAJ, BAKIM ve KULLANIM TALİMATLARI
ASSEMBLY, MAINTENANCE and USE INSTRUCTIONS
TR Bu el kitabı montaj yöntemlerini kapsar , düzenleyici ve kullanım ve bakım talimatları için
bilgi verir. Güvenli ve temiz yerde muhafaza etmenizi tavsiye ederiz.
GB This manual contains the assembly procedures, the information for the installer and use and
maintenance instructions. We recommend the user to keep it in safe and clean place.

İÇİNDEKİLER
CONTENTS
YK 80S
İÇİNDEKİLER / CONTENTS : sayfa / page
GÜVENLİK / SAFETY 2
RESİM GALERİSİ / PICTURE GALLERY 3-9
TEKNİK ÖLÇÜLER / TECHNICAL DIMENSIONS 3
TAVAN AÇMA VE MERKEZLEME / OPENING AND FIXING HOLES 4
ARAC TAVAN BAĞLANTI U ‘LARI / CONNECTION U ROOF OF THE VEHICLE 5
İZOLASYON VE SİLİKON / IZOLATION AND MASTIK 6
ÜNİTE TAVAN MONTAJ / UNIT ROOF ASSEMBLY 7–8
HORTUM MONTAJ / HOSE ASSEMBLY 9
ELEKTRİK ŞEMASI / ELECTRICAL DIYAGRAM 10
RAKOR MONTAJ VE DİJİTAL DÜĞME / FITTING ASSEMBLY AND DIGITAL PANEL 11–13
YEDEK PARÇA LİSTESİ (RESİM) / SPARE PART LIST (PICTURE) 14-16
GENEL TANIMLAR / GENERAL DESCRIPTION 17
TEKNİK VERİLER / TECHNICAL DATA 18
UYARILAR VE MONTAJ TALİMATLARI / WARNINGS AND ASSEMBLY INSTRUCTIONS 19–21
KULLANIM VE BAKIM ÖNERİLERİ / MAINTENANCE AND SUGGESTIONS FOR USE 22–23

GÜVENLİK
SAFETY
YK 80S
Sayfa / Page 2
GÜVENLİK TALİMATI
SAFETY INSTRUCTIONS
YK 80S model tavan tipi klimanızı çalıştırmadan önce bu servis el kitabını dikkatlice okuyunuz.
Read this service manual guide carefully before operating your YK 80S Roof type air conditioner.
Uygunsuz kullanım koşulları sonucu oluşabilecek sorunlarda da , garanti iptal olmaktadır ve tazminat
talepleri dikkate alınmamaktadır.
In case of problems due to improper utilization conditions the guarantee is cancelled and the compensation
demands are not taken into consideration.
Lütfen kendi güvenliğiniz için aşağıda yer alan kurallara dikkat ediniz:
Please take heed of the rules below for your own safety:
Genel durumlarda / Under normal circumstances:
-Tamir ve bakım işlemleri sadece gerekli eğitim almış ve yetkiye sahip uzman personele yaptırınız. YILKAR
yetkili servislerine ait bilgileri , YILKAR’ın resmi web sayfası www.yilkarklima.com ’dan ulaşabilirsiniz.
The repair and maintenance must be done by the authorized and trained expert staff. Apply to to Yılkar
official site; www.yilkarklima.com for the information about authorized services.
-Cihaz çalışır durumda olduğunda elinizi ünitenin içine uzatmayın ve Kondanser ile Evaporatör fanına herhangi
bir yabancı cisim tutmayın.
Do not stretch your hand into the unit or do not hold objects against the condenser and evaporator fans
while the device is working.
-Yanma tehlikesi! Lütfen ısı değiştiricisine Evaparatör veya bağlantılarına elinizle temas etmeyin.Şayet unite
üzerinde çalışacak ise ve tam olarak soğumadıysa aynı durum fan üzerindeki direnç içinde geçerlidir.
Burning hazard! Please do not place your hand against the temperature converter, evaporator or evaporator
attachments. Do not place your hand against the resistor if it will work or if it is not fully cooled down.
-Hatalı parçaları derhal değiştirin ve tespit edilen hataları düzelttirin.
Change the faulty parts immediately and have the determined faults fixed.
-Dikkat! Isı değiştiricisi, Kondanser ve Evaparatör üzerinde tespit edilen hataları düzelttirin.
Attention! Have the determined faults fixed on the temperature converter, condenser and evaporator.
-Bakım tamir işlemlerinde gerekli güvenlik ekipmanları kullanmak zorunludur.
It is obligatory to use the necessary safety equipments during the fixing and maintenance processes.
-Bakım çalışmaları sadece motorlar kapalı konumda olduğunda yapılabilir.
Maintenance processes are to be done only when the motors are shut down.
-Klima ünitesi açılmadan önce akü bağlantısı kesilmelidir.
The accumulator connection must be cut out before the air conditioner unit is opened.

TEKNİK ÖLÇÜLER
TECHNICAL DIMENSIONS
YK 80S
Sayfa / Page 3
1200
190
1200
780 140
1098
174
366
A
B
A- SOĞUK HAVA ÜFLEME YÖNÜ
COLD AIR BLOWING DIRECTION
B- SICAK HAVA EMİŞ YÖNÜ
HOT AIR SUCTION DIRECTION
01
KONDANSER (DIŞ) ÜNİTE
CONDANSER (OUT) UNIT
EVAPORATÖR (İÇ) ÜNİTE
EVAPORATOR (İN) UNIT

TAVAN AÇMA VE MERKEZLEME
OPENING AND FIXING HOLES
YK 80S
Sayfa / Page 4
815
470
407,5
Ø72
407,5
527
215 225
Ø10 x 4
1200
1200
SÜRÜŞ YÖNÜ
DRIVE WAY
BAĞLANTI TAKOZU İÇİN
FOR CONNECTION MOUNTING
HORTUM VE KABLO İÇİN
FOR HOSE AND CABLE
ARAC TAVANI
ROOF OF THE VEHICLE
02

ARAC TAVAN BAĞLANTI U’LARI
CONNECTION U ROOF OF THE VEHICLE
YK 80S
Sayfa / Page 5
800
895
A
EVAPORATÖR BAĞLANTI İÇİN
FOR CONNECTION
EVAPORATOR
B
KONDANSER BAĞLANTI İÇİN
FOR CONNECTION
CONDANSER
ARAC TAVANI
ROOF OF THE VEHICLE
ALTTAN BAKIŞ
BOTTOM VIEW
SÜRÜŞ YÖNÜ
DRIVE WAY
03

İZOLASYON VE SİLİKON
IZOLATION AND MASTIK
YK 80S
Sayfa / Page 6
470
815
9
120
Ø72
BAĞLANTI TAKOZLARININ
ETRAFINA PU MASTİK SIKILIR
PU MASTIK AROUND GETS TO
CONNECTING MOUNTING
ARACIN TAVANI
ROOF OF THE VEHICLE
ARACIN TAVANI
ROOF OF THE VEHICLE
BAĞLANTI TAKOZLARININ ve HORTUM
GROMETİ ETRAFINA PU MASTİK SIKILIR
PU MASTIK AROUND GETS TO CONNECTING
MOUNTING and HOSE GROMMET

ÜNİTE TAVAN MONTAJ
UNIT ROOF ASSEMBLY
YK 80S
Sayfa / Page 7
DIŞ ÜNİTE MONTAJ
OUT UNIT ASSEMBLY
ÜSTTEN BAKIŞ
TOP VIEW
KONDANSER ÜNİTESİ
CONDANSER UNIT
YK 80S FRP KAPAK
YK 80S FRP COVER
05

ÜNİTE TAVAN MONTAJ
UNIT ROOF ASSEMBLY
YK 80S
Sayfa / Page 8
İÇ ÜNİTE MONTAJ
IN UNIT ASSEMBLY
SU TAHLİYE HORTUMU
WATER EVACUATION HOSE
EVAPORATÖR ÜNİTESİ
EVAPORATOR UNIT
ALTTAN BAKIŞ
BOTTOM VIEW
06
Min. 10 cm

HORTUM MONTAJ
HOSE ASSEMBLY
YK 80S
Sayfa / Page 9
BASINC HORTUMU (13/32)
PRESSURE HOSE (13/32)
EMİŞ HORTUMU (5/8)
VACUUM HOSE (5/8)
ARA HORTUM
DISTANCE HOSE
ÜSTTEN BAKIŞ
TOP VIEW
SU TAHLİYE HORTUMU
WATER EVACUATION HOSE
ARKA BAKIŞ
BACK VIEW
07

RAKOR MONTAJ
FITTING ASSEMBLY
YK 80S
Sayfa / Page 11
Soğutucu madde rekorunun görünümü / The illustration of the cooler agent union;
Rekorlar hortumlara preslenirken, ilk önce hortumun düz bir şekilde kesilir, daha sonra rekorların iç kısımları
yağlanır, hortumların rekorlara düzgün bir şekilde oturtulduğuna dikkat edilir ve en son olarak hidrolik presler
yardımıyla rekorlar hortumlara preslenir. Güvenlik amacıyla hortumlarda 15 cm’lik bir pay hesaba katılmalıdır.
Fittings pressed in hoses, straight hoses are cut first, then the fittings-lubricated internal parts, hoses
assemblied hit fittings is important to properly fitting, and most recently with the help of hydraulic presses extruded
hoses. For safety, 15 cm of excessive parts of pipes must be taken into account.
KLİMA GAZI ŞARJ REKORLARI
AIR CONDITIONING GAS CHARGE FITTINGS
08
BASINC HATTI GAZ ŞARJ REKORU (13/32)
PRESSURE LINE GAS CHARGE FITTING (13/32)
VAKUM HATTI GAZ ŞARJ REKORU (5/8)
VACUUM LINE GAS CHARGE FITTING (5/8)
NOT / NOTE: KLİMANIN GAZ ŞARJ ETME REKORLARI ARACIN ALTINDA VE
KOMPRESÖRE 2-3 METRE UZAKLIKTA MONTAJ EDİLİR.
FITTING AIR CONDITIONING GAS CHARGING, VEHICLE IS UNDER THE ASSEMBLY
AND COMPRESSOR 2-3 METERS AWAY.

KLİMA KONTROL DÜĞMESİ
CLIMATE CONTROL PANEL
YK 80S
Sayfa / Page 12
Dijital Klima Kontrol / Digital Climate Control :
Dijital kumanda, ünitedeki sıcaklık propları yardımıyla
otomatik olarak ayarlanmış set değerleri sayesinde klimayı
devreye alıp çıkartmaya yardımcı olur.
The digital remote control helps starting or shutting down
the conditioner with the help of the heat props and by the set
values that are automatically set.
1-Soğutma Modu / Cooling Mode:
A/C butonu kompresörü kapatarak veya
açarak klimayı çalıştırır veya kapatır.
A/C button starts or shuts down the
conditioner by starting or shutting down the compressor.
2- Isıtma Modu (Opsiyonel) / Heating Mode (Optinal):
3- Bekleme Modu / Waiting Mode:

RAKOR MONTAJ
FITTING ASSEMBLY
YK 80S
Sayfa / Page 13
Sıcaklık ayarlama butonu / Temperature adjustment button:
Bu iki buton sayesinde araç içindeki ısı ayarlanır. Butonlar her basıldığında 1° C değişim meydana
gelir. Butonlar yardımıyla ayarlanan sıcaklık değerine iç ortam geldiğinde otomatik olarak kompresörü
devre dışı bırakır ama fan motorları çalışmaya devam eder.
The temperature inside the vehicle is adjusted by these two buttons. An alteration of 1° C happens
by every push of the buttons. When the inner environment meets the temperature value adjusted by
the buttons, it leaves the compressor out of service automatically, but the fan motors go on working.
Fan kontrol butonu / Fan control button:
Fan kontrol butonu (aşağıdaki resime bakınız) evaporator fanını çalıştırır. Mevcut üç farklı fan
kademesi ile hava akımı ve neticesinde soğutma oranı ayarlanır. Butona her basıldığında fan hızı
sırayla artış gösterir .
Fan control button (See the figure below) starts the evaporator fan. By 3 different grades of fan,
air flow and cooling rate are adjusted. By every push of the button, fan speed increases.
Diğer Fonksiyonlar/ Other Functions:
Klimalarda opsiyonel bir durumdur. Ortama dış havadan 100% temiz hava alınmasını sağlayan
butondur.
This feature is optional for conditioners. It takes in 100 % clean air from the outer environment.
Ayarlanan Sıcaklık
Set Temperature
Fan Hızı
Fan Speed
Dış Ortam Sıcaklık
Out Side Temperature
Araç İçi Sıcaklık
Vehicle In Side Temperature

YEDEK PARÇA
SPARE PARTS
YK 80S
Sayfa / Page 14
R02
R03
R04
R06
R07
R08
R09
R10
R11
R12
R01
R05

YEDEK PARÇA
SPARE PARTS
YK 80S
Sayfa / Page 15
R13
R14
R15

YEDEK PARÇA LİSTESİ
SPARE PARTS LIST
YK 80S
Sayfa / Page 16
KOD NUMARASI
CODE NUMBER
ADET
QUANTITIY
AÇIKLAMA / DESCRIPTION
REFERANS RESİM
REFERANCE IMAGE
104.01.12003.01
1
YK 80S ALM EVAPORATÖR BATARYA
YK 80S ALM EVAPORATOR BATTERY
R01
104.04.2HN00.02
1
BLOK VALF / BLOCK VALVE
R02
105.01.RK002.02
1
PCB RÖLE KART / PCB RELAY CARD
R03
105.01.RK002.02
2
BLOWER MOTOR (1000 m³/h)
R04
504.11.01301.01
1
YK 80S FRP KAPAK / FRP COVER
R05
502.01.01301.01
3
12’’ S AKSİYAL MOTOR / S AXIAL ENGINE
R06
103.02.FT001.01
1
SACLI GEÇME FİTİL (5 mt) / EDGING PROFILE WITH METAL
CORE (5 mt)
R07
104.02.11005.01
1
ALM KONDANSER / ALM CONDANSER
R08
104.09.CD002.89
1
KOMPAKT RECEIVER DRAER / COMPACT RECEIVER DRAER
R09
101.12.01301.01
1
BAĞLANTI BORUSU (KONDANSER – SIVI TANKI) /
CONNECTION HOSE (CONDANSER –LIQUID TANK)
R10
105.07.MDPP4.02
1
4 YOLLU MÜŞÜRÜ / 4 WAY PRESSURE SWITCH
R11
103.03.ARF10
1
PE –ARMAFLEX (3-5-10 mm)
R12
105.01.KU010.01
1
DİJİTAL KLİMA KONTROL PANELİ /
DIGITAL CLİMATE CONTROL
R13
105.12.KF0MN.01
1
KOFRA / TERMİNAL BOX
R14
104.03.SD5
1
SANDEN KOMPRESÖR / SANDEN COMPRESSOR
R15
Yedek parça sipariş ederken dikkat edilmesi gereken konular;
The important points that have to be taken into consideration when ordering spare parts;
Bu katalog, belirtilen üniteye ait mevcut yedek parçalar bilgilerinize sunulmaktadır. Bu parçalar ünitenin
kullanıldığı araca göre ölçü, adet ve çeşitlilik açısından farklılık gösterebilmektedir.
In this catalogue the existing spare parts that belong to the unit are presented .In terms of dimensions,
quantitity and diversity these spare parts may differ according to the vehicle on which the unit is installed.
Tamir işlemleri esnasında her zaman orijinal yedek parça kullanılmalıdır. YILKAR tarafından onaylanmamış
olan parçalar, ünitenin güvenliğini ve düzgün çalışmasını olumsuz etkileyebilir. Bu tür durumlarda ünite GARANTİ
kapsamından çıkar.
For repairing only the original spare parts should be used. The parts not approved by Yılkar may cause safety
problems and may cause the unit not to function properly. In these cases the GUARANTY is cancelled
Hızlı ve doğru bir yedek parça sevkiyatı için lütfen her zaman aşağıdaki bilgileri vermenizi rica ederiz:
Please provide the below information for a quick and accurate dispatch/shipment:
1. Açık adresiniz / Detailed Address 2.Takılan aracın ruhsat fotokopisi / Copy of licence of the vehicle
3. İstenilen sevkiyat biçimi / Requested(Preferred) dispatch/shipment type
4. Ünitenin tam tanımı ve seri numarası / Complete definition of the unit and serial number
5. Telep edilen yedek parçaya ait parça no. ve miktarı / Item no. and quantitity for the requested spare part

MONTAJ TALİMATLARI
ASSEMBLY INSTRUCTIONS
YK 80S
Sayfa / Page 17
GENEL TANIMLAR
GENERAL DESCRIPTION
15 koltuğa kadar olan minibüsleri iklimlendirmek için geliştirilen yenilikçi tasarımlı bir tavan üstü
iklimlendirme cihazıdır. Evrensel, kompakt ve ekonomiktir.
Roof top air conditioner with an innovative design developped to condition minibuses up to 15 seats.
Universal , compact and affordable.
Aerodinamik tasarımıyla bu ünite, aracın yüksekliğini 20 cm bile arttırmamaktadır (şekil 01). Böylece tasarımı
sayesinde, hava ve yakıt tüketimine direnci en aza indirgenmiştir.
This unit, with its aerodynamic design , do not even add 20 cm to the height of the vehicle (fig. 01). Thus,
thanks to its design , resistance to air and fuel consumption are minimized.
Kolayca ve çabukça takılan bu ünite, aracın tavanına monte edilecek üniteye yerleştirilen 1 kondenser ve 1
evaporatör içerir. Bunun aracın tavanına takılması ve R134a soğutucu dolaşımı olan hortumlar aracılığıyla
kompresöre bağlanması gerekir.
This unit, which is easily and quickly fitted, it includes 1 condenser and 1 evaporators housed in a unit to be
installed on the roof of the vehicle. This need to be fitted onto the roof of the vehicle and connected to the
compressor , through hoses filled with the circulating r134a coolant.

MONTAJ TALİMATLARI
ASSEMBLY INSTRUCTIONS
YK 80S
Sayfa / Page 18
TEKNİK VERİLER
TECHNICAL DATA
Tavan Tipi Klima Ünitesi
ROOF TOP CLIMATE UNIT
YK 80S
Soğutucu kompresörü
Cooler Compressor
Sanden SD5 H14
Soğutma gücü
Cooling Capacity
8 kW (+5°C Evaporasyon , +50°C Kondesazyon, %46 bağıl nem)
Yağ çeşidi
Oil type
PAG 100 yağ /oil
Yağ miktarı
Oil quantity
250 ccm
Soğutucu madde - Doldurulacak miktar
Cooler agent –The quantity to be filled
R 134 a –1,5 kg ± 150 gr
Evaporatör fanı
Evaporator fan
2 çift radyal fan / double radial fan; 2 kademeli / graded
Evaporatör hava akımı
Evaporator air circulation
2000 m³/h
Evaporatör
Evaporator
1
Kondanser fanı
Condenser fan
2 Aksiyel vantilatör / Axial ventilator
Kondanser
Condenser
1
Basınç şalteri
Pressure switch
Alçak basınç / Low pressure: 2,0 bar
Fan Kontrol / Fan Control: 17 bar
Yüksek basınç / High pressure: 25 bar
Ölçüler ; Uzunluk x Genişlik x Yükseklik
Dimensions; Length x Width x Height
İç ünite: 1190 X 366 X 174 - Dış ünite:1200 X 1200 X 190
In unıt Out unıt
Ağırlık / Weight
35 KG (MONTAJ KİTİ HARİÇ / EXCLUDING THE MONTAGE KIT)
Ortam havası / Ambient climate
%100 iç hava / inner air
Azami toplam elektrik alımı
Maximum total electricity intake
47 A 12 V
25 A 24 V

MONTAJ TALİMATLARI
ASSEMBLY INSTRUCTIONS
YK 80S
Sayfa / Page 19
UYARILAR VE MONTAJ TALİMATLARI
WARNINGS AND ASSEMBLY INSTRUCTIONS
Montaj sırasında bu el kitabında verilen talimatlara dikkatlice uyduğunuzdan emin olunuz.
Üretici standart dışı montaj ve modifikasyonlardan doğan cihaz ve insanların göreceği zararlardan
mesuliyet kabul etmez.
When installing, be sure to follow carefully the instructions given in this manual. The
manufacturer declines all responsibilities for damage to equipment or people caused by non-
standard system installations or modifications.
Montaja başlamadan önce, iklimlendirme ünitesini monte edeceğiniz tavan kısmının, ünitenin
kıvrımınkiyle uyumlu bir kıvrımı olup olmadığını kontrol ediniz.
Before beginning installation , check that the section of the roof on which you are going to fit the
air conditioning unit has a curve which is compatible with that of the unit.
İklimlendirme cihazının taşıma yüzeyi görevi görecek olan tavan kısmının yeterince sert olup
olmadığını kontrol ediniz. Gerekirse, iskeleti destekleyen dikey ve paralel elemanlarla sağlamlaştırınız.
(şekil 06)
Make sure the area of the roof used as the bearing surface of the air-conditioner, is sufficiently
solid.If necessary, reinforce the framework by adding supporting uprights and cross members. (fig 06)
Bu, ünitenin takıldığı alanın yapılmasından kaynaklanan çöküntüleri ve böylece suyun birikmesini
ve aracın içine sızmasını engelleyecek.
This will prevent depressions from forming in the area where the unit is fitted and, thus, water from
accumulating and filtering into the vehicle.
İklimlendirme cihazını, tavanın paralel eksenine göre merkezi olacak şekilde yerleştiriniz.
Place the air-conditioner centrally with respect to the longitudinal axs of the roof.
İklimlendirme cihazını aracın tavanına kaldırmadan önce, dış kapak tutturan vidaları gevşeterek,
kapak çıkartınız.
Before lifting the conditioner onto the roof of the vehicle, remove the external cover by loosening
the relavite fastening screws.
İklimlendirme cihazını sabitlemek için, aracın tavanına 5 delik açılması gerekir (4’ü bağlantı
takozları için, 1’i de hortum geçişi için) (şekil 02) + 24 tavan bağlantı u ‘ları için + 4evaporatör
bağlantısı için bağlantı vidası kullanılır (şekil 03).
To fit the airconditioning unit, it is necessary to make 5 openings on the roof of the vehicle(4for the
connection mounting and 1for the distance hose) (fig 02)+ 24 for the roof connection u + 4for the
evaporator connection use bolt (fig 03).
1
2

MONTAJ TALİMATLARI
ASSEMBLY INSTRUCTIONS
YK 80S
Sayfa / Page 20
Gövdesinde herhangi bir kesik yapmadan önce, aracın aküsünü çıkartınız; tavanın delikleri
açacağınız kısmında herhangi bir elektrik kablosunun olmadığından emin olunuz.
Before making any cuts in the body, disconnect the battery of the vehicle; make sure that there
are no electrics cables in the section of the roof where you intend to make the openings.
Delikleri, tavanın kaburgaları arasındaki boşluklara gelecek şekilde açınız; kaburgaların yerini
değiştirmeyiniz.
Make the holes keeping within the spaces between the ribs of the roof; do not remove them.
Tavan üstü ünitenin zemininde, kondanser ünitesini altına 2mesafe PE ARMAFLEX contası (şekil
04), bağlantı takozlarının etrafına ve tavan bağlantı u larının altına PU MASTIK uygulayınız (şekil 03).
On the ground of the roof top unit, glue 2 lengths of seal PE ARMAFLEX under the condanser unit
(fig 04), use PU MASTIK for the connection mounting and under the roof of connection u (fig 03).
İklimlendirme cihazını, evaporatör ve kondanser üniteleri aracın tavanındaki deliklere tam olarak
denk gelecek şekilde yerleştiriniz. Üniteyi tavana M.10 vidaları kullanarak bağlayınız. (şekil 05 ve 06)
Position the conditioning unit in such a way that the evaporator and the condanser unit
correspond exactly to the openings made in the vehicle roof.Fasten it to roof using M.10 screws. (fig
05 and 06)
İç ünitenin altındaki 2 armatüre, temin edilen metal bağlantılar ile yerlerine takarak, 2 su tahliye
borusuna bağlayınız; (şekil 06)
Connect 2 lengths of condansation drainage hose to the 2 fittings beneath the unit, fastening
them in place with the metal clamps supplied; (fig 06)
Atık drenaj hortumu deliği boyunca hiçbir çekme ya da tıkanma olmaması ve hortumun her
zaman aşağıya doğru eğrilmiş olması çok önemlidir.
It is extremely importand that there are no siphons or choking along the hole length of the
waster drainage hose and that it always slopes downwards.
Soğutucu hortumlarının geçişi için en iyi rotayı seçin ve aracın çeşitli bölmelerini hazırlayın.
Choose the best route fort he passage of the coolant hoses and prepare the various compartments
of the vehicle.
Hortumlar dar kıvrımlardan, keskin uçlardan ya da onlara zarar verecek metal levhalardan
kaçınılarak doğru şekilde yerleştirilmiş olmalı.
The hoses must be accurately position, avoiding narrow bends, sharp edges or metal sheetings
which might damage them.
3
4
5
Table of contents
Other YILKAR Air Conditioner manuals

YILKAR
YILKAR YK 80 S User manual

YILKAR
YILKAR YK 60 S Additional User manual

YILKAR
YILKAR YK 90 S Additional User manual

YILKAR
YILKAR YK 120 S User manual

YILKAR
YILKAR YK 155 MB User manual

YILKAR
YILKAR YK 60 S Additional User manual

YILKAR
YILKAR YK 100 User guide

YILKAR
YILKAR Montaj Talimati YK 190 MB L User manual

YILKAR
YILKAR YK 300 User manual

YILKAR
YILKAR YK 100 S User manual