Yoostar YS1000 User manual

YOOSTAR
Owner’s manual
Everything YOO need to know about your
YOOSTAR ENTERTAINMENT SYSTEM
Yoostar Owners Manual booklet.indd 1 4/16/09 9:22:15 AM

Contents
Getting Started ...............................................................................
What’s included ..............................................................................
Unpack your Yoostar Studio in a Box ...............................................
Assemble Your Camera ...................................................................
Install the YooStar Immersive Technology software..........................
Connect YOOSTAR Camera to your Computer..................................
Setting up Your Green Screen..........................................................
Configure your YooStar studio .........................................................
Position your YooStar Camera .........................................................
Position your YooStar Green Screen.................................................
Register your YooStar Entertainment System...................................
Recording Tips and Frequently Asked Questions (FAQs)...................
Prevent the Camera from Falling.....................................................
Prevent the Camera from Overheating ............................................
Connect YOOSTAR to your TV ..........................................................
Electrical Safety..............................................................................
To avoid damaging the USB camera cord........................................
Federal Communications Commission (FCC) Statement ..................
GETTING STARTED
Welcome to YOOSTAR!
If you’re reading this then YOO are a proud owner of the Yoostar
entertainment system. You’re only minutes away from becoming
the star you were always destined to be. Just follow the easy guide
below and get ready for an experience of a lifetime.
Yoostar Owners Manual booklet.indd 2-3 4/16/09 9:22:15 AM

UNPACK YOUR YOOSTAR
STUDIO IN A BOX
Inside the Yoostar box you’ll find everything you need for your very own
Hollywood studio. Included here are –
Yoostar camera-
Green screen-
Portable green screen frame-
Remote control-
Alternate screen clip adapter-
Alternate tripod adapter-
ASSEMBLE YOUR
CAMERA
Attach the base to the camera neck by aligning
and inserting into neck into the tripod base and
screwing the connecting bolt securely.
With the stand completed connect the camera head
on top of the neck by squeezing the clips located
beneath the camera head. Place camera head on
top of pivot located in center of the red platform
on top of neck. When positioned release clip so
camera head attaches to neck securely. (Repeat
this when connecting camera head to optional clip
adapters supplied here).
Holding camera securely train USB cable into
channel located on back of neck and place tail
securely into clip located on rear top of tripod
stand.
Slide the remote control onto the back of the
Yoostar camera.
page 2 page 3
Yoostar Owners Manual booklet.indd 4-5 4/16/09 9:22:20 AM

POSITION YOUR
YOOSTAR CAMERA
The Yoostar camera is designed to stand vertically on your desk and/or
tabletop next to your computer or laptop.
CONNECT YOOSTAR TO
YOUR COMPUTER
Insert the USB cable form
the Yoostar camera into the
appropriate USB dock on your
computer.
page 4 page 5
CONNECT YOOSTAR
TO YOUR TV
To connect to a high-definition or standard-definition TV or monitor, you
need to purchase the appropriate cables below after evaluating the
necessary connections between your TV or monitor and your computer.
The Yoostar entertainment system is compatible with all the following
connections:
• Component HD AV Cable
• 360 Component HD AV Cable
• 360 HDMI Cable
• DVi/HDMI Cable
CAUTION
Before using the Yoostar camera, be sure to remove the clear plastic film
that covers the lens. This protective seal can prevent the clarity of filming
when you try to load a disc.
Yoostar Owners Manual booklet.indd 6-7 4/16/09 9:22:20 AM

CAMERA CARE
Prevent the Camera from Falling
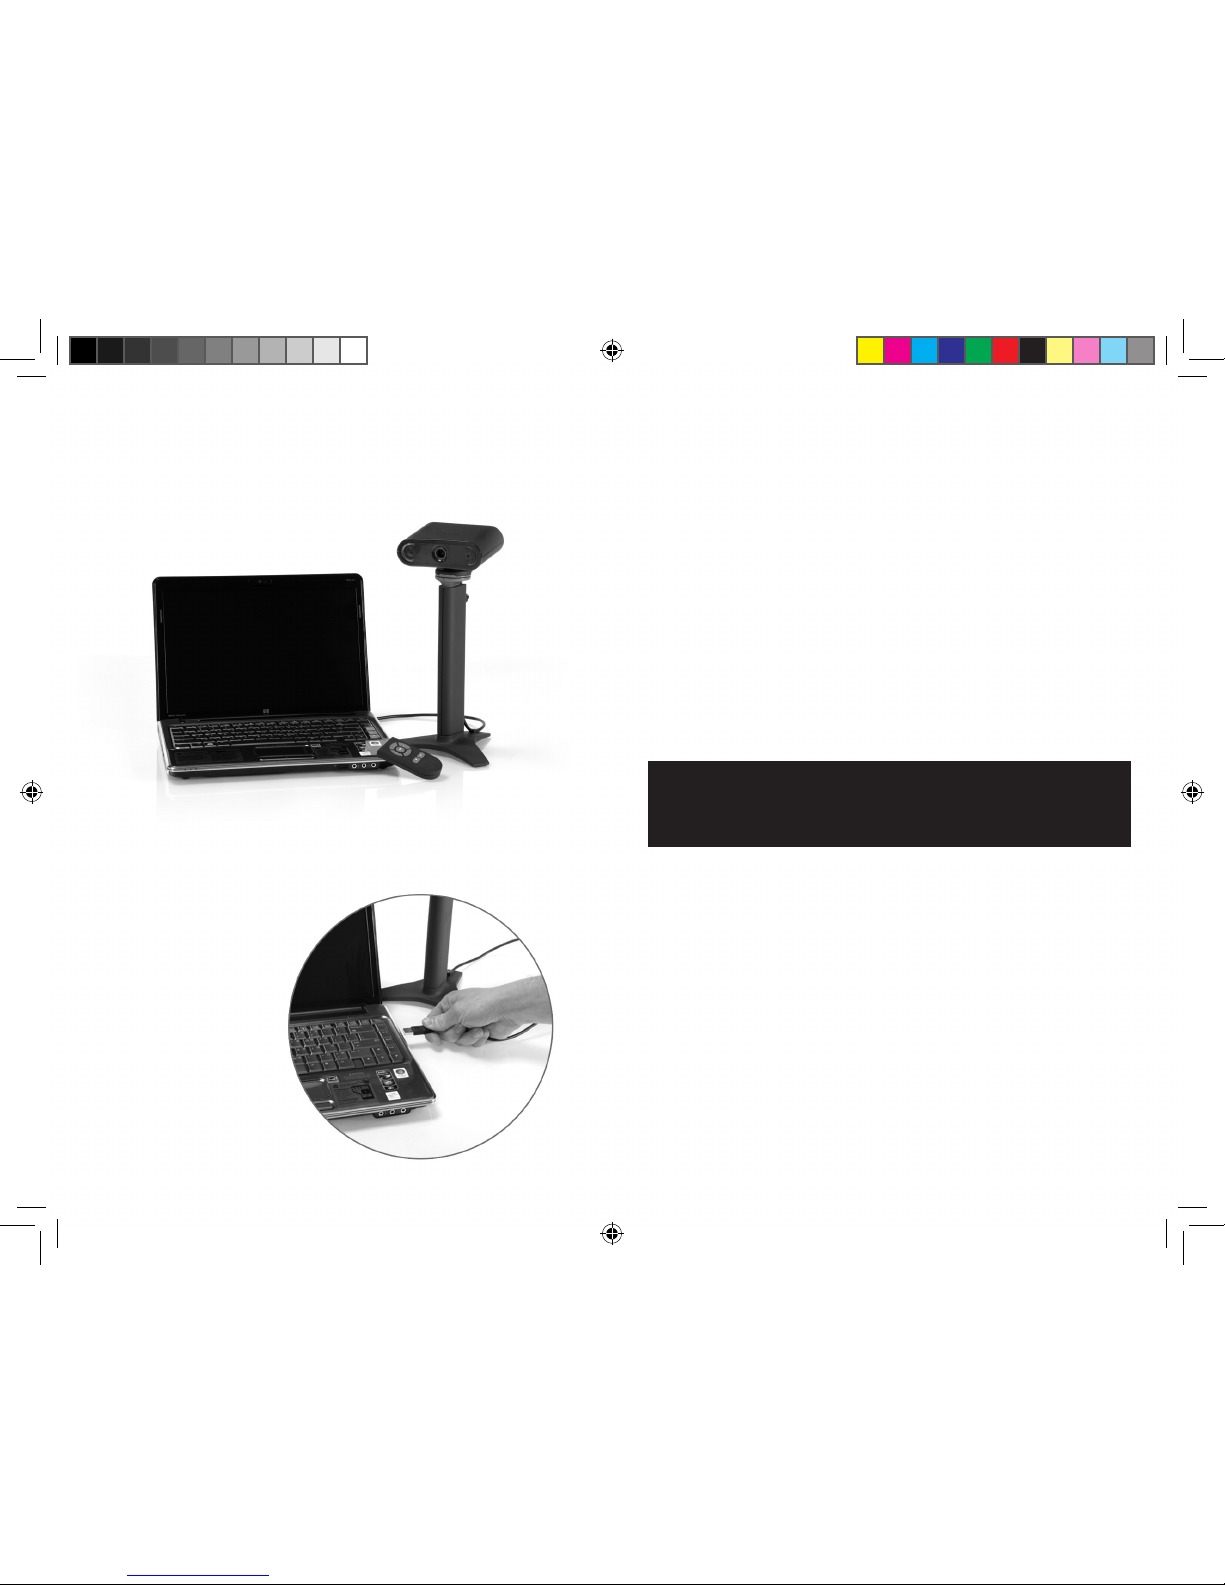
To reduce the risk of the camera falling and damage to the camera itself,
set up the Yoostar camera according to these instructions. Place the
camera on a surface that:
• Is at and level.
• Is stable and not likely to tip over.
• Allows all three feet of the base to be in contact with the
surface.
• Is not likely to allow the camera to slip or slide off.
• Is clean and free of dust and debris.
If the surface or camera feet become dirty or dusty, clean them with a
dry cloth. If the camera is in a fully extended position vertically, put it on a
surface where it is not likely to fall if it tips over.
Arrange all cables and cords.
When the Yoostar camera is not in use, keep camera in DOWN position. You
may want to disconnect the USB camera cable if you are using a laptop to
prevent a pull on
Prevent the Camera from Overheating
Do not place the camera near any heat sources, such as radiators, heat
registers, stoves, or amplifiers.
Avoid Smoke and Dust
Do not use the camera in smoky or dusty locations. Smoke and dust can
damage the lens of the Yoostar camera.
Electrical Safety
Always connect the power cords according to the following instructions:
• Fully insert the USB cord into your computer’s appropriate port
until it clicks.
As with many other electrical devices, failure to take the following
precautions can result in serious injury or death from electric shock or fire
or damage to the Yoostar entertainment system.
To avoid damaging the USB camera cord:
• Protect the USB cord from being pinched or sharply bent,
particularly where they connect to the computer source.
• Do not jerk, knot, sharply bend, or otherwise abuse the camera
cable.
• Do not expose the camera cable to sources of heat.
• Do not wrap power cords around the power supply unit.
• Keep children and pets away from the power cords. Do not
allow them to bite or chew on them.
• When disconnecting the power cords, pull on the plug—do not
pull on the cord.
• Do not let the power supply hang from either power cord.
• If a power cord or power supply becomes damaged in any way,
stop using it immediately and contact Xbox Customer Support
for a replacement.
Unplug your Yoostar camera during lightning storms or when unused for
long periods of time.
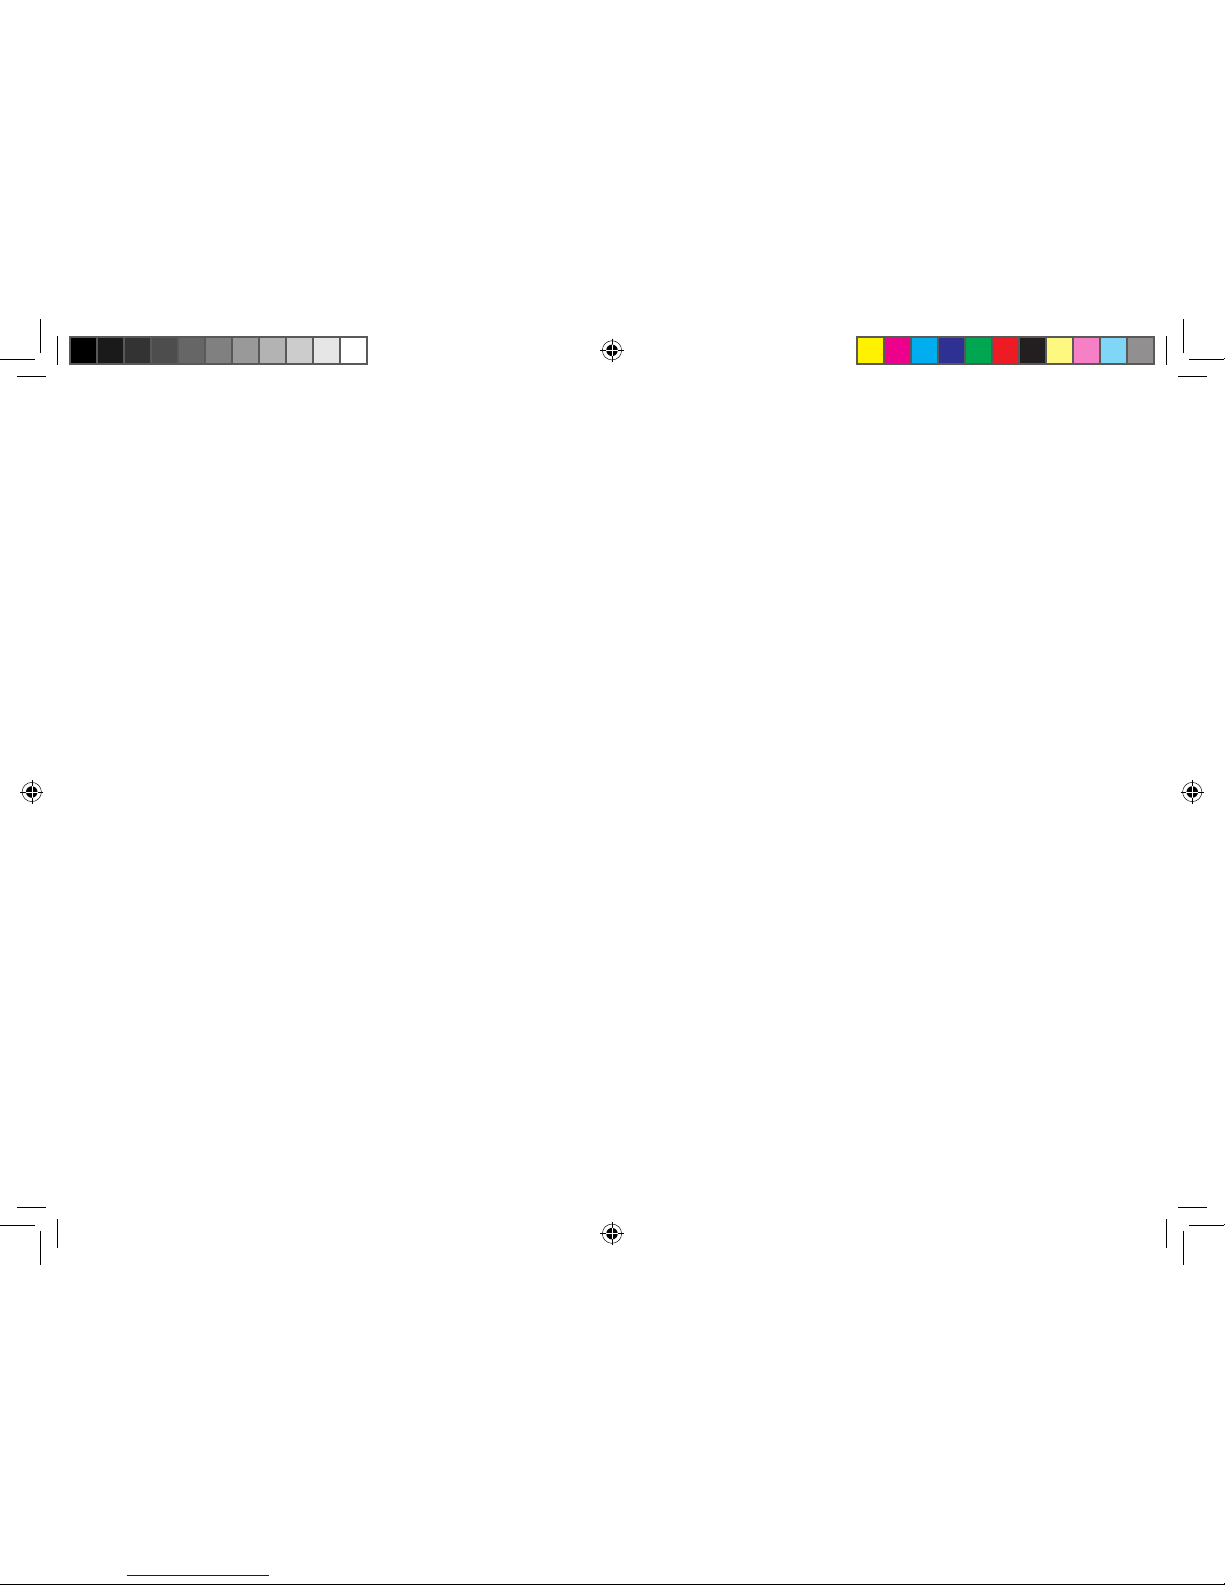
Connect Your Yoostar camera to Your Computer
To connect your camera to your computer, insert the controller cord
connector into either controller port on the front of the console. To
disconnect, pull the USB cable out. Be careful to hold the camera securely
when pulling out the USB cable.
Note
Do not touch camera plate with your ngers or allow metal parts to touch
them. Doing so may damage the lens and performance of the Yoostar
camera. Clean only with a dry or slightly damp cloth. Using cleaning
solutions or attempting to clean connectors may damage your controller.
page 6 page 7
Yoostar Owners Manual booklet.indd 8-9 4/16/09 9:22:20 AM

SETTING UP YOUR
GREEN SCREEN
Remove the Yoostar green screen frame and green screen from the Yoostar
package.
Assemble the green screen stand
Hold green screen stand securely by back support. Slide out one leg to full
extended position. Repeat and slide out second leg. When two legs are
fully extended and locked place on oor and continue same for third and
fourth leg of green screen stand.
When stand is completed place green screen on oor and hook both right
and left corner tabs onto frame. Lift green screen and hook corner tab on
top left leg of frame. Repeat same with top right
leg.
Position green screen as directed in application.
INSTALLING SOFTWARE
Open software
• Users have a 10 day free trial before software must be registered
• Enter serial number from Certicate of Authenticity in the box
• Create User Name
• Enter valid e-mail address (address is used to conrm registration)
• Enter password
• Conrm password
• Press REGISTER
Cascade
• Explain two cascades
Need copy here,Need copy
here,Need copy hereNeed copy
here,Need copy here,Need copy
here,Need copy here,Need copy here
• Your Clips
• Your Performances
• Show navigation of cascade
• Mouse
• Keyboard (arrows, page up / dn,
Home, End)
• Remote (arrows, Play, Rec, Select)
• Show how the Your Performances
Button works
• Changes content in cascade to
show recorded performances
• Your Performances cascade works
the same as the Your Clips Cascade
• Show how the Filters work
• Click on Movies (show cascade showing only movies)
• Click on TV (show cascade showing only tv)
• Show how the Search box works
• Enter an actor’s name, movie name, director’s name etc…
• Filters cascade to show only results matching your search criteria
page 8 page 9
Yoostar Owners Manual booklet.indd 10-11 4/16/09 9:22:24 AM

• Preview a clip
• Click the play button on the cascade image
• Click the (x) or the video to close the player
Settings
Show how Settings work
Click on settings button
Discuss each of the settings
General Settings
Speaker volume – Controls audio output levels
Mic Level – Controls audio input levels
Subtitles - Turns teleprompter on or off
Mirror Camera – sets camera to work as a mirror
image instead of normal visual
Cascade Movies – Turns on / off the mini movies on
the cascade
Cascade Sound – Turns on / off the mini movie
sounds on the cascade
User Accounts
Add user accounts
Each user account must be validated with an account at Yoostar.
com
Parental Controls
A pin number must be set the first time the Parental Controls are
used
Parental Controls determine what level of content is visible in the
Cascade
Setting Movie Ratings to “G” will only show G rated movies in
the Cascade
Record
From the Your Clips Cascade
Select a clip to perform
Double click on an image – or -
Click on the details button – or –
Use the remote to navigate to a clip and press the select button
Show and describe “pick a role” screen
Description of the clip
Preview of the clip
Roles available from this clip
Print Script
Show camera setup
Select a role to play
Double click on a role image
Highlight a role image and click record
Step in process
Ensure the camera is completely showing the greenscreen
Nothing should be showing in the image but the greenscreen
Adjust the camera or greenscreen if necessary
Position yourself in the chalk outline on the screen
Press the record button
Using your Remote, press the REC button
Using your Mouse, click the REC button
Using your keyboard press the Space Bar
Step completely out of the scene
Make sure that the greenscreen is the only thing showing in the camera
frame
Press the Record Button
Using your Remote, press the REC button
Using your Mouse, click the REC button
Using your keyboard press the Space Bar
Position yourself back into the scene and within the Chalk Outline
Press the Record Button
Using your Remote, press the REC button
Using your Mouse, click the REC button
Using your keyboard press the Space Bar
After the countdown ends the scene begins
Following the teleprompter, record your scene
page 10 page 11
TEXT IS JUST DROPPED IN FOR NOW
NOT FORMATED YET
Yoostar Owners Manual booklet.indd 12-13 4/16/09 9:22:24 AM

When recording ends you have several options
Preview your scene
Click on the Play button on the image
Using your remote press the Play Button
Try the scene again
Click on the Try Again Button
Using your remote move to highlight the Try
Again button and press Select
Save your Performance as is
Click on the Save Button
Using your remote move to highlight the Save
button and press Select
Delete the recorded sceneo
Click on the Delete button – or –
Using your remote move to highlight the
Delete button and press Select
Add an Introduction to your performanceo
This will save your performance and allow
you to record and introduction
Click on the Add Intro button – or –
Using your remote move to highlight the
Add Intro button and press Select
Add Intro
An intro can be added to a performance from two different•
places in the application
Using the Add Intro button at the completion of a Recording•
Using your Remote, navigate to the Add Intro Buttono
and press Select
Using your Mouse, click the Add Intro buttono
Using your keyboard navigate to the Add Intro Buttono
and press Enter
After pressing the Add Intro button complete the Step In Step Out•
process as follows:
Ensure the camera is completely showing the green-o
screen
Nothing should be showing in the image
but the greenscreen
Adjust the camera or greenscreen if neces-
sary
Position yourself in the chalk outline on the screeno
Press the record buttono
Using your Remote, press the REC button
Using your Mouse, click the REC button
Using your keyboard press the Space Bar
Step completely out of the sceneo
Make sure that the greenscreen is the only
thing showing in the camera frame
Press the Record Buttono
Using your Remote, press the REC button
Using your Mouse, click the REC button
Using your keyboard press the Space Bar
Position yourself back into the scene and within theo
Chalk Outline
Press the Record Buttono
page 12 page 13
Yoostar Owners Manual booklet.indd 14-15 4/16/09 9:22:24 AM

Using your Remote, press the REC button
Using your Mouse, click the REC button
Using your keyboard press the Space Bar
After the countdown ends the Intro begins•
You have 15 Seconds to record your Intro•
When recording ends you have several options•
Preview your Introo
Click on the Play button on the image
Using your remote press the Play Button
Try the Intro againo
Click on the Try Again Button
Using your remote move to highlight the
Try Again button and press Select
Save your Intro as iso
Click on the Save Button
Using your remote move to highlight the
Save button and press Select
Delete the recorded Introo
Click on the Delete button – or –
Using your remote move to highlight the
Delete button and press Select
After your selection, you are returned to the Manage Perfor-•
mances screen
Manage Performances
After Saving a Performance you will be placed on the Manage•
Performance Screen
The Manage Performance screen is used to manageo
the details of your performance:
Using the mini cascade you select a per-
formance to work with
Upload your performance to YooStar.com
Select a performance and press•
the Upload button
Preview your performance
Pressing the play button on the•
image
Select a thumbnail to represent the spe-
cific performance
Add metadata (Title, Description, Category,
Tags) about your performance
Record an Intro or change an existing one
page 14 page 15
Yoostar Owners Manual booklet.indd 16-17 4/16/09 9:22:24 AM

Upload
Click on the UPLOAD button•
In order to upload your performance, you must haveo
an active account at YooStar.com
Select a User Name to upload the performance too
User must be setup on YooStar.com
Use the Add Button to add a user to upload too
A new user must have an active account
on YooStar.com
Set the permissions for this videoo
Public – All active members of YooStar.com
can see your performance
Private – Only you can see your perfor-
mance on YooStar.com
Friends – Only members who are your
friend can see the video
Click the Upload Now buttono
Your performance will be uploaded to
YooStar.com
Before your performance is visible on YooStar.com ito
must pass several system checks
YooStar.com does not allow any inappro-
priate content on our site
page 16 page 17
Federal Communications Commission (FCC) Statement
This equipment has been tested. And it found to comply with the limits
for a Class B digital device pursuant to Part 15 of the FCC Rules. These
limits are designed to provide reasonable protection against harmful
interference in a residential installation. This equipment generates and
uses and radiates radio frequency energy and, if not installed and used in
accordance with the instruction, may cause harmful interference to radio
communications. However, there is no guarantee that interference will
not occur in a particular installation. If this equipment does cause harmful
interference to radio or television reception, which can be determined by
turning the equipment off and on, the user is encouraged to try to correct
the interference by one or more of the following measures:
- Reorient or relocate the receiving antenna.
- Increase the separation between the equipment and receiver.
- Connect the equipment into an outlet on a circuit different from that to
which the receiver is connected
- Consult the dealer or an experienced radio /TV technician for help.
Warning: A shielded-type power cord is required in order to meet FCC
emission limits and also to prevent interference to the nearby radio and
television reception. It is essential that only the supplied power cord be
used.
1. This device complies with Part 15 of the FCC Rules. Operation is subject
to the following two conditions: (1) This device may not cause harmful
interference, and (2) This device must accept any interference received,
including interference that may cause undesired operation.
2. Changes or modifications not expressly approved by the party
responsible for compliance could void the user’s authority to operate the
equipment.
Yoostar Owners Manual booklet.indd 18-19 4/16/09 9:22:25 AM

BACK COVER
Yoostar Owners Manual booklet.indd 20 4/16/09 9:22:25 AM
Table of contents