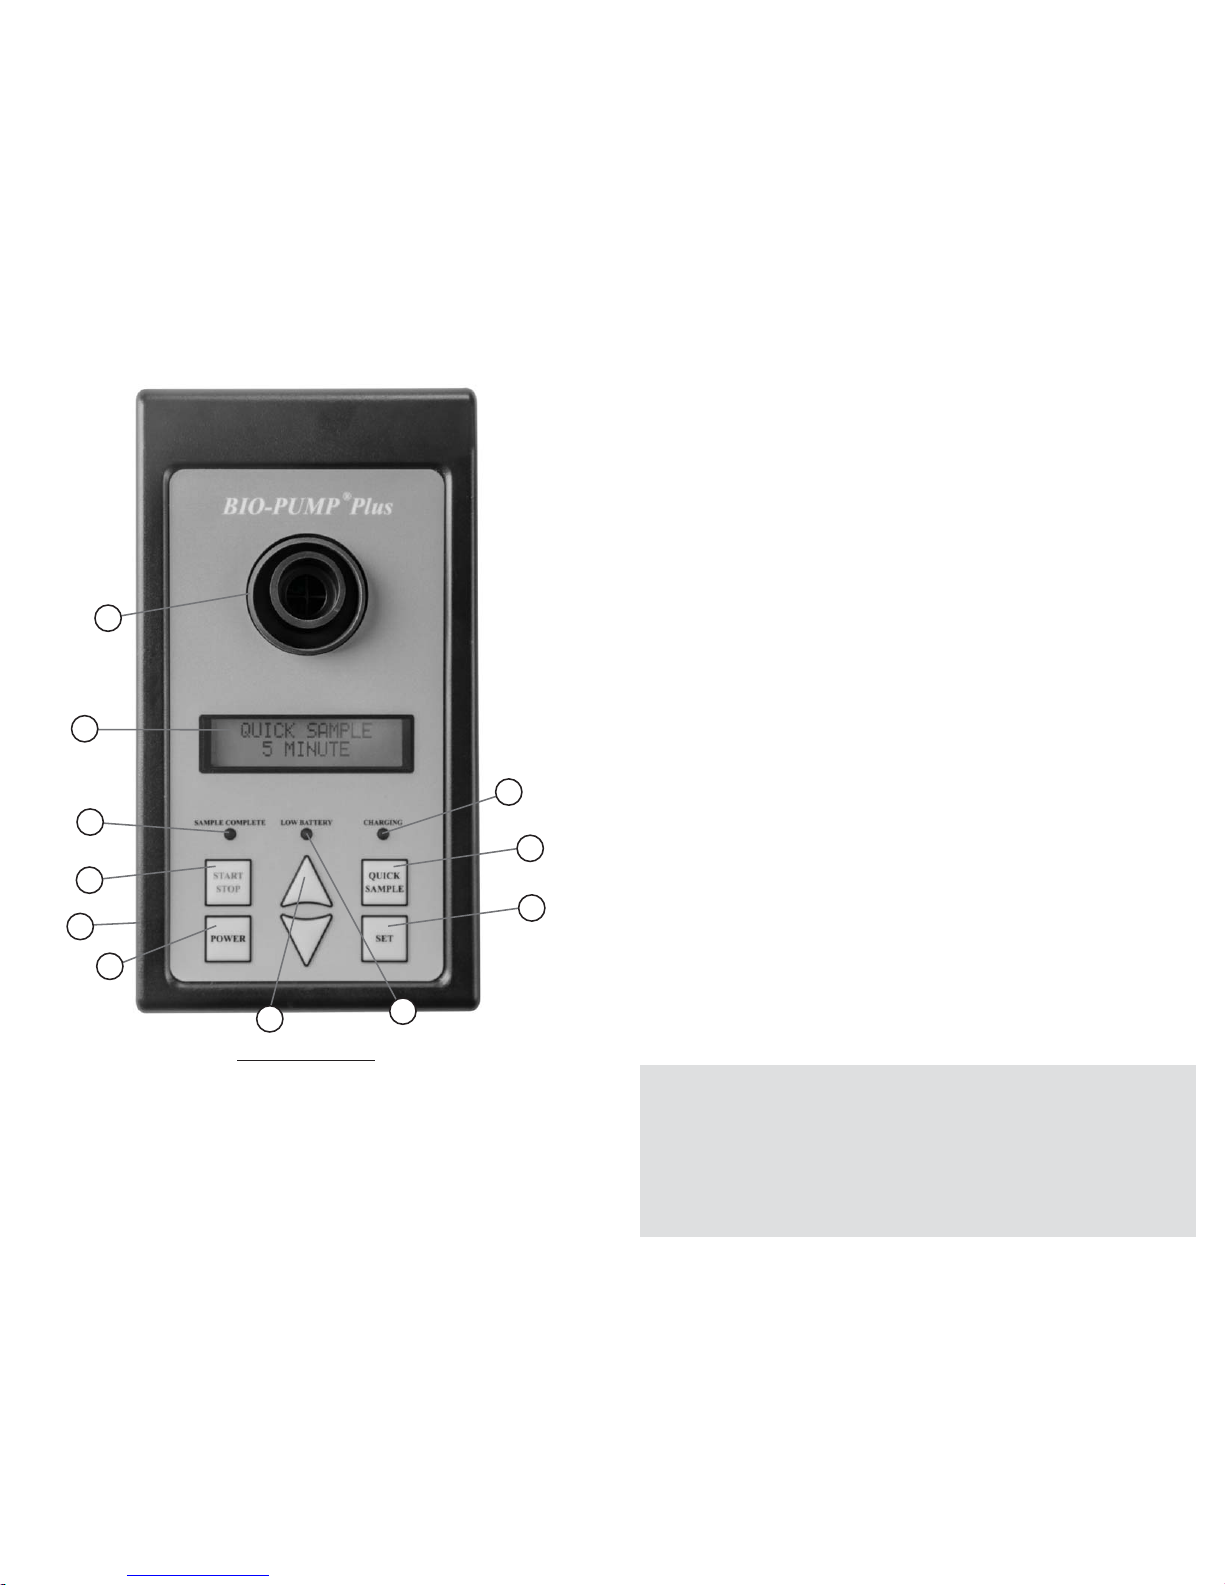
1. Press the POWER button to turn the pump on.
2. Using the arrows, select CALIBRATE BIO-PUMP.
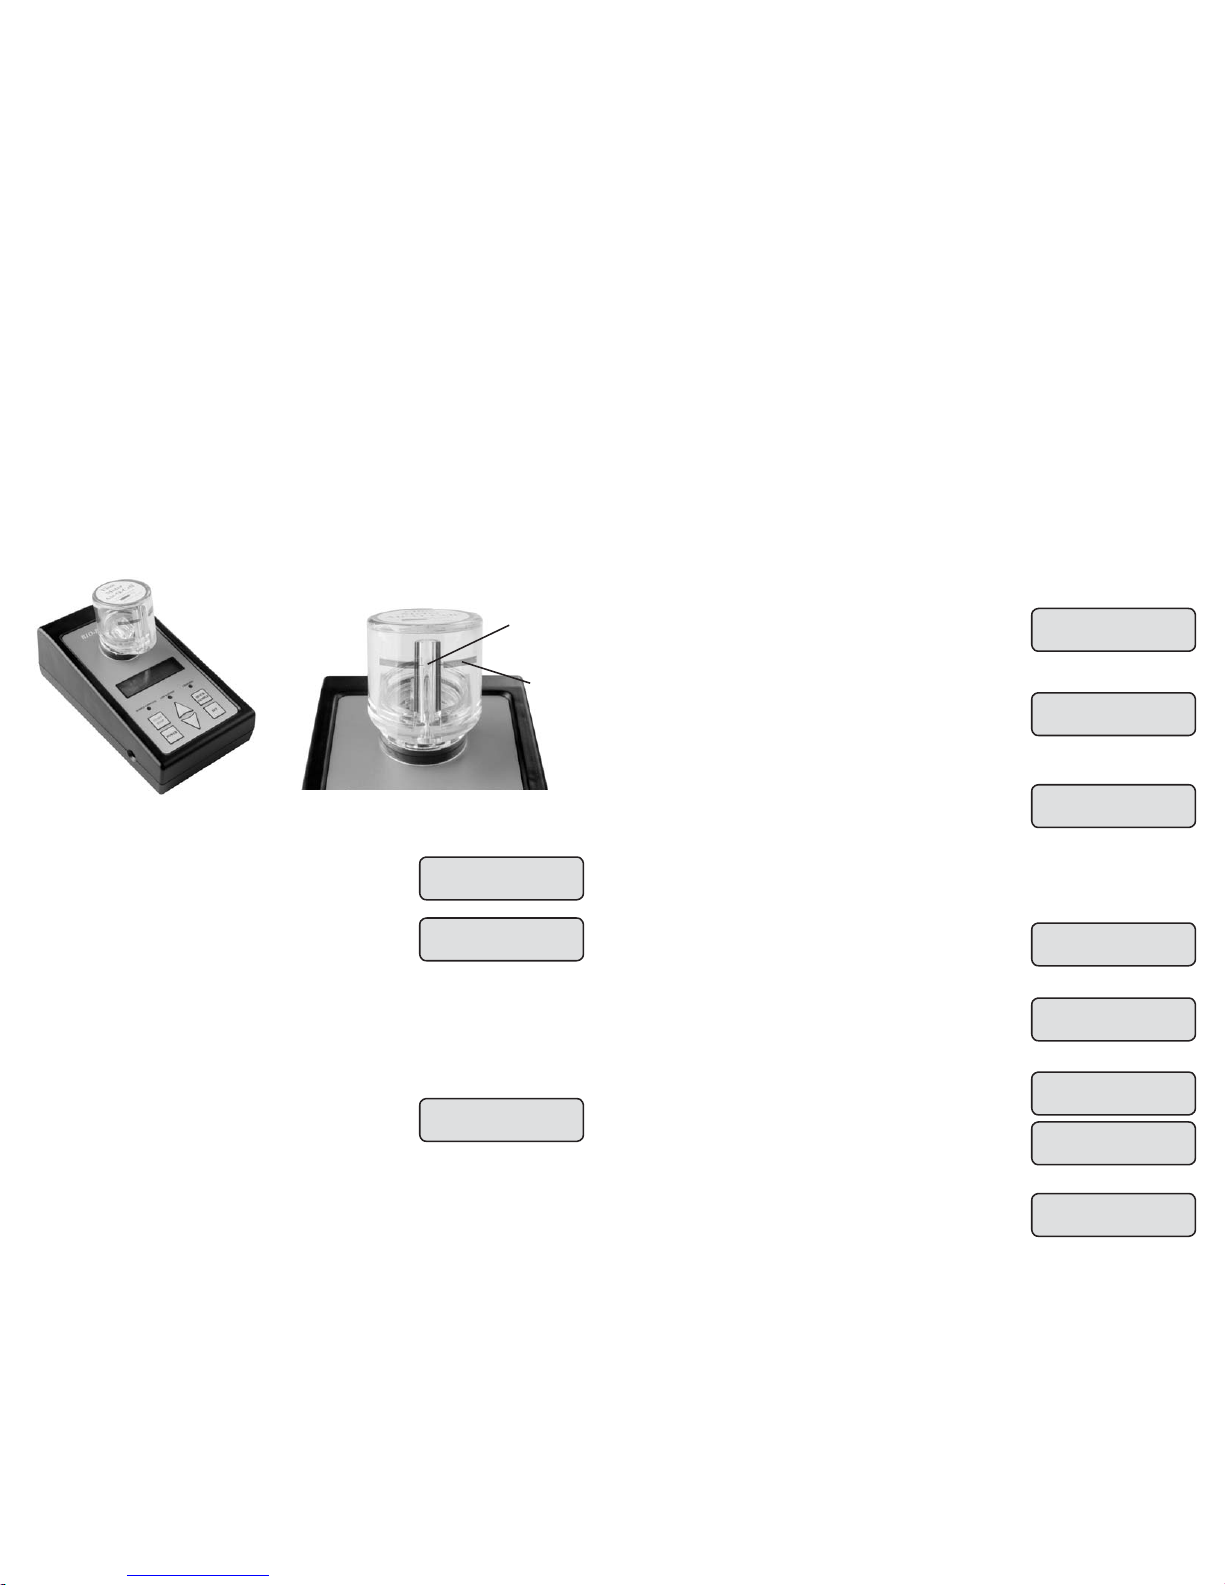
3. Connect the flow indicator or TSI Calibrator.
4. Press the SET button.
5. The pump will begin running at a default flow rate that is
approximately 15 LPM. Use the arrows to adjust the flow
rate until “15 LPM” registers on the flow indicator or on
the TSI’s LCD.
6. Press the SET key to save the calibration.
Note:
When you enter calibration mode, the pump will reset its flow rate to a default setting that
is approximately 15 LPM. To check the pump calibration without resetting the flow rate,
you may use the “Verify Calibration” function.
CALIBRATE
BIO-PUMP
VERIFY
CALIBRATION
ADJUST FLOW THEN
PRESS SET
Adjusting the Calibration
Verifying the Calibration
1. Press the POWER button to turn the pump on.
2. Use the arrow buttons to select VERIFY CALIBRATION.
3. Connect the flow indicator or TSI tube adapter.
4. Press the SET or START button to begin.
5. Measure the flow rate with the calibrator. To stop, press the stop
button. To adjust the calibration, use the CALIBRATE BIO-PUMP
option as described above.
Calibration
It is recommended that the Bio-Pump®Plus be calibrated and verified at least once every day of use.
A flow indicator for Air-O-Cell®cassettes is supplied with the pump for ease of calibration. You may
also calibrate your pump using the optional TSI-4046 Primary Calibrator with attachments. These are
the only approved calibrators that are specially designed to work with low backpressure impeller fan
type pumps.
Warning
DO NOT calibrate the pump using any other devices. Doing so will yield inaccurate readings due to
the backpressure created by the calibrators. Calibrators known by Zefon to cause theses inaccuracies
include, but are not limited to:
Bios Drycal, Bios Defender, Gilian Gilibrator, Gilian Challenger, or standard miniBUCK calibrators.
15LPM Mark
Float Ball
Adjust flow until ball is centered on line.Connect flow indicator to pump as shown
4
Sampling Modes
Bio-Pump®Plus comes with 3 different sampling modes to choose from:
Taking Sampling Using the Quick Sample Mode
Taking Samples Using Single Sampling Mode
1. Place the pump in the desired location.
2. Place cassette on the rubber grommet on top of the pump so that
the cassette fits snugly.
3. Press the POWER button to turn the pump on.
4. Using the arrows, select “SINGLE SAMPLING MODE”
5. Press SET.
6. Using the arrows, enter the sample run time (adjustable in 1
minute increments).
7. Press SET. (optional)
8. Press START to begin sampling. Once completed, the unit will
beep, the display will show “SAMPLE COMPLETE” and the yellow
sample complete light will turn on. Remove cassette from pump
by gently pulling upward.
9. Seal cassette, document the sample run time and send to
laboratory for analysis.
Note: “Single Sample” mode will exit upon hitting the “SET”
button after runtime has been set. Previous runtime will be stored
in memory.
1. Place the pump in the desired location.
2. Place cassette on the rubber grommet on top of the pump so that
the cassette fits snugly.
3. Press the POWER button to turn the pump on.
4. Press the “QUICK SAMPLE” button. The display should read
“Quick Sample, 1 minute.
5. Continue to press the “QUICK SAMPLE” button to change the
sampling time from 1, 2, 5, and 10 minutes.
6. Once the correct number of minutes is displayed, press “START”
to begin sampling.
7. Once completed, the unit will beep, the display will show
“SAMPLE COMPLETE” and the yellow sample complete light will
turn on. Remove cassette from pump by gently pulling upward.
Seal cassette, document the sample run time and send to
laboratory for analysis.
Note: “Quick sample” mode will exit upon hitting the “SET” button
at any time.
1. Quick Sample Mode
Quick Sample modes allows easy sampling of the most commonly used sampling times of 1, 2, 5,
or 10 minutes.
2. Single Sampling Mode
Single Sampling Mode is designed to take one sample at a predetermined amount of time. The
amount of sample time can be set anywhere from 1 minute to 9 hours 59 minutes.
3. Sequential Sampling Mode
Sequential sampling allows the pump to be programmed to turn on and off at predetermined times.
Example: it can be programmed to run for one minute every hour for five hours.
5
RUN TIME 0:00:00
SET TIME 0:00:00
ENTER RUN TIME
0:00:00
SINGLE
SAMPLING MODE
SAMPLE COMPLETE
RUN TIME 0:00:00
SET TIME 0:00:00
QUICK SAMPLE
5 MINUTE
SAMPLE COMPLETE
Select Quick Sample Time, then
press START
Display shows set time and run time
during sampling
Display shows set time and run time
during sampling
Use Up/Down arrows to select Single
Sampling Mode, then press SET
Use Up/Down arrows to enter the
desired run time, then press SET
PRESS START
TO RUN SAMPLE