ZENIT-19 User manual, 1980 year
– 5 –
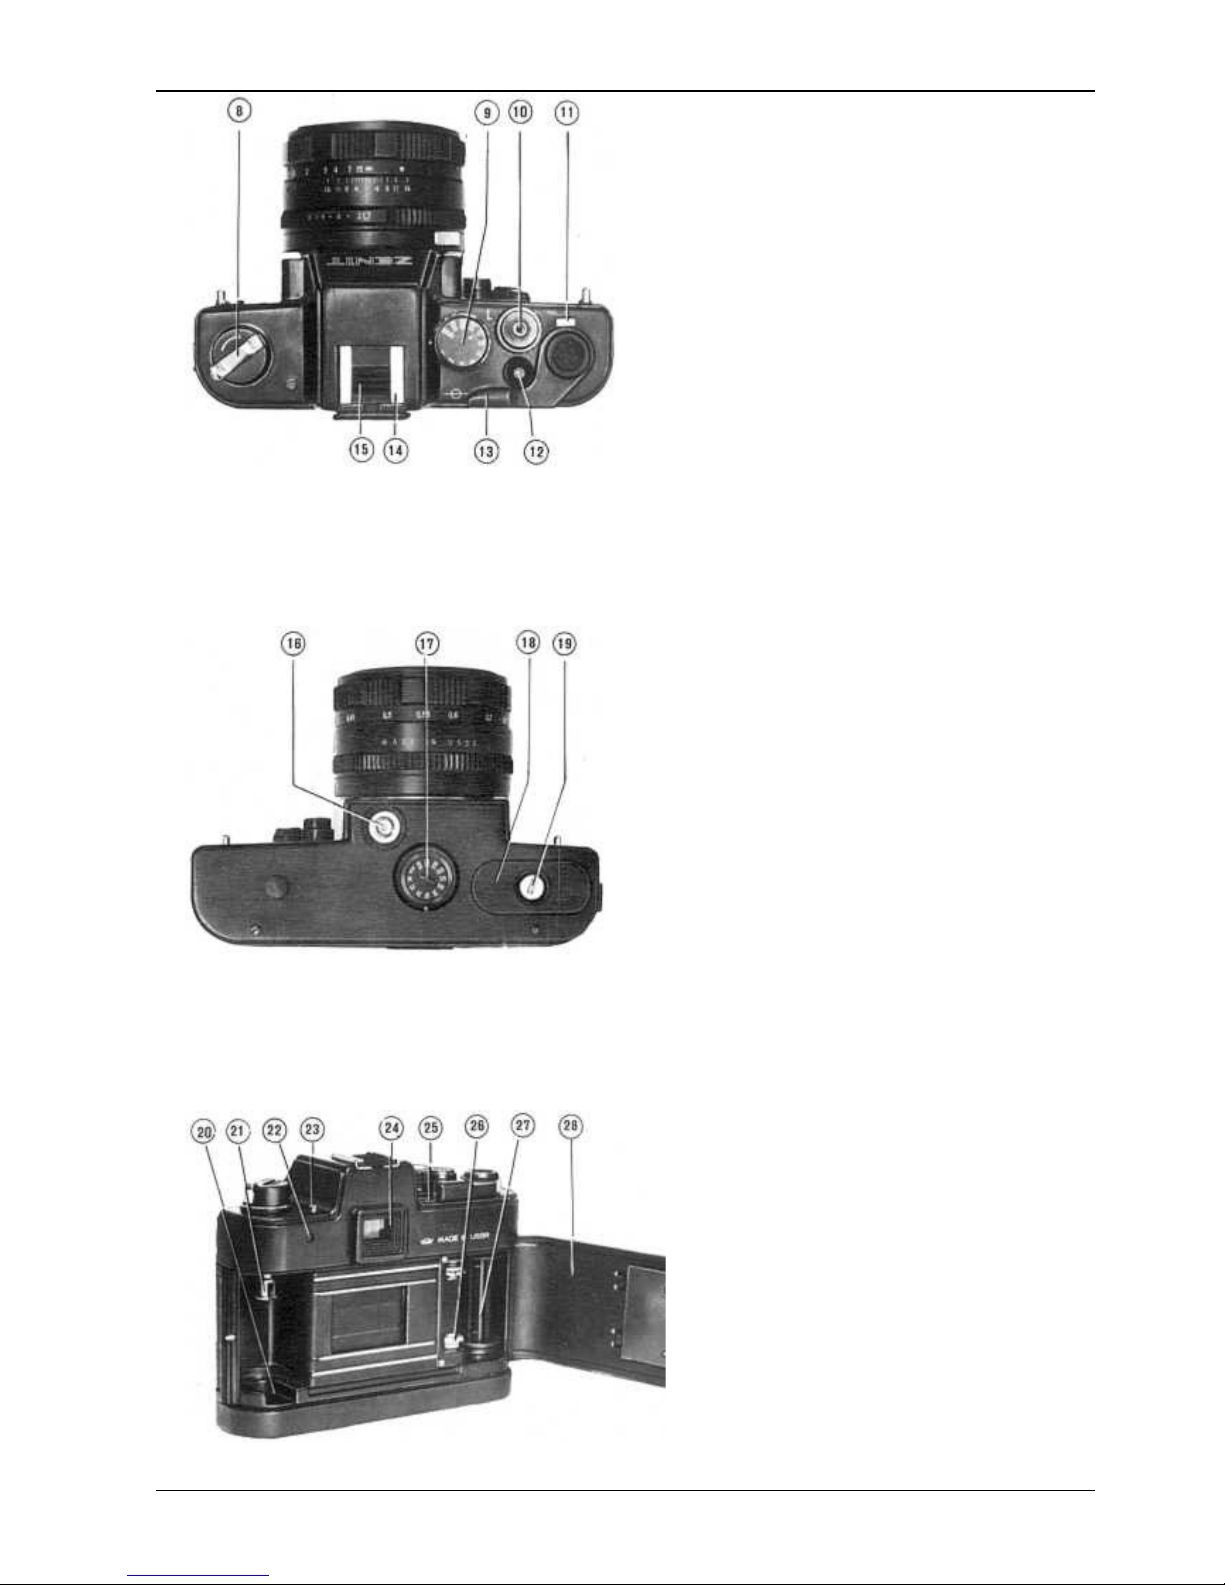
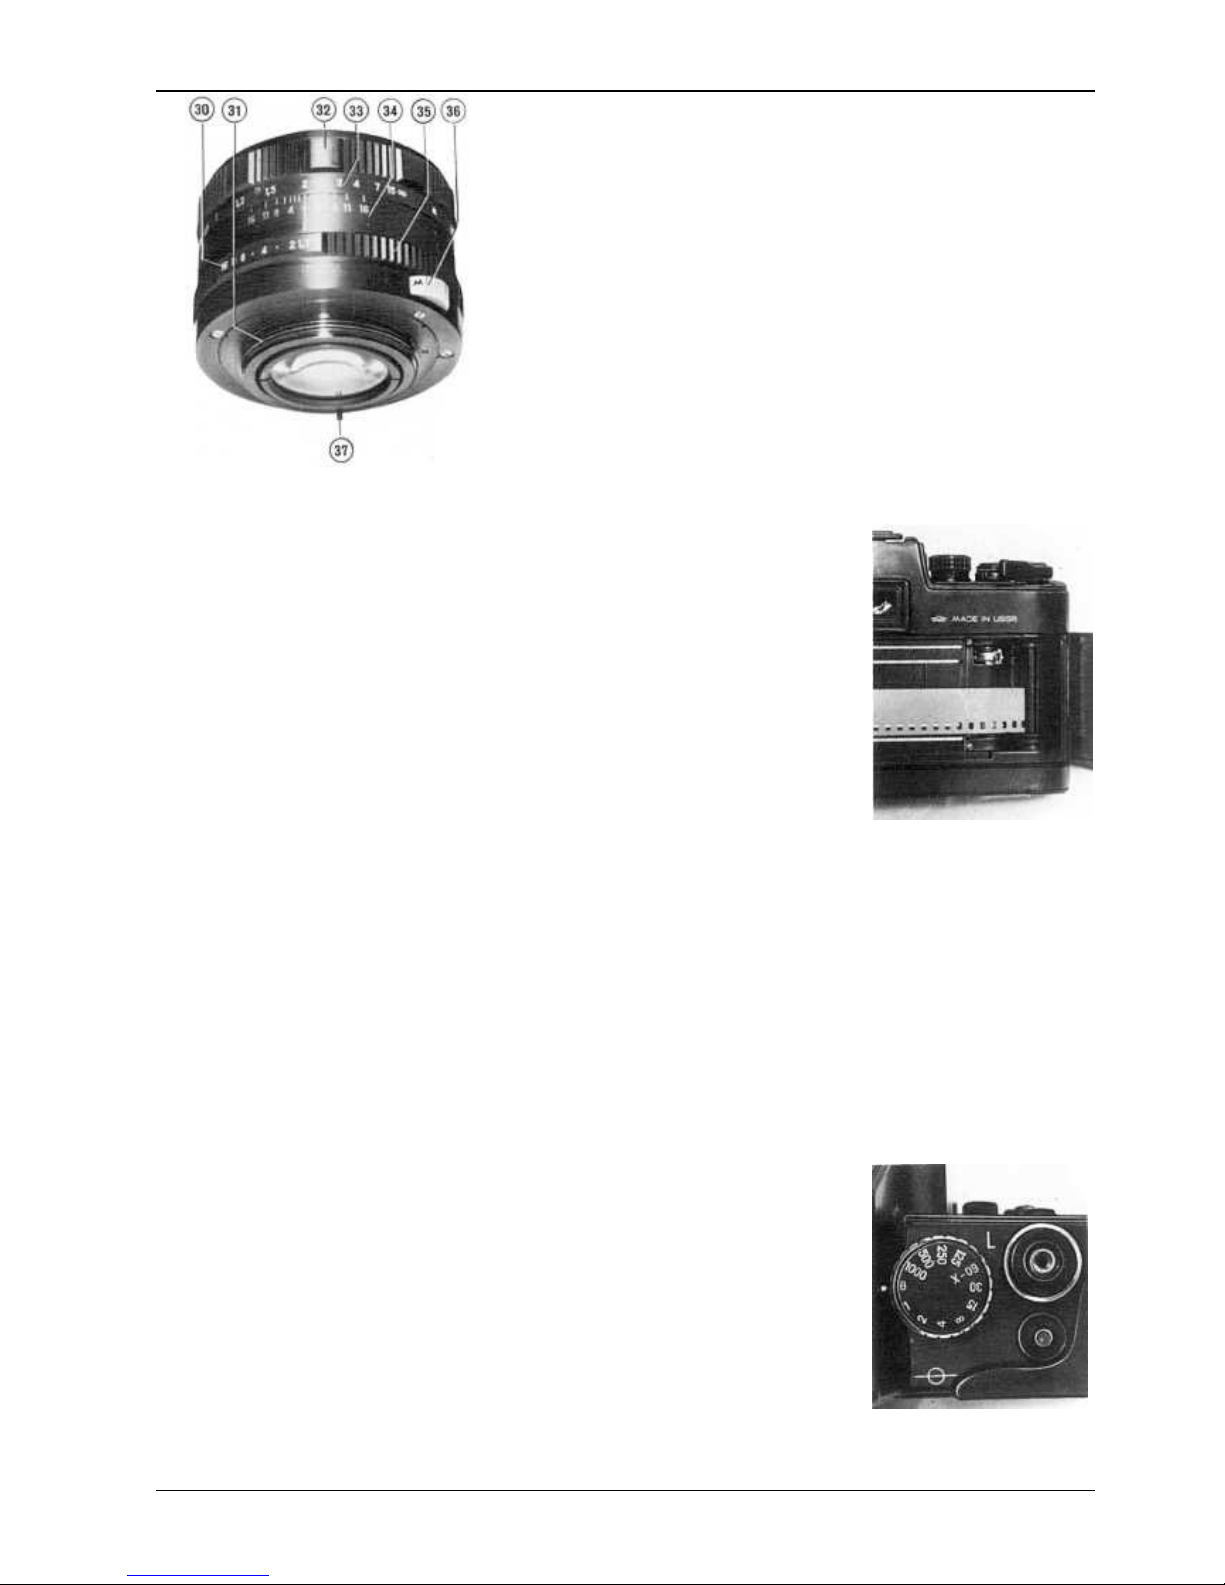
6. Aperture Setting
Set a selected aperture value against the index mark by turning diaphragm setting ring 35.
The diaphragm is capable of operating in two modes:
— in automatic one (selector switch 36 in “A” position). In this mode turning of diaphragm setting
ring 35 does not result in lens diaphragming but sets preliminarily the aperture value to which the
diaphragm will stop down upon pressing release button 10 and before the shutter firing or upon
pressing depth-of-field preview button 4. The diaphragm remains open in the “A” mode until the
release button or the pre-view button are pressed;
— in manual one (selector switch 36 in “M” position). In this mode the lens diaphragm is set
manually by turning diaphragm ring 35. As a rule the “M” mode is used to take pictures with extension
tubes that are not fitted with a control pin operating the pre-set diaphragm mechanism.
7. Exposure Setting
Correct exposure setting depends on a proper combination of aperture, shutter speed and film speed.
The exposure is often set either with the shutter priority (the rate of the subject movement is taken into
account) or with the aperture priority (depth of field is taken into account).
In those cases either a shutter speed is set first (as indicated in section “Shutter Speed Setting”) and
then an aperture value is selected depending on it, or an aperture value is set first (as indicated in
Section “Aperture Setting”) and then a shutter speed is selected.
To obtain a cbmbination of aperture and shutter speed which would ensure a correct exposure do
the following:
— aim the lens at a subject to be taken;
— while looking through the viewfinder eyepiece press pre-view button 4;
— turn diaphragm setting ring 35 or shutter speed dial 9 to match the needle in the viewfinder field
of view with the cut of the black mask on the right-hand side of the viewfinder.
The exposure is excessive if the needle deflects to sign “+” and insufficient if it deflects to sign “–”.
Should the needle keep on deflecting to sign “ + ” with all possible combinations of aperture and
shutter speed values, either the subject illumination should be decreased, or a filter of a corresponding
filter factor used, or the camera should be loaded with film of a lower speed.
If the needle keeps on deflecting to sign “ – ” with all possible combinations of aperture and shutter
speed values, either the subject illumination should be increased or film of a higher speed be used.
8. Focusing
In the camera viewfinder there is Fresnel lens 38 with microraster centre spot 39 surrounded with
ground glass circle 40. While watching the subject being photographed turn focusing ring 32 to obtain
the sharpest image on the microraster or the ground glass circle. For this purpose perform focusing
with the diaphragm fully open.
The best sharpness can be obtained when the image appears sharp and without ripples on the
microraster. The ground glass circle is mainly used for micro- and macrophotography, or for taking
pictures with small apertures (when microraster loses its sensitivity), as well as for estimating the
depth of field with the set aperture.
Focusing can be done as well without looking in the viewfinder. For this purpose turn focusing ring
32 and making use of distance scale 33 set the value, corresponding to the distance from the subject
being taken to film plane index O 25, against the large index mark of scale 34 (the small red index
mark on scale 34 is used to take pictures on some infra-red photographic material).