Zero Appliances GR265G Manual

Installation, Service and User
INSTRUCTIONS
FOR THE
ZERO MODEL:
GR265 G/E
Vaccine Storage Refrigerator & Ice Pack Freezer
2-WAY: L.P. Gas & 230V Electric
ZERO APPLIANCES (PTY) LTD
Cat. I3+ (28–30/37) & I3B/P (30)
WARNING: THIS APPLIANCE MUST BE EARTHED
ENSURE THAT THE GAS SUPPLY HOSE IS NOT IN
CONTACT WITH OR NEAR THE BURNER BOX

Instructions for Installation, Operation & Service
Manufacturer: Zero Appliances, Chloorkop, Ext. 44, Kempton Park, Gauteng, South Africa.
Email: albert@zeromedical.co.za OR enquiries@zeroappliances.co.za
MODEL: GR265 G/E Vaccine Storage Refrigerator & Ice Pack
Freezer
Contents: Page
Important Information and Safety Instructions 1
Technical Data 1
Data Plate 2
Installation Instructions 2
Controls 2
To Start Operation 3
LP Gas Operation 3
220 Volt Electric Operation 3
Troubleshooting 4
Some Useful Hints 4
Cleaning Your Refrigerator 4
Vaccine and Ice Pack Loading Schedule 5
Electrical diagram 6
Defrosting 7
Prolonged Storage 7
Who to Contact 7

1.
Important Information and Safety Instructions
It is important to read through these instructions carefully before beginning to use the refrigerator.
To ensure reliable refrigeration and economical operation, the refrigerator must be installed and used
as described in this manual.
Retain these instructions for future use.
For Your Safety:
If you smell gas:
1. Open windows and immediately evacuate all people.
2. Do not touch electrical wires, switches, light matches, smoke, or do anything that could ignite gas.
3. Extinguish any open flames.
4. Close cylinder valve or tank supply valves. Do not turn on valves until leak has been corrected.
5. Immediately call your gas supplier.
Warnings:
- Your 220v power supply must be earthed (grounded) –unit supplied with earthing
through the 220v plug.
- Ensure that the refrigerator is standing level.
- All gas-burning appliances consume air (oxygen). To avoid endangering your life, do
not use this appliance in an unventilated room. Make sure there is an open window or
designated ventilation opening to provide air supply. Do not obstruct the flow of
combustion and ventilation air. Provide additional ventilation for any additional fuel
burning appliances and additional occupants.
- Do not store or use gasoline or other flammable vapour and liquids in the vicinity of
this or any other appliance.
- Do not spray aerosols in the vicinity of this appliance while it is operating.

2.
Data Plate
The data plate, located on the back of the refrigerator will register your model number, serial number
and product number.
Record these details here, for easier access if the need for a service should arise.
Model Number ____________________________
Serial Number ____________________________
Product Number____________________________
Installation Instructions
Placement of the Refrigerator
The room should have a capacity (length x width x height) of at least 20m³ and must be adequately
ventilated as well as follow all relevant national and local regulations.
Further, the room should have a window (which can be opened) . It is important that the refrigerator is
not subject to radiation of heat from a stove etc.
For best performance also at high ambient temperatures, there must be free air circulation over and at
the rear of the refrigerator.
The refrigerator is designed for a free-standing installation and the clearance to the rear wall and to
the possible side walls, should be at least 50mm. The clearance above the refrigerator should be at
least 600mm.
NB: The refrigerator must be adjusted to a vertical and horizontal level position, see bubble spirit
level supplied with the refrigerator. Use the feet on the refrigerator to adjust its position.
Controls
Description of Controls:
A. Temperature Controller (Located at the back of the appliance)
B. Piezo Ignitor
C. Flame Indicator
D. Flame Failure Device
E. Gas Thermostat

3.
To Start Operation
NB: ONLY OPERATE ON ONE POWER SOURCE AT A TIME
LP Gas Operation:
NB. Ensure that the Electric Power Supply has been switched off.
1. Open the shut-off valve for the gas bottle (check that there is enough gas). Open any shut-off
valve of the gas installation.
2. Turn on the gas supply.
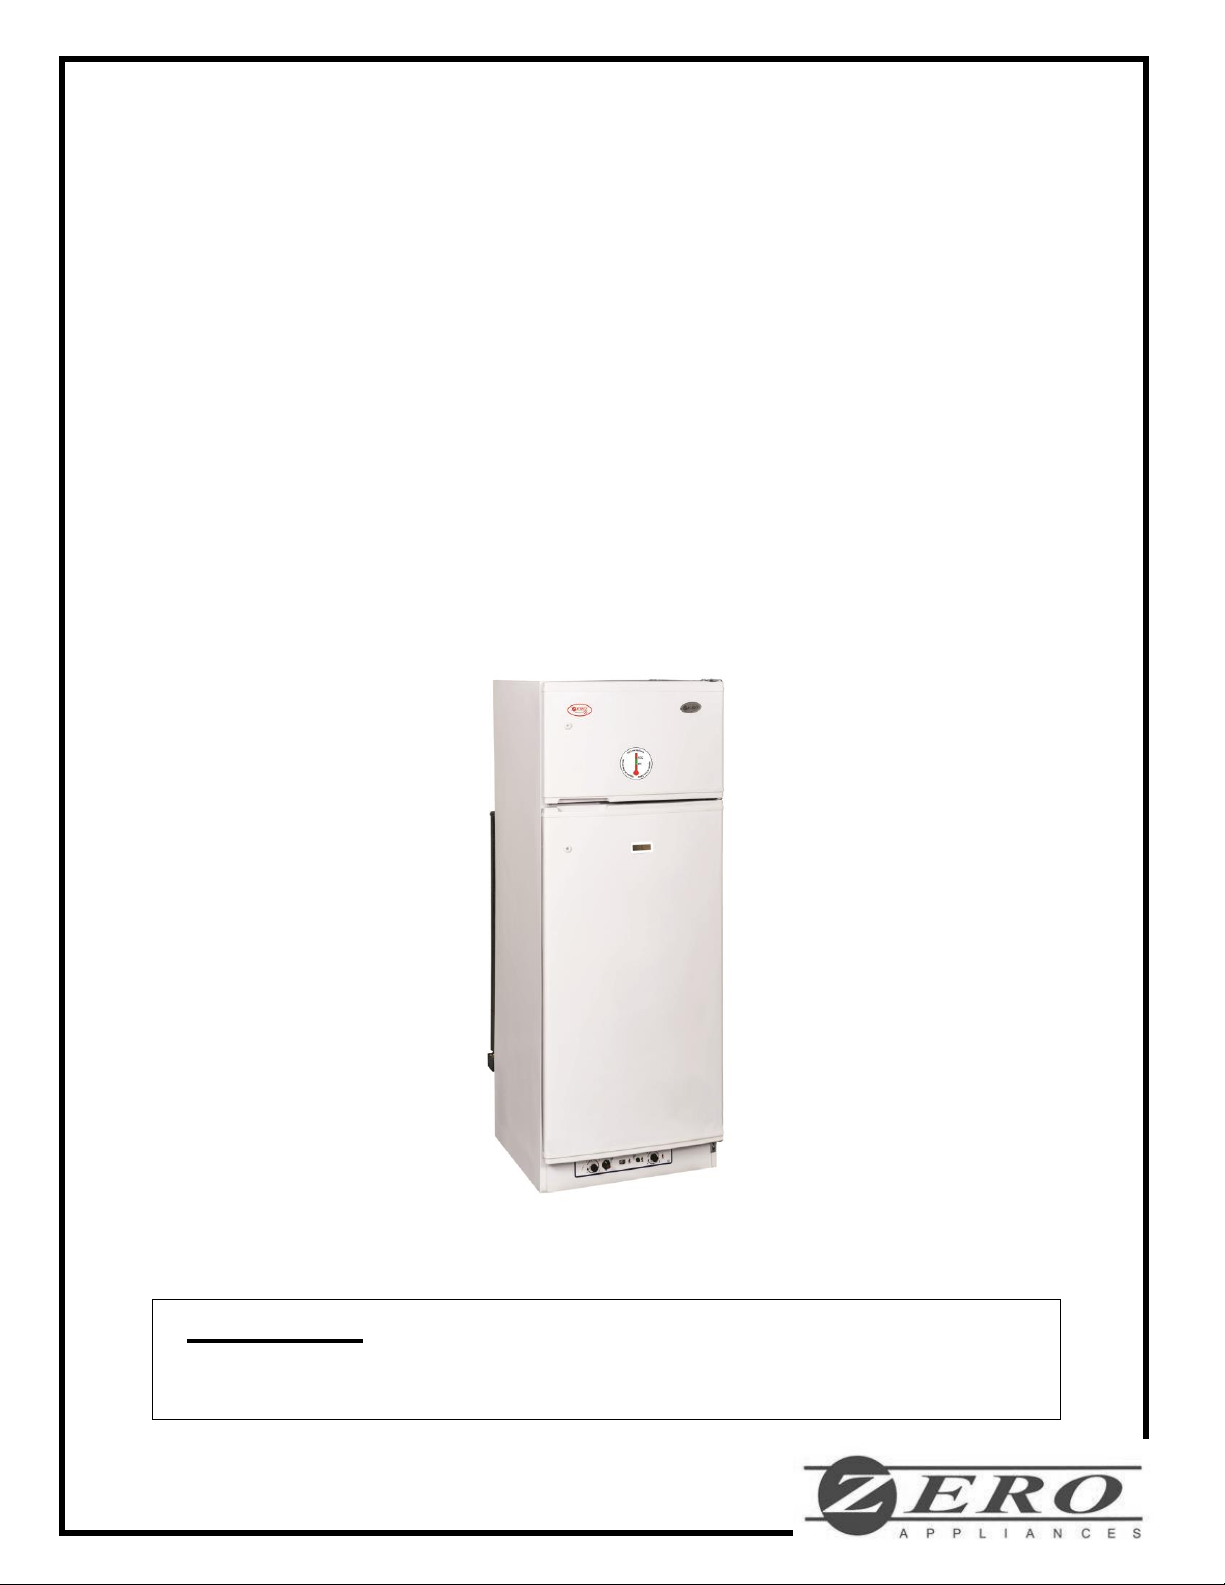
3. Turn gas thermostat (knob E), to the coldest position i.e. fully clockwise, to 4 (please note that
Thermostat is situated on outside, on the front of the unit, at the bottom)
4. Keep the flame failure device knob D, pressed in for approximately 15 seconds and simultaneously
operate the ignitor, B, until the flame ignites by pressing in and then releasing the button.
5. Keep the flame failure device knob pressed in for a further 15 seconds, then release it. During this time
the gas flame indicator needle C, will move into the green section, indicating the flame is burning.
If the needle returns to its original place, repeat steps 3, 4 and 5 until the needle remains in the green
section. Run the refrigerator empty for 8 hours, then load with vaccines and then monitor temperature
via external thermometer and control temperature as required by means of the thermostat.
6. To terminate gas operation, push in and turn knob to the OFF position (Lower than 1 in the 9 o’clock
position).
Thermostat Setting: 4 = Coldest position 1 and below = Warmest Position
Note:
- If the Piezo electric igniter, B, does not spark properly, as can occur in extremely damp and
humid conditions, the burner can be lit directly with a match by a second person, instead of
using step number 4.
- If strong, gusty winds prevail, regularly check the gas flame indicator needle remains in the
green section to ensure that the wind has not extinguished the flame. If it has, repeat steps 3,
4 and 5, or revert to the alternative mode of operation.
- After initial installation, changing of gas cylinder, or servicing etc., the gas pipes may contain
some air, which should be allowed to escape by briefly pressing on the flame failure device.
This will ensure the flame lights quickly.
- It is essential that the 30mBar regulator be used.
- In the case of burn back, turn knob to off position and close valve on cylinder.
- If burn back continues, contact your local service agent.
- To switch on, open valve and repeat steps 3, 4 and 5.
- The flame failure device should never be depressed for periods longer than 15 seconds, as
this can cause a potentially dangerous build-up of un-burned gas.
- If the burner does not ignite, allow sufficient time for any un-burned gas to dissipate, and then
repeat the ignition steps.
220 Volt Operation:
NB: ENSURE THAT THE GAS SUPPLY HAS BEEN SWITCHED OFF
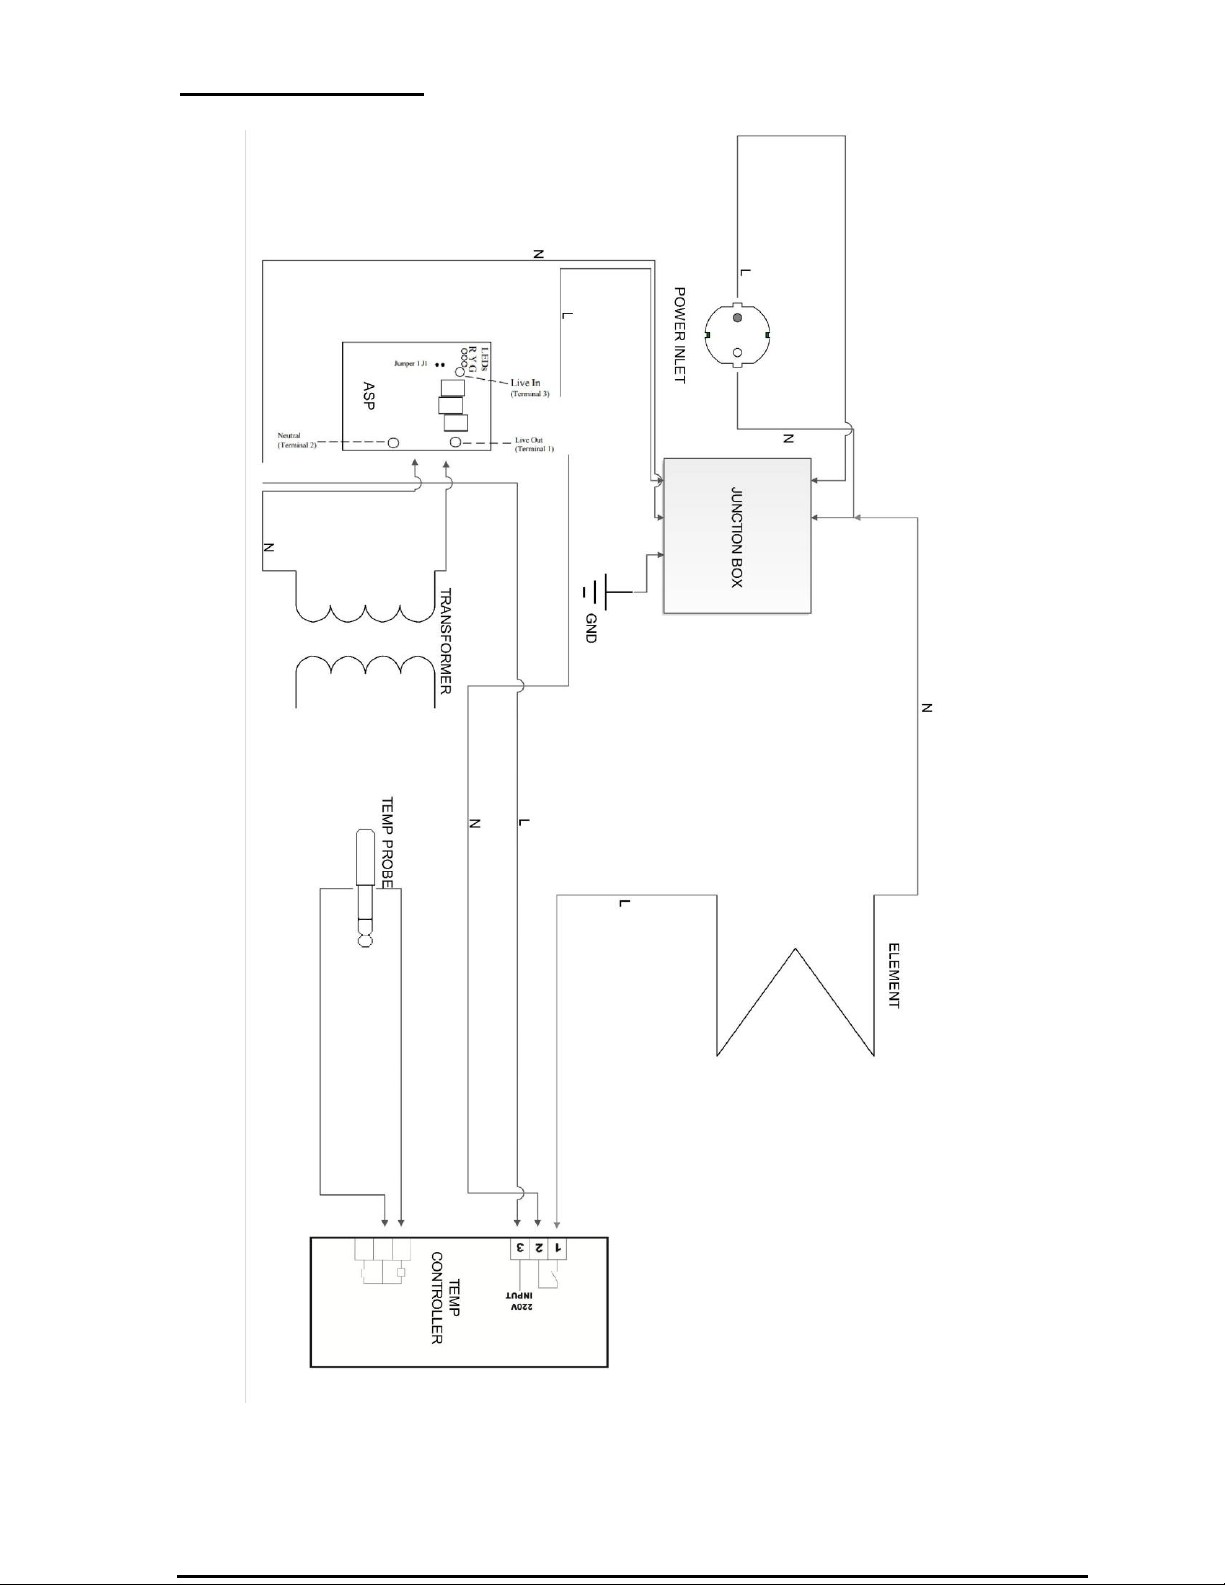
Ensure that the 220v power supply is earthed. The unit is earthed through the plug provided.
The appliance is fitted with a temperature controller (A). There is no need for any user
settings on this control.
Connect the plug to mains supply and switch on.
Run the refrigerator empty for 8 hours, then load with vaccines and then monitor temperature via
the external thermometer.
Warning –If the supply cord is damaged, it must be replaced with a new cord or assembly
available from the manufacturer or one of the service agents.

4.
Troubleshooting
If the freezer fails to work, check the following points before calling for service.
That Installation instructions have been followed.
That the unit is level
If possible, start the unit on an alternative connected energy source.
If it fails to work on gas, check:
a. That the gas bottle is not empty
b. The LP gas supply valve is open
c. That the regulator is not faulty (try an alternative 30mBar regulator)
Some Useful Hints
Make sure that:
Defrosting is carried out periodically
The refrigerator is clean and dry with the door open when it is not to be used for some time.
Liquids or items with strong odours are well packaged.
The ventilation of the absorption unit is not obstructed.
You do not touch the absorption unit while it is in operation as parts of it will be extremely hot.
You check the condition of the gas supply tube regularly.
oEnd fittings in good condition
oOverall appearance etc.
You never put bottles or cans of fizzy drinks into the Ice Pack freezer compartment as they
may burst when freezing. Also, do not give children ice-lollies straight from the compartment
as they could cause frost burns.
Hot liquids and foods are not introduced into the refrigerator, allow to cool first.
You are aware that the operating temperature of the refrigerator could be affected by the
ambient temperature, the location of the refrigerator, the frequency with which the door is
opened and the volume and concentration of products stored in it.
You avoid packing products too tightly –air must be able to circulate freely.
Cleaning Your Refrigerator
The inside of the refrigerator should be cleaned regularly to keep it fresh and hygienic.
Clean your refrigerator using ½ a litre of warm water and a little bicarbonate of soda. Soak a
soft cloth in the solution, wring it out and use it to clean out the interior of the refrigerator and
its fittings.
Do not use wax polish, scouring powder, strong scented products or household cleaners and
detergents to clean the interior of the refrigerator as they may damage the surface and leave
a strong odour
The door seal, should only be cleaned with soap and water and then thoroughly dried.
The exterior of the refrigerator (except the door seal) should be wiped clean regularly using a
damp cloth and a small quantity of detergent.
The absorption unit behind the refrigerator should be cleaned with a brush from time to time,
but make sure the refrigerator is switched off when doing this.

5.

6.
Electrical Diagram
.

7.
Defrosting
Frost will gradually accumulate on the refrigerator’s interior surface.
It must not be allowed to grow thick as it acts as an insulator and adversely affects refrigerator
performance.
Check the formation of frost regularly and when it gets to around 5mm thick, defrost the
refrigerator.
To defrost the refrigerator, turn it off and remove all fridge contents.
Warning:
Normally the temperature of items would rise unduly during defrosting so alternative cooling
must be used.
Do not try to accelerate defrosting by using any kind of heating appliance, or sharp object, as
this might damage the plastic surface of the refrigerator.
Once defrosting is finished, empty out the drip tray and thoroughly clean the interior.
Prolonged Storage
Disconnect all electrical connections and the gas supply.
Empty the refrigerator. Defrost and clean it thoroughly as described earlier.
Leave the door partially open to exclude any odors and mildew forming.
Important
Before using the refrigerator again, ensure that no foreign bodies are present in the chimney,
burner (dust, insects, nests, etc.) or in the Gas Regulator.
Warning: (This refers to the absorption Cooling Unit on the back of the Refrigerator)
The needle valve screw used for admitting the ammonia/hydrogen filling charge to an
absorption unit is fitted to the unit’s reservoir. It is a strictly applied provision of the guarantee
extended on the unit to the customer, that any interference with the filling valve screw will
automatically void the guarantee. The absorption unit must not be opened, since it contains
corroding chemicals under high pressure.
Who to Contact
For service of your Zero refrigerator, please firstly contact your selling agent.
This manual suits for next models
1
Table of contents
Other Zero Appliances Freezer manuals

Zero Appliances
Zero Appliances GF230IP Manual

Zero Appliances
Zero Appliances ECF220AC User manual

Zero Appliances
Zero Appliances GEV60 Manual

Zero Appliances
Zero Appliances ECF220 DC Manual

Zero Appliances
Zero Appliances GF120 Manual

Zero Appliances
Zero Appliances GF180IP Manual

Zero Appliances
Zero Appliances GF250D Manual