1 BY ONE 436NA-0006 User manual

USER MANUAL
SOUND BASE SYSTEM
436NA-0006
436UK-0006
436DE-0006

Contents
Contents
-1-
Features .....................................................................................................................2
For yourAttention.....................................................................................................3-4
Panel......................................................................................................................5-6
Wall-mounting..........................................................................................................7-8
Connections...........................................................................................................9-10
Remote Control.....................................................................................................11-12
Basic Playback..........................................................................................................13
Trouble shooting........................................................................................................14
Specifications............................................................................................................15

Features
-2-
Thanks foryour purchaseof ourproduct. Pleaseread throughthis manualbefore making
connections andoperating thisproduct. Retainthis manualfor futurereference.
Line input
AUX input
Optical input
USB slot
ARC function
Bluetooth playback
Package Contents:
User manual
User manual
Remote control Wall plug(2x) and screw(2x) and bracket screw(4x)
Bracket(2x) Audio Cable

Toreduce the riskof electric shockor fire, donot open thecover. Referservicing to qualified
service personnel.
IMPORTANTNOTES
For YourAttention
The lightning flash isintended to alert theuser to the presenceof dangerous voltage withinthe
product's enclosure, and touchingthe internal components mayresult in a riskof electric shock
to persons.
The exclamatory markis intended toalert the userto the presenceof important operating
instructions.
RISK OF ELECTRIC SHOCK
DO NOT OPEN
CAUTION
CAUTIONCAUTION
Please read throughthis manual beforemaking connections andoperating this product.Retain this manualfor
future reference.
Don't open thecabinet of thisunit. No user-serviceableparts inside. Referservicing to qualifiedpersonnel only.
Switch offthe unit whenyou don't useit. Switch off the unitand disconnect itfrom theAC power supplywhen it is
not being usedfor a longtime.
Don't install theunit in aplace exposed toheating sources ordirect sunshine.
Don't install theunit in aplace exposed tomoisture or rain.
The apparatus shallnot be exposedto dripping orsplashing and anyobject filled withliquids, such asvases shall
not be placedon it.
Install the uniton a horizontal,flat and firmsurface with goodventilation. Never blockthe vents whichwill cause
malfunction resulted fromoverheating.
Use a softand clean ragto clean theoutside of theunit . Neverclean it withchemicals or detergent.
This book isonly a guidefor user's operation,not a criterionfor configuration.
Only use attachments/accessoriesspecified by themanufacturer.
Where the Mainsplug is usedas the disconnectdevice, the disconnectdevice shall remainreadily operable.
WARNING: Thebatteries shall notbe exposed toexcessive heat suchas sunshine, fireor the like.
CAUTION: Danger ofexplosion if batteryis incorrectly replaced.Replaceonly with thesame or equivalenttype.
-3-

FCC STATEMENT
For YourAttention
1. Thisdevice complies withPart 15 ofthe FCC Rules.Operation is subjectto the followingtwo
conditions:
(1) Thisdevice may notcause harmful interference,and
(2) Thisdevice must acceptany interference received,including interference thatmay cause
undesired operation.
2. Changes ormodifications not expresslyapproved by theparty responsible forcompliance could
void the user'sauthority to operatethe equipment.
NOTE: Thisequipment has beentested and foundto comply withthe limits fora Class Bdigital
device, pursuant toPart 15 ofthe FCC Rules.These limitsare designed toprovide reasonable
protection against harmfulinterference in aresidential installation.
This equipment generatesuses and canradiate radio frequencyenergy and, ifnot installed and
used in accordancewith the instructions,may cause harmfulinterference to radiocommunications.
However, thereis no guaranteethat interference willnot occur ina particular installation.If this
equipment does causeharmful interference toradio or televisionreception, which canbe
determined by turningthe equipment off and on,the user isencouraged to tryto correct the
interference by oneor more ofthe following measures:
Reorient or relocatethe receiving antenna.
Increase the separationbetween the equipmentand receiver.
Connect the equipmentinto an outleton a circuitdifferent fromthat to whichthe receiver is
connected.
Consult the dealeror an experiencedradio/TV technician forhelp.
FCC Radiation ExposureStatement
This equipment complieswith FCC radiationexposure limits setforth for anuncontrolled environment.This
equipment should beinstalled and operatedwith minimum distance20cm between theradiator & yourbody .
-4-

FRONT PANEL:
Panel
-5-
22
11
1 DISPLAY SCREEN
2 REMOTE SENSOR

Panel
-6-
REAR PANEL:
3344
1 HDMI
2 AUXINPUT
3 OPTICAL DIGITALAUDIO INPUT
4 AC INPUT
11
1 STANDBY
2 SOURCE
3 USB SLOT
4 VOLUME-
5 VOLUME+
6 LINE IN
22
1122
SIDE PANEL:
44
335566

Wall-mounting
-7-
Mounting soundbaron awall
In order toprevent injuries,the soundbase device mustbe
securely fasten tothe wall inaccordance with thebelow
installation instructions.
1.Drill the twoholes(about 6mm diameter) in thewall and keep
the distance betweendrill holes ofthe sound baseis 500mm.As
shown in thepicture on theright(diagram 1).
2. Insert thetwo plugs suppliedinto two drilledholes and then
insert two screwssupplied into twoholes and tighten.Asshown in
the picture onthe right(diagram 2).
3. Take care toleave 4 mmbetween the screwheads and wall.As
shown in thepicture on theright(diagram 3).
500mm
4mm
Diagram 1
Diagram 2
Diagram 3

Wall-mounting
-8-
Mounting soundbaron awall
4.Insert the wall-mountingbracket supplied intothe pedestal of
the sound base.Asshown in thepicture on theright(diagram 4).
5.Use the bracketscrews supplied toinsert the wall-mounting
bracket hole andtighten.As shown inthe picture onthe
right(diagram 5).
6.Use the assembledsound base tohang on thesetscrews on
the wall .Asshown in thepicture on theright(diagram 6).
Diagram 4
Diagram 5
Diagram 6

Connections
-9-
LINE IN/AUXIN
This soundbase havetwo extragroups of
audio inputterminals. You caninput the
analogue stereo audiosignals from extra
devices such asVCD, CD, VCR,DVD
player, etc.
Use theaudio cableto connectthe stereo
audio outputterminals ofa VCD,CD,
VCR,DVD playerto thestereo input
terminals LINE IN/AUX INof thissound
base.
Its correspondingsignal sourceis LINE
IN/AUX INwhich canbe availableby
pressing [LINE/AUX] onthe remote
control.
OPTICAL
Optical Input
Optical Output
Use theoptical cableto connectthe optical
input ofthis soundbase tothe optical
output ofVCD, CD,VCR, DVDplayer.
Optical Input
LINE Output
AUX Input
R
L
L
R
AUX Output
LINE IN
Line Input
AUDIO INPUT
AUDIO OUTPUT
ARC(AUDIO RETURNCHANNEL)
ARC is audioreturn channel function,itis used indigital audio outputof liquid-crystal
display television inorder to getthe optimal synchronoussound quality .
Use the HDMIcable to connectthe HDMI-ARC inputport of thissound base tothe
ARC outputport ofthe liquid-crystaldisplay television.

Connections
-10-
Press standby buttonto power onthe sound base,then
press source buttonon the soundbase to switchthe
corresponding bluetoothmode, thebt willbe flashingquickly
in thedisplay screen , thesound baseis insearching
bluetooth signal status, byone BS015
Note:
Bluetooth connection rangein 10 meters.
The bluetooth pairingmodel 1byone BS015in your device
was notdeleted.
use yoursmart phoneto searchthe
bluetooth signalof thesound base,select 1 on
your list, input the password0000 if needthe password
prompt, thesound basewill synchronizeto playsongs on
your mobilephone whilethe btkeep solidlight inthe display
screen meansto beconnected successfully.
Disconnected the bluetoothon the smartphone to switched
off thebluetooth connection.
In bluetooth mode,[PLAY/PAUSE],[NEXT],[PREVIOUS],
[VOLUME+/-] etc.are alsoactive.
Bluetooth
Model:1byone BS015
BLUETOOTH

-11-
Remote control
Insert thebatteries into theremote control. Pointthe remote controlat theremote sensor onthe front
panel. Theremote control workswithin a distanceof about 8metres from thesensor and withinan
angle ofabout 30degrees fromthe leftand rightside.
Note:
Remove the batterywhen you donot intend touse the remotecontrol for along time.
Weak batteriescan leakand severelydamage the remote control.
The battery must not be exposed to excessive heat source, such as sunshine, fire or any other
things likethat.
Be environmentally friendlyand dispose ofbatteries according toyour government regulations.
Remote Control Operation
Battery Installation
Remove the battery
compartment coveron
the back ofthe remote
control.
Load two AAA/1.5Vbatteries intothe
battery compartmentmaking surethat
the batteryhave beeninserted withthe
correct polarities matchingthe symbols +,
- as indicatedinside the battery
compartment.
Replace thecover.

Remote Control
-12-
1 STANDBY
2 VOLUME+
3 PREVIOUS
4 PLAY/PAUSE
5 VOLUME-
6 LINE/AUX
7 BT(BLUETOOTH)
8 ARC
9 MUTE
10 NEXT
11 USB
12 OPTICAL
2
7
6
1
3
4
5
8
9
11
10
12
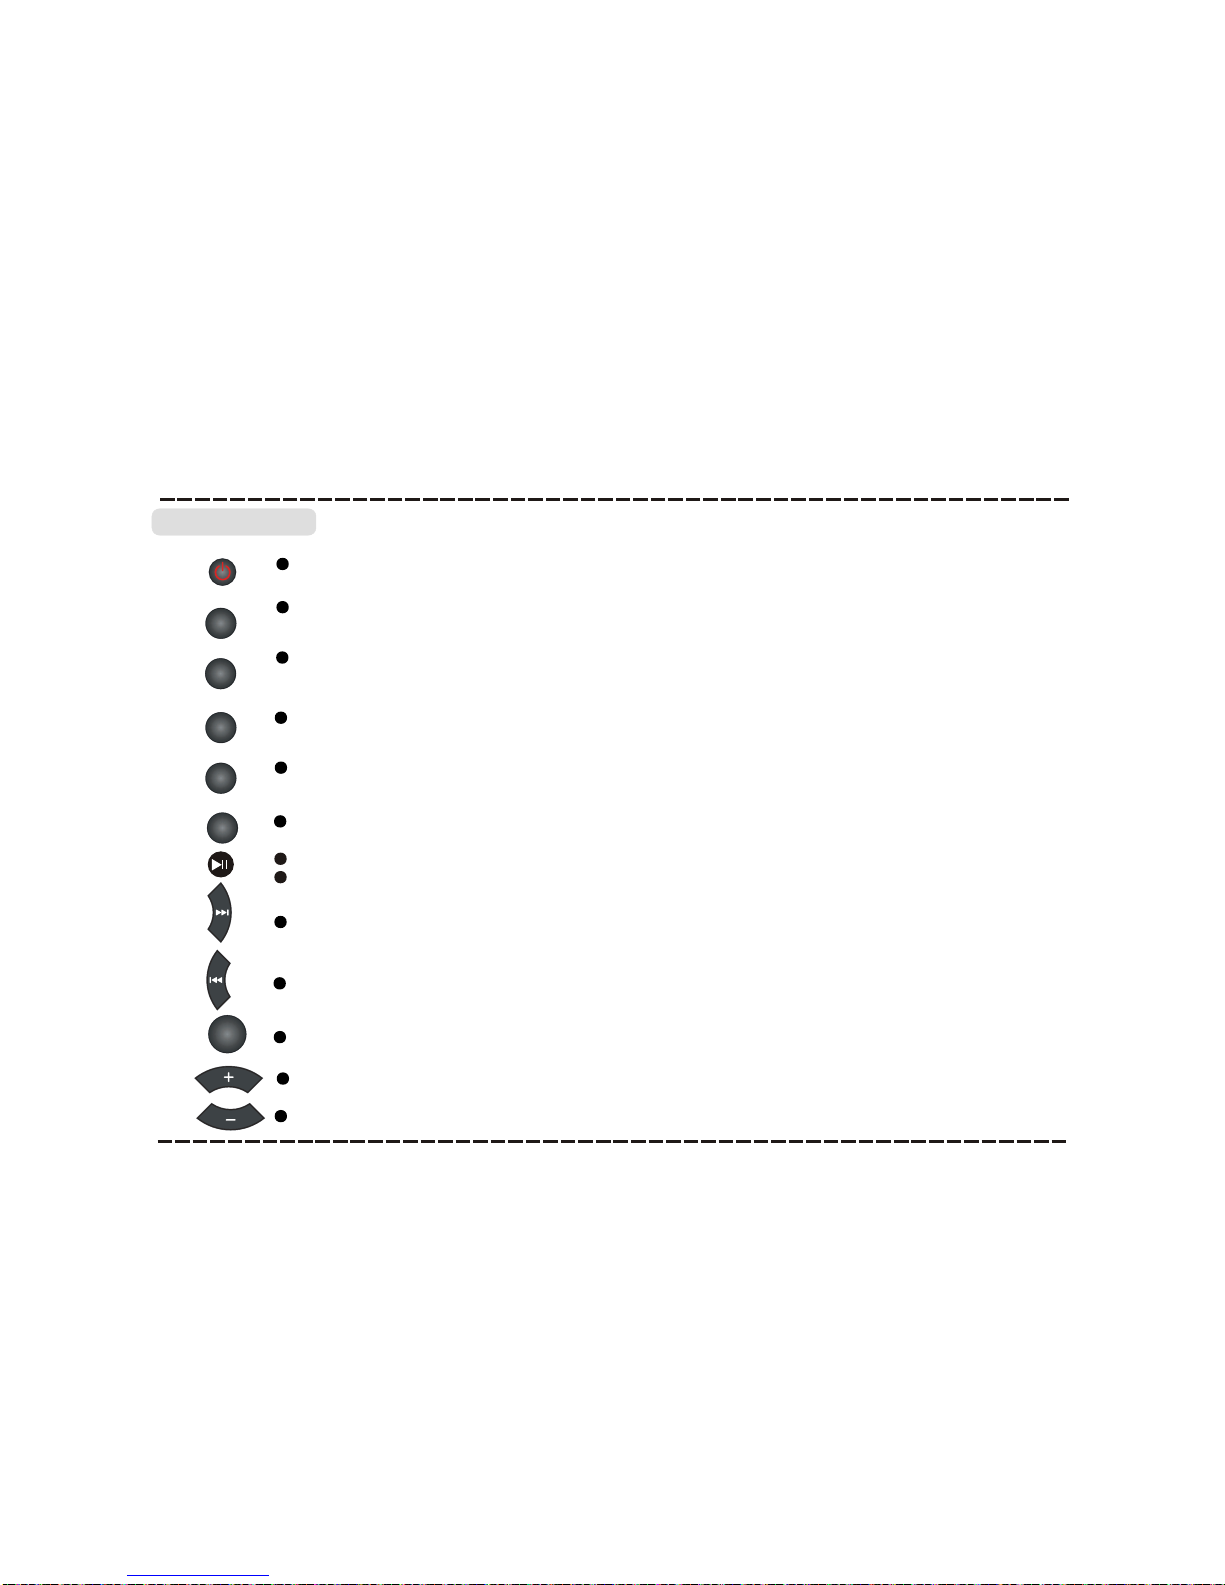
STANDBY Press to switchon the unit.Press it againto put theunit in standbymode.
Press to temporarilypause a playback.Press it againto resume theplayback.
Hold down thisbutton for 3seconds to disconnectbluetooth.
Basic Playback
-13-
Operation
Press to skipto the nexttrack.
Press to returnto the previoustrack.
Press to enterto USB mode.
Press repeatedly toswitch between LINEandAUX INmode.
Press to enterto OPTICALIN mode.
LINE/AUX
Press to temporarilyswitch offthe sound .Press it againto switch iton.
Press [VOLUME+] toturn up thevolume.
Press [VOLUME-] toturn down thevolume.
MUTE
USB
OPT
Press to enterto ARCmode.
ARC
Press to enterto BT(BLUETOOTH)mode.
BT

-14-
Troubleshooting
Before resorting tomaintenance service, pleasekindly check byyourself with thefollowing chart.
Sound
There is nosound or
the sound is
distorted.
The audio cablesaren't connected securely.
The volume isset to theminimum level.
The sound isswitched off.
Connect the audiocables securely.
Turn upthe volume.
Press [MUTE] onthe remote controlto
switch on thesound.
Press [PLAY/PAUSE].
The remote
control does not
function.
Symptom Cause(s) Remedy
The buttons onthe
unit doesn't work. Switch off andunplug the unit.
Then connect theplug to thepower supply
and switch iton again.
The unit isbeing interfered withstatic electricity
etc.
The ACpower cord isnot connected tothe power
supply or isnot connected toa power supply
securely.
Please check thatthe ACpower cord
is connected securely.
No Power
There is nobattery in theremote control.
The batteries areout of charge.
The remote controlisn't pointed tothe remote
sensor.
The remote controlis out ofits operating area.
The unit isshut down.
Install twoAAA/1.5V batteries init.
Replace the batterieswith new ones.
Make sure thatthe remote controlis
pointed to theremote control sensor.
Make sure theremote control iswithin
the operating area.
Switch off theunit and disconnectit from
the ACoutlet. Then poweron the unitagain.

-15-
Specifications
20WX2
Power supply
AC ~100-240V,50/60Hz
Working
environment
Temperature -10~+35
Relative humidity
5%~90%
Power output (Max)
3dB(20Hz~20kHz)
Frequency response

Other manuals for 436NA-0006
1
This manual suits for next models
2
Table of contents
Other 1 BY ONE Speakers System manuals


