WWW.511TACTICAL.COM
1
CONTENTS
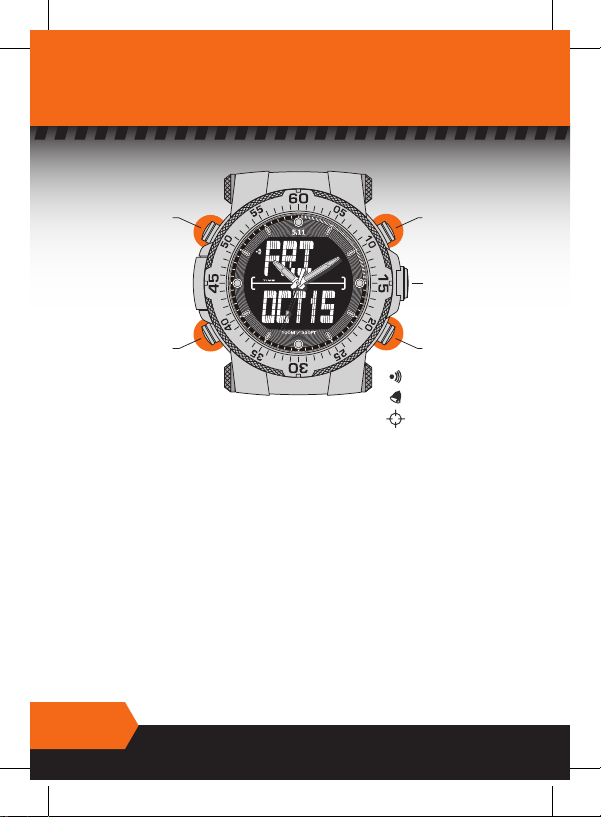
Overview
• Functions ...............................................Page 2
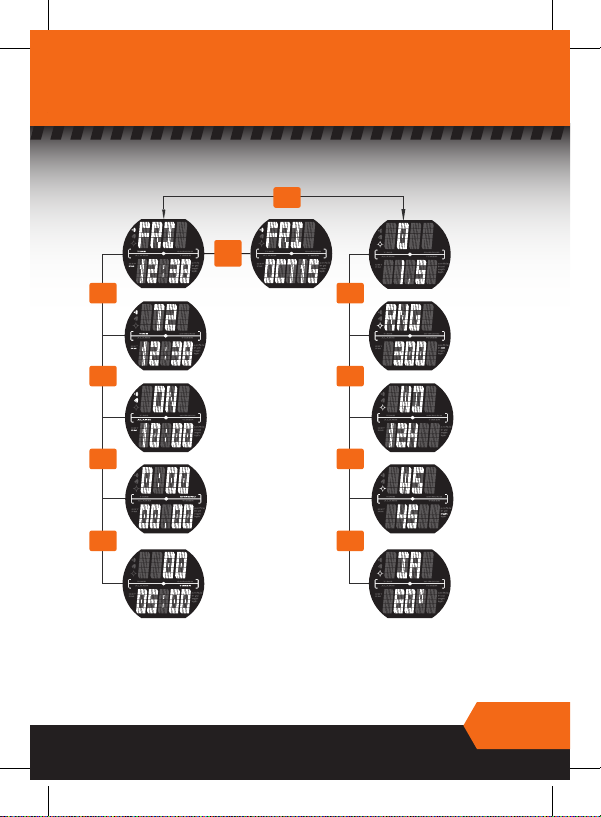
• Basic navigation .........................................Page 3
Analog Functions
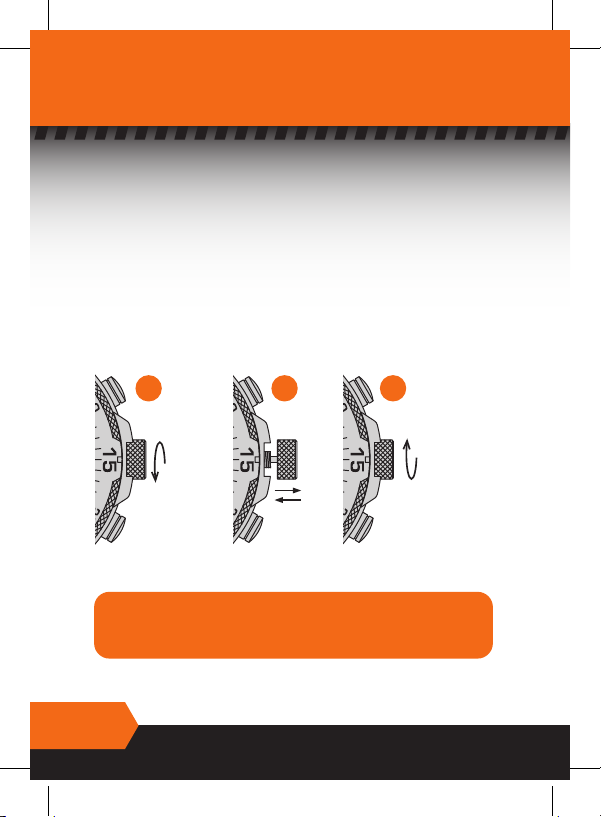
• Time setting .............................................Page 4
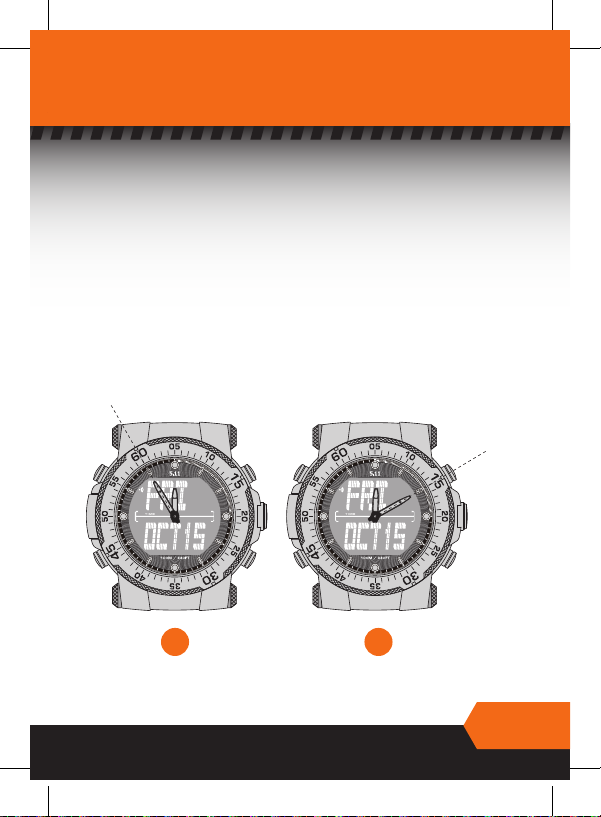
• Bezel Timer operation ..................................... Page 5
Digital Time Functions
• Back-Light .............................................. Page 6
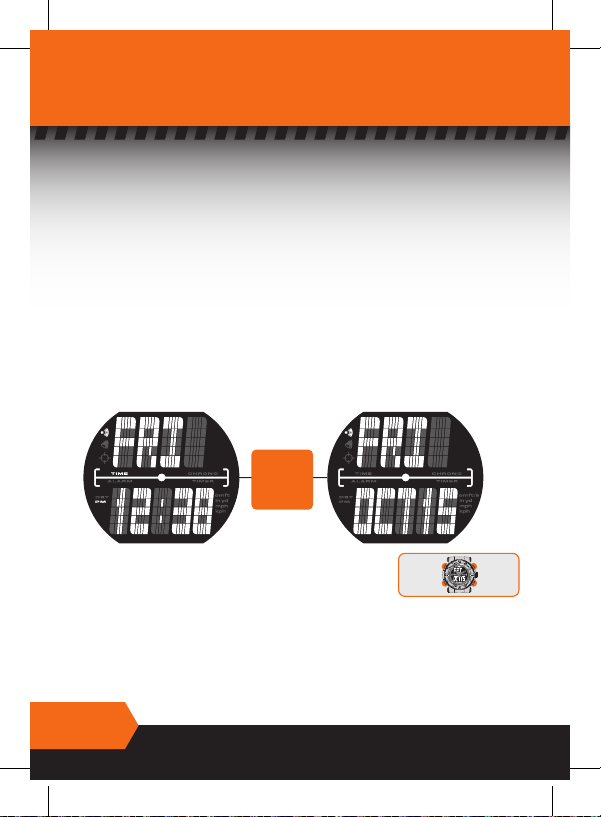
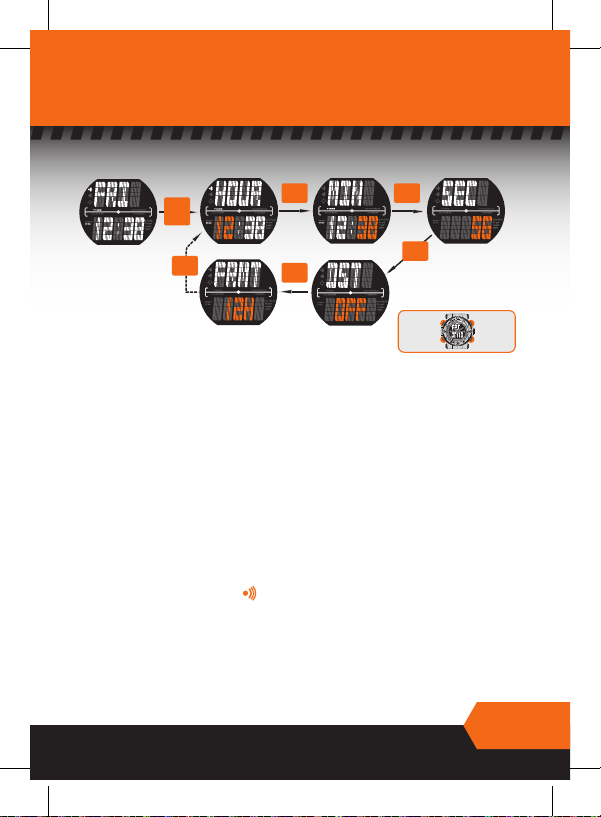
• Home Time setting ........................................ Page 7
• Calendar setting ......................................... Page 8
• Time Zone 2 setting ....................................... Page 9
• Alarm setting and operation . . . . . . . . . . . . . . . . . . . . . . . . . . . . . . . Page 10
• Chronograph (stopwatch) operation . . . . . . . . . . . . . . . . . . . . . . . . Page 11
• Timer setting and operation . . . . . . . . . . . . . . . . . . . . . . . . . . . . . . . . Page 12
Long Range Shooting Primer .................................. Page 13
Sureshot®
• Intro .................................................... Page 16
• Functions ............................................... Page 18
• Operations .............................................. Page 21
Watchband
• To Change or Replace Watchband . . . . . . . . . . . . . . . . . . . . . . . . . . Page 22
Warranty and Service ........................................ Page 23
Warranty Claim Form ........................................ Page 27