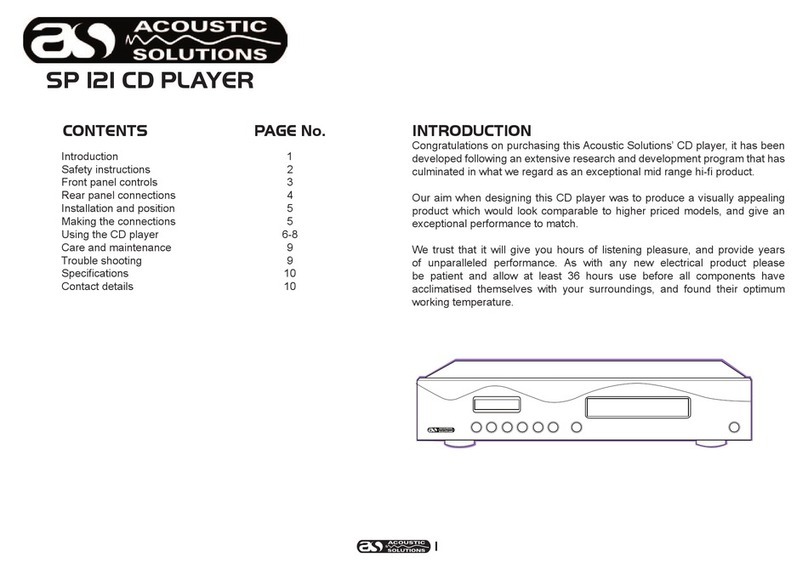
ACOUSTIC SOLUTIONS SP120 User manual

CONTENTS PAGE No.
Introduction
Safety instructions
Control locations front panel
Connection locations back panel
Installation and position
Making connections to an amplier
Using the CD player
Care and maintenance
Trouble shooting
Secications
Contact details
Congratulations on purchasing this Acoustic Solutions’ CD player, it has been developed following an extensive research and development program that has
culminated in what we regard as an exceptional mid range hi- product.
Our aim when designing this CD player was to produce a visually appealing product which would look comparable to higher priced models, and give an
exceptional performance to match.
We trust that it will give you hours of listening pleasure, and provide years of unparalleled performance. As with any new electrical product please be patient
and allow at least 36 hours use before all components have acclimatised themselves with your surroundings, and found their optimum working temperature.
INTRODUCTION
1
2
3
4
5
5
6-11
12
12
13
14
HI-FI SEPARATES
SP120 CD PLAYER
1

CAUTION: To reduce the risk of electric shock, do not remove any cover. NO USER-SERVICEABLE PARTS INSIDE, REFER ANY SERVICING TO QUALIFIED
SERVICE PERSONNEL.
IMPORTANT SAFETY INSTRUCTIONS
• Read and keep these instructions available for future reference.
• For indoor use only.
• The unit must only be connected to a suitable mains power supply using the mains power lead provided.
• To reduce the risk of re or electrical shock, do not expose this unit to rain or moisture.
• Unplug the unit from the wall socket during lightning storms and when it is not going to be used for a long period of time.
• Take care that foreign objects do not enter, or liquids are not spilled, into the enclosure through any openings. If this should happen, refer to qualied service
personnel before attempting to use.
• Ensure adequate ventilation - do not cover this unit with curtains, etc.
• Do not install near any heat source, such as radiators, or other equipment that produces heat.
• Protect the mains power cable from being damaged.
• The SP120 system is double insulated and does not require an earth connection in the UK mains plug.
UK MAINS PLUG DETAILS
For your convenience a mains plug with a fuse (3 Amp) has been tted to
this appliance. For your safety please observe the following information.
• The SP120 is designed to operate on AC mains supply between 220
and 240 volts, 50 Hz.
• The wires in the mains lead are coloured in accordance with the
following code:
BLUE - NEUTRAL
BROWN - LIVE
• Under no circumstances should the Neutral or Live wires be connected
to the ‘E’ (Earth) terminal.
CAUTION
RISK OF ELECTRIC SHOCK!
DO NOT OPEN!
SAFETY INSTRUCTIONS
The exclamation point within an equilateral
triangle is intended to alert the user to important
operating and maintenance instructions in the
service literature relevant to this appliance.
The lightening ash symbol with the arrowhead within
an equilateral triangle is intended to alert the user
to the presence of uninsulated ‘dangerous voltage’
within the product’s enclosure that may be sufcient
to constitute a risk of electric shock to persons.
This product complies
with European low
voltage (73/23/EEC)
and electromagnetic
compatibility (89/336/EEC)
directives.
2

FRONT PANEL CONTROLS
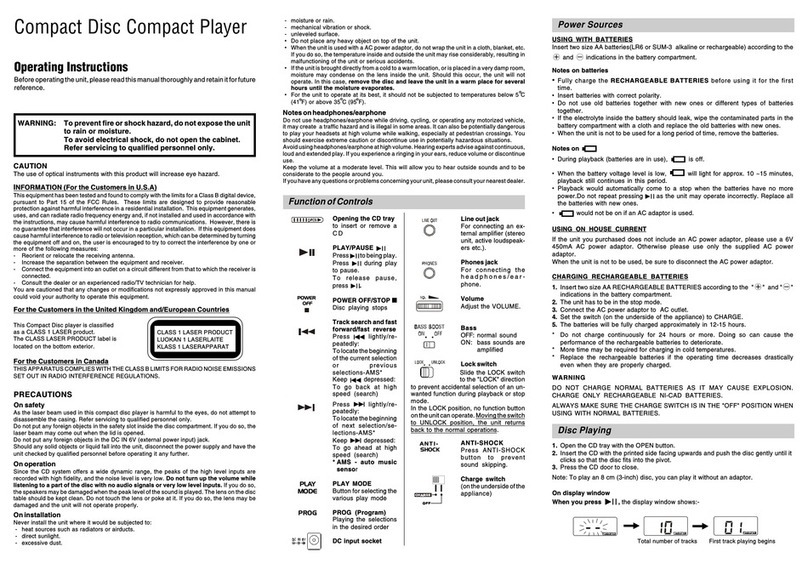
1. LCD display, provides information such as track number, track time, play/pause indication, random and program features. Also provides a musical calendar
which provides an instant visualisation of the total number of tracks, and which track is playing.
2. Program button, allows all of the tracks on a CD to be programmed into a playing sequence.
3. Random button, allows tracks to be played in no prede ned order.
4. Skip Down/ Fast Rev, press once to advance one track backwards, hold to skip backwards through current track.
5. Skip Up/ Fast Fwd, press once to advance one track, hold to skip through current track.
6. IR receptor, this can be used with the optional 3 in 1 remote control. This controls the Hi-Fi ampli er. DAB tuner and CD player
from one controller.
7. Play/Pause button, press once to play a CD, press again to pause the CD, press again to resume play.
8. Stop button, stops CD from playing.
9. Eject button, allows CD drawer to be opened and closed.
10. CD drawer, opens or closes when the eject button is pressed, place CD into tray, label side uppermost.
12. LED power indicator shows green to indicate that the SP120 is on. It will show red if the SP120 is in stand-by mode as set by the
optional remote control.
13. Power button, switches mains power on/off to internal components, however please note that mains power is still applied to this unit even though this
switch may be off.
3

1. Warning labels, please observe that this unit contains high voltages, and should not be opened, please refer to page 2 of this manual.
2. Mains cable inlet position, please ensure that this cable strain relief bush is intact and has not been damaged.
3. Analogue audio outputs for connection to line input sockets on an amplier.
4. Optical S/PDIF output for connection to an audio amplier with a digital optical input.
REAR PANEL CONNECTIONS
4

INSTALLATION AND POSITION
This CD player should be positioned on a at stable surface. We would recommend that the position of your hi- equipment should be chosen carefully to
provide adequate protection for this device, and also provide an attractive showcase for your investment. Hi- equipment is not designed to be moved often,
therefore it is recommended that a permanent home for your hi- be achieved as soon as possible.
This CD player contains sensitive electronic circuitry, it is not recommended that audio equipment such as CD players, turntables or cassette decks
be placed immediately next to heavy electrical equipment which may interfere with them . Do not place this product in areas of direct sunlight, nor place it
adjacent to a radiator or other heating appliances.
Like all electrical devices this tuner will generate a modest amount of heat. The cooling of this device is reliant upon the ow of air through the case.
Care should be taken not to cover this unit with items such as rugs, covers or curtains which will restrict this air ow, and may cause over heating.
Never allow the CD player to come into contact with water or liquids, and ensure that small objects do not fall through the ventilation grilles. In the event of this
happening, disconnect the wall plug from the mains supply immediately, and contact your local dealer for service advice.
Do not position the power cable where it can be walked upon, or damaged by regular trafc. Ensure that all other interconnection cables are stowed safely
behind the unit, and cannot be easily snagged or kicked, thus causing damage to the unit.
Ensure that all interconnection cables have been made correctly, and that correct polarity has been maintained.
5
MAKING THE CONNECTIONS
It is necessary to connect this CD player to an external amplier and loudspeaker set up, (it is not possible to connect loudspeakers directly to this CD player).
Please see the following diagram which details the required connections:
Hi-Fi Amplier
SP120

USING THE CD PLAYER
Carefully unpack the SP120, retaining the protective packaging for future
transportation requirements.
Ensure that all connections have been made in accordance with the connection
diagram on page 5.
Understanding the LCD display
To load a CD
1) Press Eject, this will open the CD drawer. Place a CD with the label
uppermost into the carriage. Press Eject again to shut the CD drawer.
2) The CD will automatically load, you will hear the CD spinning and the
LCD screen will ash “--”, the total number of tracks and total playing time
will be displayed on the LCD screen, The music calendar will also display
the total number of tracks
If the number of tracks on the CD is 17 or over, the total number of tracks
will be displayed by the track number, but the musical calendar will only
display the rst 16 tracks . The musical calendar will resume normal
display once a CD with 16 tracks or less is accessed.
3) If there is a problem loading the CD, or no CD is placed in the CD drawer,
the following display will be seen. Please check the integrity of the CD,
or if the problem persists, please contact your local dealer.
6
Repeat; one/all, displays
when this function is
activated from optional
remote
Music calendar
instant track number.
indicator
Random play
indicator
Memory, displayed in
program mode
Play
symbol
Pause
symbol
Track
number.
Track
time

To play a CD
1) To commence playing the CD press play/pause button once. This will start
playing the CD at the rst available track.
The LCD screen will show the track number and time elapsed. The remaining
tracks on the CD will also be displayed on the musical calendar, the track
playing will ash on the musical calendar.
The play symbol will also be illuminated on the LCD.
To pause a CD
1) To pause the CD press the play/pause button once while the CD is playing.
This will temporarily stop the CD at this point.
The play symbol will disappear from the display, and be replaced by the
pause symbol, and the track time will be displayed at the paused position.
To recommence play, press the play/pause button again.
To stop/clear a CD
1) To stop the CD playing, press the stop button once.
The LCD display will show the total number of tracks on the CD, and will
display the total playing time of the CD.
All previously set functions will be cancelled, to resume play from track one
press play/pause again.
7

8
To skip through tracks on a CD
1) It is possible to change the track which is being played, either forwards
or backwards through the CD.
To move to the next track, press the >> button once, to continue advancing
press this button again until the desired track is located.
To move to a previous track press the << button once, this will return the
current track being played to the start, and pressing this button again will
move the CD back to the previous track. Continue this operation until the
desired track is located.
To fast search through a CD track
1) It is possible to search through the current track being played in order to nd
a desired position.
To search forward through the track hold down the >> button, this will then
activate a fast forward search, release this button to stop this search when
required. To reactivate this search hold down >> button again.
To search backward through the track hold down the << button, this will then
activate a fast backward search, release this button to stop this search when
required. To reactivate this search hold down the << button again.
Note: The scanning speed will increase the longer a search button is
held down.
The volume during search will be lower than the normal playing level.
Search can be activated in the pause mode, but no sound will be heard,
to resume normal play press play/pause.

9
To activate random play
1) It is possible for the SP120 to select tracks to be played at random. There is no
predened sequence for this operation and it is not possible to program tracks while
in this mode. The CD will stop as normal once all tracks have been played
at random.
It is possible to activate random either while playing, or in the stop mode.
If in the stop mode the press the random button, and the LCD screen will indicate that
this mode is activated. Press play to activate random play.
Alternatively while in play mode, press the random button for this mode to activate.
The LCD screen will show the track number rotating whilst random tracks are
selected. Whilst playing, the track number will rotate every 5 seconds to indicate the
random mode.
To stop random play, press the stop button once. The LCD screen will show the total
number of tracks on the musical calendar, and total amount of play time.
The track number display continues to rotate to indicate the random mode while
stopped.
To clear the random mode press stop again.
Random play can be disabled during play by pressing the random button again, and
normal play mode will resume from this point.
The random mode will be cancelled if the CD drawer is opened, or if the mains
power switch is turned off.

10
To activate a programming sequence
1) It is possible to program the SP120 to select tracks to be played in sequence.
Up to 20 tracks can be programmed, if you enter more tracks than 20 then
program 1 will be over-written.
Press the program button whilst in the stop mode. The LCD display will indicate
memory and the track Number will read Pr P:01.The music calendar will not be
shown.
Press the << or >> button to select the required tracks to be programmed. The track
number will be displayed, and the music calendar will show the selected track
ashing.
Press the program button again to store this track in the memory list.
The display will show PR P:02, and requires the 2nd track to be selected, repeat the
process as above until the required track has been reached to store in position 2.
Press the program button again to store this track.
It is possible to check the tracks which have been programmed by pressing the
program button again which will return the sequence to program No. 1. By
pressing the program button repeatedly this will allow scrolling through the stored
tracks for checking. At the end of the stored track list it is possible to add another
track using the programming sequence as above.
Once you are satised with your programmed sequence, press play/pause to
commence playing of the rst programmed track.
The music calendar will display a list of the tracks which have played during
the sequence.

11
To stop the programmed sequence press stop, the display will show Pr P:01, and
the music calendar will show all of the programmed tracks in the memory. To
resume playing from program No.1, press play/pause again.
It is possible to change a programmed track, by pressing the program button while
in stop mode. Press the program button again until the programmed track to be
changed is reached. Use the << or >> buttons to select the new track which is
required. Press the program button again to store this new track.
To add another track to the program sequence, press the program button while in
stop mode. Continue to press the program button until the complete programmed
sequence has been shown, the next available position will then be displayed,
and a track number can be added using the process already described.
To cancel a program sequence press the stop button twice. The memory indicator
will go out, and the LCD display will show the total number of tracks and time as in
normal operation.
The program sequence will be cancelled if the CD drawer is opened.
To use the repeat function (available using optional remote control only)
It is possible to repeat one or all of the tracks on a CD.
Using the remote control press the repeat button once to activate the repeat one
function. This will continue to play the current track continuously until the stop
button is pressed.
Press the repeat button again to activate repeat all, this will play all CD tracks
as normal and then will repeat them again. This will continue until the stop button is
pressed.
To cancel the repeat function, press the repeat button again to remove the
indication from LCD panel.

CARE AND MAINTENANCE
TROUBLE SHOOTING
• Mains socket not switched on, or faulty.
• Plug not fully inserted into wall socket.
• Mains fuse has blown in plug.
• Internal mains fuse has blown inside unit, this will need to be replaced by a
qualied service technician.
• Power cord has become damaged, this should be replaced immediately by a
qualied service technician.
• Power not turned on.
• Amplier not set correctly.
• Signal cables not connected between CD and amplier.
• No CD loaded into drawer.
• Check disc is not loaded upside down.
• Check disc is clean and not damaged.
• Check that the disc is not scratched, dirty or damaged.
• Ensure that the player is on a rm level service.
• Audio connect cables damaged or not correctly connected.
• Audio cables have become tangled with mains cables.
No power when switched on
No sound
The player will not load the disc
The disk is skipping
Loud buzz or hum
Symptom Possible cause
To clean this CD player, wipe the case with a slightly moist lint-free cloth. Do not use any cleaning uids containing alcohol, ammonia or abrasives. Do not
spray an aerosol at, or near, the CD player.
Always use the original packaging if it is necessary to transport the unit at any time.
If this unit is used in a dusty environment, it may be necessary to have the unit serviced at your local dealer periodically. It is not advisable to allow large
deposits of dust to accumulate within this unit as this may prevent correct cooling. Similarly dust deposits which become damp can sometimes lead to
electrical problems which may cause severe damage to the delicate electronics within this unit.
12

Output Voltage
Frequency response
(Using 1kHz 0dB as reference )
20 Hz 0dB
100 Hz 0dB
10 kHz 0dB
20 kHz 0dB
De-emphasis response
5 kHz 0dB
16 kHz 0dB
Channel balance
Separation
Harmonic distortion
T.H.D + Noise
S/N Ratio
Product physical specications
Dimensions in mm (WxDxH)
Nett weight
Shipping weight
SPECIFICATIONS
13
0.7V ± 2dB
-0.5dB ± 1dB
0dB ± 1dB
-0.5dB ± 2dB
-3.0dB ± 2dB
-4.5dB ± 2dB
-9.0dB ± 3dB
Less than 2.0dB
More than 60dB
Less than 0.05%
More than 90dB
430x230x80mm(+12mm feet )
4.30Kg
5.5Kg

CONTACT DETAILS
We trust you are completely satised with this product from Acoustic Solutions Limited, however please feel free to contact us if you experience any difculties,
or if you would like to express your views regarding our products.
Please write to:
Acoustic Solutions Limited.
Grand Union Buildings
54 High Street
Weedon Bec
Northampton
NN7 4QD
United Kingdom
Telephone +44 (0)1327 340601
Fax: +44 (0)1327 342298
www.acousticsolutions.co.uk
email: [email protected]
Through the process of continuous improvement, Acoustic Solutions Limited reserves the right to change or alter specications without prior notice. E&OE
14
Table of contents
Other ACOUSTIC SOLUTIONS CD Player manuals
