Activox XYC100B-SPT User manual
Manufactured & Distributed by
www.InovaLabs.com
Operator’s Manual
For Use with models:
XYC100B-sPt & XYC100B-Pro
NOW WITH
MORE BATTERY,
LESS WEIGHT!
Copyright © 2014 Inova Labs, Inc. All rights reserved.
No part of this document may be reproduced or
transmitted in any form or by any means, electronic,
mechanical, photocopying, recording, or otherwise,
without prior written permission from Inova Labs Inc.
Inova Labs Inc.
3500 Comsouth Drive
Suite 100
Austin, TX 78744 USA
Phone: 1.512.617.1700
Toll-Free: 1.800.220.0977
www.InovaLabs.com
Represented in Europe by:
QNET BV
Hommerterweg 286
6436 AM Amstenrade
The Netherlands

TABLE OF CONTENTS
Introduction 2
Application/Indications For Use 2
Symbol Descriptions 3
Warnings 3
Contraindications 4
Adverse Events/Hazards 4
Standard Package Contents 5
User Controls 6
Part Names 8
Operating Instructions 9
Battery Life Timetable 12
Carry Case Configuration Instructions 13
Flying With Your POC 13
Operating Procedure 14
Light Indicators/Alarms 16
Routine Cleaning and Maintenance 18
Service Life 19
Technical Support 19
Disposal 19
Oxygen Concentration Over Altitude and Flow Rate 20
Specifications 20
Accessories 21
Warranty 22
EMC Information 26

2
INTRODUCTION
The Operator’s Manual will provide familiarity with all models of
the LifeChoice Activox Portable Oxygen Concentrator (POC) and its
accessories. Be sure to read all of the enclosed information in its
entirety before using the LifeChoice Activox POC. The POC
is an internally powered, Type BF device when powered by the
Internal Battery and a Class II, Type BF device when connected
to the external AC Adapter/Charger, DC Adapter/Charger, or
rechargeable External Battery. The essential performance of the POC
is to provide oxygen at a volume that remains within tolerance
(the tolerance was defined based on technical judgment from within
the manufacturer’s expertise in this specific medical application). In
addition, the device’s ability to detect certain error conditions (such
as low concentration or no breath) and create an alarm is also considered
a part of essential performance.
APPLICATION/INDICATIONS FOR USE
This manual applies to the LifeChoice Activox POC XYC100B-SPT
and XYC100B-PRO.
INDICATIONS FOR USE: The LifeChoice Activox Oxygen Concentrator
is used on a prescriptive basis by patients who are diagnosed as
requiring supplemental oxygen. This oxygen concentrator will
provide supplemental, high concentration oxygen to these patients. It is
not life-supporting nor life-sustaining. It may be used continuously in a
home, institution or travel environment. The LifeChoice Activox is also
portable.
This device should be used only when prescribed by a physician.
3
WARNINGS
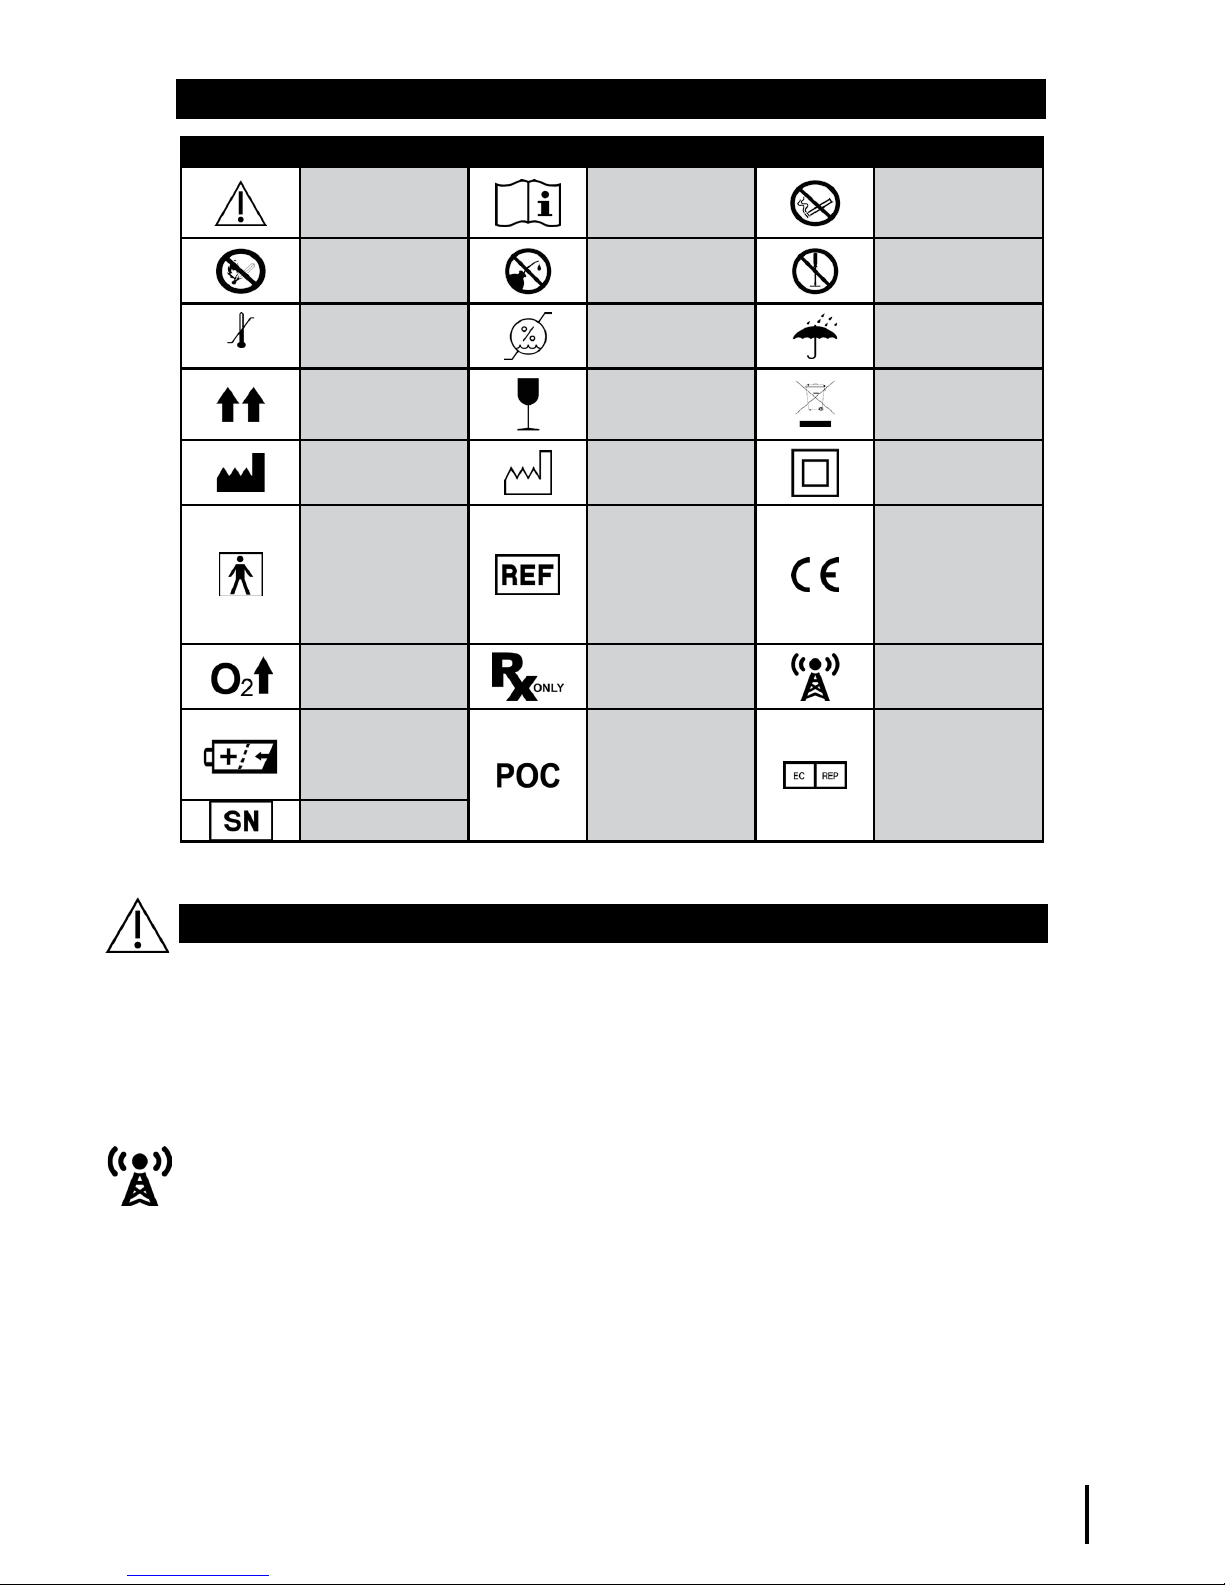
SYMBOL DESCRIPTIONS
Symbol Description Symbol Description Symbol Description
Caution
Consult
instructions for
use
No smoking
No open flame No oil or grease Do not
disassemble
Temperature
limit
Humidity
limitation Keep dry
This side up Fragile, handle
with care
Compliant with
WEEE
Manufacturer Date of
manufacture
Class II
equipment
Type BF applied
part
Device that
has conductive
contact with
patient
Catalogue
number
CE Marking
of Conformity
Representative
Gas flow Prescription
only Radio frequency
Rechargeable
battery
Portable
Oxygen
Concentrator
Connection
Authorized
representative
in the European
Community
Serial number
1. U.S. Federal law restricts this device to sale by or on the order of a physician.
2. It is the responsibility of the patient and/or provider to make back-up
arrangements for an alternative oxygen supply.
3. Availability of an alternate source of oxygen is required in case of power
outage or mechanical failure.
4. The device is designed to be used in the provided approved carry case.
5. The device should be located as to avoid pollutants or flames.
6. Portable and mobile RF communications equipment can affect medical
electrical equipment.
7. The device should not be used adjacent to or stacked with other equipment.
8. When traveling by air, the device and External Battery must be transported
as carry-on (not checked) baggage.
9. The device and external battery pack contain lithium-ion batteries that
are subject to special shipping regulations. If shipping either the device or
battery pack, notify the shipper that the shipment will contain lithium-ion
batteries.
10. In the event of a external battery’s cell leaking, do not allow the liquid to
come in contact with the skin or eyes. If contact has been made, wash the
affected area with copious amounts of water and seek medical advice.

4
CONTRAINDICATIONS
1. The device is not intended to be life-sustaining or life-supporting.
2. In certain circumstances, oxygen therapy can be hazardous. Please
seek medical advice before using this device.
3. The device is designed to provide a flow of high purity oxygen
up to 3 LPMeq pulse. The device should only be used by patients
prescribed oxygen therapy within this range.
4. As the device will alarm through audio and visual indicators, patients
who are unable to communicate discomfort, hear, see and/or
understand the alarms may require additional monitoring.
Inova Labs Inc. assumes no liability for persons choosing not to
adhere to manufacturer’s recommendations. Failure to adhere to the
statements below may impair performance of the device and will void
all warranties.
1. DO NOT use oil, grease or petroleum-based products on or near
the device as the use of such products may damage the electronic
components of the device and will void all warranties.
2. DO NOT use power supplies or accessories other than those that
came with the device as the use of non-specified accessories may
impair performance and void all warranties.
3. DO NOT allow smoking or open flames within 10 ft. (3 m) of the device
as the device produces enriched oxygen gas which accelerates
combustion.
4. DO NOT operate the device in the accessory bag or any other
enclosed bag as improper ventilation will impair performance and
void all warranties.
5. DO NOT submerge or expose the device to liquids as it may
damage the electronic components of the device and will void all
warranties.
6. DO NOT operate or expose the device to temperatures and humidity
levels outside of the specified operational environment conditions listed
in the Specifications section on page 20. Extreme temperatures and
humidity levels may damage the device and void all warranties.
7. DO NOT press the control panel buttons with any hard, sharp
and/or small object as it may damage the control and will void all
warranties.
ADVERSE EVENTS/HAZARDS
5
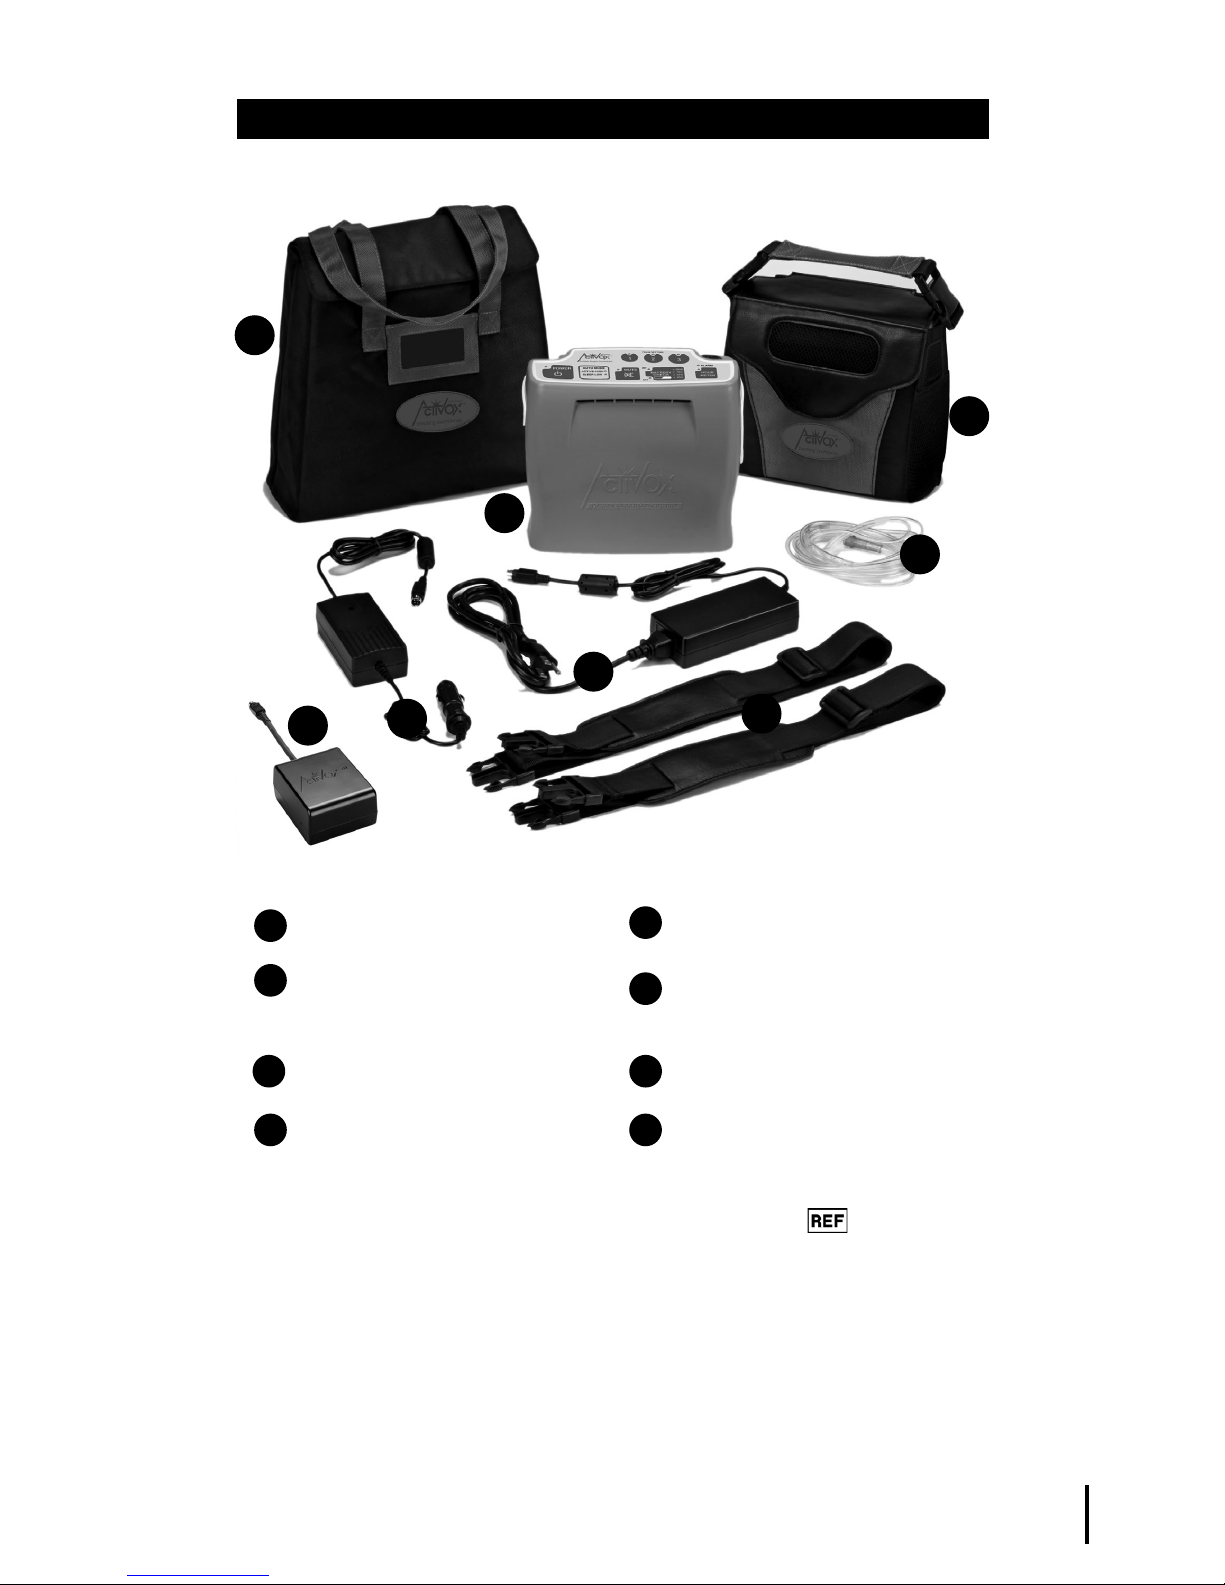
STANDARD PACKAGE CONTENTS
Model identified on unit and packaging labels. See .
*An optional External Battery is available for purchase which provides up to 3 hours of
additional battery time. (Reference Battery Life table as battery life will vary depending
upon model, breath rate and Pulse Setting.)
†Nasal cannula may not be included. Based on international requirements.
AC Power Adapter
DC Power Adapter
Standard 7-Foot (2-meter) Long
Single Lumen Nasal Cannula†
Accessory Bag
LifeChoice Activox POC
4-Way Carry Case
Use as a backpack, shoulder
strap, waist pack or briefcase
Adjustable Straps
For use with 4-Way Carry Case
External Battery*
8
1
2
5
6
7
8
3
4
1
2
6
5
7
3
4

Indicator Lights: Colored LED lights indicate either a change in
operating status or a condition that may need response (alarm).
Audible Signals: An audible signal (beep) indicates either a change
in operating status or a condition that may need response (alarm).
Audio response will vary among users depending upon hearing
abilities.
Pulse Setting Control Buttons: There are three individual Pulse
Setting Control Buttons on the Control Panel: 1, 2, and 3 which
reference oxygen flow. Use the setting prescribed by your doctor.
Power Button: To turn the LifeChoice Activox POC on or off, press
the Power Button.
Auto Mode Indicators: There are two inhalation sensitivity modes
on the control panel: Active-High and Sleep-Low, which automatically
adjust based on oxygen demand (e.g. breathing patterns) requirements.
(Reference Control Panel diagram.)
Mute Button: The POC features a mute function to disable audible
alarms during operation. If an alarm has been muted, the amber Mute
Button LED will be illuminated. (Reference Control Panel diagram.)
CAUTION: Please use this function appropriately as it silences
important audio signals regarding the status of the POC.
INT and EXT Indicators: These LED lights will indicate
which power source the unit is using or charging. The INT LED
represents the Internal Battery, while the EXT LED represents the
External Battery.
Battery Check Button: Displays the battery charge level of the
internal, and if connected, external battery.
6
Battery Charge
Indicator
Alarm Indicator
Pulse Setting
Control Buttons
1, 2, 3 LPMeq
Power Button
Auto Mode
Indicators
Control Panel
Mute Button Battery Check
Button
INT & EXT
Indicators
Hour Meter
Button
For use by
trained service
personnel only
USER CONTROLS

7
Battery Charge Indicator: The Battery Charge Indicator consists of
four LEDs labeled “25%”, “50%”, “75%”, and “100%”.
NOTE: Charge level indication is approximate. The charge indicator
will show 4 solid green lights when the battery has a charge level of 96
percent or more. When the battery reaches a full 100 percent charge,
the INT or EXT (if connected) LEDs will turn off.
Hour Meter Button: The POC will read and display the number
of hours that the unit has been used. (Refer to Routine Maintenance
section.)
Nasal Cannula: A standard single lumen nasal cannula or equivalent must
be used with the POC to provide oxygen from the concentrator. A standard
single lumen cannula, 7-foot (2-meter), is recommended for use.†For
a replacement cannula, please contact your local medical equipment
supplier. Follow cleaning and care instructions provided with the nasal
cannula.
CAUTION: Use of some administration accessories not specified for use
with this oxygen concentrator may impair the performance.
* Reference Alarm Indicators Table for explanation of low battery alarms.
† Nasal cannula may not be included. Based on international requirements.
Battery Check LED Charge Level
25% LED 50% LED 75% LED 100% LED
Off Off Off Off 0%*
Blinking Off Off Off 1% -12%*
On Off Off Off 13% - 25%
On Blinking Off Off 26% - 37%
On On Off Off 38% - 50%
On On Blinking Off 51% - 62%
On On On Off 63% - 75%
On On On Blinking 76% - 95%
On On On On 96% - 100%

8
PART NAMES
Cannula Nozzle Fitting: The Nasal Cannula connects to the oxygen
output nozzle at the top of the POC. DO NOT place the cannula into
nasal passages until the POC is fully powered on. Breathing through
the Cannula during start-up may prevent the system from powering
on.
Control Panel: All user controls are located on this panel. See User
Controls section on page 6 for details.
Fan Inlet Vent: Cooling air is drawn in through this opening.
(See Maintenance section for cleaning instructions.)
Fan Outlet Vent: Processed air is exhausted through this opening.
External Battery Port: Connect the External Battery, if purchased,
to this port. (This connection is to be used solely with the specified
external battery.) Precaution: Please pay attention to the orientation
of the connector. Wrong alignment could cause damage to the
connector.
FAA Approval Sticker: Located on the bottom of the unit.
Fan Inlet Vent
FAA Approval
Sticker (located
on bottom)
Cannula
Nozzle Fitting
Control Panel
Fan Outlet
Vent
External
Battery Port

9
OPERATING INSTRUCTIONS
The LifeChoice Activox POC is recommended and designed to be operated
and stored in its carry case at all times. To configure the carry case as a
backpack, please reference the Carry Case Configuration Instructions.
FOLLOW THESE STEPS BEFORE FIRST USE:
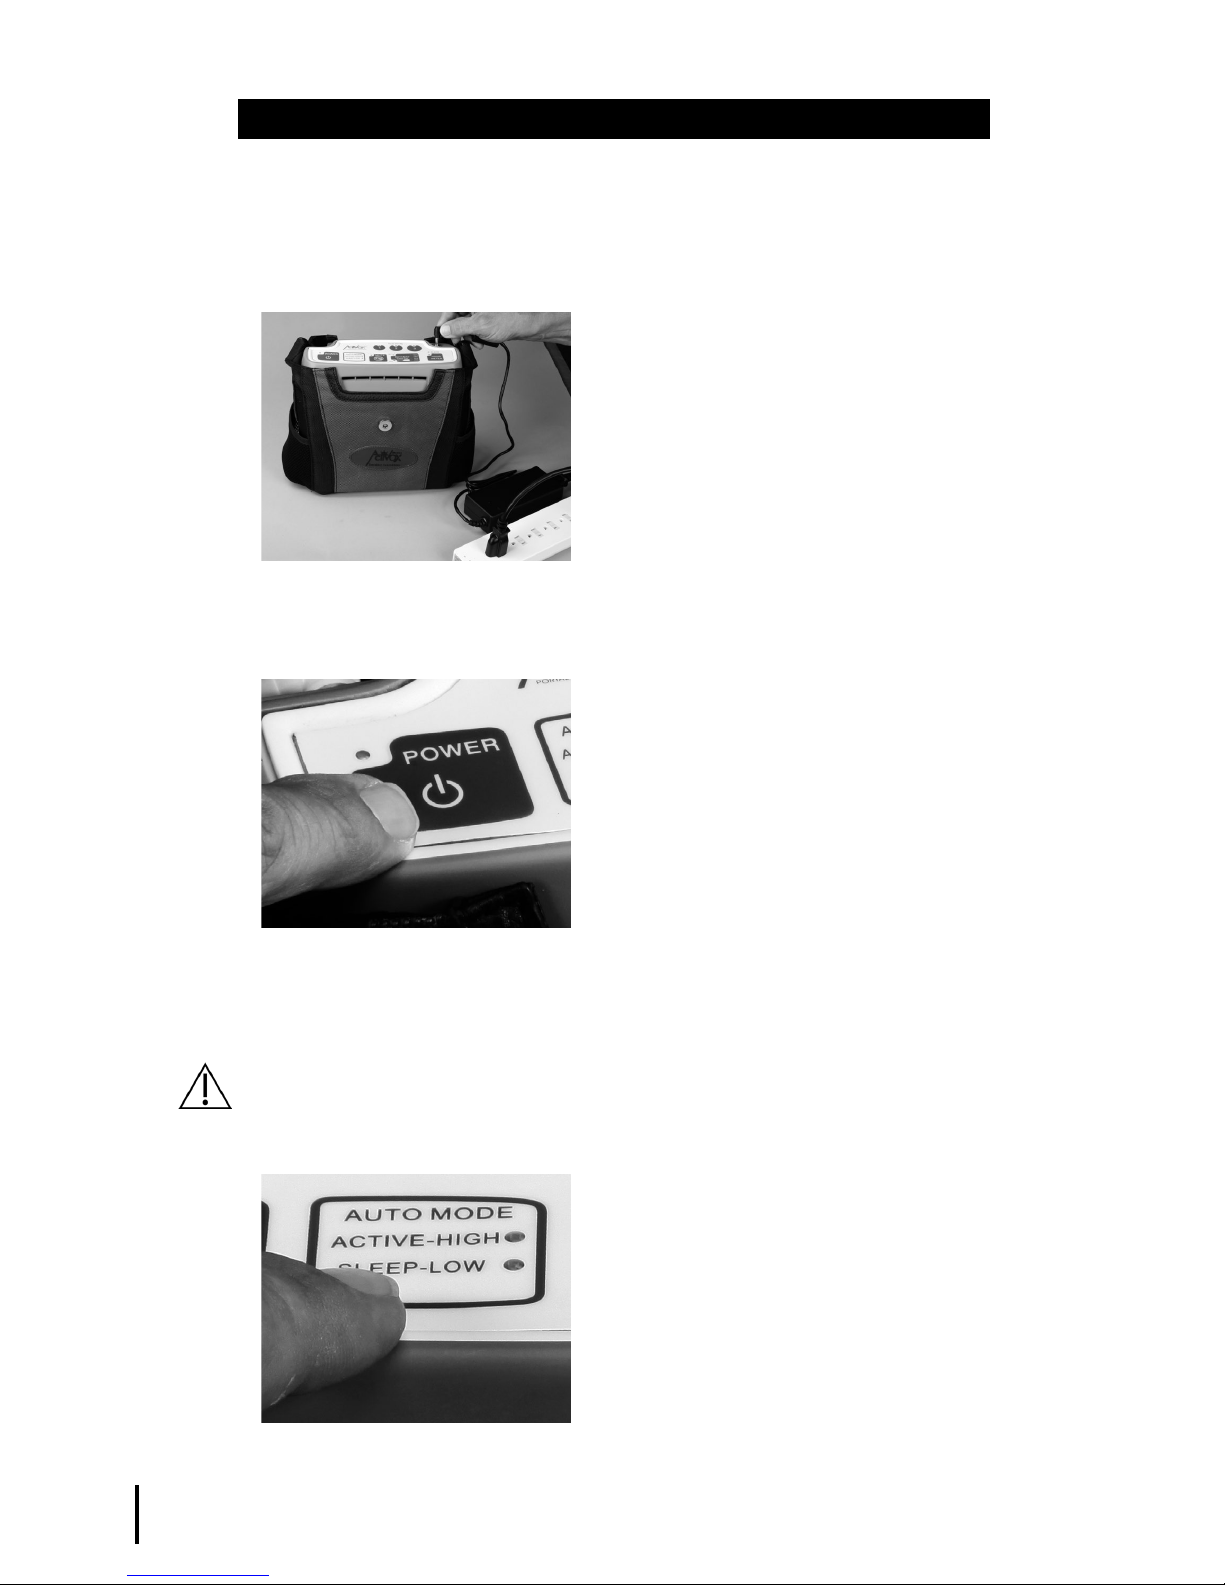
1. Charge the POC before initial use. The Pro Model can take up
to 4.5 hours to fully charge and the Sport Model can take up to 3
hours. Begin charging by connecting the AC Adapter to the unit
and charger end to an electrical outlet.
2. Verify that the Battery Check LED labeled “INT” is solid green and the
Power LED is flashing green. This indicates that the system recognizes
the external power source and is charging the Internal Battery.
If an external battery was purchased, connect it to the External Battery
Port. By design, the External Battery will begin charging after the
Internal Battery has reached a full charge. It can take up to 3 hours to
fully charge the External Battery.
CAUTION: Never use an external battery that is not authorized by
Inova Labs Inc. DO NOT dismantle, open or shred secondary cells
or batteries. DO NOT expose cells or batteries to heat or fire. Avoid
storage in direct sunlight.
3. Connect the nasal cannula securely to the POC cannula nozzle
fitting.
POWERING THE LIFECHOICE ACTIVOX POC
The POC can be powered in four different ways: (1) Internal Battery,
(2) AC Adapter/Charger, (3) DC Adapter/Charger, (4) External
Battery (optional, sold separately from the Standard Package).
The rechargeable batteries are maintenance-free and can only be
purchased at the factory or through an authorized repair facility.
1. Internal Battery: A rechargeable internal battery is located within
each POC unit. (Reference Battery Life Timetable as battery life will
vary depending upon model,
breath rate and Pulse Setting.)
When the POC is being powered
from the Internal Battery, the
Battery Check LED labeled “INT
will slowly flash.Pushing the Battery
Check Button will display the
charge level of the Internal Battery.
If not connected to the AC or DC
Adapter/Charger, the Internal
Battery will slowly discharge over time even when not in use. Always
check the battery level prior to use to ensure adequate charge level.
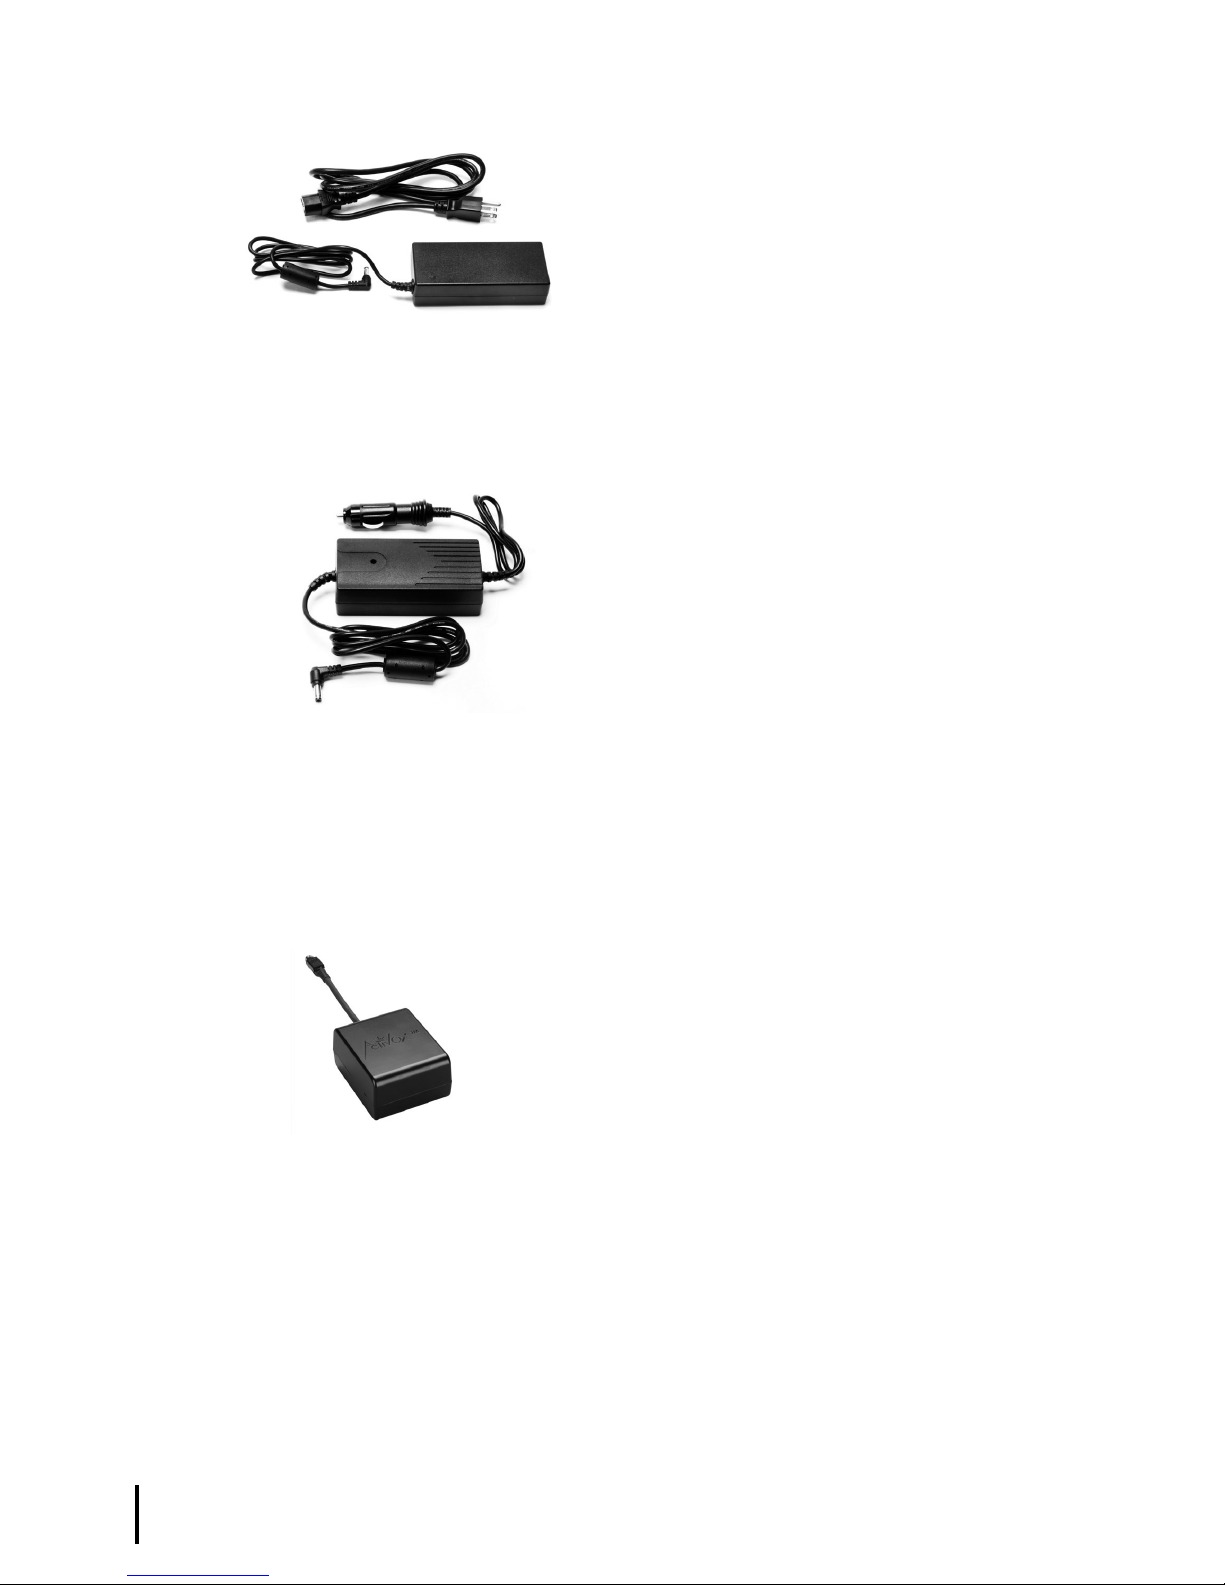
2. ACAdapter/Charger:AnACAdapter/Chargerallows the POC to be powered
from a standard 100-240 VAC, 50/60 Hz
outlet. When the unit is operated from an AC
Adapter/Charger, power from the AC outlet
powers the unit and recharges the internal
and/or External Battery. (See Battery
Charging section for details.)
Using an AC Adapter/Charger that is not
specified by Inova Labs with the POC
may damage the unit and will void all
warranties.
3. DC Adapter/Charger: A DC Adapter/Charger can be connected from
the POC unit to a vehicle’s (car, boat, motor
home, etc.) standard 12 VDC outlet. When
the system is connected to the DC outlet,
power from the vehicle battery powers the
POC unit and recharges the Internal and/
or External Battery. (See Battery Charging
section for details.)
NOTE: The 12 VDC outlets in some pre-2000 model cars will not provide
sufficient current to operate the POC and charge the battery at the same
time. Verify that a DC outlet can provide at least 10 amps at 12 VDC. Car
auxiliary power varies significantly; therefore, the rate of charging will
vary. It is recommended that the vehicle be turned on before plugging
the DC Adapter/Charger into the POC.
4. External Battery: To power the POC from an external battery, connect
the External Battery to the External Battery Port. A
fully charged external battery will supply power to the
POC for up to three hours. (Reference Battery Life
Timetable as battery life will vary depending upon
model, breath rate and Pulse Setting.)
When the POC is being powered from the External
Battery, the Battery Check LED labeled “EXT”
will be slowly flashing. Pushing the Battery Check
Button will display the charge level of the External
Battery.
INTERNAL BATTERY CHARGING
1. Connect the unit to either an AC or DC Adapter and corresponding
charger to a suitable outlet.
2. With the unit powered off, verify that the INT Battery Check LED is solid
green and the Power LED is flashing green. This indicates that an external
power source is recognized and the battery is charging.
10
OPERATING
INSTRUCTIONS
continued

11
3. It can take a fully discharged
Internal Battery up to 4.5 hours
with the Pro Model or 3 hours with
the Sport Model to reach a 100
percent charge level. Press the
Battery Check button to check the
charging process.
4. When the Internal Battery is fully
charged, the INT Battery Check LED
will turn off.
NOTE: The charge indicator will show 4 solid green lights when the
battery has a charge level of 96 percent or more. When the battery
reaches a full 100 percent charge, the INT LED will turn off.
5. It is recommended to recharge the Internal Battery, even if only
partially depleted as often as possible. The Internal Battery cannot
be overcharged, so it is okay to leave it plugged in via an AC or DC
Adapter/Charger continuously.
EXTERNAL BATTERY CHARGING
1. Connect the External Battery to the External Battery Port on the
POC. Then connect the unit to either an AC or DC Adapter and
corresponding charger to a suitable outlet. To prolong battery life
and maintain communication with the POC, it is recommended to
charge the External Battery when you charge the POC’s Internal
Battery.
2. Verify that the Battery Check LED labeled “EXT” is solid green and
the Power LED is flashing green.
This indicates that an external power
source is recognized and the battery
is charging.
NOTE: By design, the Internal
Battery will charge first. That means
that the External Battery will not start
charging until the Internal Battery
reaches a 100 percent charge level.
Use the INT and EXT Battery Check
LEDs to determine which batteries
are charging.
3. It takes up to 3 hours for a fully discharged External Battery to reach
a 100 percent charge level when plugged into the unit and an AC or
DC Adapter/Charger. Press the Battery Check button to check the
charging progress.
NOTE: By design, the External Battery will power the POC when
plugged in. Once the External Battery depletes, the unit will switch to
internal battery power. If both the Internal and External batteries are
fully discharged, it can take up to 7.5 hours to achieve a 100 percent
charge level in both batteries.
OPERATING
INSTRUCTIONS
continued

4. When the External Battery is fully charged, the EXT Battery Check LED
will turn off.
NOTE: The charge indicator will show 4 solid green lights when the
battery has a charge level of 96 percent or more. When the battery
reaches a full 100 percent charge, the EXT LED will turn off.
In the event the power supply is interrupted to the POC when the AC or DC
Adapter/Charger is connected, a two-second audible alarm will sound and
the compressors will transition from external to internal power. During this
transition, you may hear the compressors momentarily pause. No action
is required as the system will automatically transition to internal power and
resume operation.
NOTE: If the POC is powered off and either the AC or DC Adapter/Charger
is connected and charging is complete, the internal fans may continue to
operate for an additional period of time until the temperature inside the unit
is sufficiently cooled.
REPRESSURIZATION
If the unit has not been used for a period of one or more days, it will
automatically re-pressurize itself. During this time, you may hear the
compressors running for a few seconds.
12
OPERATING
INSTRUCTIONS
continued
* Based on breaths per minute.
BATTERY LIFE TIMETABLE
Battery Type
Pulse Setting
1 LPMeq 2 LPMeq 3 LPMeq
Internal
Battery*
Sport Model 5.5 Hours 4 Hours 3.25 Hours
Pro Model 12.5 Hours 7.25 Hours 6.25 Hours
External
Battery* All Models 3 Hours 3 Hours 2 Hours

13
CARRY CASE CONFIGURATION INSTRUCTIONS
BACKPACK
1. Adjust each strap to make sure they are the same length.
2. Unfold the snaps that are tucked into the mesh pocket on the
backside of the Carry Case.
3. Attach one strap to the top left and bottom right snaps on the Carry
Case making sure the shoulder pad is near the top clip.
4. Attach the second strap to the top right and bottom left snaps on the
Carry Case making sure the shoulder strap is near the top clip.
5. Form an “X” with the straps at the top and slide arms into the configuration
as if putting on a backpack. Assistance may be required with this step.
6. Adjust straps as needed. Assistance may be required with this step.
The LifeChoice Activox POC is approved by the FAA for use on
commercial aircraft. This approval is listed as a part of the labeling
on the bottom panel of the unit. Follow the instructions outlined below
before traveling with the POC.
1. Fully charge the Internal and, if purchased, External battery
within 24 hours of a trip.
2. Pack all required accessories (AC and DC Adapter/Charger,
Operator’s Manual, etc.)
3. Download and complete the “Physician Statement” from
www.InovaLabs.com/Resources. Bring the signed and completed
Physician Statement to the airport and be ready to provide it to the
airline if requested.
The POC is FAA-approved for air travel. The required FAA label
location is on the bottom of the POC. The FAA-approved POC list
shows Inova Labs LifeChoice Activox. Every airline has specific
information required for traveling with oxygen. Before traveling,
review your airline’s specific requirements. Visit the Inova Labs
website, www.InovaLabs.com,for additional information.
NOTE: Airlines may have specific requirements for traveling with
oxygen. Before traveling, notify your airline that you will be traveling
with an approved POC.
FLYING WITH YOUR POC
OPERATING PROCEDURE
1. Locate and position the POC so that the Fan Inlet Vent and Fan Outlet
Vent are not obstructed. The unit, particularly the air inlet slots
and the air outlet areas, should be positioned in a well-ventilated
space.
2. Power the POC using one of
the four modes described in the
Powering the LifeChoice Activox
POC section.
3. Press the Power Button once to turn the unit on. An audible beep
will sound and the Power LED, the Auto Mode Active-High LED and
the Pulse Setting of 1 LED will flash
green. This indicates that the POC
is powered on, ready for use, and
the settings may now be changed.
Pressing the Power Button for an
extended time after the audible beep
will cause the system to turn off.
NOTE: After powering on the POC,
allow 3 minutes for the unit to reach
stated performance. After initial
power on, the Pulse Setting LED
corresponding to the last flow rate
used will illuminate.
CAUTION: DO NOT place the cannula into nasal passages until the
POC has fully powered on. Breathing through the cannula during
start-up may prevent the system from powering on.
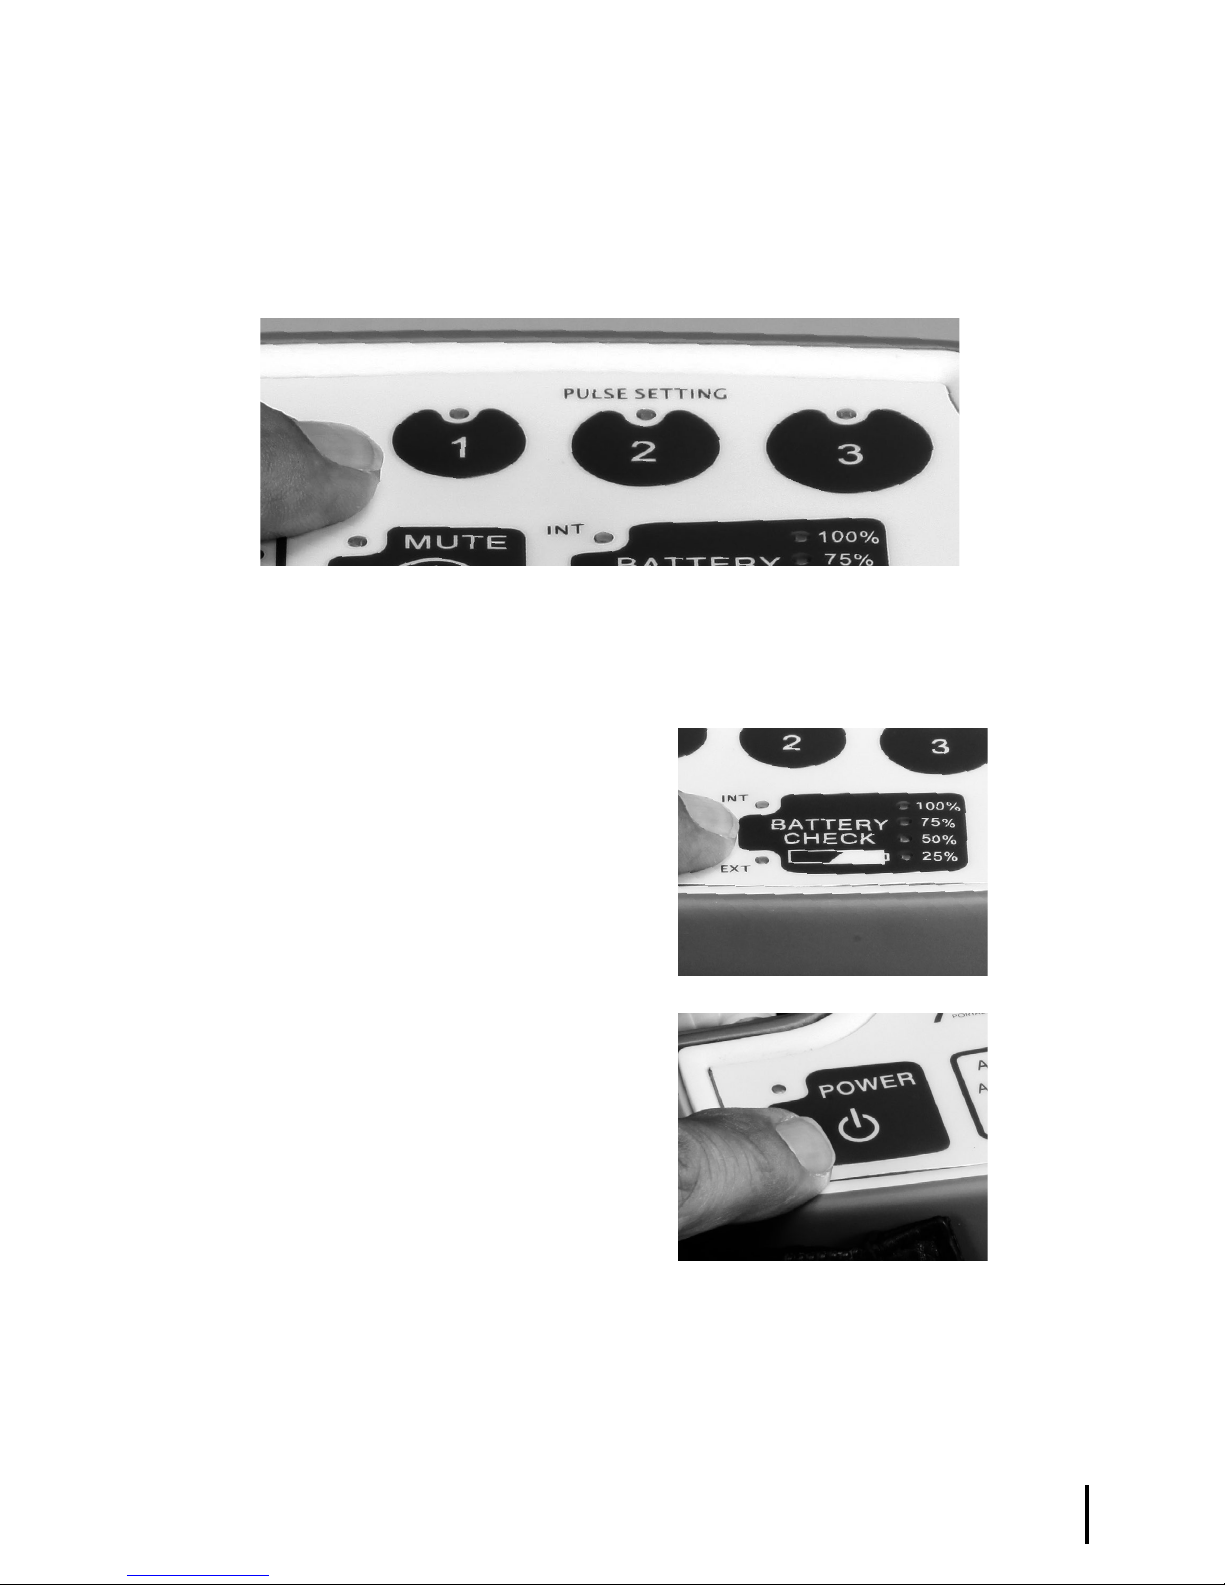
4. There are 2 inhalation sensitivity
modes on the control panel:
Active-High and Sleep-Low which
automatically adjust based on oxygen
demand (e.g. breathing pattern)
requirements. No action is required
to start the delivery of oxygen.
14
15
5. Select a Pulse Setting of 1, 2, or 3 as prescribed by your doctor. The
device utilizes PULSE-WAVE™ Delivery which delivers oxygen
congruent with your inhalation rate. Because this type of delivery
is very gentle, you may not feel the pulse of oxygen. To verify that
oxygen is being delivered, reference the LED above your selected
Pulse Setting. This LED will flash every time a breath is detected
and a bolus of oxygen is delivered.
6. Place the nasal cannula in the nasal passages and breathe normally.
When the POC senses inhalation, oxygen is supplied through
the cannula. The duration and size of the pulse is dependent
upon the Pulse Setting selected.
7. Check to make sure your unit’s
battery is fully charged before
venturing out with the POC for
the first time. (See Battery Charge
Indicator section, User Controls).
8. To turn the POC off, press the
Power Button and hold for 2
seconds until the green Power LED
goes off and the unit shuts down.
After the POC is powered off, the
internal fans may continue to
operate for an additional period of
time until the temperature inside
the unit is sufficiently cooled.
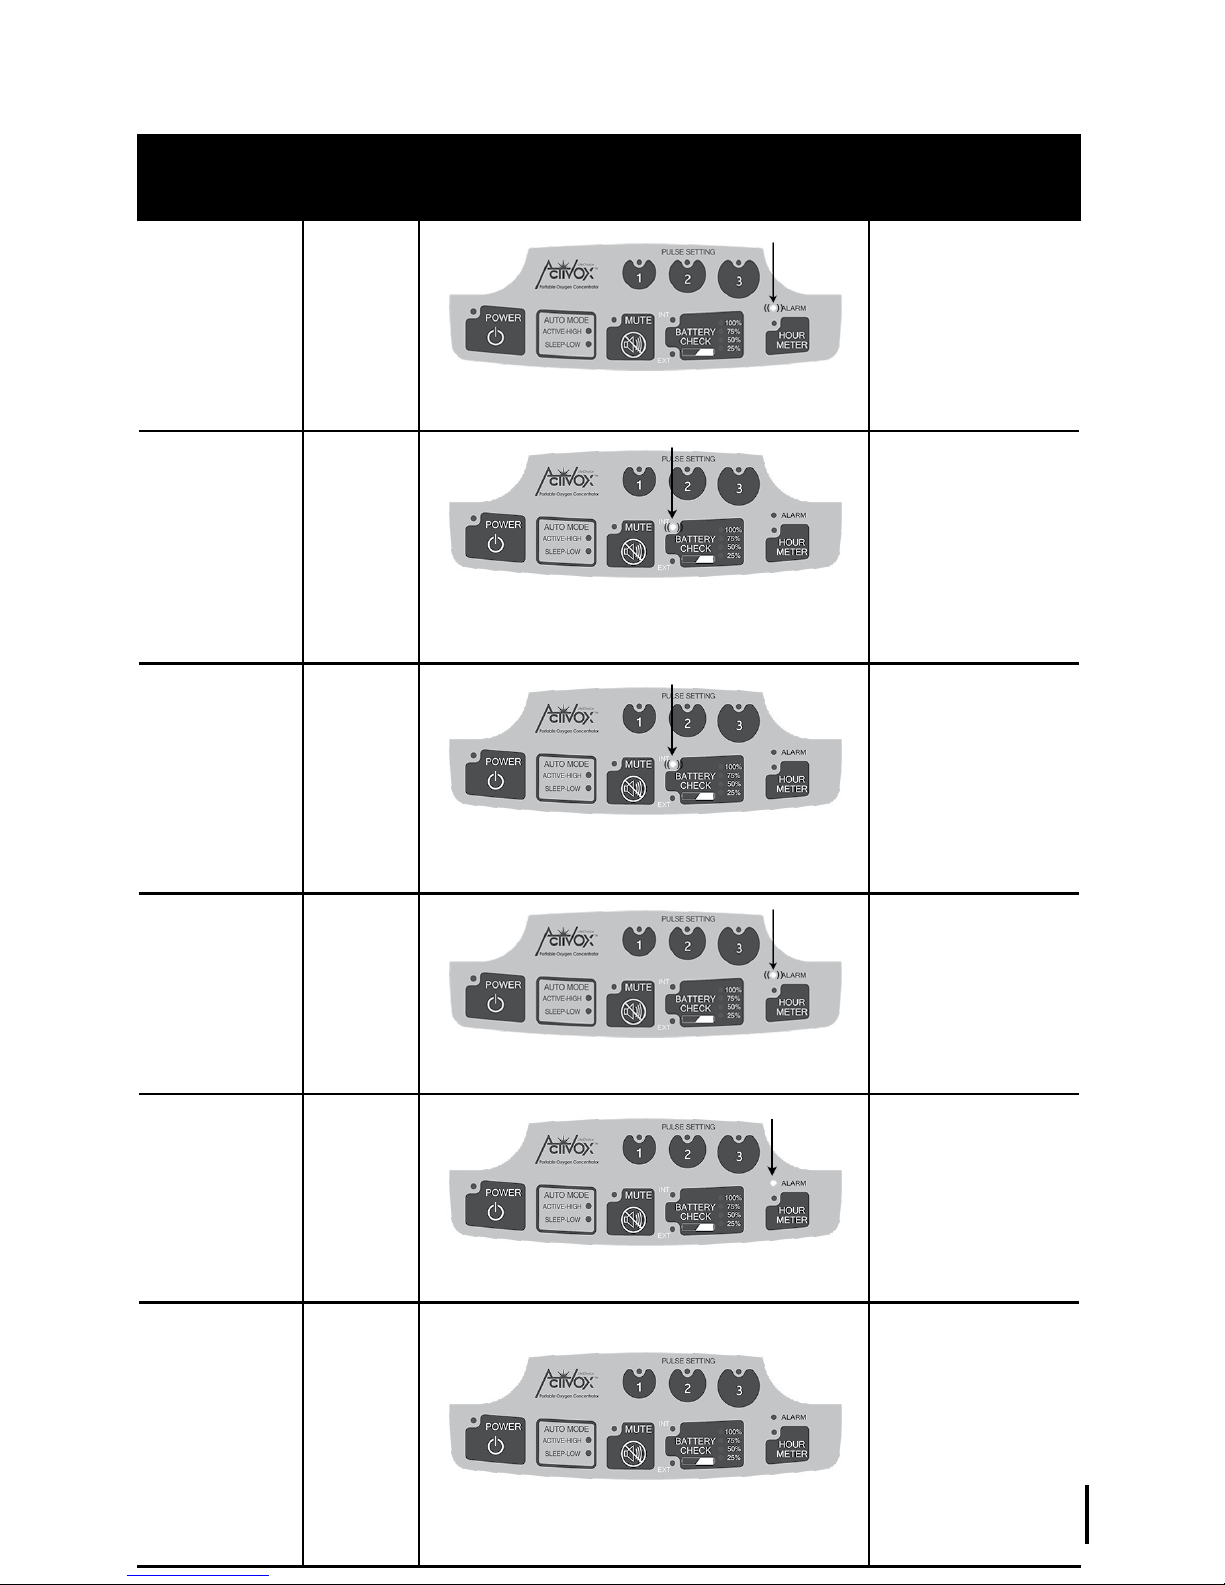
LIGHT INDICATORS/ALARMS
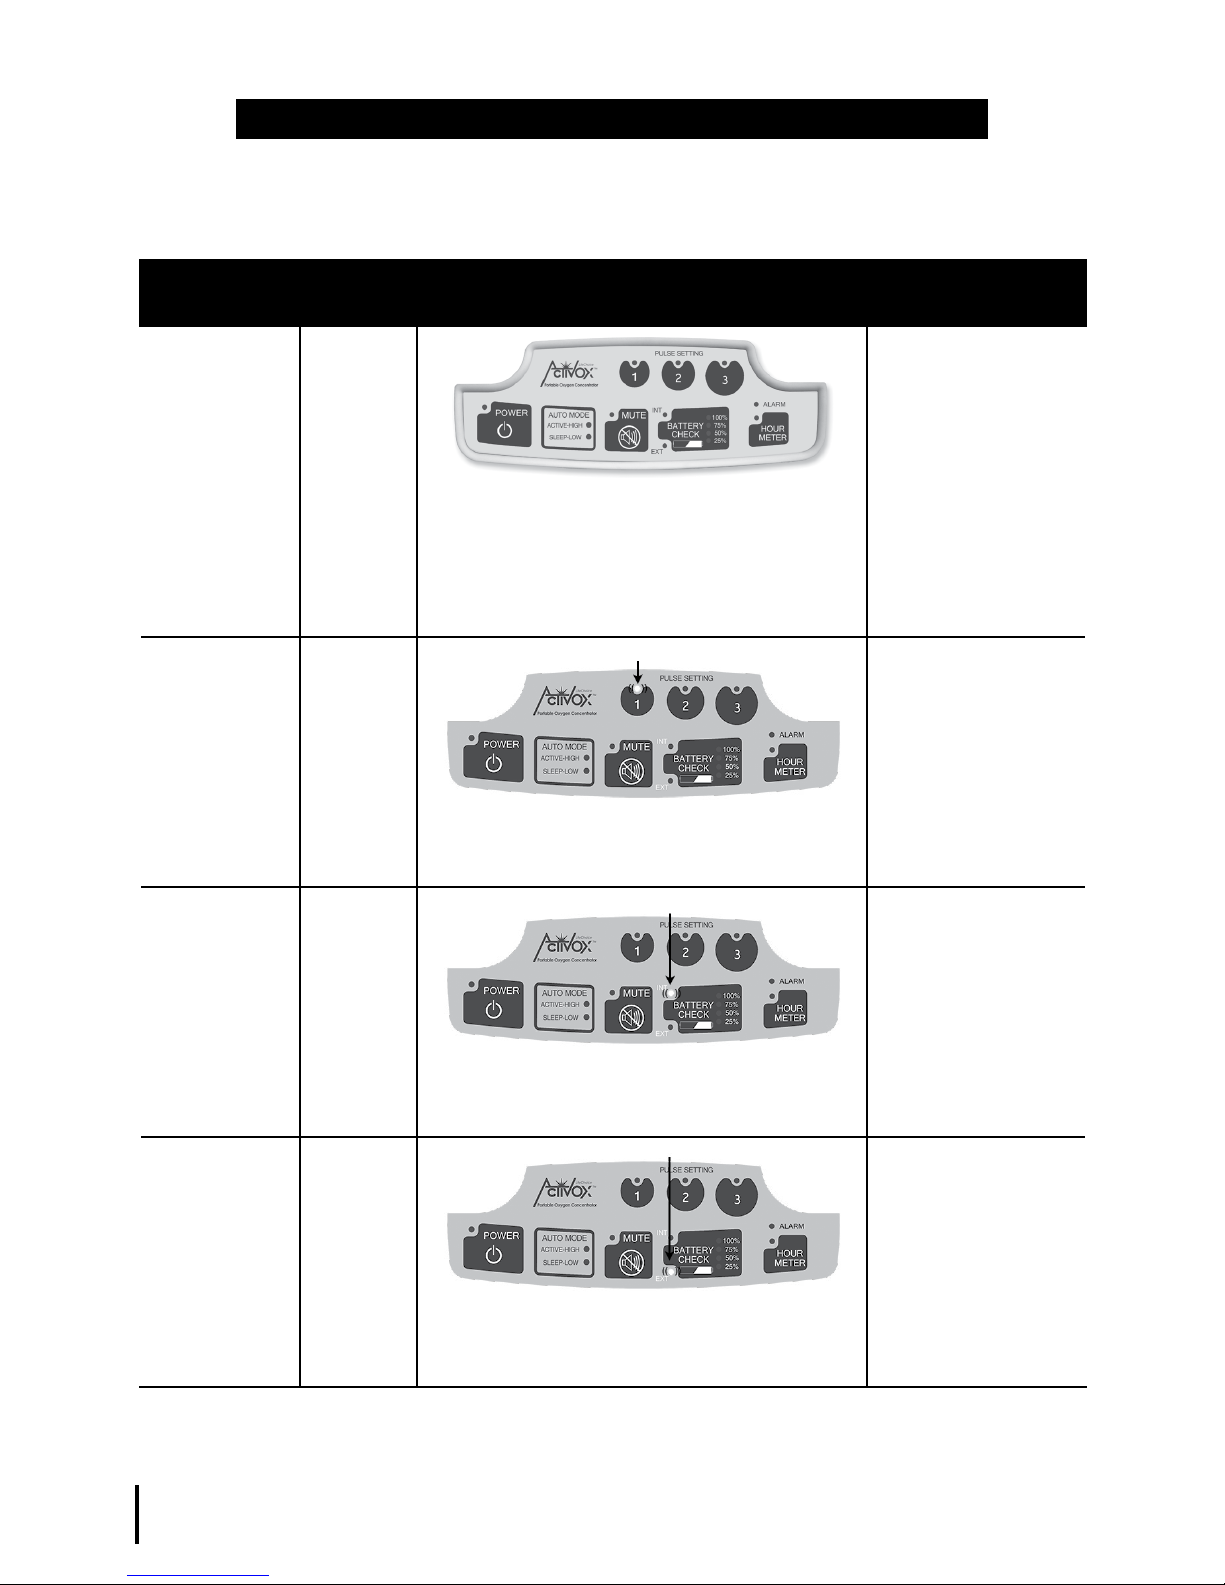
NORMAL OPERATION INDICATORS
16
Normal
Operation
Audible
Alert Light Indication Action
POC turned
on
Brief
audible
tone Green LEDs of Power, Active-High and Pulse
Setting 1 are illuminated.
NOTE: After the initial power on, the Pulse
Setting LED corresponding to the
last flow rate used will illuminate
You may begin to
use the POC unit in
3 minutes
POC has
detected an
inhalation/
breath and
is delivering
a pulse of
oxygen
None
Green LED of selected Pulse Setting flashes
with each breath
POC is functioning
normally.
POC powered
by internal
battery
None
Green LED light labeled INT flashes slowly
POC is functioning
normally.
POC powered
by external
battery
None
Green LED light labeled EXT flashes slowly
POC is functioning
normally.
17
ALARM INDICATORS
Problem Audible
Alert Light Indication Action
No breath
detected by
the unit for
approximately
75 seconds
Intermit-
tent beep
Amber Alarm LED light flashes
Check cannula
connection. Breathe
through nose and
alarm will shut off.
If alarm persists,
contact your
provider.
Low Battery
Alarm
(Approximately
10 minutes of
battery power)
Single
loud, long
beep
every 60
seconds
Amber Battery Check LED labeled
INT flashes slowly
Connect the POC to
an external power
source.
Critical
Low Battery
Alarm
(Approximately
30 seconds of
battery power)
Fast
audible
beep
(Unit shuts
down) Amber Battery Check LED labeled
INT begins flashing quickly
Connect the POC to
an external power
source.
Critical High
Temperature
Alarm
(Unit is
overheating
Fast
audible
beep
(Unit shuts
down)
Amber Alarm LED light flashes until unit cools
Change to another
source of oxygen
while allowing the
unit to cool.
Low Oxygen/
Service Alarm
Continu-
ous audi-
ble alarm
Alarm LED is solid Amber
Turn off the unit.
Change to another
source of
oxygen and contact
your equipment
provider.
AC Power
Interruption
Single
audible
beep for 2
seconds
All LEDs off
Switch to another
source of oxygen.
Check the power
supply. If an issue
is found, solve as
appropriate. If no
issue was found,
contact your
provider.

ROUTINE CLEANING AND MAINTENANCE
The LifeChoice Activox POC was designed to minimize the amount of
routine maintenance that is required. The device does not have any
end-user repairable parts. Aside from the preventative maintenance
outlined below, all other maintenance required must be performed
by qualified personnel.
Fan Inlet Vent Cleaning: There is one inlet vent located on the right
side (facing the unit) of the POC. The carrying case for the unit has
mesh material corresponding to the location of the Fan Inlet Vent.
You should visually check the carrying case to ensure that there is no
buildup of lint, hair or other materials
that could obstruct the flow of air into
the unit’s fan inlet vent. Remove any
material buildup using a soft brush.
At least once a month inspect the
grille of the intake vent and if it appears
dirty, use a dry cotton swab (Q-Tip
or similar) to clean it. Never use
alcohol, solvents, or petroleum
distillates for cleaning.
Unit and Carrying Case Cleaning: If it is necessary to clean the unit
and/or carrying case, use only warm water and a mild liquid dish
detergent. Dampen a cloth in the solution and carefully wipe the
outside surfaces of the unit and/or carrying case.
CAUTION: DO NOT use alcohol, solvents, polishes or any oily
substances since they may be flammable.
Nasal Cannula Inspection: At least once a week, visually inspect the
nasal cannula. Make sure there are no kinks or obstructions. Replace
as needed with a standard 7 ft. (2 m) single lumen nasal cannula from
your local medical equipment supplier.
Reserve Oxygen Supply: Your equipment provider should provide
or suggest an alternative source of supplemental oxygen therapy in
case there is a mechanical failure or power outage.
Hour Meter: The Hour Meter function is for use by trained service
personnel only.
18
Other manuals for XYC100B-SPT
1
This manual suits for next models
2
Table of contents


