adapx Capturx User manual

Capturx® Pen and
Pen Manager User
Guide
Version 3.4
2011

Capturx Pen Manager 3.4
http://www.adapx.com/support/capturx-pen-manager-digital-pen 2
Contents
How to Use the Pen and Docking Station.......................................... 3
How to Use the Capturx Pen Manager .............................................. 4
How to Use the Connection Field……………………………….……………….8
How to Use Capturx enabled XID Files……………………………………….9
How to View Stored Ink Records……………………………………………….11

Capturx Pen Manager 3.4
http://www.adapx.com/support/capturx-pen-manager-digital-pen 3
The Digital Pen and Docking Station
The pen looks and feels just like an ordinary ballpoint pen and you use it in the same way.
There are no keys to press. You simply activate the pen by removing the cap and deactivate
it by replacing the cap.
The docking station is used to dock your pen and to connect your pen to a PC or laptop via
the USB port so you can upload data. The docking station consists of the base, insert, and
the USB connector you use to connect the docking station to your computer.
To upload the ink using the pen and docking station:
1. You may need to place the ink cartridge in the pen. To place the cartridge in the pen,
take one of the ink cartridges and gently slide it into the hole at the tip until it is
completely seated and does not fall out. It’s normal for the cartridge to have some
movement.
2. Attach the docking station to a PC or laptop via the USB port.
3. Fully insert the pen in the docking station.
4. The gold connection points on the pen and docking station need to be aligned and
the pen needs to be firmly placed in the docking station.
5. After you connect the USB port to your computer and dock your pen, you will initially
need to keep the pen in the docking station for four hours for it to fully charge.
Note: The pen needs to be charged before you can use it to capture data. To prevent your
battery from running low, do not leave the cap off the pen for extended periods of time.
Keep the pen cap in a safe place.

Capturx Pen Manager 3.4
http://www.adapx.com/support/capturx-pen-manager-digital-pen 4
Capturx Pen Manager
Capturx Pen Manager is used to manage settings for the pen and to process ink records
saved on the pen. Features and options include:
View the docked and/or locked status of the pen
Enter and save personal info on the pen
Assign a password to the pen
Set as a ―Customer Reference Pen‖for accessing additional services
View the remaining time left on the battery of the pen
Download or delete pages on the pen
Choose pen download options
Activate the pen for enterprise enabled applications
Enable/Disable the Bluetooth feature on the pen
Register the pen
Enter an email or server address for sending ink records
Install additional pattern
Get updates about new versions of Capturx software
Use the Pen Manager icon to verify pen activity or access the Pen Manager by double-
clicking on the icon in your system tray.
Four states of the icon are used to show you status:
Static Icon
One or more pens are
docked
Animated Icon
One or more pens
have unprocessed ink
in their memory
Animated Icon
Pen is processing ink
records - either
downloading ink
records from the pen
or importing from an
XID file to the
personal computer
Static Icon
One or more pens are
locked
Static Icon
No pens docked
Hovering over the system tray icon with your mouse pointer will provide you with the
battery charge information and the memory status of the pen.

Capturx Pen Manager 3.4
http://www.adapx.com/support/capturx-pen-manager-digital-pen 5
The Capturx Pen Manager includes features that enable the routing of pen data. Each of
these is identified by the number in the diagram and chapters below with descriptions:
(1)A Tab For Each Pen
Tabs are used to separate Capturx Pen Manager options for each individual pen that has
been docked. Selecting an individual tab will show you the options for that specific digital
pen. The ―Close‖ button is used to close the particular tab you have open.

Capturx Pen Manager 3.4
http://www.adapx.com/support/capturx-pen-manager-digital-pen 6
(2) Pen Docking Status
Pen status tells you if the pen is currently docked or locked (using the password). If the pen
is undocked, Capturx Pen Manager will show you the data from the last docking.
(3) Assign Personal Data & Password to Pen
Use this section to assign a password and to assign personal data to the pen. If you
registered your pen during the original activation process, the information you entered will
appear in the "personal data" section. Enter or change personal data anytime by filling in
the desired fields, the updated fields will be used to identify the pen user when uploading
pen data.
By assigning a password, you prevent others from using the pen to download data or from
viewing the personal information you have entered. Once you assign a password, you will
be asked to enter it before you can download data from a docked pen. The password
options include:
Delete Button: Use this button to delete the password on your pen
Change Button: Use this button to change the password you have previously
assigned to the pen
Note: Keep your password in a safe place. If your password is lost, you cannot retrieve it
and you will need to reset the pen which will result in loss of pen data.
The Customer Reference Pen is used to designate the pen serial number that is sent to
Adapx to identify the account used for acquiring additional pattern. You may be asked to
supply this serial number when ordering products. Capturx will select the first pen that you
dock as your CRP. After docking other pens, you may select them as your CRP.
Pen Status (4)
This section allows you to view the following information:
Battery Status: Percent charged, writing time, and idle time left on the pen
Data on Pen: Percentage of free space left on the pen, pages remaining, and the
number of current pages on the pen ready to download. You can also delete and
download the current pages on the pen by selecting the desired button.
Pen Docking Options (5)
This section allows you to select a download option for how you want to download your pen
data. For example, if you select "Auto download‖, the data will be auto downloaded. The
download options include:
Auto Download –Data is automatically downloaded as soon as the system
detects a docked pen.

Capturx Pen Manager 3.4
http://www.adapx.com/support/capturx-pen-manager-digital-pen 7
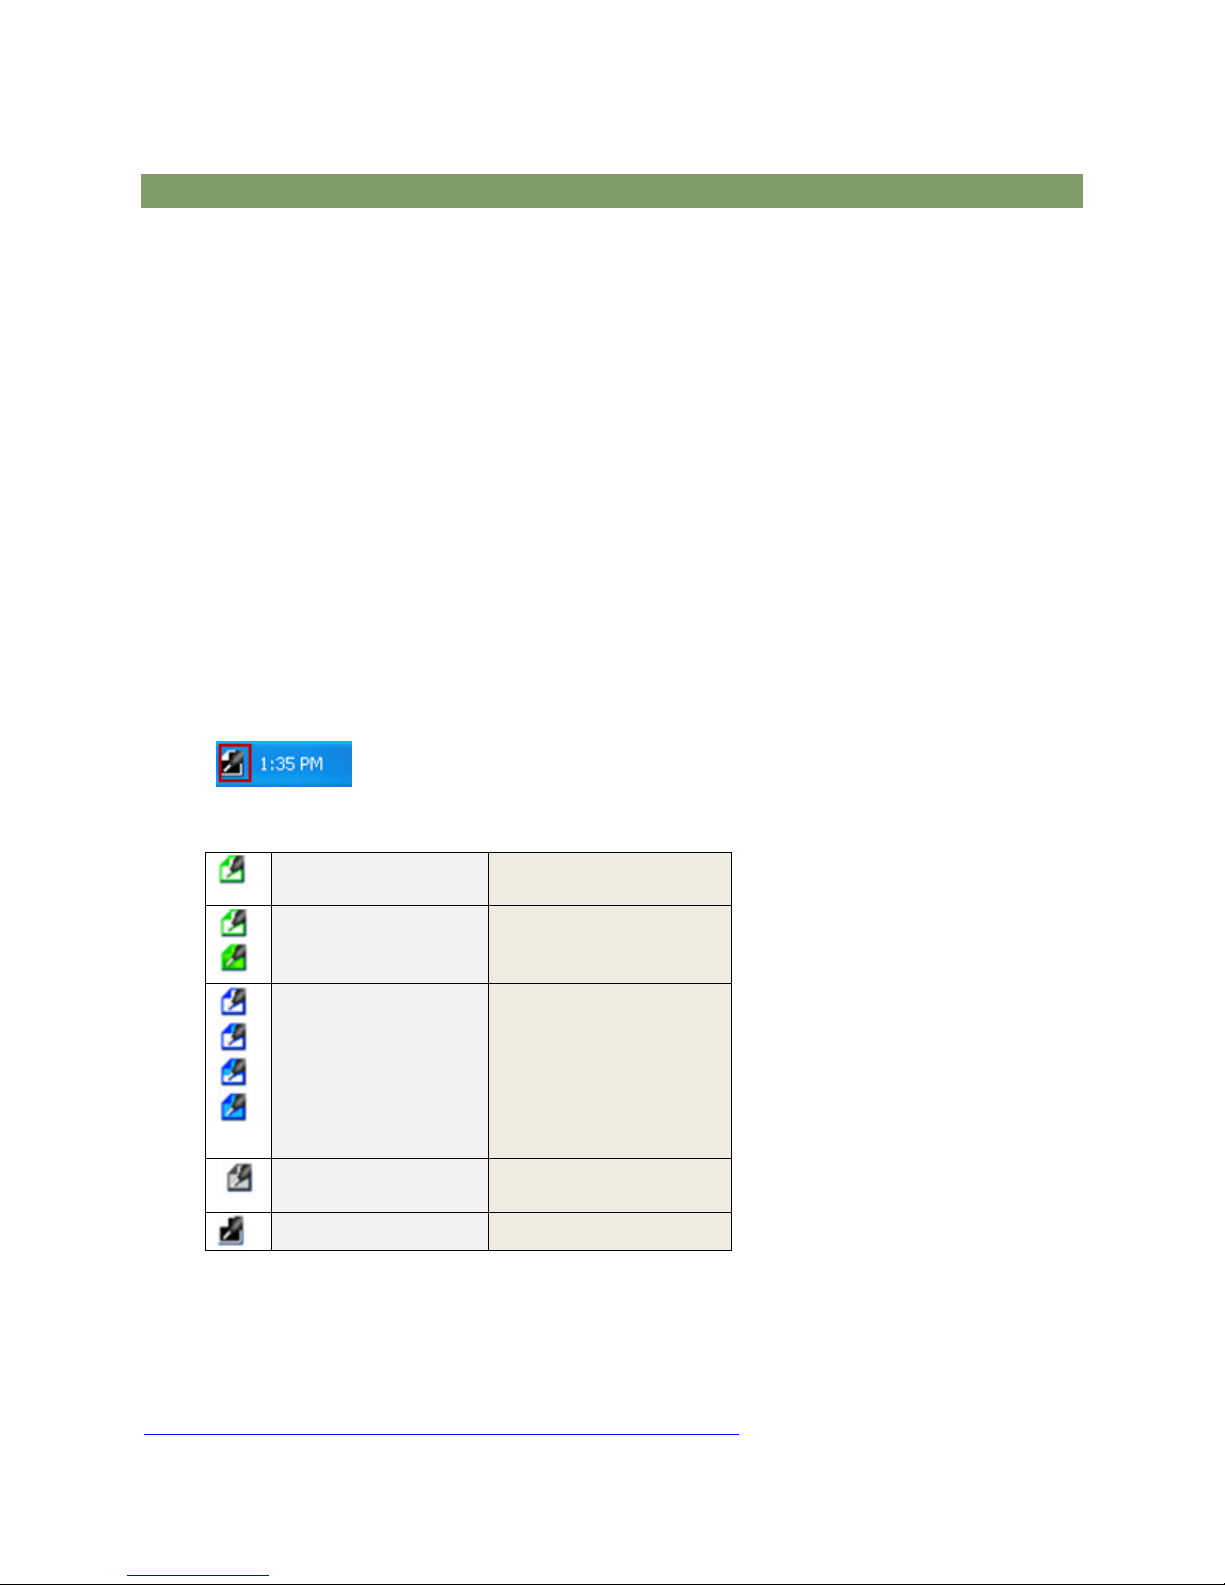
Prompt for Download –When the system detects a docked pen, you are
prompted for permission to download the data. For example:
Manual Download –With the pen docked, the system will wait for you to initiate
download using the Download button on the Pen Status section of the Pen
Manager.
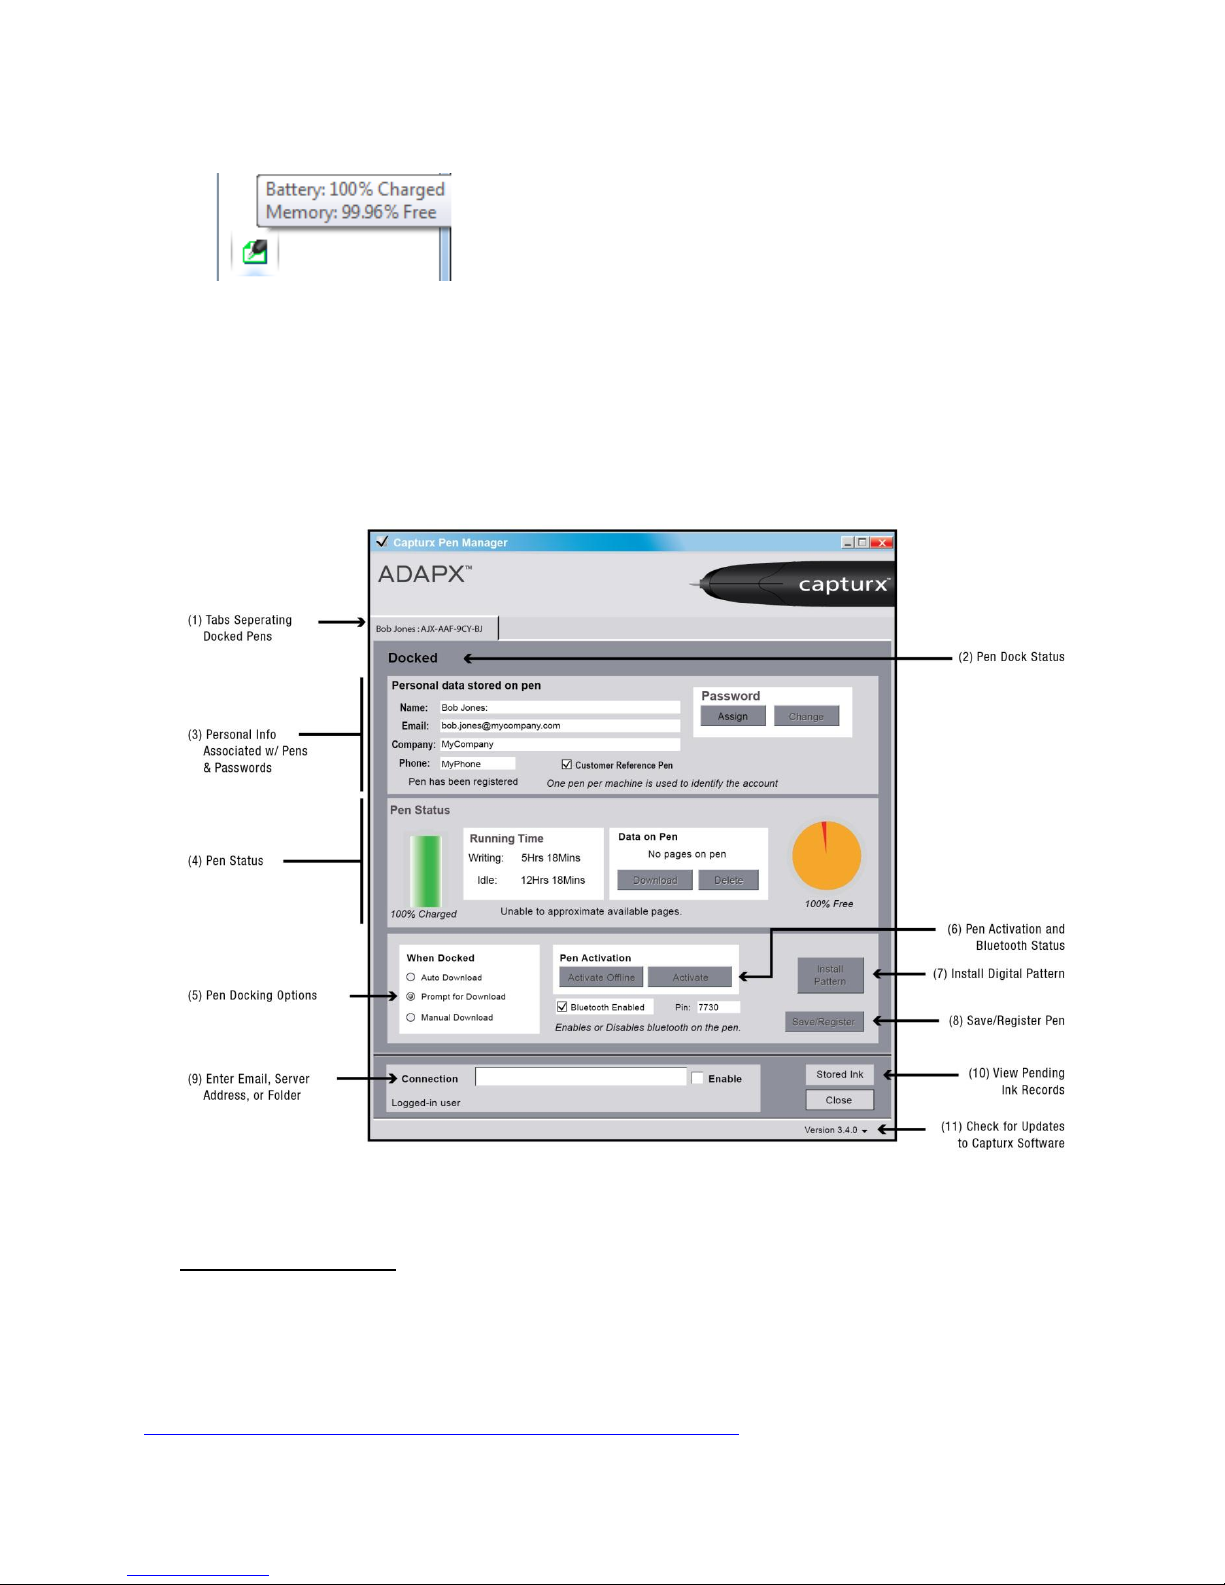
(6) Pen Activation and Enable Bluetooth
To begin using Capturx products, other than Capturx for Microsoft OneNote, you must have
an activated pen. (Typically, your pen will come fully activated from Adapx.) Although
activating the pen is part of the initial registration and activation process, you may want to
activate additional pens or to activate your pen if you did not do it during the initial
registration. You have the choice to activate using an offline key or via the internet. Activate
offline by manually entering your software activation key.
The Enable Bluetooth option allows you to use the check box to enable the Bluetooth feature
on the pen hardware. Your Bluetooth PIN will also be displayed, so that you can use it to
pair your pen with a supported mobile device (for use with Capturx Mobile on that device).
When using Bluetooth, see how Capturx works with mobile devices at:
http://www.adapx.com/products/capturx-mobile.
(7) Install Pattern
The Install Pattern button is activated when you have a pattern credit on a docked pen. To
add more pattern to your local PC, dock the digital pen which has the pattern credit and
click the Install Patern button.
(8) Save/Register Pen
Selecting the Save/Register button will save the changes you made to the pen and update
the pen’s registration information sent to Adapx with the information shown in section 3.
(9) Enter Email, Server Address, or Folder
You can send ink records to an email recipient or to a Capturx-enabled Server by entering
the mail recipient address or URL in the ―Connection‖ field at the bottom of the Pen Manager
and selecting Enable.Also, you can save the pen data (XID file) to a folder on your
computer network by typing the path into the Connection box and selecting Enable. See
―How to use the Connection Field‖ for more details.
(10) View Pending Ink Records

Capturx Pen Manager 3.4
http://www.adapx.com/support/capturx-pen-manager-digital-pen 8
Ink records are available to view in the Capturx Pen Manager prior to being uploaded into
the associated file and application. The Stored Ink Dialog can be selected from Capturx Pen
Manager. This is also the place to view pen data associated with import errrors.
11) Check for updates to Capturx software
To check if Adapx has released a new version of Capturx Pen Manager, or any other Capturx
software, click the arrow next to the version number in the bottom right corner, click
Updates, and then click Check for Updates. At the top of the dialog, you will see the
newest versions available. To upgrade, click the New Version number and follow the
instructions on the displayed Web page.
How to use the Connection Field
Use the Connection Field to send pen data to Capturx-enabled servers or to email ink
records to others for processing.
Ink Records routed to Capturx-enabled Server:
1. Enter a URL or site address of the Capturx-enabled Server in the Connection field
2. Select Enable
Records written on forms printed from the Capturx-enabled Server will be processed and
remaining ink records on the pen will then be processed on the local machine.
Ink Records routed to other Capturx installations via email:
1. Enter an email address formatted as [email protected] in the Connection field
and select Enable.
2. Dock the pen once the data is collected
3. Capturx will create an email using your default email client with the sender being
whatever email address is entered into the Connection field. The ink records will be
contained in an XID file (Adapx Ink Document) attached to the email.
When routing digital ink, an XID file will be created once the pen is docked –all data stored
on the pen will be saved in this XID file.
Each XID file will be named with the following:
a. Pen Author, date and time of the file upload

Capturx Pen Manager 3.4
http://www.adapx.com/support/capturx-pen-manager-digital-pen 9
You can also use the Connection Field to save the pen data (XID file) to a location on your
computer network by typing the path into the Connection box and selecting Enable.
Capturx Enabled XID Files
Opening XID files:
In order for the email recipient to open the XID file, the recipient must have Capturx Pen
Manager 3.0 or later installed, a well as the corresponding Capturx application for each
printout upon which digital ink was written.
1. Double click on the XID file named with the appropriate date/time, author
2. Capturx Pen Manager will process the ink and make it available to the
appropriate Capturx application.
For either kind of XID, successful processing of Ink Records will be reported by Capturx Pen
Manager after processing.
John.doe@adapx.com

Capturx Pen Manager 3.4
http://www.adapx.com/support/capturx-pen-manager-digital-pen 10
Unsuccessful processing of Ink Records will result in a ―Failure‖ message. Failures are
generally explained by the following conditions and can be rectified with the accompanying
actions:
If an error has occurred while processing an ink record from and XID file, the following
dialog will appear.
If Ink records cannot be processed a preview of each unprocessed record is
available to view in the Stored Ink Records dialog on the ―Import Errors” tab.
Each record will show:
Ink Record displayed on the right side of the dialog
Pen User Name
Date and time record was downloaded
Pen Serial Number
Error message

Capturx Pen Manager 3.4
http://www.adapx.com/support/capturx-pen-manager-digital-pen 11
Stored Ink Records
Ink records are available to view from Stored Ink within Capturx Pen Manager —prior to
the ink being processed by the associated file or when an error occurs when attempting to
process ink records.
Stored Ink can be selected from Capturx Pen Manager or by selecting ―OK‖ from the error
dialog when ink records cannot be processed.
Users can view stored ink records in two ways:
a. Pending ink; prior to sending the ink record to the associated file.
b. If an error has occurred processing the ink from the pen.
Pending Ink Tab
Ink records which can be viewed in the Pending Ink tab:
Ink is successfully downloaded by docking the digital pen or clicking on an
XID file, but no Capturx application has tried to process the ink record.
Each record will show:
Ink Record displayed on the right side of the dialog
Pen User Name
Date and time record was downloaded
Pen Serial Number
File Name
File Type

Capturx Pen Manager 3.4
http://www.adapx.com/support/capturx-pen-manager-digital-pen 12
Note: OneNote ink records will be processed automatically and cannot be
previewed
When a pending ink record has been previewed options include:
Export: Select to save ink record as Capturx XID file to disk that can be processed
with the associated file
Process: Select to send the ink record to the associated file for processing once the
error has been resolved.
Notes: Processing an ink record for any PDF file will cause all pending PDF ink to be
processed.
Ink records for ArcGIS must be processed from within ArcGIS.
Email: Select to save ink record as a Capturx XID file and send via email to a user
with the appropriate destination file
Delete: Select to delete the ink record from the digital pen
Import Errors Tab
If an error has occurred downloading ink from the pen the following dialog will appear.
If Ink records cannot be processed, a preview of each unprocessed record is
available to view in the Stored Ink Records dialog on the Import Errors tab.

Capturx Pen Manager 3.4
http://www.adapx.com/support/capturx-pen-manager-digital-pen 13
Each record will show:
Ink Record displayed on the right side of the dialog
Pen User Name
Date and time record was downloaded
Pen Serial Number
Error message
Ink records that have received an error message can be previewed with options to:
Export: Select to save ink record as Capturx XID file to disk that can be processed
with the associated file
Process: Select to send the ink record to the associated file for processing
Email: Select to save ink record as a Capturx XID file and send via email to a user
with the appropriate destination file
Delete: Select to delete the ink record
Other manuals for Capturx
1
Popular Accessories manuals by other brands

Justin
Justin JB-540-10400 user manual

Dakota Alert
Dakota Alert R-3000 owner's manual

Elkay
Elkay EHOA8 1B Series Installation, care & use manual

Microtips Technology
Microtips Technology Omago SG-101 user manual

EMX Industries
EMX Industries RAVEN quick start guide

Baumer
Baumer UNCK 09G8914/KS35A quick start guide

Baolong
Baolong TMSS5B5 Operation manual

InLife
InLife JW-6638 user manual

PCB Piezotronics
PCB Piezotronics ICP J320C33 Installation and operating manual

LAUREN
LAUREN WOSW installation guide

S+S Regeltechnik
S+S Regeltechnik HYGRASGARD DFF Series Operating Instructions, Mounting & Installation

Russound
Russound A-OM manual