Adexa SR600G User manual

Cabinet Refrigerators/
Freezers
Instruction manual
NL
Koelkasten/
vrieskasten
Handleiding
9
IT
Armadi frigoriferi/
congelatori
Manuale di istruzioni
30
FR
Armoires réfrigérantes/
congélateurs
Mode d'emploi
16
ES
Frigoríficos / Congeladores
de cabina
Manual de instrucciones
37
DE
Koelkast/Vriezer
Bedienungsanleitung
23
PT
Frigoríficos/congeladores
Manual de instruções
44
PLEASE READ THE OPERATION MANUAL BEFORE USING.
SAVE THIS MANUAL FOR LATER USE.

UK
Safety Tips
•
Position on a flat, stable surface.
•
A service agent/qualified technician should carry out
installation and any repairs if required. Do not remove any
components or service panels on this product.
•
Consult Local and National Standards to comply with the
following:
-Health and Safety at Work Legislation
-EN Codes of Practice
-Fire Precautions
-IEE Wiring Regulations
-Building Regulations
•
DO NOT use jet/pressure washers to clean the appliance.
•
DO NOT use the appliance outside.
•
DO NOT use this appliance to store medical supplies.
•
DO NOT use electrical appliances inside the appliance (e.g.
heaters, ice cream makers etc.)
•
DO NOT stand or support yourself on the base, drawers or
doors.
•
DO NOT allow oil or fat to come into contact with the plastic
components or door seal. Clean immediately if contact occurs.
•
Bottles that contain a high percentage of alcohol must be
sealed and placed vertically in the refrigerator.
•
Always carry, store and handle the appliance in a vertical
position and move by holding the base of the appliance.
•
Always switch off and disconnect the power supply to the unit
before cleaning.
•
Keep all packaging away from children. Dispose of the
packaging in accordance with the regulations of local
authorities.
2

NL
•
If the power cord is damaged, it must be replaced by a
agent or a recommended qualified technician in order to avoid
a hazard.
Caution Risk of Fire
•
Do not store explosive substances such as aerosol cans with a
flammable propellant in this appliance.
•
Warning: Keep clear of obstruction all ventilation openings in
the appliance enclosure or in the structure for building-in.
•
Warning: Do not use mechanical devices or other means
to accelerate the defrosting process, other than those
recommended by the manufacturer.
•
Warning: Do not damage the refrigerant circuit.
•
Warning: Do not use electrical appliances inside the food
storage compartments of the appliance, unless they are the
type recommended by the manufacturer.
3

Note: If the unit has not been
stored or moved in an upright
position, let it stand upright for
approximately 12 hours before
operation. If in doubt allow to
stand.
Note: Before using the appliance
for the first time, clean the
shelves and interior with soapy
water.
UK
Introduction
Please take a few moments to carefully read
through this manual. Correct maintenance and
operation of this machine will provide the best
possible performance from your product.
Pack Contents
The following is included:
•
Refrigerator or Freezer
•
Keys x 2
•
Shelf guides x 6 (Single) / x 12 (Double)
•
Shelves x 3 (Single) / x 6 (Double)
•
Waste water tray
•
Instruction manual
Prides itself on quality and service, ensuring
that at the time of packaging the contents are
supplied fully functional and free of damage.
Should you find any damage as a result of transit,
please contact your dealer immediately.
Installation
1.
Remove the appliance from the packaging.
Make sure that all protective plastic film and
coatings are thoroughly removed from all
surfaces.
2.
Maintain a distance of 20cm (7 inches)
between the unit and walls or other objects
for ventilation. Increase this distance if the
obstacle is a heat source.
3.
Set the brakes on the castors to keep the
appliance in position
OR
Level the appliance by adjusting the screw
feet.
Removing the Compressor Safety
Band
•
The compressor is located on the top of the
appliance, and sits on rubber washers. Under
normal operating conditions the compressor is
allowed to vibrate.
•
To avoid damage through excessive motion
during transit, a stainless steel safety band is
placed over the compressor and screwed into
the top of the appliance.
•
This safety band and the two screws fixing it
to the appliance must be removed before the
appliance is turned on.
Compressor
Safety Band
Compressor
Screws
Lock/Unlock the Doors
A lock is fitted to the doors to ensure foodstuffs
are kept secure within your appliance.
Use the keys provided to lock/unlock the doors.
Fitting the Waste Water Tray
The waste water tray comes ready to fit to the
underside of the appliance.
Slide the tray into the runners situated under the
appliance.
4

NL
Fitting the Shelves & Floor Guards
1.
Place one set of shelf guides on either side of
the cabinet at the desired height.
2.
Slide the shelf into place.
3.
Repeat for the remaining shelves.
4.
Place the floor guards on the floor of the
cabinet, ensuring the flat side is clear of the
floor.
Operation
Storing Food
To get the best results from your appliance,
follow these instructions:
•
Only store foodstuffs in the appliance when it
has reached the correct operating temperature.
•
Do not place uncovered hot food or liquid
inside the appliance.
•
Wrap or cover food where possible.
•
Do not obstruct the fans inside the appliance.
•
Avoid opening the doors for prolonged periods
of time.
Turn On
1.
Ensure the power switch is set to [O] and turn
on at the socket.
2.
Switch on the Power [I]. The current
temperature within the appliance is displayed.
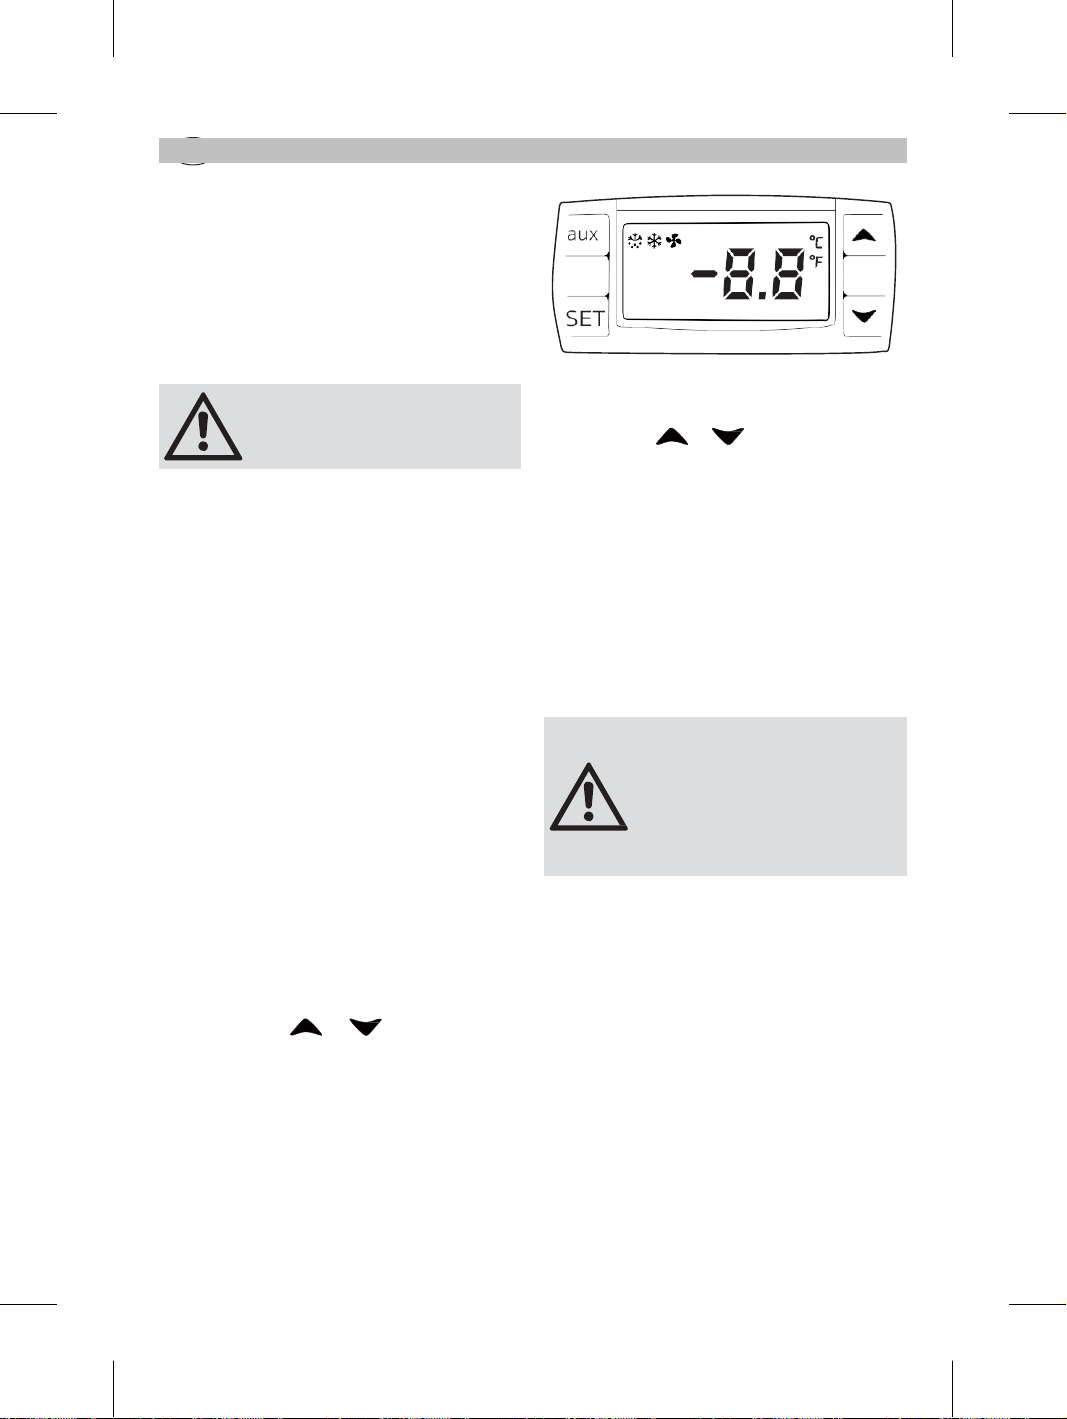
Control Panel
To unlock / Lock the keyboard press and
together for 3 seconds. Display will flash PON
(unlocked) / POF (locked).
Set the Operating Temperature
1.
Press the SET button. The display will flash.
2.
Press the or buttons to display the
required temperature.
3.
Press the SET button to store the temperature.
Manual Defrost
Press and hold the defrost button "aux" for 2
seconds to begin a manual defrost. The defrost
light illuminates.
Cleaning, Care &
Maintenance
•
Clean the interior of the appliance as often as
possible.
•
Do not use abrasive cleaning agents. These
can leave harmful residues.
•
Clean the door seal with water only.
•
Always wipe dry after cleaning.
•
Do not allow water used in cleaning to run
through the drain hole into the evaporation
pan.
•
Take care when cleaning the rear of the
appliance. Sharp edges can cut.
•
A agent or qualified technician must
carry out repairs if required.
5
Defrost appliance at least
every 3 months, more often if
required.
Switch off and disconnect
from the power supply before
cleaning.
Note: This is vital for
ensuring correct drainage of
condensation.

UK
Stainless Steel Care
To maintain the stainless steel exterior of your item, please consider the following information:
Never:
•
Use abrasive Scourers or scrubbing pads etc
•
Use Chlorinated or acidic detergents
•
Allow anything e.g. food, dirt, cleaning chemicals to remain on the surface for longer than necessary,
clean them off right away.
•
Allow the surface to remain wet.
Do:
•
Clean often.
•
Use soft Cloths or plastic Scourers.
•
Rub with the grain of the metal, rather than across it.
•
Use detergents and polish designed for cleaning Stainless Steel.
•
Ensure that the cleaning products are washed off fully and that the steel is left dry.
Routine Maintenance
Cleaning the Condenser
•
The condenser is part of the refrigeration system. The condenser requires monthly cleaning.
•
Always disconnect power supply before carrying out Routine Maintenance.
•
Failure to clean the condenser will reduce the performance and life of your unit and may
invalidate your warranty.
Upright Cabinets
The condenser is located below the refrigeration
cabinet. These models have a removable filter
which can be cleaned with a vacuum cleaner.
Upright Cabinets
The condenser is located above the refrigeration
cabinet. These models have a removable filter
which can be cleaned with a vacuum cleaner.
6

NL
Troubleshooting
If your appliance develops a fault, please check the following table before making a call to the
Helpline or your dealer.
Fault
Probable Cause
Solution
The appliance is not
working
The unit is not switched on
Check the unit is plugged in correctly and
switched on
Plug and lead are damaged
Call agent or qualified Technician
Fuse in the plug has blown
Replace the fuse
Power supply
Check power supply
Internal wiring fault
Call agent or qualified Technician
The appliance turns on,
but the temperature is
too high/low
Too much ice on the evaporator
Defrost the appliance
Condenser blocked with dust
Clean the Condenser
Doors are not shut properly
Check doors are shut and seals are not
damaged
Appliance is located near a
heat source or air flow to the
condenser is being interrupted
Move the refrigerator to a more suitable
location
Ambient temperature is too high
Increase ventilation or move appliance to a
cooler position
Unsuitable foodstuffs are being
stored in the appliance
Remove any excessive hot foodstuffs or
blockages to the fan
Appliance is overloaded
Reduce the amount of food stored in the
appliance
The appliance is
leaking water
The appliance is not properly
levelled
Adjust the screw feet to level the appliance
(if applicable)
The discharge outlet is blocked
Clear the discharge outlet
Movement of water to the drain is
obstructed
Clear the floor of the appliance (if
applicable)
The water container is damaged
Call agent or qualified Technician
The drip tray is overflowing
Empty the drip tray (if applicable)
The appliance is
unusually loud
The safety band has not been
removed
Remove the safety band
Loose nut/screw
Check and tighten all nuts and screws
The appliance has not been
installed in a level or stable
position
Check installation position and change if
necessary
7
UK
Electrical Wiring
The plug is to be connected to a suitable mains socket.
Appliances are wired as follows:
•
Live wire (coloured brown) to terminal marked L
•
Neutral wire (coloured blue) to terminal marked N
•
Earth wire (coloured green/yellow) to terminal marked E
All appliances must be earthed, using a dedicated earthing circuit.
If in doubt consult a qualified electrician.
Electrical isolation points must be kept clear of any obstructions. In the event of any emergency
disconnection being required they must be readily accessible.
Disposal
EU regulations require refrigeration product to be disposed of by specialist companies who remove or
recycle all gasses, metal and plastic components.
Consult your local waste collection authority regarding disposal of your appliance. Local authorities are
not obliged to dispose of commercial refrigeration equipment but may be able to offer advice on how to
dispose of the equipment locally.
Alternatively call the helpline for details of national disposal companies within the EU.
Compliance
The WEEE logo on this product or its documentation indicates that the product must
not be disposed of as household waste. To help prevent possible harm to human
health and/or the environment, the product must be disposed of in an approved and
environmentally safe recycling process. For further information on how to dispose of
this product correctly, contact the product supplier, or the local authority responsible for
waste disposal in your area.
Parts have undergone strict product testing in order to comply with regulatory
standards and specifications set by international, independent, and federal authorities.
Products have been approved to carry the following symbol:
8

NL
Veiligheidstips
•
Plaatsen op een vlakke en stabiele ondergrond.
•
De installatie en eventuele reparaties zijn door een
servicetechnicus/vaktechnicus uit te voeren. Verwijder geen
componenten of servicepanelen van dit product.
•
Raadpleeg en volg de plaatselijke en nationale regelgeving op
m.b.t. tot het volgende:
-Wetgeving van gezondheid en veiligheid op de werkplaats
-Werkregels
-Brandpreventie
-IEE bekabelingsnormen
-Bouwverordeningen
•
Dit product NIET reinigen met spuit-/drukreinigers.
•
Dit product NIET gebruiken voor de berging van medische
producten.
•
In dit product GEEN elektrische apparaten gebruiken (zoals
bijv. verwarmers, ijsmakers, etc.)
•
NIET op de kastbasis, lades en deuren staan of als
ondersteuning gebruiken.
•
Laat NIET toe dat olie of vet in contact komt met plastic
componenten of deurafdichtingen. Onmiddellijk reinigen indien
dit wel gebeurt.
•
Uitsluitend geschikt voor gebruik binnenshuis.
•
Flessen met en hoog alcoholpercentage moet goed worden
gesloten en verticaal in de koelkast worden bewaard.
•
Dit product altijd in een verticale positie vervoeren, opbergen
en gebruiken. Het product aan de kastbasis vervoeren.
•
Alvorens dit product te reinigen dient men altijd de
stroomvoorziening uit te schakelen.
•
Laat verpakkingsmateriaal niet binnen handbereik van
kinderen. Verpakkingsmateriaal in overeenstemming met de
regelgeving van de plaatselijke overheden als afval laten
verwerken.
9

NL
•
Indien de stroomkabel beschadigd raakt, dient men deze door
een technicus of een aanbevolen vaktechnicus te laten
vervangen om gevaarlijke situaties te verhinderen.
Voorzichtig Risico van Fire
•
Heeft explosieve stoffen zoals spuitbussen niet slaan met een
brandbaar drijfgas in dit apparaat.
•
Waarschuwing: Houd vrij van obstakels alle
ventilatieopeningen in het apparaat behuizing of in de
structuur voor de bouw-in.
•
Waarschuwing: mechanische apparaten of andere
middelen niet gebruiken om het ontdooien te versnellen, met
uitzondering van de fabrikant aanbevolen die door.
•
Waarschuwing: het koelcircuit niet beschadigen.
•
Waarschuwing: Gebruik geen elektrische apparaten binnen
het voedsel opbergvakken van het apparaat, tenzij ze het type
aanbevolen door de fabrikant.
10

Install
atie
Opmerking: Voor het eerste
gebruik van dit product dient u
de lades en de binnenzijde met
zeepwater te reinigen.
NL
Inleiding
Neem de tijd en lees deze handleiding aandachtig
door. Een correct gebruik en onderhoud van deze
machine waarborgt de beste prestatie van uw
product.
Verpakkingsinhoud
De verpakking bevat het volgende:
•
Koelkast of Vrieskast
•
Sleutels x 2
•
Ladegeleiders x 6 (enkele) / x 12 (dubbele)
•
Vloerplint (1 per deur)
•
Lades x 3 (enkele)/ x 6 (dubbele)
•
Afvoerwaterbak
•
Handleiding
Is trots op de haar productkwaliteit en
dienstverlening en controleer de inhoud van de
verpakkingen, tijdens de verpakkingsfase, op
functionaliteit en schade.
Mocht u product door transport zijn beschadigd,
neem dan onmiddellijk contact op met uw
dealer.
1.
Haal het product uit de verpakking. Zorg ervoor
dat u de beschermingsfolie en -lagen van alle
oppervlakken heeft verwijderd.
2.
Voor een adequate ventilatie dient men een
afstand van 20cm aan te houden tussen dit
product of muren en andere objecten. Vergroot
deze afstand indien het object een warmtebron
is.
3.
Zet de remmen van de wieltjes om het product
op zij plaats vast te zetten OF nivelleer het
product door de verstelbare poten aan te
passen.
Veiligheidsband van de compressor
verwijderen
•
De compressor bevindt zich in het
bovendeel van het product en steunt op
rubberen onderlegplaatjes. Onder normale
werkomstandigheden is het trillen van de
compressor normaal.
•
Om beschadiging tijdens teveel bewegingen
tijdens transport te voorkomen, is ereen
veiligheidsband om de compressor geplaatst
en vastgeschroefd in het bovendeel van het
product.
•
Men dient de veiligheidsband en de
bijbehorende twee bevestigingsschroeven te
verwijderen alvorens het product aan te zetten.
Veiligheids
band van de
compressor
Compressor
Schroeven
Vergrendelen/ontgrendelen van
deuren
De deuren zijn voorzien van een slot om de
levensmiddelen veilig te bewaren in uw
product. Gebruikt de meegeleverde sleutels om de
deuren te vergrendelen/ontgrendelen.
Het plaatsen van de afvoerwaterlade
De afvoerwaterlade is klaar voor plaatsing in het
onderdeel van het product.
Schuif de lade op de geleiders aan de onderzijde
van het product.
11
Opmerking: indien het apparaat
niet in een rechtopstaande
positie is opgeslagen of
vervoerd, dient men het
product 12 uur vóór gebruik in
de rechtopstaande positie te
plaatsen. Bij twijfel dient men het
product in een rechtopstaande
positie te plaatsen.
NL
Het plaatsen van de lades &
vloerplinten
1.
Plaats één set van de ladegeleiders aan beide
zijden van de kast en op de gewenste hoogte.
2.
Schuif de lade op zij plaats.
3.
Herhaal deze handeling voor de overige lades.
4.
Plaats de vloerplinten aan de onderkant van de
kast en zorg dat het vlakke deel niet in contact
is met de vloer.
Bediening
Opslag van levensmiddelen
Volg de volgende aanwijzingen voor de beste
resultaten met uw product:
•
Bewaar uitsluitend levensmiddelen in het
product wanneer het product de juiste
gebruikstemperatuur heeft gereikt.
•
Plaats geen open warme levensmiddelen of
vloeistof in het product.
•
Voedsel bedekken en inwikkelen wanneer
mogelijk.
•
Niet de interne ventilatoren in het product
blokkeren.
•
Laat de deuren niet al te lang openstaan.
Inschakelen
1.
Controleer of stroomschakelaar in de positie [O]
staat en de steker in het stopcontact zit.
2.
Zet de Power (Stroom) [I] aan. De actuele
interne temperatuur van het product wordt
weergegeven.
Bedieningspaneel
Te ontgrendelen / vergrendelen van het
toetsenbord drukt
en
samen gedurende
3 seconden. Knippert PON (Unlocked) / POF
(gesloten).
Werktemperatuur instellen
1.
Druk op de SET knop. Het display knippert.
2.
Druk op de of knoppen om de
vereiste temperatuur weer te geven.
3.
Druk op de SET knop om de
temperatuurwaarde op te slaan.
Handmatig ontdooien
De knop “aux”indrukken en gedurende
2 seconden ingedrukt houden om ontdooiing te
starten. Het ontdooiingslampje gaat aan.
Reiniging, zorg &
onderhoud
•
Reinig zo vaak mogelijk de binnenkant van het
product.
•
Gebruik géén schurende reinigingsmiddelen.
Dergelijke middelen kunnen schadelijke resten
achterlaten.
•
Reinig de deurafdichting uitsluitend met water.
•
Na reiniging altijd droogmaken.
•
Het voor reiniging gebruikte water mag niet
door het afvoergat naar de verdampingspan
stromen.
•
Ga voorzichtig te werk bij het reinigen van de
achterzijde van het product. Scherpe randen
kunnen snijwonden veroorzaken.
•
Eventuele reparaties moeten door een
technicus of een vaktechnicus worden
uitgevoerd.
12
Ontdooien apparaten ten minste
om de 3 maanden, vaker indien
nodig.
Alvorens het apparaat te
reinigen dient men de
stroomvoorziening uit te
schakelen.
Opmerking: dit is uiterst
belangrijk zodat een correcte
afvoer van condenswater wordt
gewaarborgd.

NL
Verzorging van roestvrij staal
De volgende informatie betreft het onderhoud van de roestvrijstalen buitenkant van het product.
Nooit:
•
schurende blokjes of sponsjes etc. gebruiken;
•
reinigingsmiddelen met chloor of zuur gebruiken;
•
toelaten dat voedsel, vuil, chemische reinigingsmiddelen enz. langer dan nodig op het oppervlak
achterblijven - verwijder ze onmiddellijk;
•
toelaten dat het oppervlak nat blijft.
Wel:
•
vaak schoonmaken;
•
zachte doeken en plastic sponsjes gebruiken;
•
met de draad van het metaal mee wrijven, in plaats van tegen de draad in;
•
reinigings- en poetsmiddelen gebruiken die speciaal voor roestvrij staal zijn bedoeld;
•
ervoor zorgen dat de reinigingsproducten volledig worden afgespoeld en dat het staal droog achter
blijft.
Routine-onderhoud
Reiniging van condensor
•
De condensor maakt deel uit van het koelsysteem. De condensor moet maandelijks worden
schoongemaakt.
•
Haal altijd eerst de stekker uit het stopcontact voordat routine-onderhoud wordt uitgevoerd.
•
Als de condensor niet wordt schoongemaakt, heeft dit een nadelige invloed op de prestaties en het
leven van de machine en kan de garantie ongeldig worden.
Rechtopstaande kasten
De condensor zit onder de koelkast. Deze modellen
hebben een uitneembaar filter dat met een
stofzuiger kan worden schoongemaakt.
Rechtopstaande kasten
De condensor zit boven de koelkast. Deze modellen
hebben een uitneembaar filter dat met een
stofzuiger kan worden schoongemaakt.
13

NL
Oplossen van problemen
Indien er een storing van uw product optreedt, dient u de onderstaande tabel te raadplegen
alvorens contact op te nemen met uw dealer of de Hulplijn te bellen.
Probleem
Mogelijke oorzaak
Handeling
Het apparaat werkt
niet
Het apparaat staat uit
Controleer of de stroomkabel van het
apparaat is aangesloten en of het apparaat
is ingeschakeld
Steker en kabel zijn beschadigd
Laat een technicus of een
vaktechnicus komen
De zekering in de steker is
gesprongen
Vervang de zekering in de steker
Stroomvoorziening
Controleer de stroomvoorziening
Storing interne bedrading
Laat een technicus of een
vaktechnicus komen
Het product staat
aan maar de
temperatuur is te
hoog/laag
Teveel ijs in de verdamper
Ontdooi het product
Condensor wordt geblokkeerd door
stof
Reinig de condensor
Deuren niet goed gesloten
Controleren of de deuren goed dicht en of
afdichtingen niet beschadigd zijn
Het product bevindt zich in de
nabijheid van een warmtebron of
de luchtstroom naar de condensor
wordt onderbroken
Verplaats de koelkast naar een geschiktere
locatie
Omgevingstemperatuur is te hoog
Verbeter de ventilatie of verplaats het
product naar een koelere locatie
Ongeschikte levensmiddelen worden
in het product bewaard
Verwijder alle overbodige warme
levensmiddelen of deblokkeer de ventilator
Het product wordt overbelast
Verminder de hoeveelheid opgeslagen
voedsel in het product
Het product lekt
water
Het product staat niet recht
Pas de verstelbare poten aan om het
product te nivelleren (indien nodig)
De afvoeropening wordt geblokkeerd
Maak de afvoeropening vrij van obstakels
De waterstroom naar de afvoer
wordt geblokkeerd
Maak de vloer vrij van obstakels (indien
nodig)
De waterbak is beschadigd
Laat een technicus of een
vaktechnicus komen
De druppellade stroomt over
Leeg de druppellade (indien nodig)
Het product maakt
ongebruikelijk veel
lawaai
U heeft de veiligheidsband niet
verwijderd
Verwijder de veiligheidsband
Moer/schroef los
Alle moeren en schroeven controleren en
aantrekken
Het product is niet op een effen of
stabiele ondergrond geplaatst
Installatielocatie controleren en indien
nodig veranderen
14
NL
Elektrische bedrading
De bedrading van dit apparaat is als volgt:
•
Stroomkabel (bruin) naar de aansluitklem gemarkeerd met L
•
Neutraalkabel (blauw) naar de aansluitklem gemarkeerd met N
•
Aardekabel (groen/geel) naar de aansluitklem gemarkeerd met E
Dit apparaat moet worden geaard met behulp van een adequaat aardingscircuit.
Bij twijfels raadpleeg een vakkundige elektricien.
De elektrische isolatiepunten mogen niet worden geblokkeerd. In geval van een nooduitschakeling
moeten de isolatiepunten direct toegankelijk zijn.
Afvalverwerking
De EU-richtlijnen vereisen dat koelproducten door gespecialiseerde bedrijven wordt verwerkt die gassen,
metalen en plastic componenten verwijderen of recyclen.
Raadpleeg uw plaatselijke afvalverwerkingsbedrijf voor informatie over de afvalverwerking van uw
apparaat. De plaatselijke overheden zijn niet verplicht om koelingsproducten van bedrijven als afval te
verwerken maar kunnen uw informeren waar u het apparaat kunt afgeven.
U kunt ook de helplijn bellen voor informatie over landelijke afvalverwerkingsbedrijven in de EU.
Productconformiteit
Het WEEE-logo op dit product of bijbehorende documentatie geeft aan dat het product
niet onder huisvuil valt en als zodanig ook niet mag worden verwerkt. Ter preventie
van mogelijke gevaren voor de gezondheid van personen en/of voor het milieu,
dient men dit product in overeenstemming met het voorgeschreven en milieuveilige
recyclingproces als afval te verwerken. Raadpleeg uw productleverancier of uw plaatselijk
afvalverwerkingsbedrijf voor meer informatie over de juiste afvalverwerking van dit
product.
De onderdelen van producten hebben strenge producttesten ondergaan om te
voldoen aan wettelijke regels en specificaties die door internationale, onafhankelijke en
landelijke overheden worden voorgeschreven.
Producten zijn goedgekeurd en voorzien van het volgende symbool:
15

FR
Conseils de sécurité
•
Placez l’appareil sur une surface plane, stable.
•
L’installation et les éventuelles réparations doivent être
confiées à un dépanneur / technicien qualifié. Ne retirez aucun
composant ou cache de ce produit.
•
Consultez les normes locales et nationales pour vous
conformer aux :
-lois sur l’hygiène et la sécurité au travail ;
-codes de bonnes pratiques EN ;
-précautions contre le risque d’incendie ;
-réglementations sur les branchements électriques IEE ;
-règlements sur la construction.
•
NE PAS nettoyer cet appareil avec un nettoyeur à jet / à
pression.
•
NE PAS se servir de cet appareil pour stocker des médicaments.
•
NE PAS utiliser d’appareils électriques à l’intérieur de l’appareil
(ex. chauffages, sorbetières, etc.)
•
NE PAS se tenir debout sur le châssis, les tiroirs ou les portes
ou s’y accouder.
•
NE PAS éclabousser les composants en plastique ou les joints
de porte d’huile ou de matières grasses. En cas d’éclaboussure,
nettoyez immédiatement la surface touchée.
•
Cet appareil est réservé exclusivement à une utilisation à
l’intérieur.
•
Les bouteilles qui contiennent un haut pourcentage d’alcool
doivent être bouchonnées et rangées à la verticale dans le
réfrigérateur.
•
Veillez à toujours transporter, stocker et manipuler l’appareil à
la verticale et à le déplacer en tenant la base du châssis.
•
N’oubliez jamais d’éteindre et de débrancher l’appareil avant
de procéder à son ettoyage.
•
Gardez les emballages hors de portée des enfants.
Débarrassez-vous des emballages onformément aux
règlements des autorités locales.
16

DE
•
Un cordon d’alimentation endommagé doit être remplacé par
un agent ou un technicien qualifié recommandé, pour
éviter tout danger.
Attention Risque d’ incendie
•
Ne stockez pas de substances explosives telles que les
aérosols avec un propulseur inflammable dans cet appareil.
•
Attention : Restez à l’écart de l’obstruction de toutes les
ouvertures de ventilation dans le boîtier de l’appareil ou dans
la structure pour la construction en.
•
Attention : Ne pas utiliser de dispositifs mécaniques ou
autres moyens pour accélérer le processus de dégivrage, autre
que le fabricant recommandé Ceux par.
•
Attention : Ne pas endommager le circuit frigorifique.
•
Attention : Ne pas utiliser d’appareils électriques à l’intérieur
des compartiments de stockage des aliments de l’appareil, à
moins qu’ils soient du type recommandé par le fabricant.
17

Remarque : Avant de mettre
l'appareil en service pour la
première fois, nettoyez les
clayettes et l'intérieur de
l'appareil à l'eau savonneuse.
FR
Introduction
Nous vous invitons à consacrer quelques instants à
la lecture attentive de ce mode d’emploi. L’entretien
et l’utilisation appropriés de cette machine vous
permettront de tirer le meilleur de votre produit
.
Contenu de l’emballage
Les éléments suivants vous sont fournis de série :
•
Réfrigérateur ou congélateur
•
2 clés
•
6 (simples) / 12 (doubles) supports de clayettes
•
Trois (simples) / six (doubles) clayettes
•
Plateau de récupération des eaux usées
•
Mode d’emploi
Attache une grande importance à la qualité
et au service et veille à fournir des produits en
parfait état opérationnel, parfaitement intacts au
moment de l’emballage.
Nous vous prions de contacter votre revendeur
immédiatement si vous constatez un
dommage quelconque survenu pendant le transport
du produit.
Installation
1.
Sortez l’appareil de l’emballage. Veillez à bien
retirer toute la pellicule et les revêtements de
protection de toutes les surfaces.
2.
Veillez à prévoir une distance de 20 cm entre
l’appareil est les murs ou autres objets, pour
laisser l’air circuler. Augmentez cette distance
si l’obstacle est une source de chaleur.
3.
Bloquez les freins des roulettes de l’appareil,
pour l’empêcher de bouger OU Mettez l’appareil
de niveau en réglant les pieds à vis.
Retrait de la sangle de sécurité du
compresseur
•
Posé sur des rondelles en caoutchouc, le
compresseur est situé sur le haut de l’appareil.
Dans des conditions d’utilisation normales, le
compresseur vibre.
•
Pour éviter tout risque de détérioration suite à
un excès de mouvement pendant le transport,
une sangle de sécurité en inox, vissée au-
dessus de l’appareil, cale le compresseur.
•
Cette sangle de sécurité et les deux vis de
fixation qui la relient à l’appareil, doivent être
retirées de l’appareil avant sa mise en service.
Sangle de
sécurité du
compresse
ur
Compresseur
Vis
Verrouillage / déverrouillage des
portes
Les portes sont munies d’un verrou qui vous
permet d’enfermer les aliments dans votre appareil
. Le verrouillage / déverrouillage de l’appareil
s’effectue à l’aide des clés fournies.
Installation du plateau de
récupération des eaux usées
Le plateau de récupération des eaux usées est livré
prêt à installer sous l’appareil.
Faites glisser le plateau dans les coulisses situées
sous l’appareil.
18
Remarque : dans les cas où
l'appareil a été stocké ou
déplacé autrement qu'à la
verticale, placez-le en position
debout pendant environ 12
heures avant de vous en
servir. En cas de doute, laissez
l'appareil se reposer.

Remarque : cette consigne est
vitale pour assurer l’écoulement
des résidus de condensation.
DE
Installation des clayettes et des
caches inférieurs
1.
Placez une paire de supports de clayettes
de part et d’autre de l’armoire, à la hauteur
voulue.
2.
Introduisez la clayette.
3.
Répétez cette opération pour les autres
clayettes.
4.
Posez les caches inférieurs sur le plancher de
l’armoire, en veillant à ce que le côté plat ne
touche pas au sol.
Fonctionnement
Stockage des aliments
Suivez ces consignes pour profiter au mieux de
votre appareil :
•
Ne stockez des aliments dans l’appareil que
lorsqu’il a atteint la bonne température de
fonctionnement.
•
Ne placez aucun aliment ou liquide chaud non
couverts à l’intérieur de l’appareil.
•
Autant que faire se peut, enveloppez ou
couvrez les aliments.
•
Veillez à ne pas obstruer les ventilateurs à
l’intérieur de l’appareil.
•
Evitez de laisser trop longtemps les portes
ouvertes.
Mise en service
1.
Vérifiez que l’interrupteur marche / arrêt est
réglé sur [O] et allumez la prise.
2.
Mettez l’appareil sous tension, position [I]. La
température à l’intérieur de l’appareil s’affiche.
Panneau de configuration
Pour déverrouiller / verrouiller le clavier, appuyez
sur et pendant 3 secondes.
L’affichage clignote PON (déverrouillé) / POF
(verrouillé).
Réglez la température de
fonctionnement
1.
Appuyez sur le bouton SET. L’affichage clignote.
2.
Appuyez sur les boutons
ou pour
afficher la température requise.
3.
Appuyez sur le bouton SET pour mémoriser la
température.
Degivrage manual
Appuyez sur les bouton «aux» et maintenez-
le enfonce pendant 2 secondes pour demarrer le
degivrage automatique. Le voyant de degivrage
s’allume.
Nettoyage, entretien et
maintenance
•
Nettoyez l’intérieur de l’appareil aussi souvent
que possible.
•
N’utilisez aucun produit de nettoyage abrasif.
Ces produits peuvent laisser des résidus nocifs.
•
Le joint de porte ne se nettoie qu’à l’eau.
•
Veillez à le sécher en l’essuyant après
nettoyage.
•
Ne laissez pas l’eau de nettoyage s’écouler
à travers l’orifice de vidange du bac
d’évaporation.
•
Soyez prudent quand vous nettoyez l’arrière de
l’appareil. Les bords effilés peuvent couper.
•
Toute réparation doit être confiée à un agent
ou à un technicien qualifié.
19
Dégivrer les appareils au moins
tous les trois mois, plus souvent
si nécessaire.
N’oubliez jamais d’éteindre et
de débrancher l’appareil avant
de procéder à son nettoyage.

FR
Entretien de l’inox
Veuillez lire les informations suivantes sur l’entretien de l’extérieur en inox de votre appareil :
Ne jamais :
•
Utiliser de tampons abrasifs, etc.
•
Utiliser de détergents chlorés ou acides
•
Laisser de saletés, de résidus alimentaires ou de produits chimiques de nettoyage sur la surface
pendant de longues périodes. Les nettoyer immédiatement.
•
Laisser la surface mouillée
À faire :
•
Nettoyer souvent
•
Utiliser des chiffons doux et des tampons en plastique
•
Frotter dans le sens du grain du métal et non l’inverse
•
Utiliser des détergents et produits d’entretien spécialement conçus pour l’inox
•
Veiller à bien rincer les produits de nettoyage et à essuyer l’inox.
Entretien courant
Nettoyage du condensateur
•
Le condensateur fait partie du système de réfrigération et doit être nettoyé tous les mois.
•
Toujours débrancher la source d’alimentation afin de procéder à l’entretien courant.
•
Un condensateur sale réduit les performances et la durée de vie de l’appareil et peut annuler la
garantie.
Armoires verticales
Le condensateur se trouve dans l’armoire de
réfrigération. Ces modèles sont équipés d’un
filtre amovible qui peut être nettoyé à l’aide d’un
aspirateur.
Armoires verticales
Le condensateur se trouve au dessus de l’armoire
de réfrigération. Ces modèles sont équipés d’un
filtre amovible qui peut être nettoyé à l’aide d’un
aspirateur.
20
Table of contents
Languages:
Other Adexa Freezer manuals


 Specification sheet")


