AEG FSK94858P User manual

aeg.com/register
FSK94858P
EN User Manual | Dishwasher
aeg.com\register

FOR PERFECT RESULTS
Thank you for choosing this AEG product. We have created it to give you impeccable
performance for many years, with innovative technologies that help make life simpler –
features you might not find on ordinary appliances. Please spend a few minutes reading
to get the very best from it.
Visit our website to:
Get usage advice, brochures, trouble shooter, service and repair information:
www.aeg.com/support
Register your product for better service:
www.registeraeg.com
Buy Accessories, Consumables and Original spare parts for your appliance:
www.aeg.com/shop
CUSTOMER CARE AND SERVICE
Always use original spare parts.
When contacting our Authorised Service Centre, ensure that you have the following data
available: Model, PNC, Serial Number.
The information can be found on the rating plate.
Warning / Caution-Safety information
General information and tips
Environmental information
Subject to change without notice.
CONTENTS
1. SAFETY INFORMATION................................................................................ 4
2. SAFETY INSTRUCTIONS.............................................................................. 5
3. INSTALLATION...............................................................................................7
4. PRODUCT DESCRIPTION............................................................................. 9
5. CONTROL PANEL........................................................................................ 10
6. PROGRAMME SELECTION......................................................................... 11
7. BASIC SETTINGS ........................................................................................13
8. WIRELESS CONNECTION...........................................................................17
9. BEFORE FIRST USE....................................................................................19
10. DAILY USE..................................................................................................20
11. HINTS AND TIPS........................................................................................ 23
12. CARE AND CLEANING.............................................................................. 25
13. TROUBLESHOOTING................................................................................ 29
14. TECHNICAL INFORMATION......................................................................34
15. ENVIRONMENTAL CONCERNS................................................................34
2 ENGLISH

My AEG Kitchen app
ENGLISH 3

1. SAFETY INFORMATION
Before the installation and use of the appliance, carefully read
the supplied instructions. The manufacturer is not responsible
for any injuries or damage that are the result of incorrect
installation or usage. Always keep the instructions in a safe
and accessible location for future reference.
1.1 Children and vulnerable people safety
• This appliance can be used by children aged from 8 years
and above and persons with reduced physical, sensory or
mental capabilities or lack of experience and knowledge if
they have been given supervision or instruction concerning
the use of the appliance in a safe way and understand the
hazards involved.
• Children between 3 and 8 years of age and persons with
very extensive and complex disabilities shall be kept away
from the appliance unless continuously supervised.
• Children of less than 3 years of age should be kept away
from the appliance unless continuously supervised.
• Children should be supervised to ensure that they do not
play with the appliance.
• Keep detergents away from children.
• Keep children and pets away from the appliance when the
door is open.
• Children shall not carry out cleaning and user maintenance
of the appliance without supervision.
1.2 General Safety
• This appliance is for cleaning household-type dishes and
tableware only.
• This appliance is designed for single household domestic
use in an indoor environment.
• This appliance may be used in offices, hotel guest rooms,
bed & breakfast guest rooms, farm guest houses and other
4 ENGLISH

similar accommodation where such use does not exceed
(average) domestic usage levels.
• Do not change the specification of this appliance.
• The operating water pressure (minimum and maximum)
must be between 0.05 (0.5) / 1 (10) MPa (bar).
• Follow the maximum number of 14 place settings.
• The appliance door should not be left in an open position to
avoid the tripping hazard.
• If the supply cord is damaged, it must be replaced by the
manufacturer, its Authorised Service Centre or similarly
qualified persons in order to avoid a hazard.
• WARNING: Knives and other utensils with sharp points
must be loaded in the basket with their points down or
placed in a horizontal position.
• Before any maintenance operation, deactivate the
appliance and disconnect the mains plug from the socket.
• Do not use high pressure water sprays and/or steam to
clean the appliance.
• If the appliance has ventilation openings in the base, they
must not be covered e.g. by a carpet.
• The appliance is to be connected to the water mains using
the new supplied hose-sets. Old hose sets must not be
reused.
2. SAFETY INSTRUCTIONS
2.1 Installation
WARNING!
Only a qualified person must install this
appliance.
• Remove all the packaging.
• Do not install or use a damaged
appliance.
• Follow the installation instructions supplied
with the appliance.
• Always take care when moving the
appliance as it is heavy. Always use safety
gloves and enclosed footwear.
• Do not install or use the appliance where
the temperature is less than 0 °C.
• Install the appliance in a safe and suitable
place that meets installation requirements.
• Do not use the appliance before installing
it in the built-in structure due to safety
manner.
2.2 Electrical connection
WARNING!
Risk of fire and electric shock.
ENGLISH 5

• Warning: this appliance is designed to be
installed / connected to a grounding
connection in the building.
• Make sure that the parameters on the
rating plate are compatible with the
electrical ratings of the mains power
supply.
• Always use a correctly installed
shockproof socket.
• Do not use multi-plug adapters and
extension cables.
• Make sure not to cause damage to the
mains plug and to the mains cable. Should
the mains cable need to be replaced, this
must be carried out by our Authorised
Service Centre.
• Connect the mains plug to the mains
socket only at the end of the installation.
Make sure that there is access to the
mains plug after the installation.
• Do not pull the mains cable to disconnect
the appliance. Always pull the mains plug.
• This appliance is fitted with a 13 A mains
plug. If it is necessary to change the mains
plug fuse, use only a 13 A ASTA (BS
1362) fuse (UK and Ireland only).
2.3 Water connection
• Do not cause damage to the water hoses.
• Before connection to new pipes, pipes not
used for a long time, where repair work
has been carried out or new devices fitted
(water meters, etc.), let the water flow until
it is clean and clear.
• Ensure that there are no visible water
leaks during and after the first use of the
appliance.
• If the water inlet hose is damaged,
immediately close the water tap and
disconnect the mains plug from the mains
socket. Contact the Authorised Service
Centre to replace the water inlet hose.
• Without electrical power, the water
protection system is not active. In this
case there is a risk of flooding.
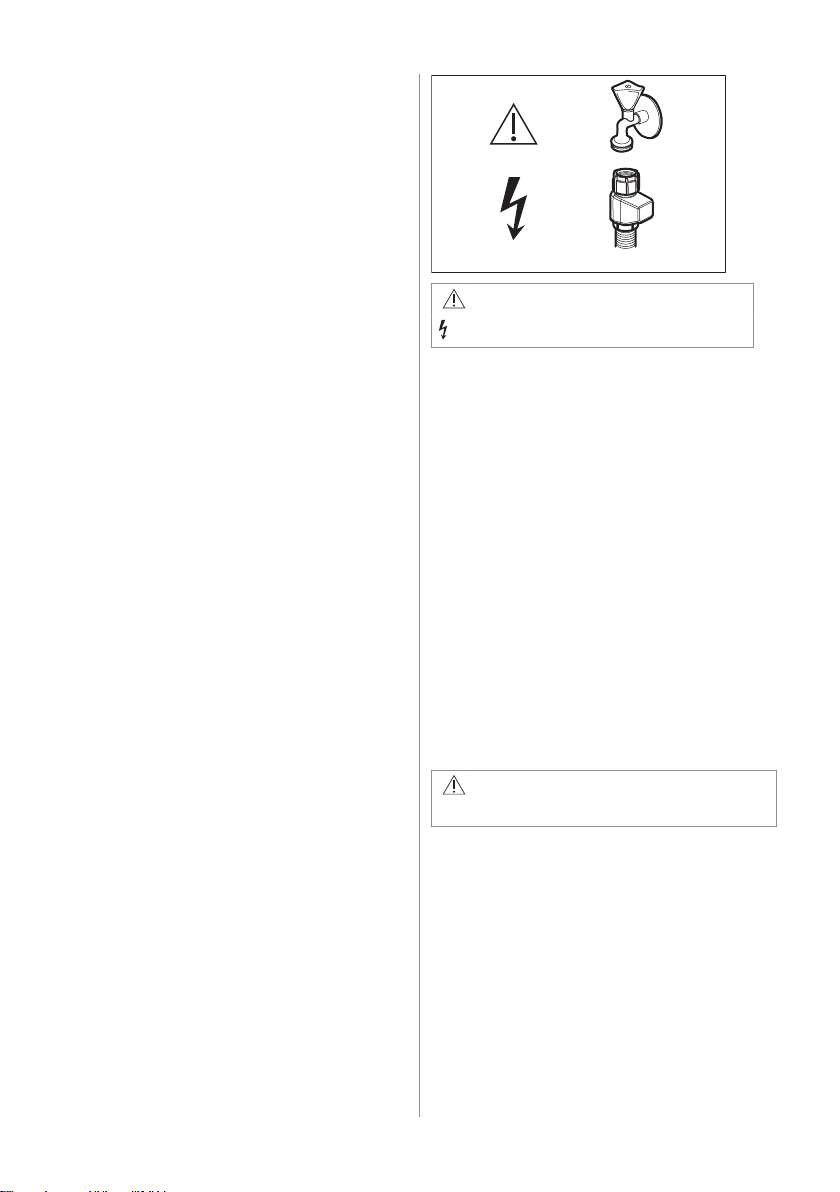
• The water inlet hose has a safety valve
and a sheath with an inner mains cable.
WARNING!
Dangerous voltage.
2.4 Use
• Do not put flammable products or items
that are wet with flammable products in,
near or on the appliance.
• Dishwasher detergents are dangerous.
Follow the safety instructions on the
detergent packaging.
• Do not drink and play with the water in the
appliance.
• Do not remove the dishes from the
appliance until the programme is
complete. Some detergent may remain on
the dishes.
• Do not store items or apply pressure on
the open door of the appliance.
• The appliance can release hot steam if
you open the door while a programme
operates.
2.5 Internal lighting
WARNING!
Risk of injury.
• This appliance has an internal lamp that
comes on when you open the door and
goes off when the door is closed.
• To replace the internal lighting, contact the
Authorised Service Centre.
2.6 Service
• To repair the appliance contact the
Authorised Service Centre. Use original
spare parts only.
• Please note that self-repair or non-
professional repair can have safety
6 ENGLISH

consequences and might void the
guarantee.
• The following spare parts will be available
for 7 years after the model has been
discontinued: motor, circulation and drain
pump, heaters and heating elements,
including heat pumps, piping and related
equipment including hoses, valves, filters
and aquastops, structural and interior
parts related to door assemblies, printed
circuit boards, electronic displays,
pressure switches, thermostats and
sensors, software and firmware including
reset software. Please note that some of
these spare parts are only available to
professional repairers, and that not all
spare parts are relevant for all models.
• The following spare parts will be available
for 10 years after the model has been
discontinued: door hinge and seals, other
seals, spray arms, drain filters, interior
racks and plastic peripherals such as
baskets and lids.
• Concerning the lamp(s) inside this product
and spare part lamps sold separately:
These lamps are intended to withstand
extreme physical conditions in household
appliances, such as temperature,
vibration, humidity, or are intended to
signal information about the operational
status of the appliance. They are not
intended to be used in other applications
and are not suitable for household room
illumination.
2.7 Disposal
WARNING!
Risk of injury or suffocation.
• Disconnect the appliance from the mains
supply.
• Cut off the mains cable and discard it.
• Remove the door catch to prevent children
and pets to get closed in the appliance.
3. INSTALLATION
WARNING!
Refer to Safety chapters.
3.1 Building in
www.youtube.com/electrolux
www.youtube.com/aeg
How to install your AEG/Electrolux
60 cm Sliding Door Dishwasher
560
1240
min. 560
3.2 Safety caps
If the furniture panel is not installed, open the
appliance door carefully to avoid the risk of
injury.
After installation, make sure the plastic
covers are locked in position. Damage or
removal of the plastic covers on the sides of
the door may impact the functionality of the
ENGLISH 7

appliance and may cause an injury. If the
plastic cover is damaged, contact the
Authorized Service Centre to replace it with
the new one.
max
5 mm
8 ENGLISH

4. PRODUCT DESCRIPTION
54
9 67
13
12
11
10
14
23
1
8
1Ceiling spray arm
2Upper spray arm
3Lower spray arm
4Filters
5Rating plate
6Salt container
7Air vent
8Rinse aid dispenser
9Detergent dispenser
10 ComfortLift basket
11 Trigger handle
12 Lower basket handle
13 Upper basket
14 Cutlery drawer
4.1 QR code on the rating plate
The rating plate has a QR code that can be
used in two ways.
Scan the QR code with the camera on your
mobile device to be redirected to My AEG
Kitchen app in the app store. Follow the
instructions on your mobile device to
download the app.
Scan the QR code with the scanner in My
AEG Kitchen app to pair the dishwasher with
your mobile device.
4.2 Internal light
The appliance has an internal lamp. It comes
on when you open the door or switch the
appliance on while the door is open.
The lamp goes off when you close the door or
switch the appliance off. Otherwise, it goes
off automatically after some time to save
energy.
ENGLISH 9

5. CONTROL PANEL
1 2 3 4 5 6
1On/Off button / Reset button
2Delay start button / Remote start button
3Display
4MY TIME program selection bar
5Option buttons (EXTRAS)
6AUTO Sense program button
5.1 Display
The display shows the following information:
• ECOMETER
• Indicators
• Programme names and durations
• Delay start time
• Information texts
5.2 ECOMETER
The ECOMETER indicates how the
programme selection impacts energy and
water consumption. The more bars are on,
the lower the consumption is.
indicates the most environmentally
friendly programme selection for a normally
soiled dishwashing load.
5.3 Indicators
Indicator Description
Rinse aid indicator. It is on when the rinse aid dispenser needs refilling. Refer to "Before first
use".
Salt indicator. It is on when the salt container needs refilling. Refer to "Before first use".
Machine Care indicator. It is on when the appliance needs internal cleaning with the Machine
Care programme. Refer to "Care and cleaning".
Drying phase indicator. It is on when you select a programme with the drying phase. It flash‐
es when the drying phase operates. Refer to "Programme selection".
Wi-Fi indicator. It is on when you activate the wireless connection. Refer to "Wireless con‐
nection".
Remote start indicator. It is on when you activate the remote start. Refer to "Daily use".
10 ENGLISH

Indicator Description
Delay Start indicator. It is on when you set the delay start. Refer to "Daily use".
Pause indicator. It flashes when you pause a wash cycle or the delay countdown by opening
the appliance door. Refer to "Daily use".
Alert indicators. They are on when a malfunction of the appliance occurs. Refer to "Trouble‐
shooting".
6. PROGRAMME SELECTION
6.1 MY TIME
MY TIME selection bar allows to select a
suitable dishwashing cycle based on
programme duration.
CA B D E
A. Quick is the shortest programme (30min)
suitable for dishwashing a load with fresh
and light soil.
B. 1h is a programme suitable for
dishwashing a load with fresh and lightly
dried-on soil.
C. 1h 30min is a programme suitable for
dishwashing and drying normally soiled
items.
D. 2h 40min is a programme suitable for
dishwashing and drying heavily soiled
items.
E. ECO is the longest programme offering
the most efficient use of energy and water
consumption for crockery and cutlery with
normal soil. This is the standard
programme for test institutes. 1)
6.2 AUTO Sense
The AUTO Sense programme automatically
adjusts the dishwashing cycle to the type of
load.
The appliance senses the degree of soil and
the amount of dishes in the baskets. It adjusts
the temperature and quantity of water as well
as the wash duration.
6.3 EXTRAS
You can adjust the programme selection to
your needs by activating EXTRAS.
ExtraSilent
ExtraSilent allows to reduce the noise
generated by the appliance. When the option
is activated, the wash pump works quietly at
a lower speed. Due to the low speed, the
programme duration is longer.
ExtraPower
ExtraPower improves the dishwashing
results of the selected programme. The
option increases the wash temperature and
duration.
GlassCare
GlassCare prevents delicate load,
glassware in particular, from damaging. The
option prevents rapid changes in the
dishwashing temperature of the selected
programme and reduces it to 45 °C.
6.4 Extras in the app
My AEG Kitchen app provides additional
dishwashing options. To access all options,
1) This programme is used to assess compliance with the UK Ecodesign for Energy-Related Products and Energy
Information Regulations.
ENGLISH 11

connect your dishwasher to the app. See
chapter "Wireless connection".
6.5 Programmes overview
Programme Dishwasher
load
Degree of
soil
Programme phases EXTRAS
Quick Crockery, cutlery Fresh • Dishwashing 50 °C
• Intermediate rinse
• Final rinse 45 °C
• AirDry 1)
• ExtraPower
• GlassCare
• ExtraHygiene 2)
Pre-rinse 3) All All • Prewash Not applicable
1h Crockery, cutlery Fresh, lightly
dried-on
• Dishwashing 60 °C
• Intermediate rinse
• Final rinse 50 °C
• AirDry 1)
• ExtraPower
• GlassCare
• ExtraHygiene 2)
1h 30min Crockery, cut‐
lery, pots, pans
Normal, lightly
dried-on
• Dishwashing 60 °C
• Intermediate rinse
• Final rinse 55 °C
• Drying
• AirDry 1)
• ExtraPower
• GlassCare
• ExtraHygiene 2)
2h 40min Crockery, cut‐
lery, pots, pans
Normal to
heavy, dried-on
• Prewash
• Dishwashing 60 °C
• Intermediate rinse
• Final rinse 60 °C
• Drying
• AirDry 1)
• ExtraPower
• GlassCare
• ExtraHygiene 2)
ECO Crockery, cut‐
lery, pots, pans
Normal, lightly
dried-on
• Prewash
• Dishwashing 50 °C
• Intermediate rinse
• Final rinse 55 °C
• Drying
• AirDry 1)
• ExtraPower
• GlassCare
• ExtraHygiene 2)
• ExtraSilent
AUTO Sense Crockery, cut‐
lery, pots, pans
All • Prewash
• Dishwashing 50 - 60 °C
• Intermediate rinse
• Final rinse 60 °C
• Drying
• AirDry 1)
Not applicable
12 ENGLISH

Programme Dishwasher
load
Degree of
soil
Programme phases EXTRAS
Machine Care For cleaning the appliance interior.
Refer to "Care and Cleaning".
• Cleaning 70 °C
• Intermediate rinse
• Final rinse
• AirDry 1)
Not applicable
1) Automatic door opening during the drying phase. Refer to "Basic settings".
2) Available only through My AEG Kitchen app.
3) Available only through My AEG Kitchen app.
Consumption values
Programme 1)2) Water (l) Energy (kWh) Duration (min)
Quick 11.0 0.620 30
Pre-rinse 5.0 0.010 15
1h 11.8 0.970 60
1h 30min 11.9 1.110 90
2h 40min 11.9 1.210 160
ECO 11.0 0.746 240
AUTO Sense 12.1 1.220 170
Machine Care 10.6 0.710 60
1) The pressure and the temperature of the water, the variations of the mains supply, the options, the quantity of
dishes and the degree of soil can change the values.
2) The values for programmes other than ECO are indicative only.
Information for test institutes
To receive the necessary information for
conducting performance tests (e.g. according
to: BS EN60436 ), send an email to:
In your request, include the product number
code (PNC) from the rating plate.
For any other questions regarding your
dishwasher, refer to the service book
provided with your appliance.
7. BASIC SETTINGS
You can configure the appliance by changing basic settings according to your needs.
Settings Values Description
Water hardness 1 - 10 (default: 5) Adjust the level of the water softener according to the
water hardness in your area.1)
Rinse aid level 0 - 6 (default: 6) Adjust the level of the rinse aid according to the neces‐
sary dosage.1)
ENGLISH 13

Settings Values Description
End sound ON
OFF (default)
Activate or deactivate the acoustic signal for the end of a
programme.1)
Auto door open ON (default)
OFF Activate or deactivate AirDry.1)
Key tones ON (default)
OFF
Activate or deactivate the sound of the buttons when
pressed.
Latest prog. selection ON
OFF (default)
Enable or disable the automatic selection of the most re‐
cently used programme and options.1)
Display on floor ON (default)
OFF Activate or deactivate TimeBeam.1)
Brightness 0 - 9 Adjust the brightness of the display.
Language List of languages (default:
English)
Set the preferred language.
Reset settings YES
NO
Reset the appliance to the factory settings. The setting
does not reset the wireless connection setup.The setting
does not reset the cycle counter.
WiFi ON
OFF (default) Activate or deactivate the wireless connection. 2)
Network Signal strength
IP
MAC
Check the information about the network connection.
Forget network YES
NO Reset the network credentials. 2)
PNC number Number Check the PNC number of your appliance.1)
Counter (cycle counter) Number Check the number of completed dishwashing cycles. The
counter restarts after reaching 65535.
1) For more details, refer to the information provided in this chapter.
2) For more details, refer to the chapter "Wireless connection".
7.1 Setting mode
How to navigate in setting mode
You can navigate in setting mode using
MY TIME selection bar.
BA C
A. Previous button
B. OK button
C. Next button
Use Previous and Next to switch between
the basic settings and to change their value.
14 ENGLISH

Use OK to enter the selected setting and to
confirm changing its value.
How to enter setting mode
You can enter setting mode before starting a
programme. You cannot enter setting mode
while the programme is running.
To enter setting mode, press and hold
simultaneously and for about 3
seconds.
• The lights related to the Previous, OK
and Next are on.
• The display shows the first available
setting and its current value.
How to change a setting
Make sure the appliance is in setting mode.
1. Use Previous or Next to select the
desired setting.
The display shows the setting name and its
current value.
2. Press OK to enter the setting.
The display shows available values.
3. Press Previous or Next to change the
value.
4. Press OK to confirm the setting.
• The new setting is saved.
• The appliance returns to the basic
settings list.
5. Press and hold simultaneously
and for about 3 seconds to exit
setting mode.
The appliance returns to the programme
selection.
The saved settings remain valid until you
change them again.
7.2 The water softener
The water softener removes minerals from
the water supply, which would have a
negative effect on the washing results and on
the appliance.
The higher the content of these minerals, the
harder your water is. Water hardness is
measured in equivalent scales.
The water softener should be adjusted
according to the hardness of the water in your
area. Your local water authority can advise
you on the hardness of the water in your
area. Set the right level of the water softener
to assure good washing results.
Water hardness
German de‐
grees (°dH)
French de‐
grees (°fH)
mmol/l mg/l (ppm) Clarke de‐
grees
Water softener
level
47 - 50 84 - 90 8.4 - 9.0 835 - 904 58 - 63 10
43 - 46 76 - 83 7.6 - 8.3 755 - 834 53 - 57 9
37 - 42 65 - 75 6.5 - 7.5 645 - 754 46 - 52 8
29 - 36 51 - 64 5.1 - 6.4 505 - 644 36 - 45 7
23 - 28 40 - 50 4.0 - 5.0 395 - 504 28 - 35 6
19 - 22 33 - 39 3.3 - 3.9 325 - 394 23 - 27 5 1)
15 - 18 26 - 32 2.6 - 3.2 255 - 324 18 - 22 4
11 - 14 19 - 25 1.9 - 2.5 185 - 254 13 - 17 3
4 - 10 7 - 18 0.7 - 1.8 70 - 184 5 - 12 2
<4 <7 <0.7 <70 < 5 1 2)
1) Factory setting.
2) Do not use salt at this level.
ENGLISH 15

Regardless of the type of detergent used,
set the proper water hardness level to
keep the salt refill indicator active.
Multi-tabs containing salt are not effective
enough to soften hard water.
Regeneration process
For the correct water softener operation, the
resin of the softener device needs to be
regenerated regularly. This process is
automatic and is the part of the normal
dishwasher operation.
When the prescribed quantity of water (see
values in the table) has been used since the
previous regeneration process, a new
regeneration process will be initiated between
the final rinse and the programme end.
Water softener level Amount of water (l)
1 250
2 100
3 62
4 47
5 25
6 17
7 10
8 5
9 3
10 3
In case of the high water softener setting, it
may occur also in the middle of the
programme, before the rinse (twice during a
programme). Regeneration initiation has no
impact on the cycle duration, unless it occurs
in the middle of a programme or at the end of
a programme with a short drying phase. In
such cases, the regeneration prolongs the
total duration of a programme by additional 5
minutes.
Subsequently, the rinsing of the water
softener that lasts 5 minutes may begin in the
same cycle or at the beginning of the next
programme. This activity increases the total
water consumption of a programme by
additional 4 litres and the total energy
consumption of a programme by additional 2
Wh. The rinsing of the softener ends with a
complete drain.
Each performed softener rinse (possible more
than one in the same cycle) may prolong the
programme duration by another 5 minutes
when it occurs at any point at the beginning
or in the middle of a programme.
All the consumption values mentioned in
this section are determined in line with
the currently applicable standard in
laboratory conditions with water hardness
2.5mmol/L (water softener: level 3)
according to the regulation: UK
Ecodesign 2021/745.
The pressure and the temperature of
water as well as the variations of the
mains supply can change the values.
7.3 Rinse aid level
The rinse aid helps to dry the dishes without
streaks and stains. It is automatically
released during the hot rinse phase. It is
possible to set the released quantity of rinse
aid.
When the rinse aid dispenser is empty, the
display shows the indicator and Rinse aid
low. If the drying results are satisfactory while
using multi-tablets only, it is possible to
deactivate the dispenser and the refill
notification. However, for best drying
performance, always use rinse aid and keep
the notification active.
To deactivate the rinse aid dispenser and the
notification, set the rinse aid level to 0.
7.4 End sound
You can activate an acoustic signal that
sounds when the programme is completed.
Acoustic signals sound also when a
malfunction of the appliance occurs. It is
not possible to deactivate these signals.
16 ENGLISH

7.5 AirDry
AirDry improves the drying results. The
appliance door opens automatically during
the drying phase and remains ajar.
AirDry is automatically activated with all
programmes.
The duration of the drying phase and the door
opening time vary depending on the selected
programme and options.
When AirDry opens the door, the display
shows the remaining time of the running
programme.
CAUTION!
Do not try to close the appliance door
within 2 minutes after automatic opening.
This can cause damage to the appliance.
CAUTION!
If children have access to the appliance,
we advise to deactivate AirDry. The
automatic opening of the door may pose
a danger.
7.6 Latest programme selection
You can set the automatic selection of the
most recently used programme and options.
The latest programme that was completed
before the appliance deactivation is saved. It
is then selected automatically after you
activate the appliance.
When the latest programme selection is
disabled, the default programme is ECO.
7.7 TimeBeam
TimeBeam displays the following information
on the floor below the appliance door:
• The programme duration when the
programme begins.
•0:00 and CLEAN when the programme is
completed.
•DELAY and the countdown duration when
the delay start begins.
• An alarm code when the appliance has a
malfunction.
When AirDry opens the door, TimeBeam
is off. To check the remaining time of the
running programme, look at the control
panel display.
7.8 PNC number
If you contact an Authorised Service Centre,
you need to provide the product number code
(PNC number) of your appliance.
The number can be found on the rating plate
on the appliance door. You can also check
the number on the display. Select PNC
number from the setting list to check the
number.
8. WIRELESS CONNECTION
You can connect your dishwasher to the
home wireless network and then link it to your
mobile devices in My AEG Kitchen app. This
functionality allows you to remotely control
and monitor your dishwasher.
ENGLISH 17

My AEG Kitchen app is available for
download from the app store on your mobile
device. You can scan the QR code from the
rating plate to be redirected to the app (see
chapter "Product description").
The app is compatible with iOS and Android
operating systems. Check the compatible
versions of the operating systems in the app
store.
Wi-Fi module parameters
Wi-Fi module NIUS-SA
Frequency 2.412 - 2.472 GHz
Protocol IEEE 802.11 b-g-n
Max Power <20 dBm
Encryption WPA, WPA2
8.1 How to connect the dishwasher
to the network and to the app
To connect your dishwasher, you need:
• Wireless network with the Internet
connection.
• Mobile device connected to the wireless
network.
1. Launch My AEG Kitchen app on your
mobile device and follow the instructions
in the app. When prompted in the app,
activate the wireless connection in the
dishwasher.
2. To activate the wireless connection,
follow one of the two methods:
• Press and hold simultaneously and
for 2 seconds.
• Enter setting mode, select the setting
WiFi and change its values to ON.
The display shows Wi-Fi is starting up and
then Wi-Fi is ready.
3. When prompted, enter the home network
credentials in My AEG Kitchen app.
If the credentials are not entered, the
dishwasher deactivates the wireless
connection after some time.
If the connection is successful, the
dishwasher displays Connection
successful. Refer to "Daily use" chapter to
activate remote start.
If the connection is unsuccessful or the
display shows Updating, refer to
"Troubleshooting".
If you want to cancel the procedure, press
any active button and confirm the
cancellation. Alternatively, deactivate and
activate the appliance.
8.2 How to deactivate the wireless
connection
Enter setting mode, select the setting WiFi
and change its value to OFF.
8.3 How to activate the wireless
connection
Enter setting mode, select the setting WiFi
and change its value to ON.
Refer to "Daily use" to activate the remote
start.
8.4 How to reset the network
credentials
If you want to connect to a different wireless
network or update the credentials of the
current network, reset the network
credentials.
Enter setting mode and activate the setting
Forget network.
The indicator is off.
Connect the dishwasher to the network and
to the app to enter new network credentials.
Refer to the instructions provided earlier in
this chapter.
18 ENGLISH

9. BEFORE FIRST USE
1. Make sure that the current level of the
water softener agrees with the
hardness of the water supply. If not,
adjust the level of the water softener.
2. Fill the salt container.
3. Fill the rinse aid dispenser.
4. Open the water tap.
5. Start the programme Quick to remove
any residuals from the manufacturing
process. Do not use detergent and do not
put dishes in the baskets.
After starting the programme, the appliance
recharges the resin in the water softener for
up to 5 minutes. The washing phase starts
only after this procedure is complete. The
procedure is repeated periodically.
9.1 The salt container
CAUTION!
Use only regeneration salt for
dishwashers. Do not use kitchen salt.
The salt is used to recharge the resin in the
water softener and to assure good washing
results in daily use.
How to fill the salt container
Make sure that the ComfortLift basket is
empty and locked in the raised position.
1. Turn the cap of the salt container
counterclockwise and remove it.
2. Put 1 litre of water in the salt container
(only for the first time).
3. Fill the salt container with dishwasher salt
(until it is full).
4. Carefully shake the funnel by its handle to
get the last granules inside.
5. Remove the salt around the opening of
the salt container.
6. Turn the cap clockwise to close the salt
container.
CAUTION!
Water and salt can come out of the salt
container when you fill it. To prevent
corrosion, fill the salt container and then
immediately start a complete
dishwashing cycle with detergent.
ENGLISH 19

9.2 How to fill the rinse aid
dispenser
AB
C
CAUTION!
The compartment (B) is for rinse aid only.
Do not fill it with detergent.
CAUTION!
Only use rinse aid designed specifically
for dishwashers.
1. Open the lid (C).
2. Fill the dispenser (B) until the rinse aid
reaches the marking ''MAX''.
3. Remove the spilled rinse aid with an
absorbent cloth to prevent excessive
foam formation.
4. Close the lid. Make sure that the lid locks
into position.
Fill the rinse aid dispenser when the
indicator (A) is clear.
10. DAILY USE
1. Open the water tap.
2. Press and hold until the appliance is
activated.
3. Fill the salt container if it is empty.
4. Fill the rinse aid dispenser if it is empty.
5. Load the baskets.
6. Add the detergent.
7. Select and start a programme.
8. Close the water tap when the programme
is complete.
10.1 ComfortLift
CAUTION!
Do not sit on the rack or put excessive
pressure on the locked basket.
CAUTION!
Do not exceed the max load capacity of
18 kg.
CAUTION!
Make sure that items do not stick out of
the basket frame as it can cause damage
to the items and the ComfortLift
mechanism.
The ComfortLift mechanism allows to lift the
lower rack up (to the second rack level) and
put it down to load and unload dishes easily.
To load or unload the lower basket:
1. Lift the basket by pulling the rack out of
the dishwasher by the basket handle. The
trigger handle should not be used.
20 ENGLISH
Table of contents
Other AEG Dishwasher manuals

AEG
AEG FFE73700PM User manual

AEG
AEG OKO FAVORIT 80800 User manual

AEG
AEG Favorit 146 S User manual

AEG
AEG FSK73907Z User manual

AEG
AEG FAVORIT34502VIO User manual

AEG
AEG FAVORIT 88060 VI User manual

AEG
AEG FAVORIT 60860 Operation manual

AEG
AEG FAVORIT 65000 I User manual

AEG
AEG FSS52615Z User manual

AEG
AEG FSE83727P User manual

AEG
AEG FAVORIT 55002 IMOP User manual

AEG
AEG FSE84727P User manual

AEG
AEG FSE52707P User manual

AEG
AEG FSK63600P User manual

AEG
AEG FAVORIT 55030 User manual

AEG
AEG FAVORIT F65000W0P User manual

AEG
AEG FSB53617Z User manual

AEG
AEG OKO FAVORIT 80850 i User manual

AEG
AEG FSK83727P User manual

AEG
AEG FAVORIT 35410 VI User manual