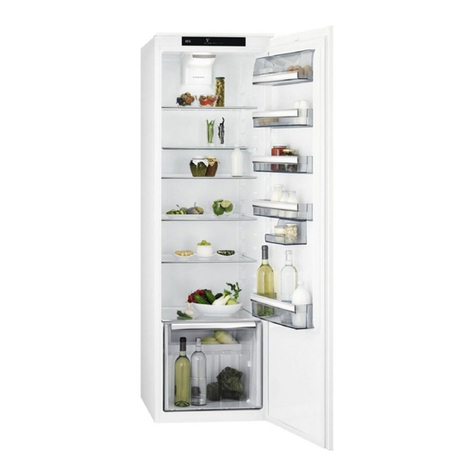
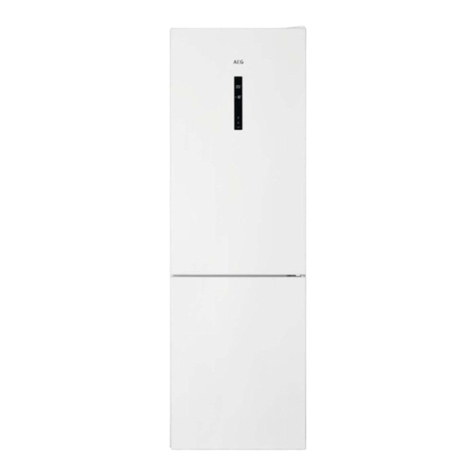
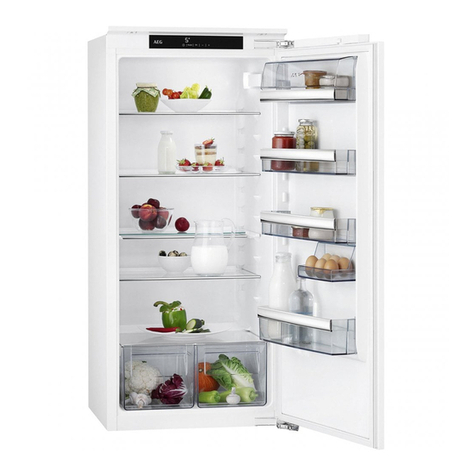
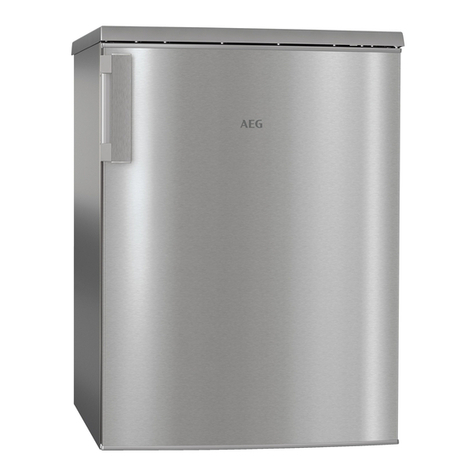
AEG RCB36102NX User manual

&.$(*D
11-27
ᄲ
&.$(*D
ۥஶ
姚考然
Jഀᄜ
Ӧ۱

EN User Manual
USER
MANUAL
5&%1;

www.aeg.com1
FOR PERFECT RESULTS
Thank you for choosing this AEG product. We have created it to give you impec-
cable performance for many years, with innovative technologies that help make
life simpler features you might not find on ordinary appliances. Please spend
afew minutes reading to get the very best from it.
Visit our website for:
Get usage advice, brochures, trouble shooter, service information:
www.aeg.com
Register your product for better service:
www.registeraeg.com
Buy Accessories, Consumables and Original spare parts for your
appliance: www.aeg.com/shop
CUSTOMER CARE AND SERVICE
Always use original spare parts.
When contacting our Authorised Service Centre, ensure that you have the following
data available: Model, PNC, Serial Number.
The information can be found on the rating plate.
Warning / Caution-Safety information
General information and tips
Environmental information
Subject to change without notice.
CONTENTS
SAFETY INFORMATION .............................................................................
SAFETY INSTRUCTIONS ...........................................................................
ENVIRONMENT CONCERNS.....................................................................
DESCRIPTION OF THE APPLIANCE .......................................................
INSTALLING YOUR NEW APPLIANCE .....................................................
,167$//$7,21 ..........................................................................
',6326$/2)7+($33/,$1&(.................................................................. 1
7(&+1,&$/'$7$ ................................................................................ 1
12,6(........................................................ 1
'$,/<US(.................................................................................................. 9
7528%/(6+227,1* ............................................................................... 1
1.
2.
3.
4.
5.
6.
7.
8.
9.
10.
11.

ENGLISH 2
1.
SAFETY INFORMATION
Before the installation and use of the appliance , carefully read the supplied
instructions . The manufacturer is not responsible if an incorrect installation
and use causes injuries and damages . Always keep the instructions with the
appliance for future reference.
1.1 Children and vulnerable people safety
• This appliance can be used by children aged from 8 years and above and
persons with reduced physical, sensory or mental capabilities or lack of
experience and knowledge if they have been given supervision or instruction
concerning use of the appliance in a safe way and understand the hazards
involved .
• Do not let children play with the appliance.
• Cleaning and user maintenance shall not be made by childre without
supervision.
• Keep all packaging away from children.
1.2 General Safety
• This appliance is intended to be used in household and similar applications
such as: - Farm houses; staff kitchen areas in shops, offices and other working
environments -By clients in hotels, motels, bed and breakfast and other
residential type environments
• Kee ventilation openings, in the appliance enclosure or in the built- in structure,
clear of obstruction.
• Do not use mechanical devices or other means to accelerate the defrosting
process, other than those recommended by the manufacturer. • Do not damage
the refrigerant circuit
• Do not use electrical appliances inside the food storage compartments of the
appliance, unless they are of the type recommended by the manufacturer
• Do not use water spray and steam to clean the appliance . • Clean the appliance
with a moist soft cloth. Only use neutral detergents . Do not use abrasive products ,
abrasive cleaning pads, solvents or metal objects.
• Do not store explosive substances such as aerosol cans with a flammable
propellant in this appliance.
• If the supply cord is damaged, it must be replaced by the manufacturer, its
service agent or similarly qualified persons in order to avoid a hazard.
• If the appliance is equipped with an Ice maker or a water dispenser, fill them
with potable water only. • If the appliance requires a water connection, connect it to
potable water supply only.
• The inlet water pressure (minimum and maximum) must be between 1 bar (0,1
MPa) and 10 bar (1 MPa)

3
2.1 Installation 2.2 Electrical connection
2. SAFETY INSTRUCTIONS
WARNING! Only a qualified
person must install this appliance.
Remove all the packaging. • Do
not install or use a damaged
appliance. • Obey the installa- tion
instruction supplied with the appli-
ance. • Always be careful when
you move the appliance because it
is heavy. Always wear safety
gloves. • Make sure the air can
circulate around the appli- ance. •
Wait at least 4 hours before
connecting the appliance to the
power supply. This is to allow the
oil to flow back in the compressor .
• Do not install the appliance close
to radiators or cookers, oven or
hobs. • The rear of the appliance
must stand against the wall. • Do
not install the appliance where
there is direct sunlight. • Do not
install this appliance in areas that
are too humid or too colds , such
as the construction appendices ,
garages or wine cellars. • When
you move the appliance, lift it by
the front edge to avoid scratching
the floor.
WARNING! Risk of fire and
electrical shock. The appliance
must be earthed • Make sure that
the electrical information on the
rating plate agrees with the power
supply. If not, contact an electri-
cian. • Always use a correctly
installed shock- proof socket. • Do
not use multi-plug adapters and
extension cables. • Make sure not
to cause damage to the electri- cal
components (e.g. mains plug,
mains cable, compressor). •
Contact the Service or an electri-
cian to change the electrical
components. • The mains cable
must stay below the level of the
mains plug. Connect the mains
plug to the mains socket only at
the end of the installation. Make
sure that there is access to the
mains plug after the installation.
Do not pull the mains cable to
disconnect the appliance. Always
pull the mains plug.
www.aeg.com

ENGLISH 4
3. ENVIRONMENT CONCERNS
Recycle the materials with the symbol .
Put the packaging in applicable
containers to recycle it. Help protect
the environment and human health
and to recycle waste of electrical and
electronic appliances. Do not dispose
appliancesmarked with the symbol
with the household waste. Return
the product to your local recycling
facility or contact your municipal office.
Connect the mains plug to the
mains socket only at the end of the
installation. Make sure that there
is access to the mains plug after
the installation.
Do not pull the mains cable to
disconnect the appliance. Always pull
the mains plug.
2.3 Use
WARNING!
2.4 Internal light
•The type of lamp used for this
appliance is not suitable for household
room illumination.
2.5 Care and cleaning
WARNING!
WARNING!
Risk of injury or damage to
the appliance.
Before maintenance, deactivate the
appliance and disconnect the mains plug
from the mains socket.
This appliance contains
hydrocarbons in the cooling unit.
Only a qualified person must do the
maintenance and the recharging of the
unit.
Regularly examine the drain of
the appliance and if necessary, clean it.
If the drain is blocked, defrosted water
collects in the bottom of the appliance.
2.6 Disposal
5LVNRILQMXU\EXUQVHOHFWULFDOVKRFNRU
ILUH'RQRWFKDQJHWKHVSHFLILFDWLRQRIWKLV
DSSOLDQFHವ'RQRWSXWHOHFWULFDODSSOLDQF
HVHJLFHFUHDPPDNHUVLQWKH
DSSOLDQFHXQOHVVWKH\DUHVWDWHGDSSOLFD
EOHE\WKHPDQXIDFWXUHUವ%HFDUHIXOQRW
WRFDXVHGDPDJHWRWKHUHIULJHUDQWFLUFXLW
,WFRQWDLQVLVREXWDQH5DDQDWXUDO
JDVZLWKDKLJKOHYHORIHQYLURQPHQWDO
FRPSDWLELOLW\7KLVJDVLVIODPPDEOHವ,I
GDPDJHRFFXUVWRWKHUHIULJHUDQWFLUFXLW
PDNHVXUHWKDWWKHUHDUHQRIODPHVDQG
VRXUFHVRILJQLWLRQLQWKHURRP9HQWLODWH
WKHURRPವ'RQRWOHWKRWLWHPVWRWRXFK
WKHSODVWLFSDUWVRIWKHDSSOLDQFHವ'RQRW
SXWVRIWGULQNVLQWKHIUHH]HUFRPSDUWPHQW
7KLVZLOOFUHDWHSUHVVXUHRQWKHGULQN
FRQWDLQHUವ'RQRWVWRUHIODPPDEOHJDV
DQGOLTXLGLQWKHDSSOLDQFHವ'RQRWSXW
IODPPDEOHSURGXFWVRULWHPVWKDWDUHZHW
ZLWKIODPPDEOHSURGXFWVLQQHDURURQWKH
DSSOLDQFHವ'RQRWWRXFKWKHFRPSUHVVRU
RUWKHFRQGHQVHU7KH\DUHKRWವ'RQRW
UHPRYHRUWRXFKLWHPVIURPWKHIUHH]HU
FRPSDUWPHQWLI\RXUKDQGVDUHZHWRU
GDPSವ'RQRWIUHH]HDJDLQIRRGWKDWKDV
EHHQWKDZHGವ2EH\WKHVWRUDJH
LQVWUXFWLRQVRQWKHSDFNDJLQJRIIUR]HQ
IRRG
5LVNRILQMXU\RUVXIIRFDWLRQ'LVFRQQHFW
WKHDSSOLDQFHIURPWKHPDLQVVXSSO\
ವ&XWRIIWKHPDLQVFDEOHDQGGLVFDUGLW
ವ5HPRYHWKHGRRUWRSUHYHQWFKLOGUHQ
DQGSHWVWREHFORVHGLQVLGHRIWKH
DSSOLDQFH
ವ 7KHUHIULJHUDQWFLUFXLWDQGWKHLQVXODWLRQ
PDWHULDOVRIWKLVDSSOLDQFHDUH
R]RQHIULHQGO\
ವ 7KHLQVXODWLRQIRDPFRQWDLQVIODPPDEOH
JDV&RQWDFW\RXUPXQLFLSDODXWKRULW\IRU
LQIRUPDWLRQRQKRZWRGLVFDUGWKH
DSSOLDQFHFRUUHFWO\ವ'RQRWFDXVH
GDPDJHWRWKHSDUWRIWKHFRROLQJXQLWWKDW
LVQHDUWKHKHDWH[FKDQJHU
5www.aeg.com
4. DESCRIPTION OF THE APPLIANCE
Note: Due to constant improvement of our products, your refrigerator may be slightly
different from the above illustration, but its functions and using methods remain the
same.
Note: To get the best energy efficiency of this product, please place all shelves,
drawers and baskets on their original position as the illustration above.
7KHUPRVWDWDQG/LJKW
/HYHOLQJ)HHW

ENGLISH 6
5. INSTALLING YOUR NEW APPLIANCE
/HIW'RRU+LQJH&RYHU[
Door Reversibility
Before reversing the door, please be prepared
below tools and material: straight screwdriver,
cross
screwdriver, spanner and the components
included in the poly bag:
8QVFUHZWRSKLQJHFRYHUDQGWKHQXQVFUHZWKH
WRSKLQJH7KHQOLIWXSSHUGRRUDQGSODFHLWRQD
VRIWSDGWRDYRLGVFUDWFKDQGGDPDJH
5HPRYHWKHWRSOHIWVFUHZFRYHU
3. Take off the upper door, take out the screw from
the middle hinge by cross screwdriver,then take
off the lower door.
4. Laying down the refrigerator, take out the adjusting
feet as below, then take off the lower hingeby cross
screwdriver.
5. Adjusting the hinge core position of the lower hinge
and upper hinge to opposite position
6. Install the lower hinge under to the refrigerator like
below, screwing in the adjusting feet, makesure the
position in horizon.
7. Install the lower door, adjust and fix the middle hinge
onto the cabinet.
3ODFHWKHXSSHUGRRUEDFNRQ(QVXUHWKHGRRULVDOLJQHG
KRUL]RQWDOO\DQGYHUWLFDOO\VRWKDWWKHVHDODUHFORVHGRQDOO
VLGHVEHIRUHILQDOO\WLJKWHQLQJWKHWRSKLQJH7KHQLQHUW
WKHWRSKLQJHDQGVFUHZLWWRWKHWRSRIXQLWDQGWKHQIL[
KLQJHFRYHULQDFFHVVDU\EDJE\VFUHZ
)L[WKHVFUHZFRYHU

7www.aeg.com
.

ENGLISH 8

9www.aeg.com
9KZ
6XSHU9[VKXY
$
(QYLURQPHQW7HPSHUDWXUHWR5HFRPPHQGHG7HPSHUDWXUH
6XPPHU!ȭȭˈȭˈȭ
1RUPDO ȭ
:LQWHUȭȭȭȭ
6HWWLQJ3DQHO
%XWWRQ
$6H EXWWRQ
3UHVVWKLVEXWWRQWRVHOHFWUXQQLQJWHPSHUDWXUHDQG³6XSHU´PRGH
,QGLFDWRUV
6XSHUPRGHLQGLFDWRUWKHOLJKWLVRQZKHQ6XSHUPRGHLVVHOHFWHG
6HWWLQJ7HPSHUDWXUHLQGLFDWRUVRIIULGJHFRPSDUWPHQW7KHOLJKWHGLQGLFDWRU
PHDQVUHODWHGWHPSHUDWXUHLVVHOHFWHG
6XSHUPRGH
$FWLYDWH6XSHUPRGH
:KHQ\RXSODQWRIUHH]HIRRGLQDVKRUWWLPH\RXFDQVHOHFW6XSHUPRGH
.HHSSUHVVLQJ6H EXWWRQ$IRURYHUVHFRQGV6XSHUPRGHZLOOEHDFWLYDWHG,QGLFDWRU
XQGHU6XSHUZLOOEHOLJKWHG
$WWKHVDPHWLPHWKHWHPSHUDWXUHLQGLFDWRURIWKHIULGJHFRPSDUWPHQWZLOOQRWFKDQJH
4XLWIURP6XSHUPRGH
y3UHVV6HWEXWWRQ$IRURYHUVHFRQGV
y2UWKHDSSOLDQFHZLOODXWRPDWLFDOO\UHVWRUHWRRULJLQDOVHWWLQJZKHQ6XSHUPRGHKDV
UXQQLQJIRUPRUHWKDQKRXUV
,Q6XSHUPRGHWKHWHPSHUDWXUHVHWWLQJRIIULGJHFRPSDUWPHQWFDQQRWEHFKDQJHG
7HPSHUDWXUHVHWWLQJRIWKH)ULGJH&RPSDUWPHQW
,QQRUPDOXVLQJPRGHQRW6XSHUPRGHSUHVV6H EXWWRQ$WRDGMXVWVHWWLQJ
WHPSHUDWXUHRIIULGJHFRPSDUWPHQWLQDF\FOHRI³ćˈćˈćˈćˈć´
8VHIXOKLQWV
3OHDVHIROORZWKHEHORZWDEOHWRFKRRVHVHWWLQJWHPSHUDWXUHRIIULGJH

ENGLISH 10
0HPRU\IXQFWLRQDIWHU3RZHURII
7KHDSSOLDQFHZLOODXWRPDWLFDOO\UHVWDUWWRUXQLQSUHYLRXVPRGHDIWHUDSRZHUIDLOXUH
7HPSHUDWXUH&RQWURORIWKH)UHH]HU&RPSDUWPHQW
7KHIUHH]HU HPSHUD XUHVH LQJVOLGHU
,8++@+8)54:852

11 www.aeg.com
Using the Water Dispenser
The water dispenser allows you to get chilled water without opening the fridge compartment door
Caution!
Do not fill water tank with any liquid other than
drinking water, beverages such as fruit juice,
carbonated fizzy soda drinks, alcoholic drinks
are not suitable for use with water dispenser.
If such liquids are filled, the water dispenser
may be malfunction and may be damaged
beyond repair. Some chemical ingredients
and additives in such drinks / beverages may
beyond repair. Some chemical ingredients
and additives in such drinks / beverages may
also attack and damage water tank.Only use
clean pure drinking water.Capacity of the tank
is 2 L, do not over fill

Before using the appliance for the first time, wash the
interior and all internal accessories with lukewarm
water and some neutral soap so as to remove the typical
smell of a brand new product, then dry thoroughly.
Important! Do not use detergents or abrasive powders, as
these will damage the finish.
To permit storage of food packages of various sizes,the
door balconies can be placed at different heights.To
make these adjustments proceed as follows: gradually
pull the balcony in the direction of the arrows until it
comes free,then reposition as required.
To help you make the most of the freezing process,
here are some important hints:
the maximum quantity of food which can be frozen in
24 hrs. is shown on the rating plate;
the freezing process takes 24 hours. No further food to
be frozen should be added during this period;
only freeze top quality, fresh and thoroughly cleaned,
foodstuffs;
prepare food in small portions to enable it to be rapidly
and completely frozen and to make it possible
subsequently to thaw only the quantity required;
wrap up the food in aluminium foil or polythene and
make sure that the packages are airtight;
do not allow fresh, unfrozen food to touch food which is
already frozen, thus avoiding a rise in
temperature of the latter;
lean foods store better and longer than fatty ones; salt
reduces the storage life of food;
water ices, if consumed immediately after removal from
the freezer compartment, can possibly cause
the skin to be freeze burnt;
it is advisable to show the freezing in date on each
individual pack to enable you removal from the
freezer compartment, can possibly cause the skin to be
freeze burnt;
it is advisable to show the freezing in date on each
individual pack to enable you to keep tab of the
storage time.
The freezer compartment is suitable for freezing fresh
food and storing frozen and deep-frozen food for
a long time.
Place the fresh food to be frozen in the bottom
compartment.
The maximum amount of food that can be frozen in 24
hours is specified on the rating plate.
The freezing process lasts 24 hours: during this period do
not add other food to be frozen.
When first starting-up or after a period out of use. Before
putting the product in the compartment let the
appliance run at least 2 hours on the higher settings.
Important! In the event of accidental defrosting, for
example the power has been off for longer than the
value shown in the technical characteristics chart under
“rising time”, the defrosted food must be
consumed quickly or cooked immediately and then
re-frozen (after cooked).
Deep-frozen or frozen food, prior to be used, can be
thawed in the freezer compartment or at room
temperature, depending on the time available for this
operation.
Small pieces may even be cooked still frozen, directly
from the freezer. In this case, cooking will take
longer.
The walls of the refrigerator are equippped with a series
of runners so that the shelves can be positioned as
desired.
Thawing
Storing frozen food
Freezing fresh food
Daily use
Freezing fresh food
Positioning the door balconies
Helpful hints and tips
Hints for freezing
First use
Accessories
Movable shelves
1www.aeg.com

To obtain the best performance from this appliance,
you should:
make sure that the commercially frozen foodstuffs were
adequately stored by the retailer;
be sure that frozen foodstuffs are transferred from the
food store to the freezer in the shortest possible
time;
not open the door frequently or leave it open longer
than absolutely necessary.
Once defrosted, food deteriorates rapidly and cannot
be refrozen.
Do not exceed the storage period indicated by the food
manufacture.
Hints for fresh food refrigeration
To obtain the best performance:
Do not store warm food or evaporating liquids in the
refrigerator
Do cover or wrap the food, particularly if it has a strong
flavour
To obtain the best performance:
Do not store warm food or evaporating liquids in the
refrigerator
Do cover or wrap the food, particularly if it has a strong
flavour
Useful hints:
Make (all types): wrap in polythene bags and place on the
glass shelves above the vegetable drawer.
For safety, store in this way only one or two days at the
most.
Cooked foods, cold dishes, etc...: these should be
covered and may be placed on any shelf.
Fruit and vegetables: these should be thoroughly cleaned
and placed in the special drawer(s) provided.
butter and cheese: these should be placed in special
airtight containers or wrapped in aluminum foil or
polythene bags to exclude as much air as possible.
Milk bottle: these should have a cap and should be stored
in the balconies on the door.
Bananas, potatoes, onions and garlic, if not packed, must
not be kept in the fridge.
For hygienic reasons the appliance interior, including
interior accessories, should be cleaned regularly.
Caution! The appliance may not be connected to the
mains during cleaning. Danger of electrical
shock! Before cleaning switch the appliance off and
remove the plug from the mains, or switch off or
turn out the circuit breaker or fuse. Never clean the
appliance with a steam cleaner. Moisture could
accumulate in electrical components, danger of electrical
shock! Hot vapors can lead to the damage
of plastic parts. The appliance must be dry before it is
placed back into service.
Important! Ethereal oils and organic solvents can attack
plastic parts, e.g. lemon juice or the juice form
orange peel, butyric acid, cleanser that contain acetic
acid.
Do not allow such substances to come into contact the
appliance parts.
Do not use any abrasive cleaners
Remove the food from the freezer. Store them in a cool
place, well covered.
Switch the appliance off and remove the plug from the
mains, or switch off or turn out the circuit breaker
of fuse.
Clean the appliance and the interior accessories with a
cloth and lukewarm water. After cleaning wipe
with fresh water and rub dry.
After everything is dry place appliance back into service.
Hints for storage of frozen food
Hints for fresh food refrigeration
Hints for refrigeration
ENGLISH 1

1 www.aeg.com

ENGLISH 1
DISPOSAL OF THE APPLIANCE
The refrigerator is built from reusable materials. It must be disposed of incompliance
with current local waste disposal regulations. The appliance contains a small
quantity of refrigerant (R600a) in the refrigerant circuit. For your safety please
refer to the section of "the refrigerant and risk of fire" in this Instruction Manual
before scrapping the appliance. Please cut off the power cord to make the
refrigerator unusable and remove the door seal and lock. Please be cautious of the
cooling system and do not damage it by puncturing the refrigerant container and/or
bending the tubing, and/or scratching of the surface coating.
Correct Disposal of this product
This symbol on the product or in its packing indicates that this product may
not be treated as household waste. Instead, it should be taken to the ap-
propriate waste collection point for the recycling of electrical and electronic
equipment. By ensuring this product is disposed of correctly, you will help
prevent potential negative consequences for the environment and human
health, which could otherwise be caused by the inappropriate waste han-
dling of this product. For more detailed information about the recycling of
this product, please contact your local council your household waste dispos-
al service, or the shop where you purchased the product.
TECHNICAL DATA
Dimension
Height mm
Width
Height mm
Width
Height mm
Width mm
Depth
mm
Depth mm
Rising Time 18 h
Voltage 220-240 V
Frequency 50 Hz
The technical information are situated in
the rating plate on the internal left side
of the appliance and in the energy label.
mm
Rising Time 18 h
Voltage 220-240 V
Frequency 50 Hz
The technical information are situated in
the rating plate on the internal left side
of the appliance and in the energy label.
mm
Rising Time 18 h
Voltage 220-240 V
Frequency 50 Hz
The technical information are situated in
the rating plate on the internal left side
of the appliance and in the energy label.
mm
Rising Time 18 h
Voltage 220-240 V
Frequency 50 Hz
The technical information are situated in
the rating plate on the internal left side
of the appliance and in the energy label.
mm
Rising Time 18 h
Voltage 220-240 V
Frequency 50 Hz
The technical information are situated in
the rating plate on the internal left side
of the appliance and in the energy label.
mm
Rising Time 18 h
Voltage 220-240 V
Frequency 50 Hz
The technical information are situated in
the rating plate on the internal left side
of the appliance and in the energy label.
mm
Rising Time 18 h
Voltage 220-240 V
Frequency 50 Hz
The technical information are situated in
the rating plate on the internal left side
of the appliance and in the energy label.
mm
Rising Time 18 h
Voltage 220-240 V
Frequency 50 Hz
The technical information are situated in
the rating plate on the internal left side
of the appliance and in the energy label.
mm
Rising Time 18 h
Voltage 220-240 V
Frequency 50 Hz
The technical information are situated in
the rating plate on the internal left side
of the appliance and in the energy label.
mm
Rising Time 18 h
Voltage 220-240 V
Frequency 50 Hz
The technical information are situated in
the rating plate on the internal left side
of the appliance and in the energy label.
mm
Rising Time 18 h
Voltage 220-240 V
Frequency 50 Hz
The technical information are situated in
the rating plate on the internal left side
of the appliance and in the energy label.
mm
Rising Time 18 h
Voltage 220-240 V
Frequency 50 Hz
The technical information are situated in
the rating plate on the internal left side
of the appliance and in the energy label.
mm
Rising Time 18 h
Voltage 220-240 V
Frequency 50 Hz
The technical information are situated in
the rating plate on the internal left side
of the appliance and in the energy label.
600
1850
600
600
600
85

1www.aeg.com

ENGLISH 1

1 www.aeg.com
Table of contents
Other AEG Refrigerator manuals

AEG
AEG SANTO K 7 10 43-4 I User manual

AEG
AEG RTB411E1AW User manual

AEG
AEG SCZ71800F0 User manual

AEG
AEG RKE63826MW User manual

AEG
AEG S74300DSM0 User manual

AEG
AEG S65300DNW0 User manual

AEG
AEG 1832 U User manual

AEG
AEG SKS58800S2 User manual

AEG
AEG SANTO U86000-4I Specification sheet

AEG
AEG RCB636E3MW User manual

AEG
AEG SDB614F1AS User manual

AEG
AEG SKB818E1DS User manual

AEG
AEG SCT91800S0 User manual

AEG
AEG RCB732E4MG User manual

AEG
AEG Automatic refrigerators User manual

AEG
AEG SKE6881VAS User manual

AEG
AEG 75428-1 DT User manual

AEG
AEG SKZ81200F0 User manual

AEG
AEG RMB96716CX User manual

AEG
AEG RKE73211DM User manual