• Do not let hot items to touch the
plastic parts of the appliance.
• Remove a detergent ball (if used)
before starting a drying programme.
• Do not use a detergent ball if setting a
non-stop programme.
2.5 Service
• To repair the appliance contact the
Authorised Service Centre. Use
original spare parts only.
• Please note that self-repair or non-
professional repair can have safety
consequences and might void the
guarantee.
• The following spare parts will be
available for 10 years after the model
has been discontinued: motor and
motor brushes, transmission between
motor and drum, pumps, shock
absorbers and springs, washing drum,
drum spider and related ball bearings,
heaters and heating elements,
including heat pumps, piping and
related equipment including hoses,
valves, filters and aquastops, printed
circuit boards, electronic displays,
pressure switches, thermostats and
sensors, software and firmware
including reset software, door, door
hinge and seals, other seals, door
locking assembly, plastic peripherals
such as detergent dispensers. Please
note that some of these spare parts
are only available to professional
repairers, and that not all spare parts
are relevant for all models.
• Concerning the lamp(s) inside this
product and spare part lamps sold
separately: These lamps are intended
to withstand extreme physical
conditions in household appliances,
such as temperature, vibration,
humidity, or are intended to signal
information about the operational
status of the appliance. They are not
intended to be used in other
applications and are not suitable for
household room illumination.
2.6 Disposal
• Disconnect the appliance from the
mains electrical and water supplies.
• Cut off the mains electrical cable
close to the appliance and dispose of
it.
• Remove the door catch to prevent
children or pets from becoming
trapped in the drum.
• Dispose of the appliance in
accordance with local requirements
for the disposal of Waste Electrical
and Electronic Equipment (WEEE).
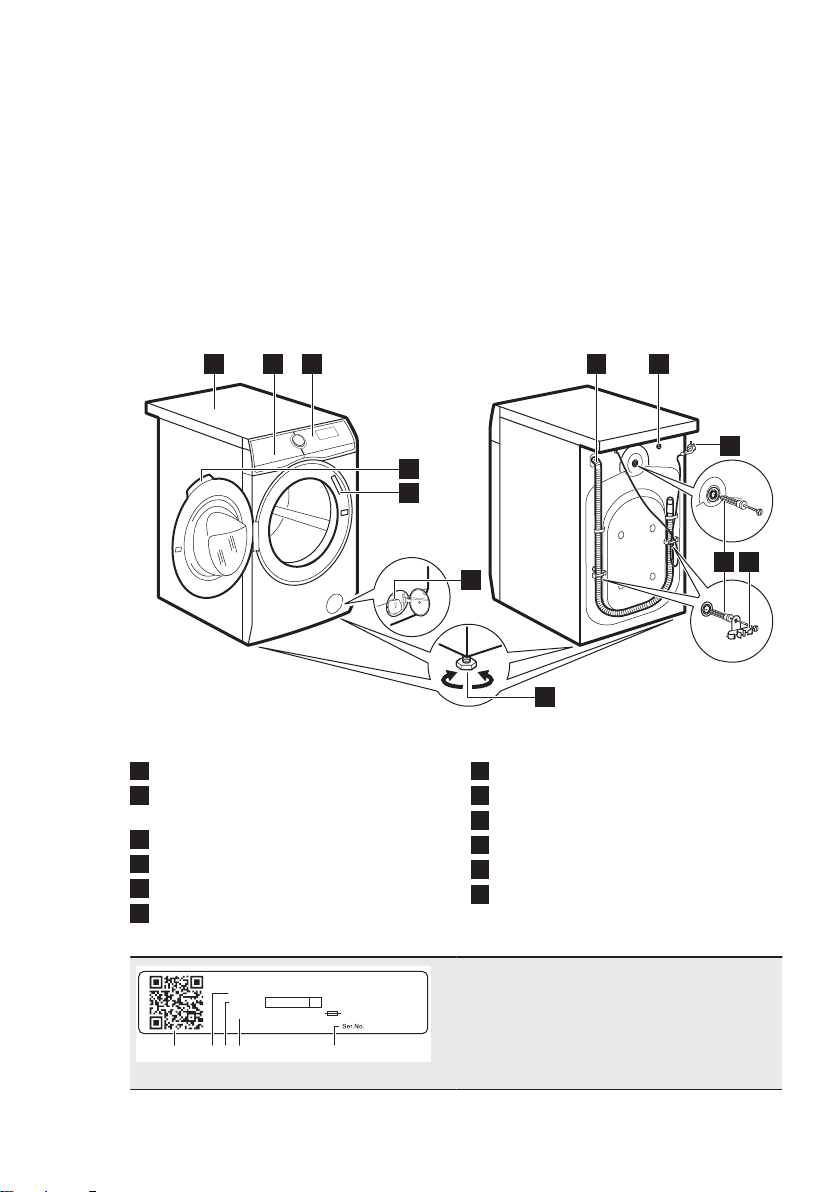
3. PRODUCT DESCRIPTION
3.1 Special features
Your new washer-dryer meets all modern
requirements for effective treatment of
laundry with low water, energy and
detergent consumption and proper care
of fabric.
• The Wi-Fi connection and Remote
Start enable you to start a cycle, to
interact with your washing machine
and to check the washing cycle status
in remote control.
• The Oko-Mix technology has been
designed to protect the fabric fibres
thanks to different pre-mixing phases
that dissolves first the detergent and
then fabric softener in the water
before they are distributed in the
laundry. So every fibre is reached and
cared for.
• Thanks to the Weight Sensors the
appliance can detect the weight of
your load and advise on how much
detergent you need to achieve the
best results without waste.
• The ProSense technology adjusts
automatically the programme duration
to the laundry in the drum to achieve
perfect washing results in the
minimum possible time.
• The STEAM mode is a quick and
easy way to refresh the clothes. The
gentle steam phase removes odours
and reduces creases in dry fabrics so
they need little ironing.
The steam relaxes the fibres and
reduces fabric creasing. Ironing will
be easier!
www.aeg.com8